Setting Up Flutter for iOS Development on macOS
A step-by-step guide to installing Flutter, configuring Xcode, sorting out CocoaPods, and getting your app running in the iOS Simulator.
Setting Up Flutter for iOS Development on macOS
A step-by-step guide to installing Flutter, configuring Xcode, sorting out CocoaPods, and getting your app running in the iOS Simulator.
If you’re getting started with Flutter on a Mac, the setup process involves a few more moving parts than most guides let on — especially if you’re on Apple Silicon. You’ll need to install Flutter, configure Xcode, set up Rosetta, deal with Ruby versions, and get CocoaPods working before you can run your first iOS build.
This guide walks through all of it in order, with explanations for why each step is needed and what to do when things go sideways.
Note: iOS development can only be done on a Mac. Building and running iOS apps from Windows or Linux is not supported by Apple’s toolchain.
Prerequisites
Before you begin, make sure you have:
- A Mac running macOS Ventura or later (recommended)
- An Apple ID
- Enough free disk space — Xcode alone is around 10–12 GB, and the iOS Simulator runtime adds another ~8 GB
Step 1: Download Flutter
Head to flutter.dev/docs/get-started/install/macos and download the Flutter SDK. Make sure you pick the right build for your processor:
- Apple Silicon (M1, M2, M3, M4) → download the ARM64 build
- Intel Mac → download the x64 build
Not sure which chip you have? Click the Apple menu → About This Mac.
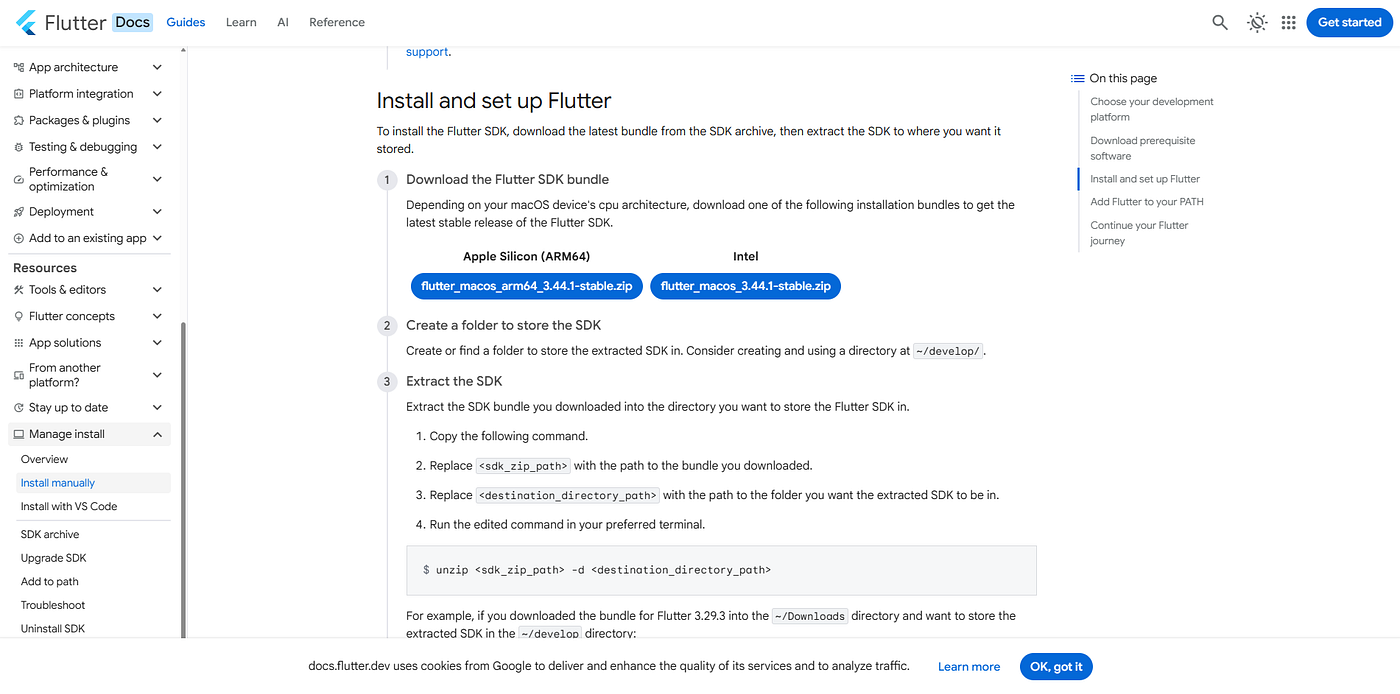
The Flutter download page showing the macOS ARM64 and Intel options side by side
Once downloaded, extract the zip and move the flutter folder somewhere permanent — your home directory or a dedicated folder like ~/development/flutter works well. Avoid leaving it in your Downloads folder, as paths set up today will break if you move the folder later.
Step 2: Add Flutter to Your PATH
For flutter commands to work in any terminal window, the Flutter binary needs to be on your system's PATH. Run this in your terminal to set it temporarily:
bash
export PATH=/Users/your-username/development/flutter/bin:$PATHReplace the path with wherever you extracted Flutter. This only lasts for the current terminal session — we’ll make it permanent in Step 8 when we configure the full shell environment.
Step 3: Install Xcode
Xcode is Apple’s build toolchain and it’s required for compiling, signing, and running iOS apps. Open the App Store, search for Xcode, and install it.
The download is around 10–12 GB, so this is a good time to step away.
Once installed, run the following command to set Xcode as the active developer directory and complete its first-launch setup:
bash
sudo sh -c 'xcode-select -s /Applications/Xcode.app/Contents/Developer && xcodebuild -runFirstLaunch'Then accept the Xcode license agreement:
bash
sudo xcodebuild -licenseRead through the terms and type agree when prompted.
Why is this necessary? Flutter’s iOS build system hands off compilation entirely to Xcode. If Xcode isn’t properly configured, flutter build ios won't work at all — it will either fail silently or throw confusing errors.
Step 4: Install Rosetta (Apple Silicon Macs Only)
If you’re on an M-series Mac, install Rosetta 2. Some components in the Flutter toolchain and certain CocoaPods native libraries are still compiled for Intel and need Rosetta to run on ARM:
bash
sudo softwareupdate --install-rosetta --agree-to-licenseThis is a lightweight, one-time installation. If you’re on an Intel Mac, you can skip this step entirely.
Step 5: Sign In to GitHub and Clone Your Project
If your Flutter project is on GitHub, you can connect Xcode to your account for easier repository access.
Open Xcode and go to Xcode → Settings → Accounts. Click the + button and choose GitHub. When prompted for credentials, use a Personal Access Token rather than your password — GitHub no longer supports password authentication for API access.
To create a token: go to GitHub → Settings → Developer settings → Personal access tokens → Generate new token. Give it at least repo scope.
Once signed in, clone your Flutter project repository via the terminal as usual:
bash
git clone https://github.com/your-username/your-repo.gitStep 6: Download the iOS Simulator
To run and test your app without a physical device, you’ll need the iOS Simulator runtime. Run:
bash
xcodebuild -downloadPlatform iOSThis downloads around 8 GB, so give it some time. When it’s done, you can open the Simulator with:
bash
open -a Simulator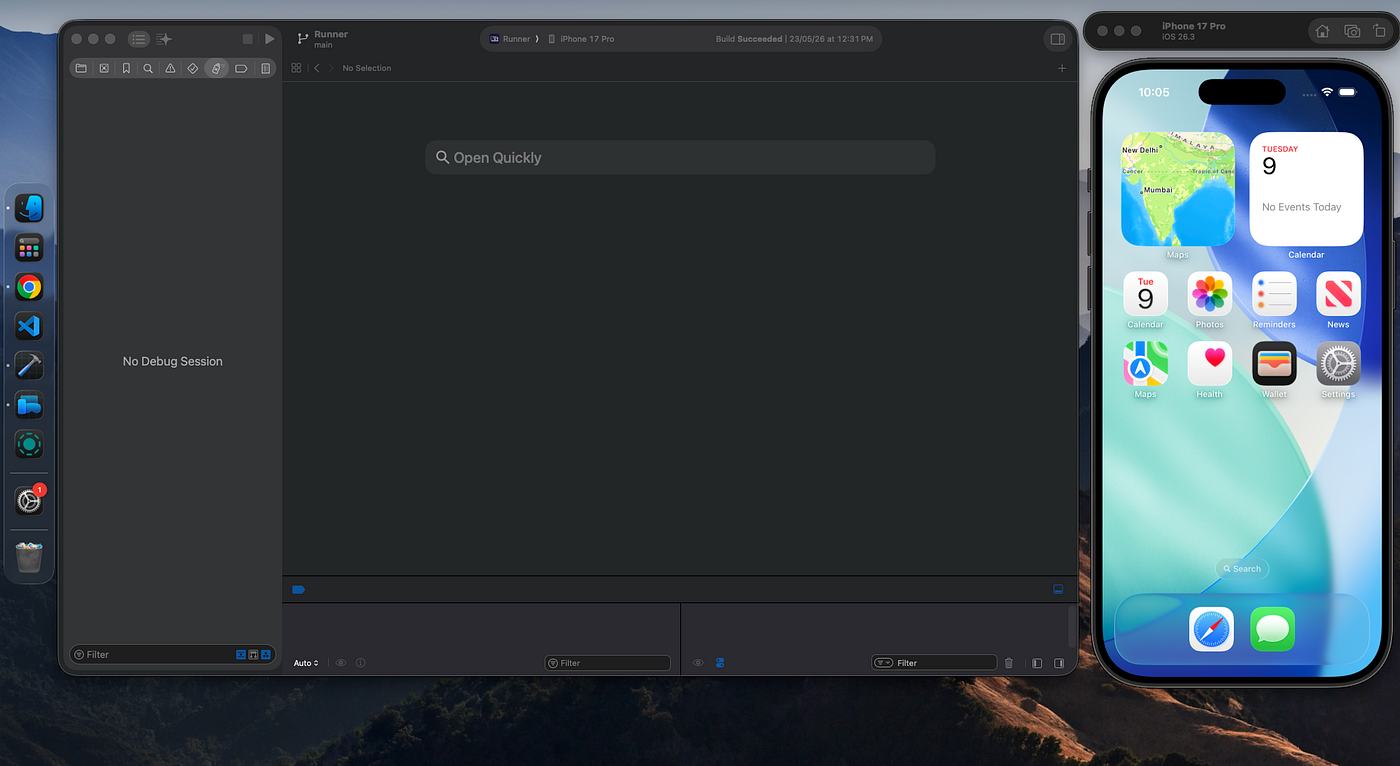
The iOS Simulator running on macOS
The Simulator is a good starting point for development, but it’s worth noting that certain features — push notifications, camera, some Bluetooth interactions — only work on a real physical device. Plan to test on actual hardware before submitting to the App Store.
Step 7: Install Homebrew and Update Ruby
CocoaPods (coming up in the next step) requires a reasonably modern version of Ruby. The version that ships with macOS (2.6.x) is too old for current CocoaPods releases, so we need to update it. The cleanest way to do that is through Homebrew.
Install Homebrew if you don’t already have it:
bash
/bin/bash -c "$(curl -fsSL https://raw.githubusercontent.com/Homebrew/install/HEAD/install.sh)"Then install a current version of Ruby:
bash
brew install ruby⚠️ A word of caution: Avoid using
sudo gem installwith the system Ruby. It writes into a read-only system path and can interfere with future macOS updates. Homebrew-managed Ruby sidesteps this entirely.
Step 8: Configure Your Shell Environment
Now let’s make all the PATH settings permanent. Open your shell configuration file:
bash
vim $HOME/.zshrcIf vim is unfamiliar: press i to enter insert mode, type or paste your changes, then press Esc and type :wq! to save and exit.
Add these lines to the file:
bash
# Flutter
export PATH=/Users/your-username/development/flutter/bin:$PATH
# Homebrew (Apple Silicon)
export PATH="/opt/homebrew/bin:$PATH"# Ruby (via Homebrew)
export GEM_HOME=$HOME/.gem
export PATH=$GEM_HOME/bin:$PATHSave and reload the file:
bash
source $HOME/.zshrcWhy GEM_HOME? This tells Ruby to install gems (packages like CocoaPods) into your home directory rather than a system-level location, which avoids the permission issues that trip up a lot of first-time setups.
Step 9: Install CocoaPods
CocoaPods is a dependency manager for native iOS and macOS code. Flutter plugins that include native functionality — camera, Bluetooth, push notifications, local storage, and so on — rely on CocoaPods to link their native components into your iOS project.
bash
sudo gem install cocoapodsIf you’re on Apple Silicon and this fails with a native extension error, install via Homebrew instead:
bash
brew install cocoapodsVerify the installation with:
bash
pod --versionStep 10: Run Flutter Doctor
With everything installed, run Flutter’s built-in diagnostics tool:
bash
flutter doctorThis checks your environment and flags anything that still needs attention. Work through anything with a red ✗. The most common items at this stage:
- CocoaPods not found → run
brew install cocoapods - Xcode license not accepted → run
sudo xcodebuild -license - Xcode developer path not set → run
sudo xcode-select -s /Applications/Xcode.app/Contents/Developer
The Xcode and CocoaPods checks should be green before you move on. Not everything needs to be resolved — Android toolchain warnings, for example, are fine to ignore if you’re only targeting iOS right now.
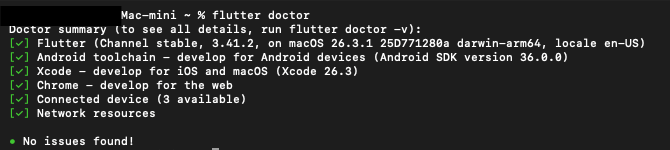
Terminal showing flutter doctor output with Xcode and CocoaPods checks passing (green checkmarks)
Step 11: Run the App in the Simulator
Navigate to your Flutter project directory:
bash
cd ~/path/to/your/flutter/projectThen run the full dependency and pod install:
bash
flutter clean && flutter pub get && cd ios/ && pod installHere’s what each part does:
**flutter clean** — Removes cached build artifacts. Good practice when setting up fresh or after switching branches.**flutter pub get** — Downloads all the Dart and Flutter packages listed inpubspec.yaml.**cd ios/ && pod install** — Installs native iOS dependencies for all the Flutter plugins in your project.
Go back to the project root and run the app:
bash
cd .. && flutter runIf everything is set up correctly, your app will launch in the iOS Simulator.
If you run into stubborn build errors that are hard to diagnose, a useful recovery step is to regenerate the iOS folder entirely:
bash
flutter create .
cd ios && pod install
flutter run
This regenerates the native iOS project from scratch and resolves most issues caused by stale configuration or plugin mismatches.
Step 12: Use VS Code for Day-to-Day Development
While Xcode handles building and signing, VS Code is generally the better environment for writing and debugging Flutter code. Install the Flutter and Dart extensions from the VS Code marketplace to get hot reload, a widget inspector, and integrated debugging.
You can open VS Code directly from your project folder:
bash
code .Troubleshooting Common Issues
CocoaPods install fails on Apple Silicon: Try brew install cocoapods instead of gem install. If you still see ffi gem errors, run sudo gem install ffi first, then retry.
**flutter doctor shows Xcode issues after installation:** Make sure you've run both the xcode-select command and sudo xcodebuild -license. Opening Xcode manually at least once can also help it complete any remaining setup.
Simulator doesn’t appear after download: Open Xcode, go to Settings → Platforms, and confirm the iOS platform is listed. If not, trigger the download again from there.
**pod install fails with dependency errors:** Delete ios/Podfile.lock, then re-run pod install. If the issue persists, delete the ios/ folder entirely and run flutter create . to regenerate it.
What’s Next
Once your app is running in the Simulator and you’re happy with the development setup, the next step is getting it onto the App Store. That process — creating a developer account, configuring signing, building the IPA, and submitting for review — is covered in the follow-up post:
→ Publishing Your Flutter App to the iOS App Store
Hit a setup issue not covered here? Drop a comment below and I’ll try to help.
메타데이터
- post_id
- 370c45ec0331
- slug
- setting-up-flutter-for-ios-development-on-macos-370c45ec0331
- url
- https://medium.com/@karthikv2910/setting-up-flutter-for-ios-development-on-macos-370c45ec0331
- canonical_url
- https://medium.com/@karthikv2910/setting-up-flutter-for-ios-development-on-macos-370c45ec0331
- author_url
- https://medium.com/@karthikv2910
- status
- ok
- fetched_at
- 2026-06-10 08:17:25




