Automating Static Website Deployment on AWS using S3, CloudFront, and GitHub Actions
Modern deployment workflows focus on automation. Instead of manually uploading website files after every change, we can use CI/CD pipelines…
Automating Static Website Deployment on AWS using S3, CloudFront, and GitHub Actions
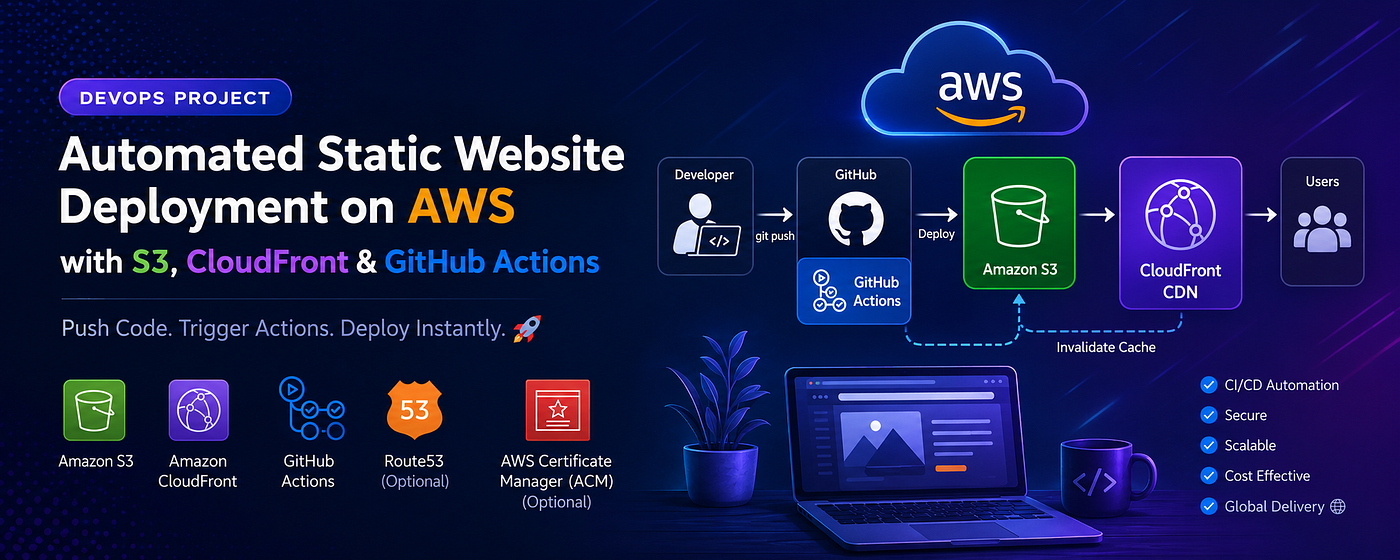
Modern deployment workflows focus on automation. Instead of manually uploading website files after every change, we can use CI/CD pipelines to automatically deploy updates whenever code is pushed to GitHub.
In this project, we will build a simple serverless portfolio deployment pipeline using:
- AWS S3
- CloudFront CDN
- GitHub Actions
Whenever a developer pushes new code:
- GitHub Actions will automatically run
- Updated files will be uploaded to S3
- CloudFront will deliver the latest content globally
As an enhancement, we can later add:
- Route53 for custom domain
- ACM for HTTPS SSL certificate
Problem Statement
Manually uploading static website files again and again is repetitive and inefficient.
This approach can cause:
- deployment mistakes
- outdated website content
- inconsistent deployments
- extra operational work
The goal of this project is to automate static website deployment using GitHub Actions while using AWS CloudFront CDN for fast content delivery.
Architecture
Developer
   ↓
Git Push
   ↓
GitHub Actions
   ↓
AWS S3 Bucket
   ↓
CloudFront CDN
   ↓
Users
What We Will Do
This project will follow these stages:
- Run website locally
- Push code to GitHub
- Create S3 bucket
- Configure CloudFront CDN
- Create IAM user
- Store AWS credentials in GitHub Secrets
- Create GitHub Actions workflow
- Test automatic deployment
- Troubleshoot CloudFront cache issue
Step 1 — Local Development
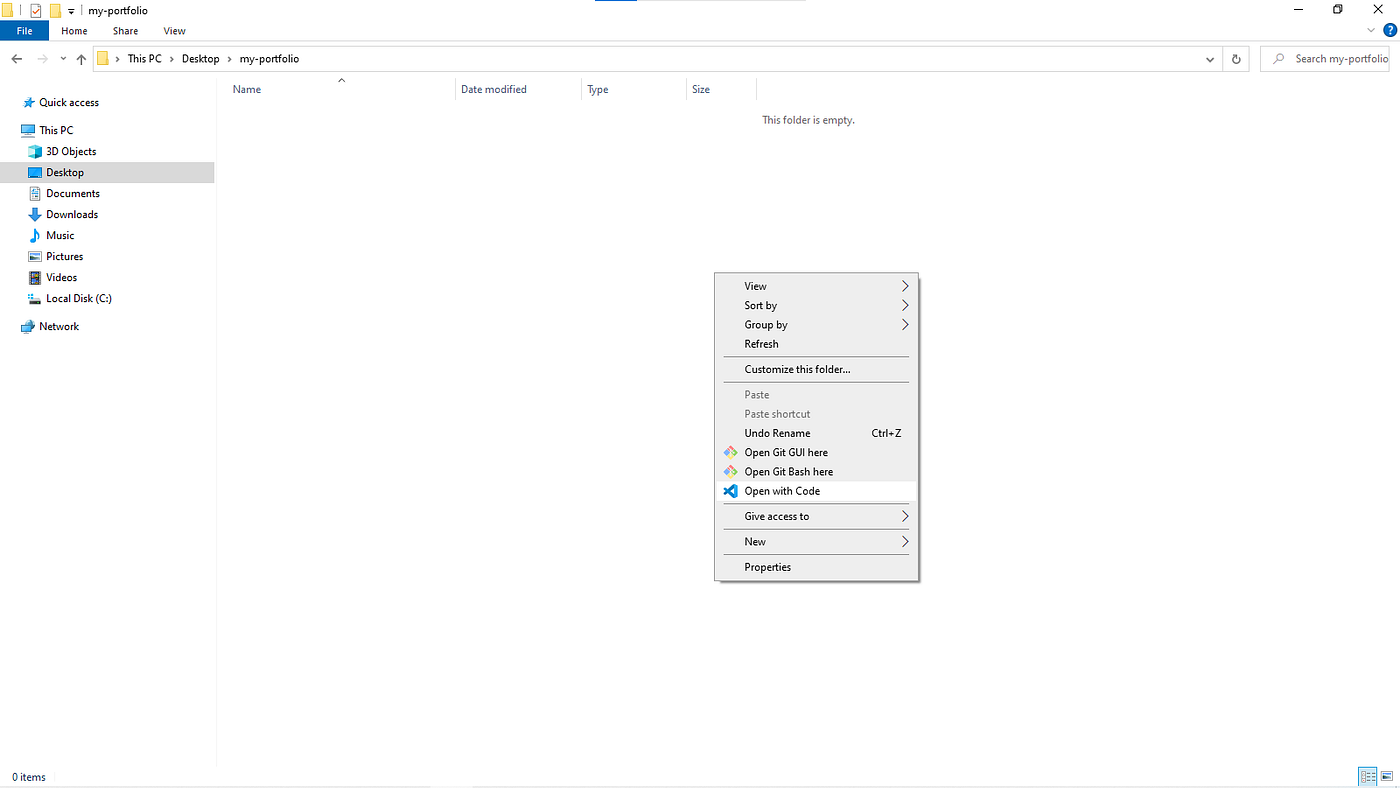
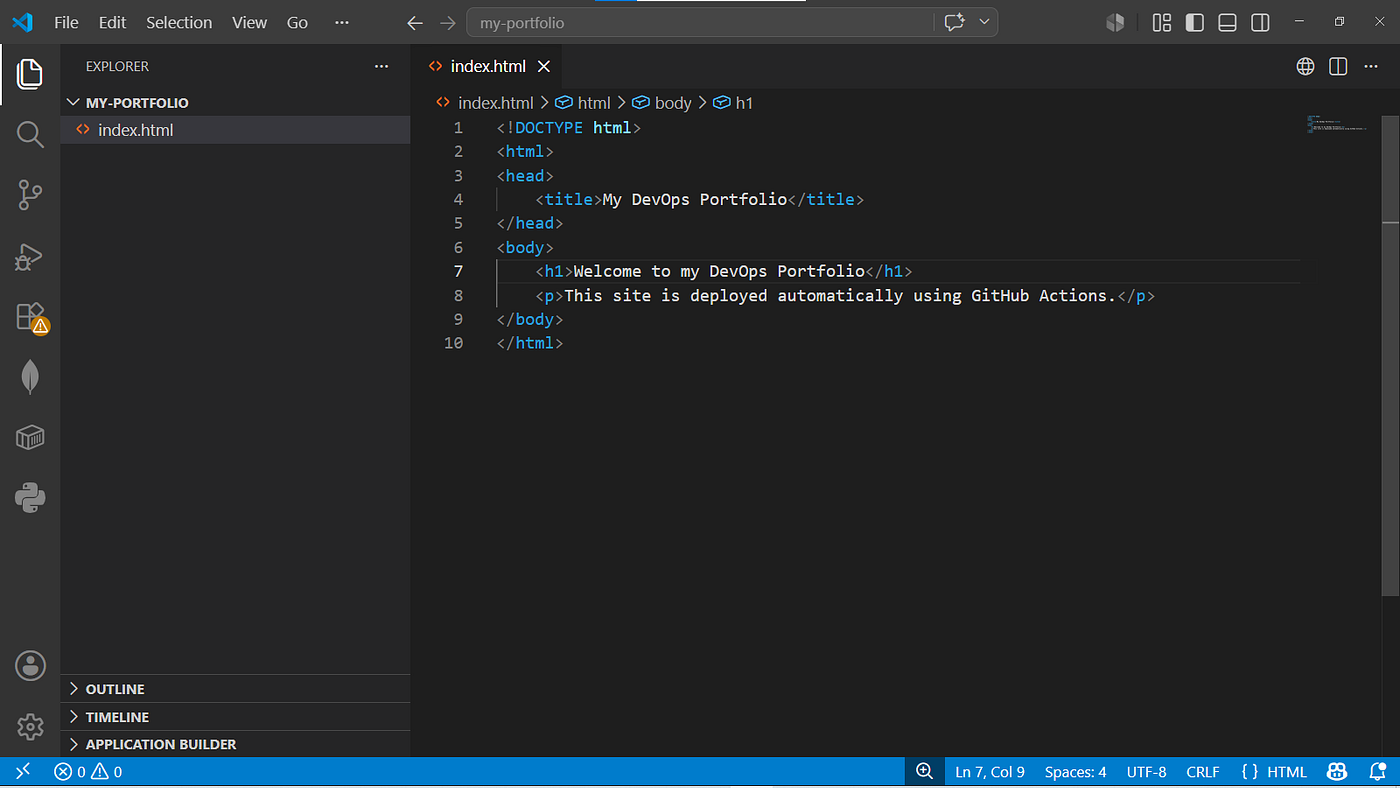
Create a folder on your laptop and open it in Visual Studio Code.
Create an index.html file and paste the following code:
<!DOCTYPE html>
<html>
<head>
    <title>My DevOps Portfolio</title>
</head>
<body>
    <h1>Welcome to my DevOps Portfolio</h1>
    <p>This site is deployed automatically using GitHub Actions.</p>
</body>
</html>
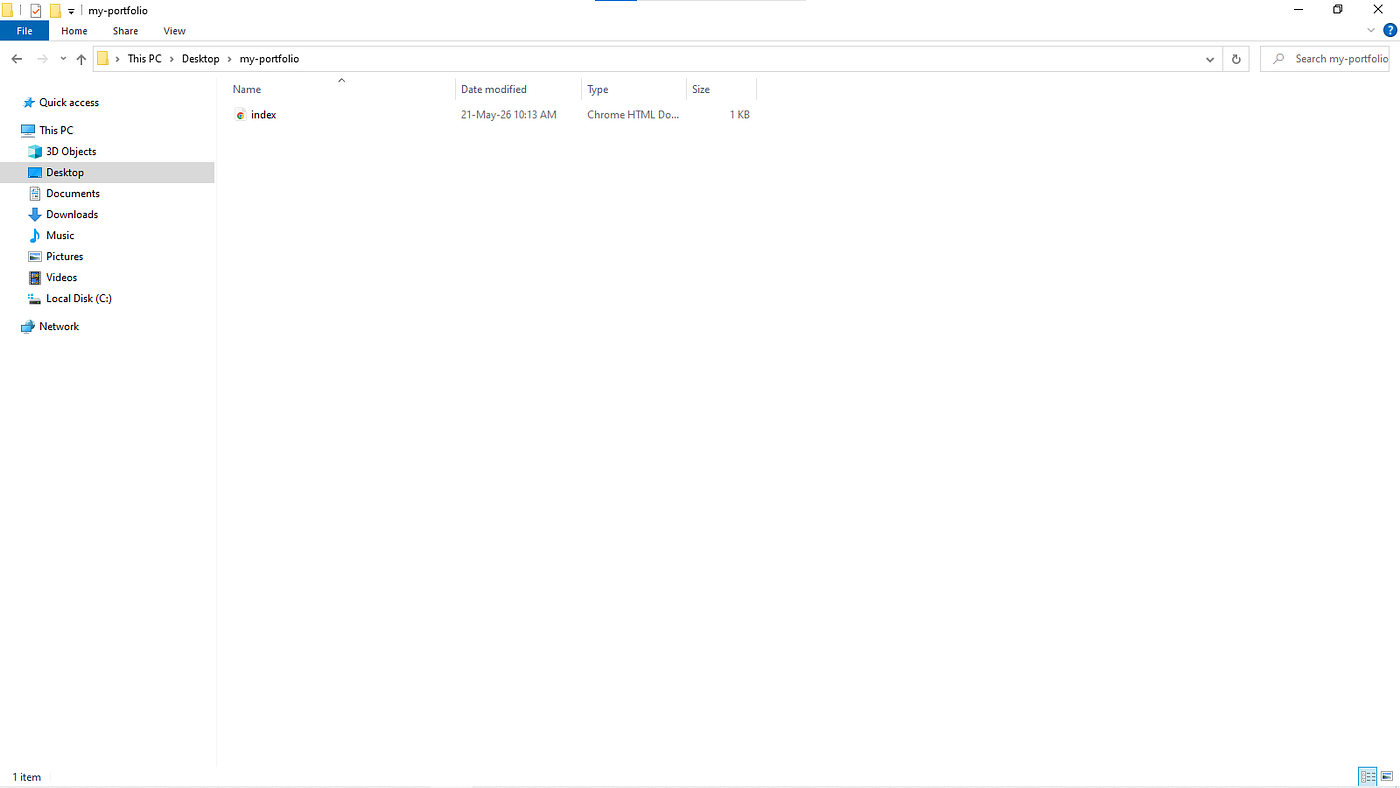
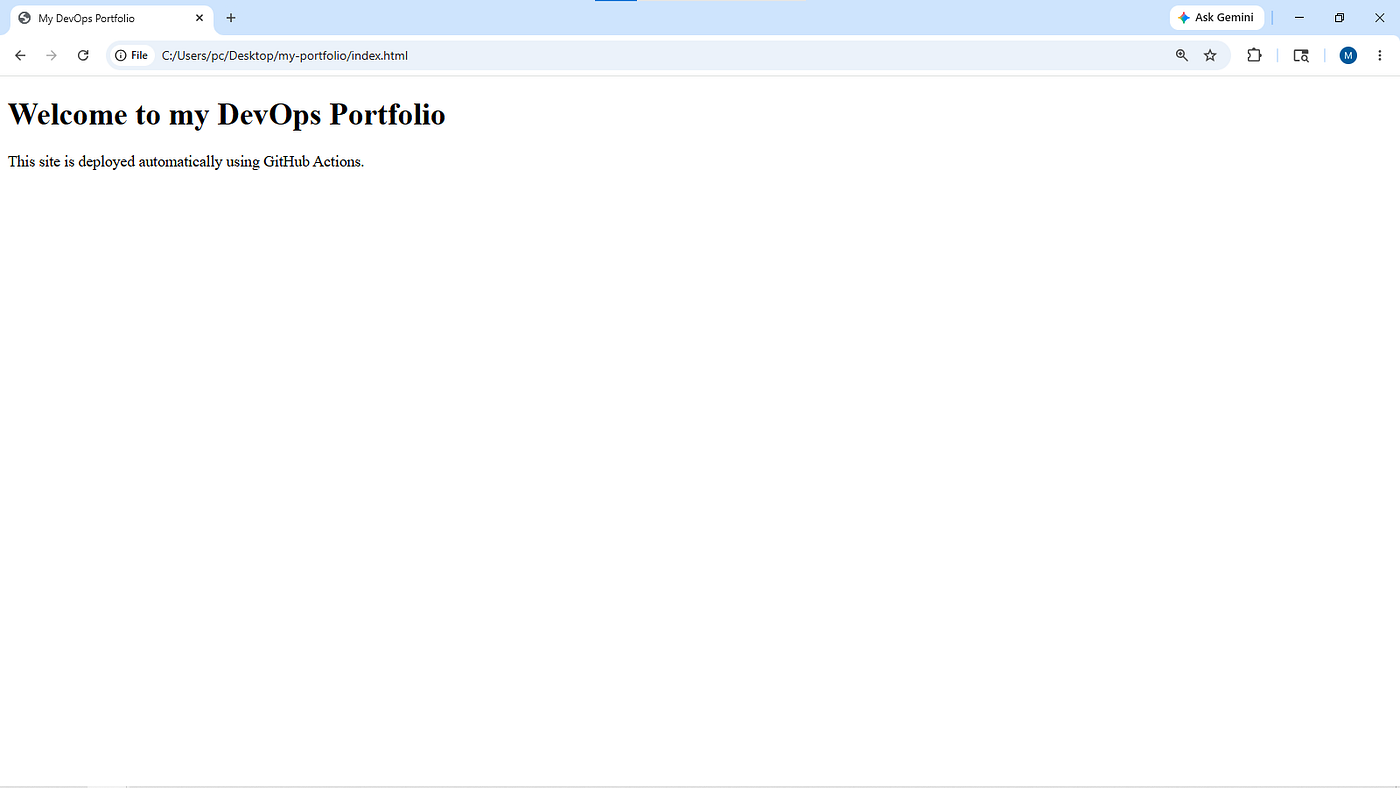
Now open the HTML file in your browser.
You should see:
Welcome to my DevOps Portfolio
This site is deployed automatically using GitHub Actions.
At this stage, the website is running locally on your machine.
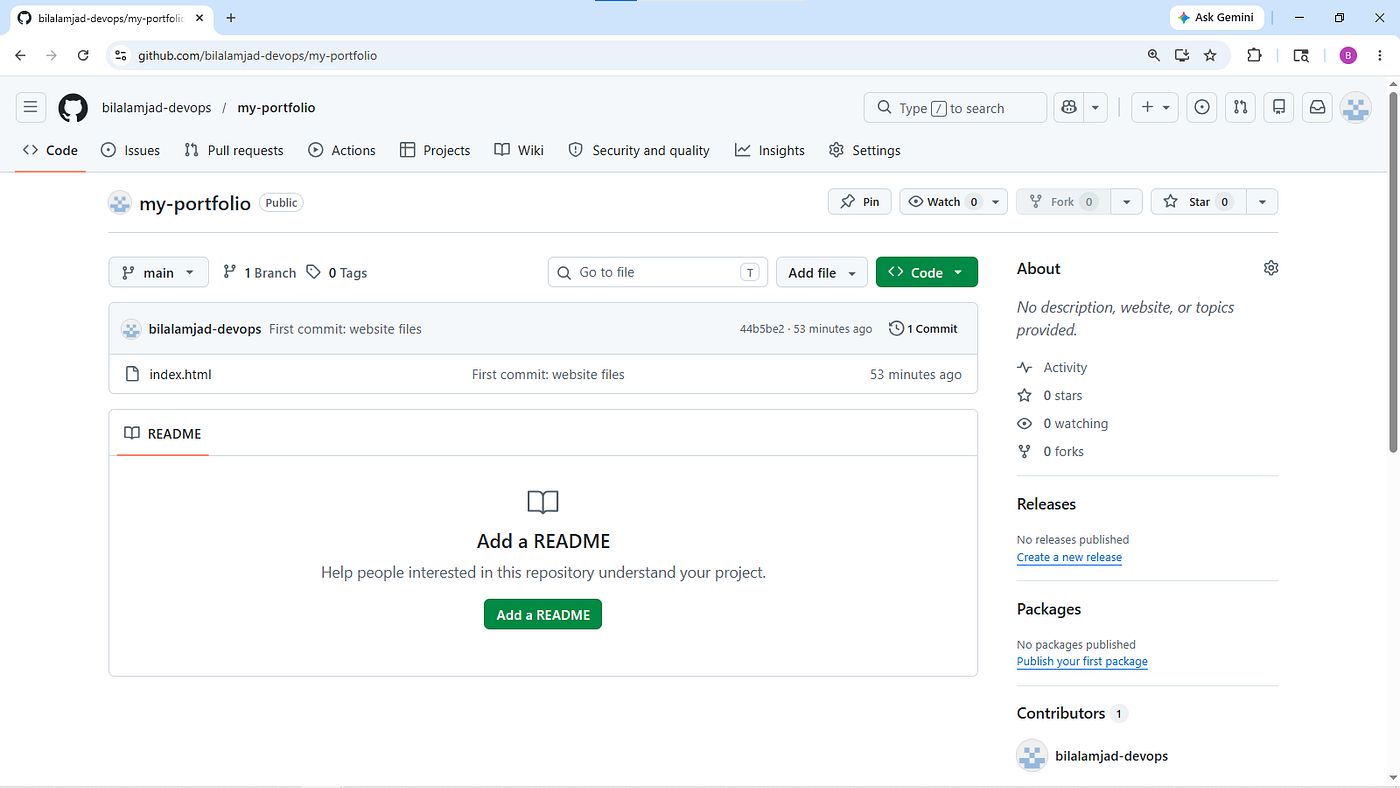
Step 2 — Push Code to GitHub Repository
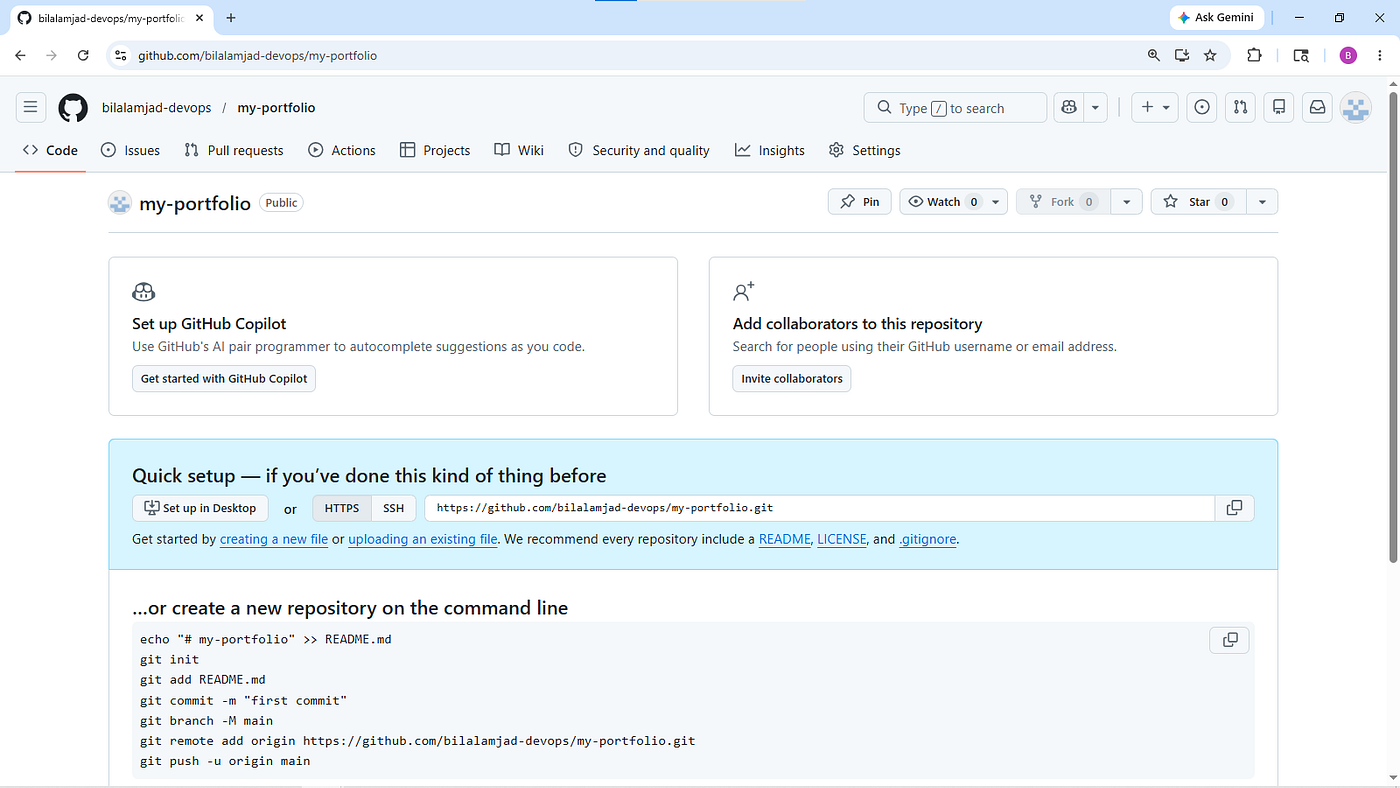
Create a new repository.
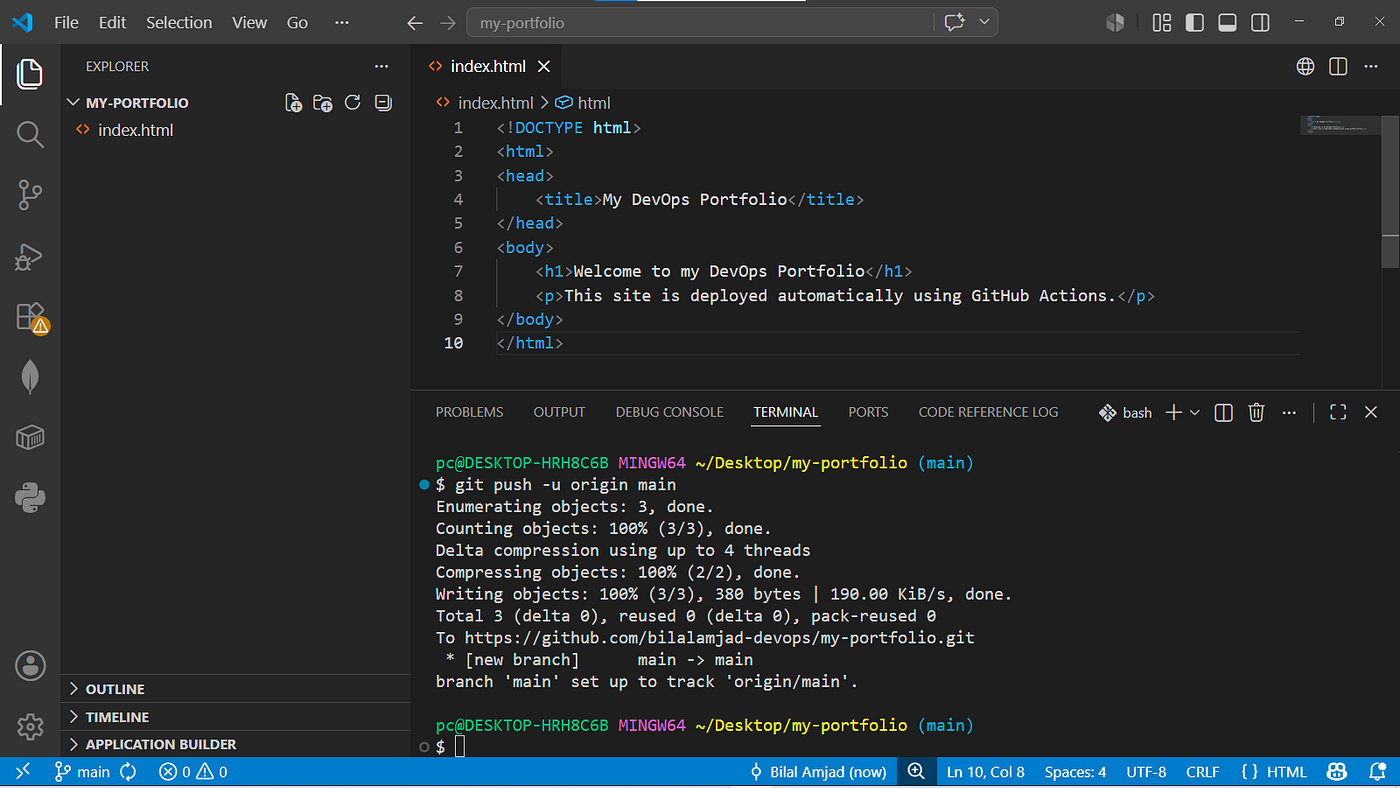
Initialize Git and push the project files.
git init
git add .
git commit -m "First commit: website files"
git branch -M main
git remote add origin <your-github-repo-url>
git push -u origin main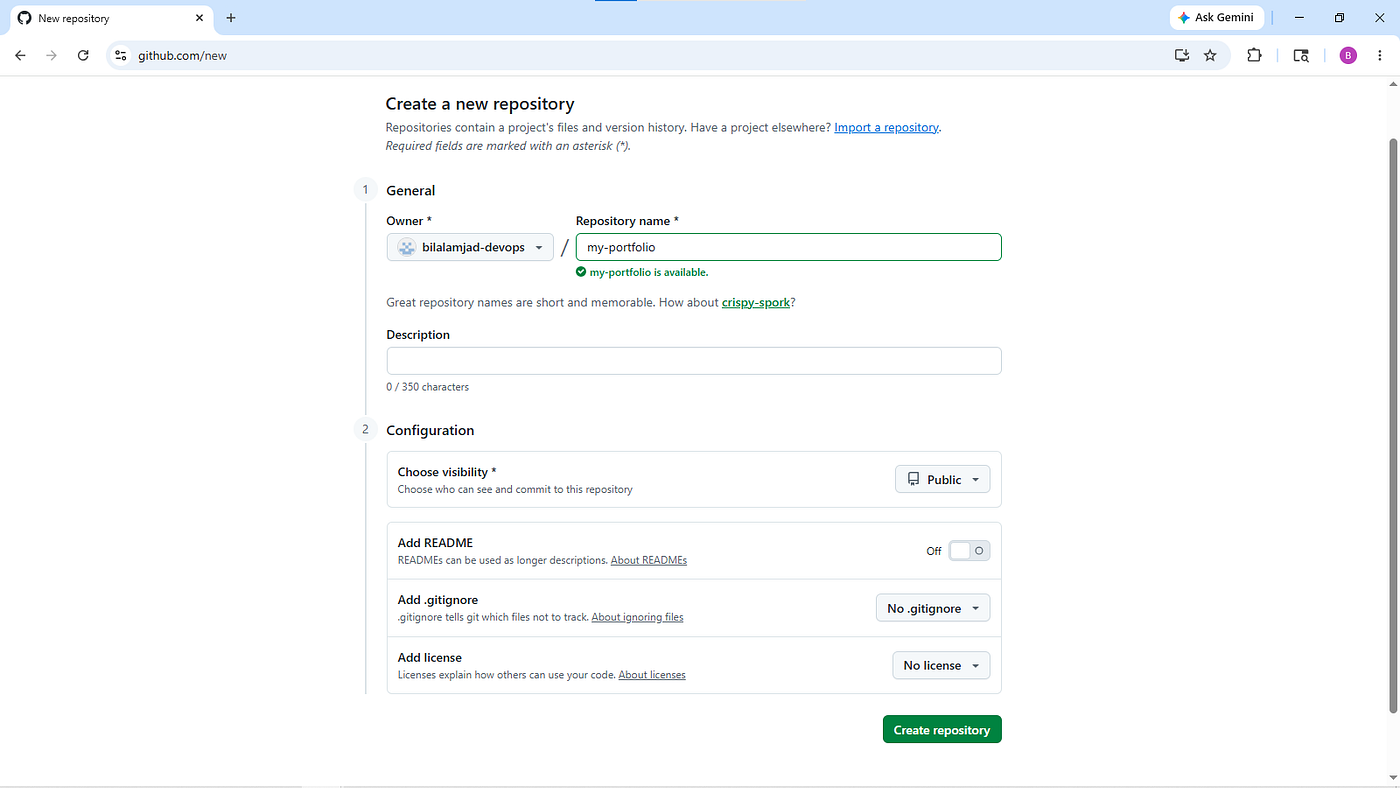
Step 3 — Create S3 Bucket, CloudFront Distribution, and IAM User
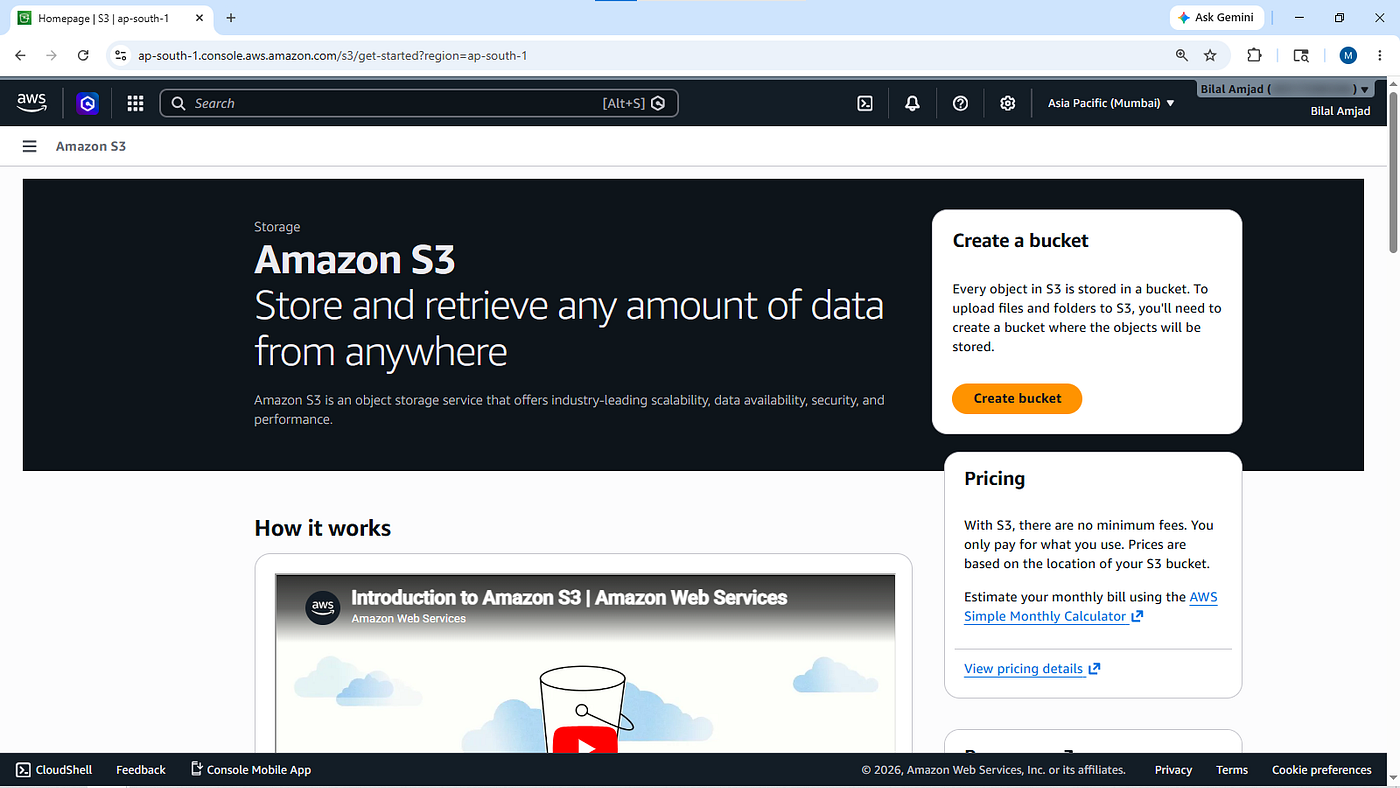
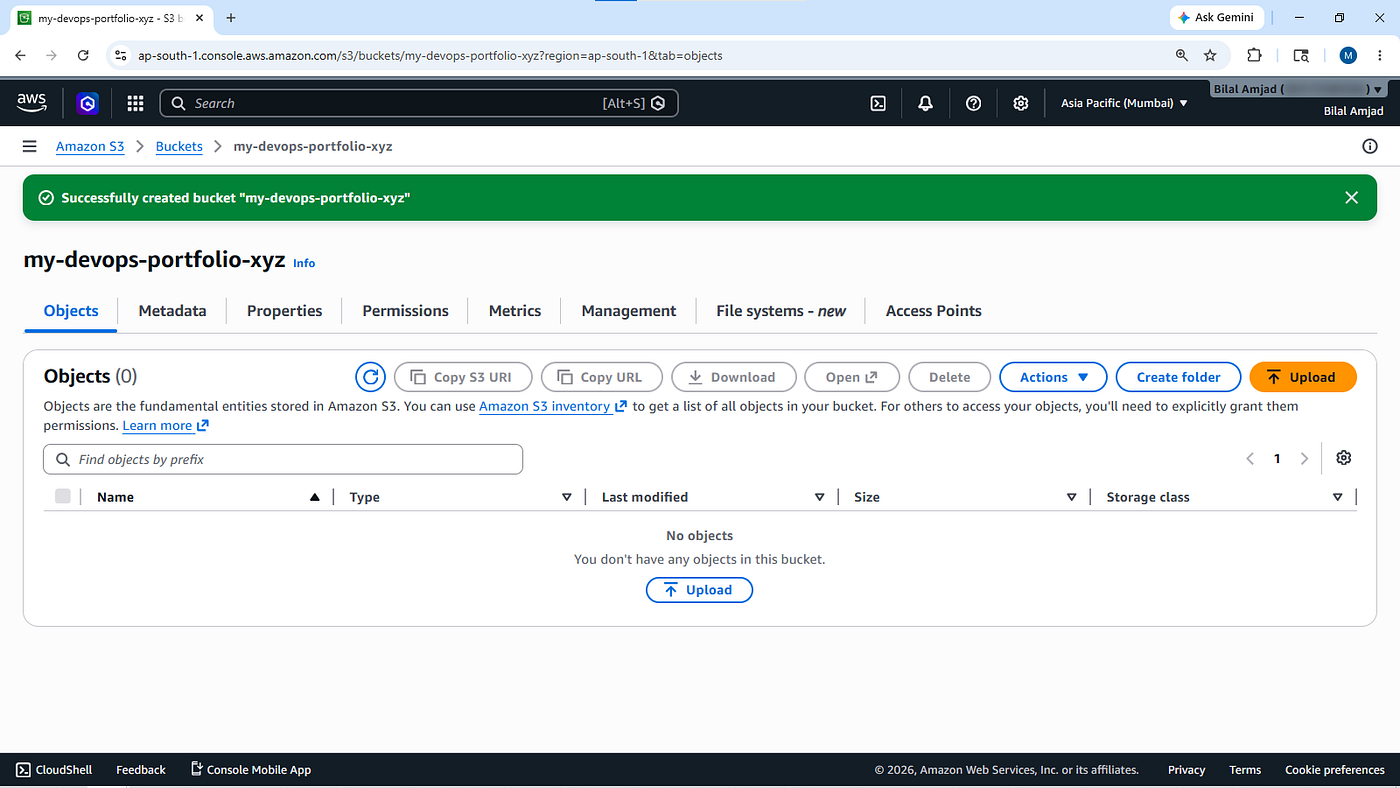
Create S3 Bucket
Go to S3 console:
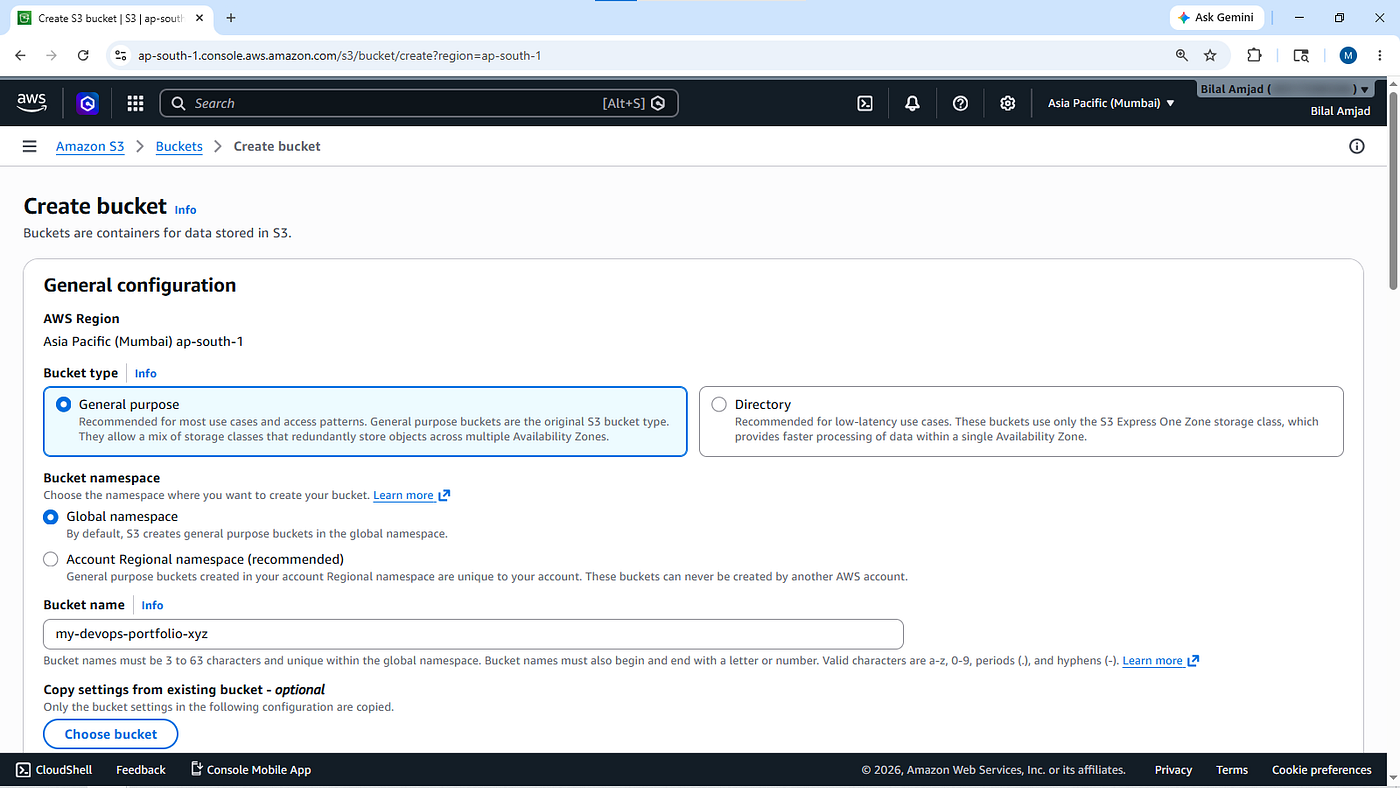
Create a new bucket.
Example bucket name:
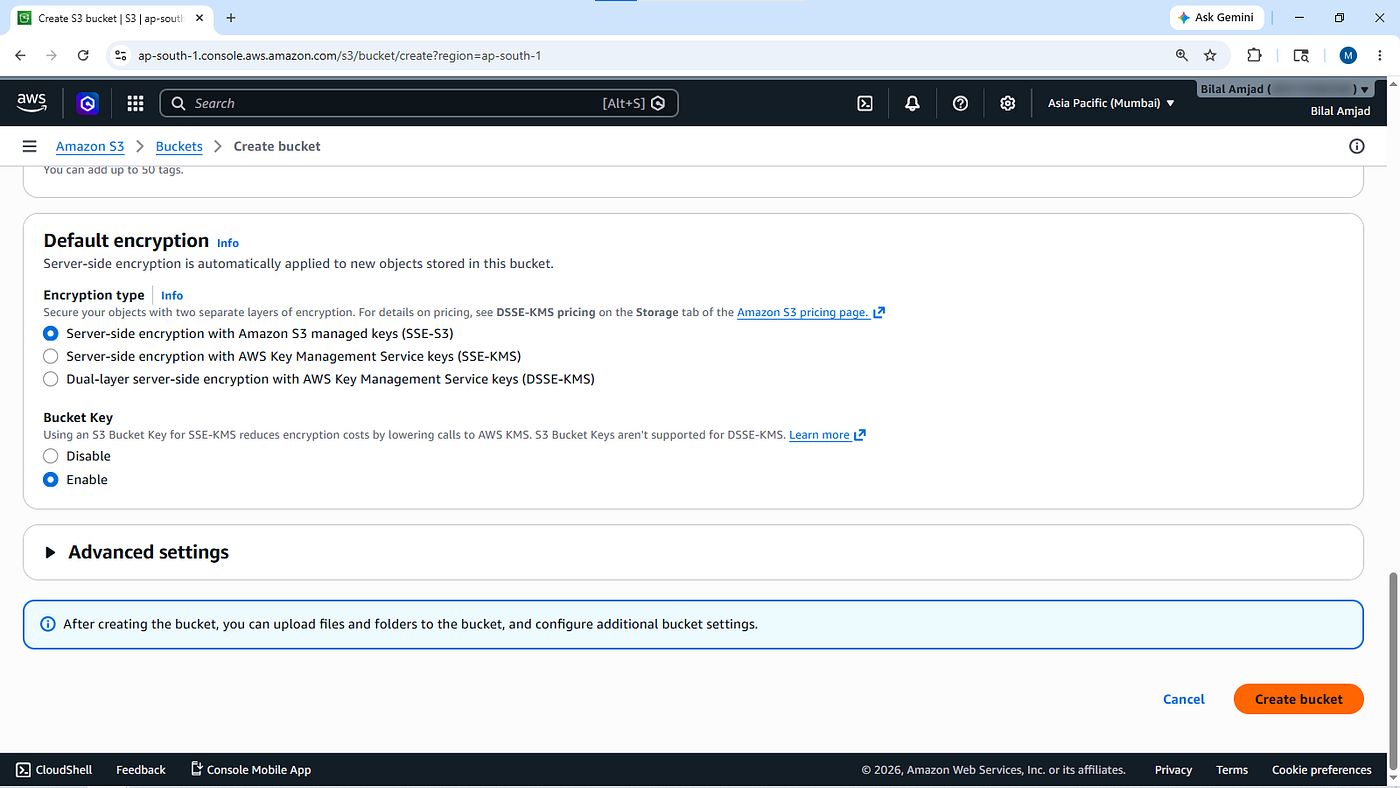
my-devops-portfolio-xyzKeep the remaining settings as default and create the bucket.
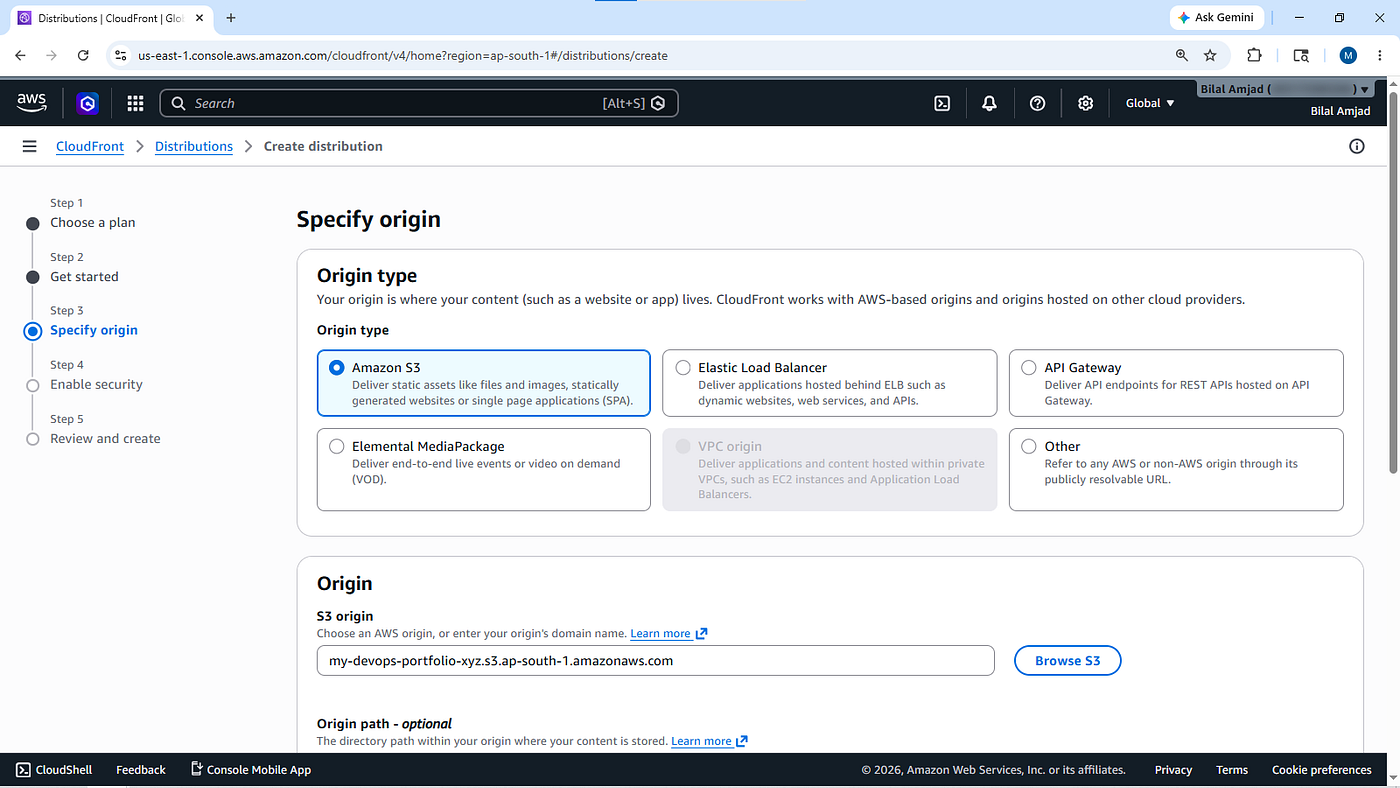
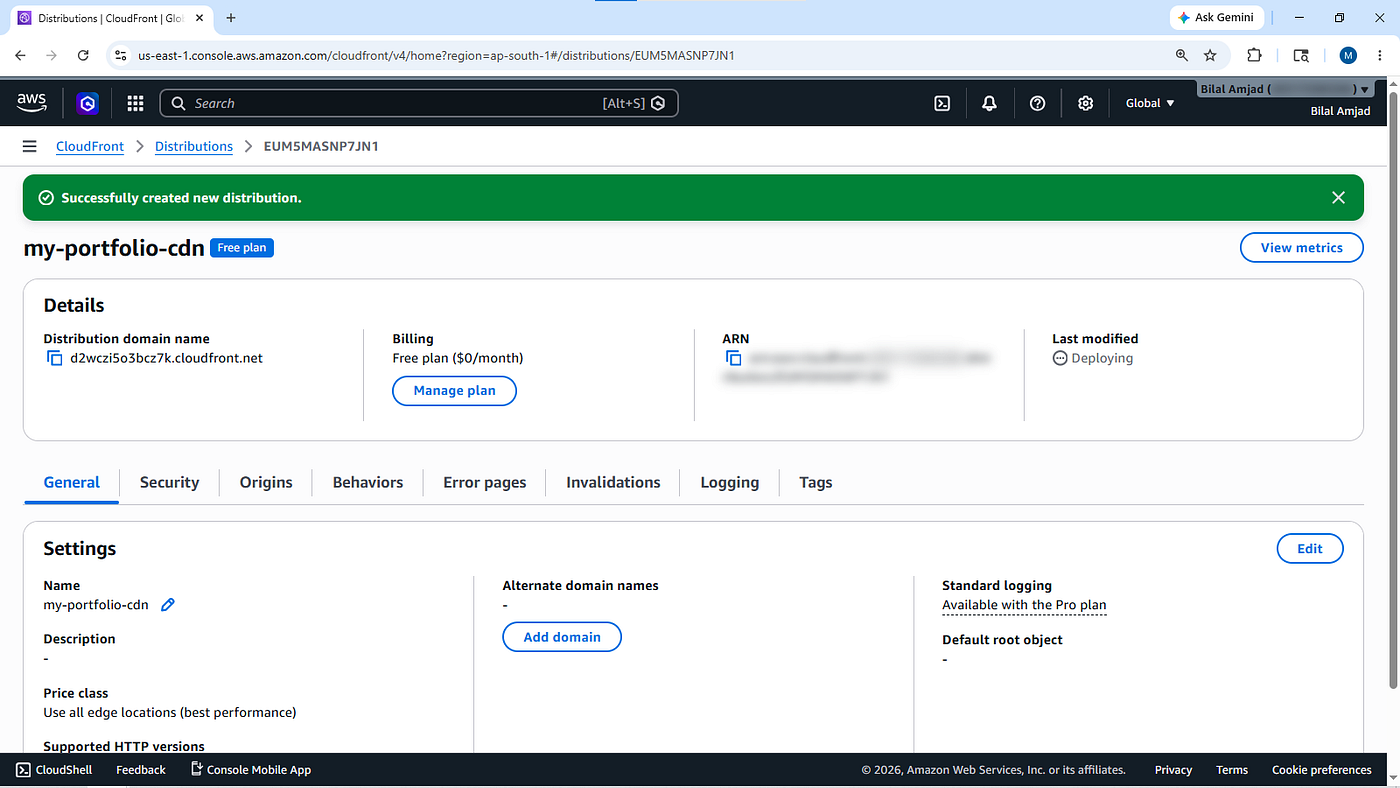
Create CloudFront Distribution
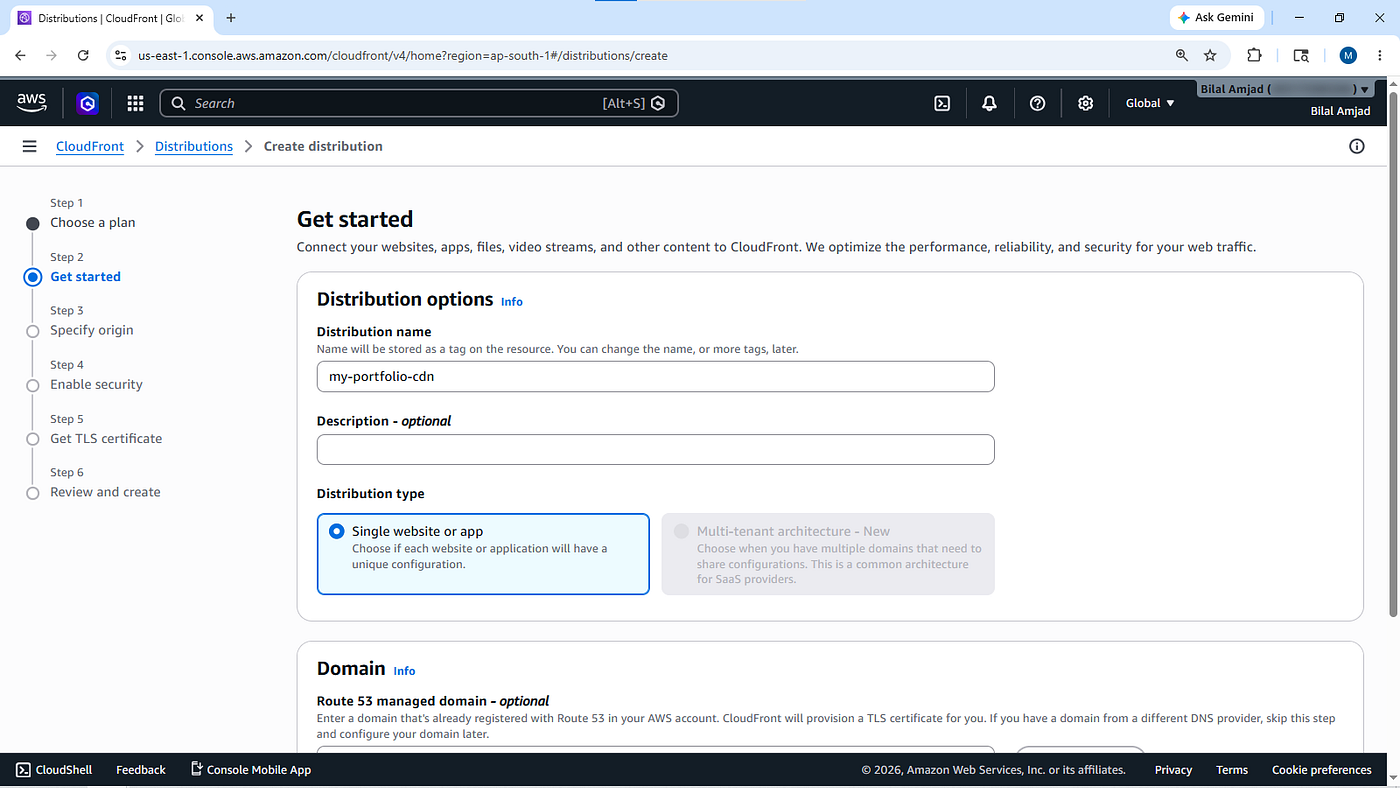
Go to CloudFront console:
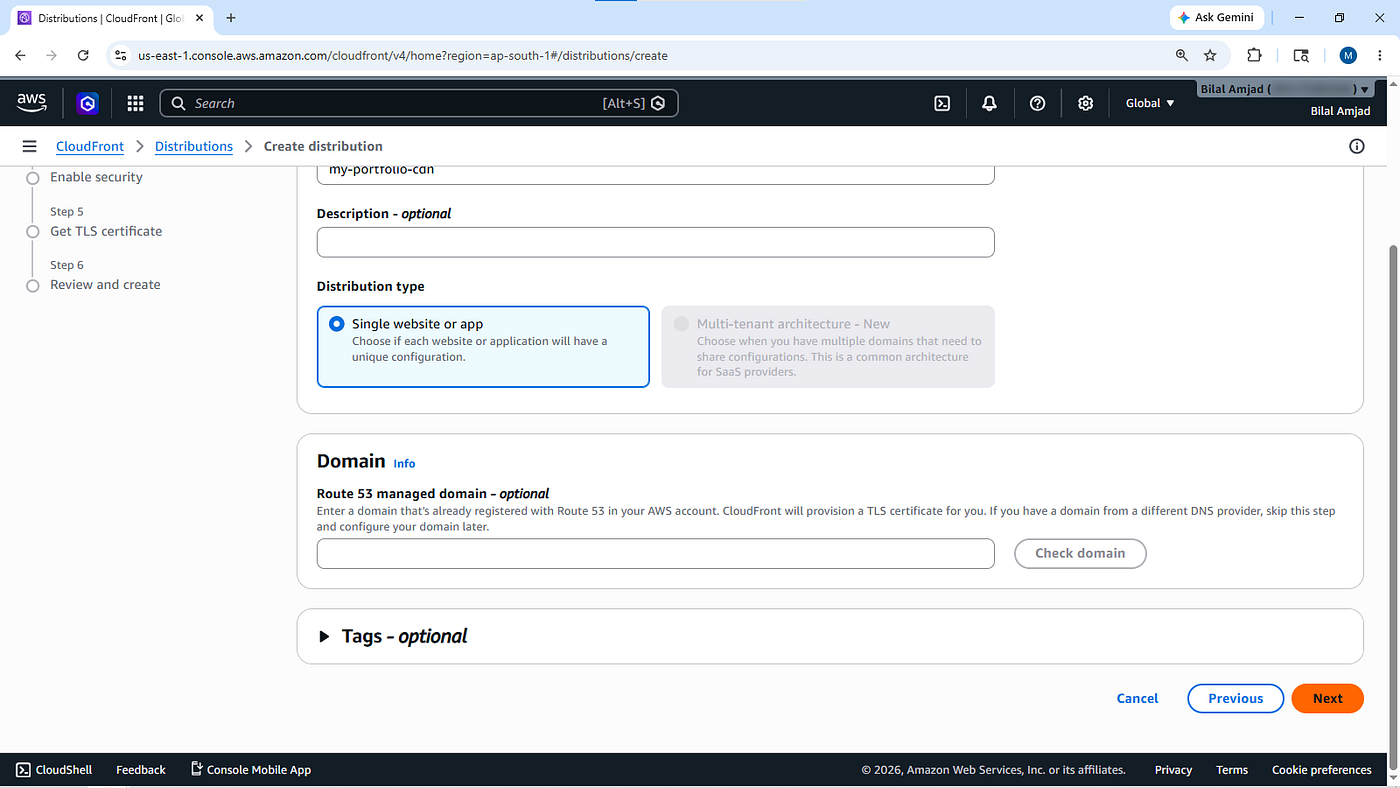
Create a CloudFront distribution.
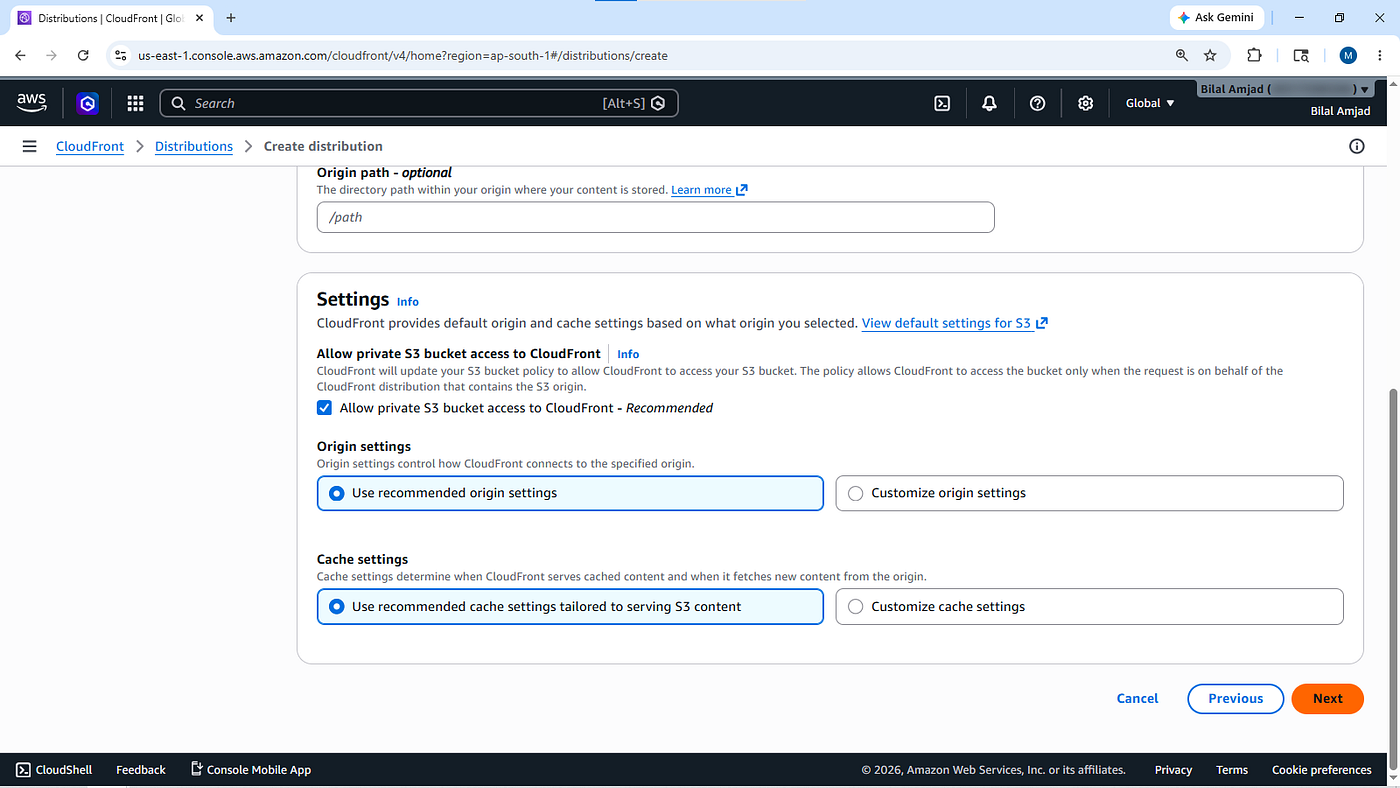
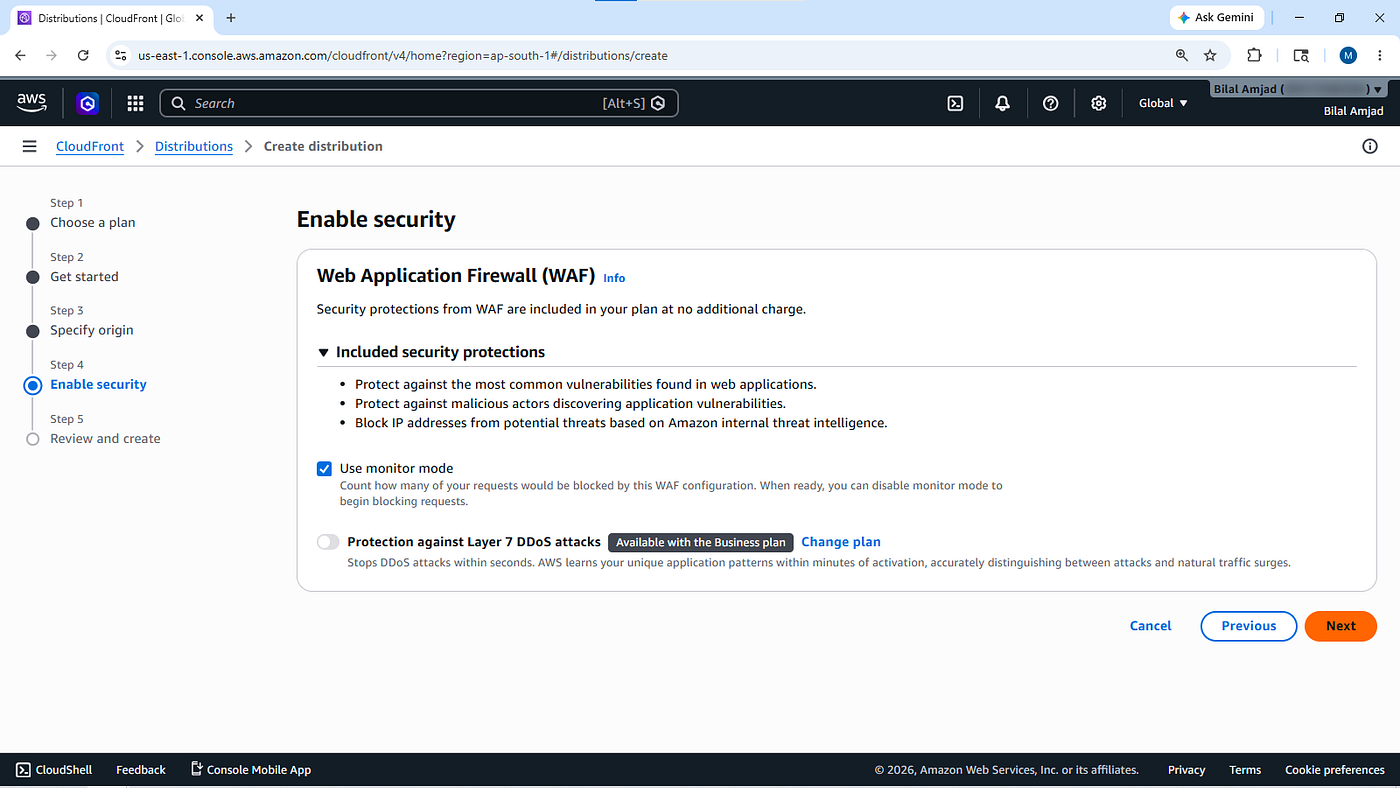
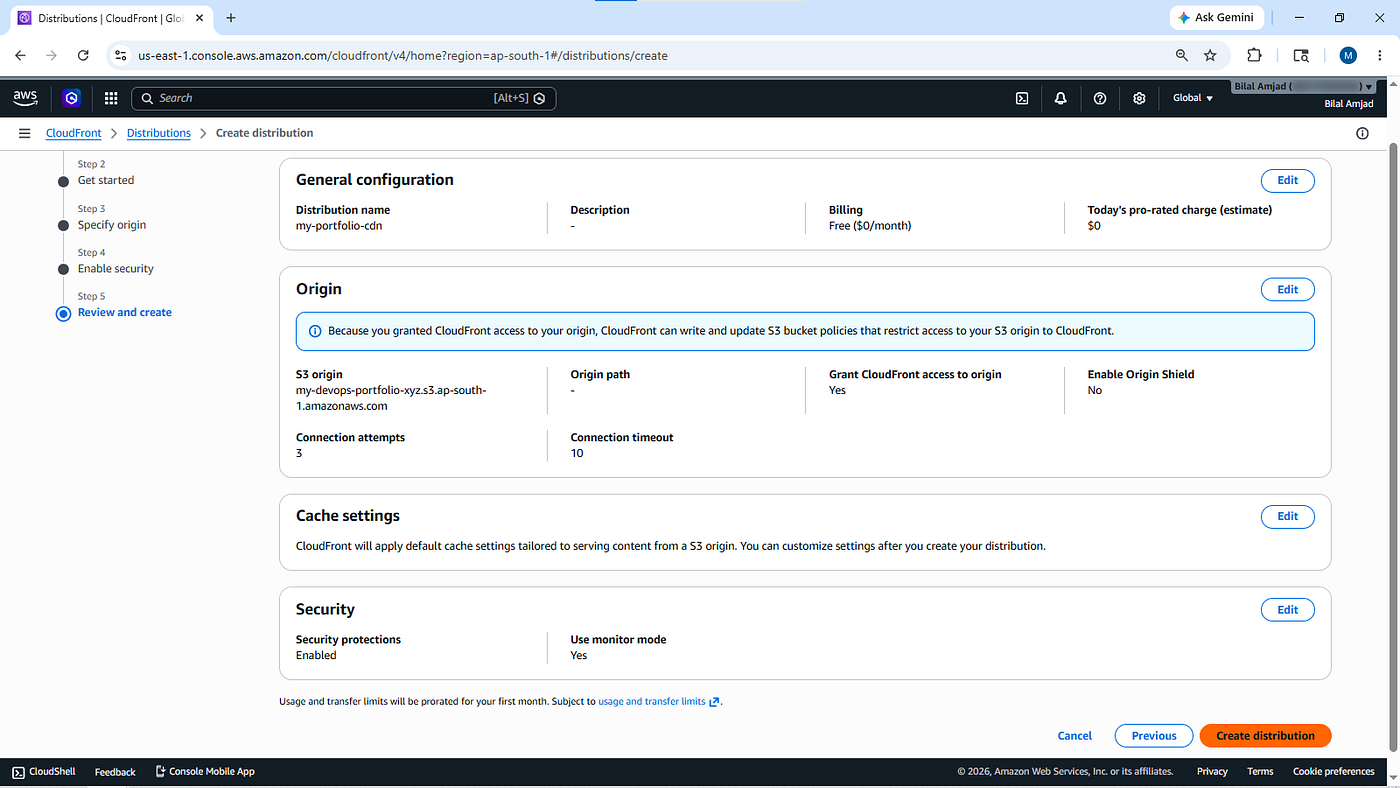
Configure:
- Origin: Your S3 bucket
- Monitoring: Enable monitoring mode
Keep remaining settings as default and create the distribution.
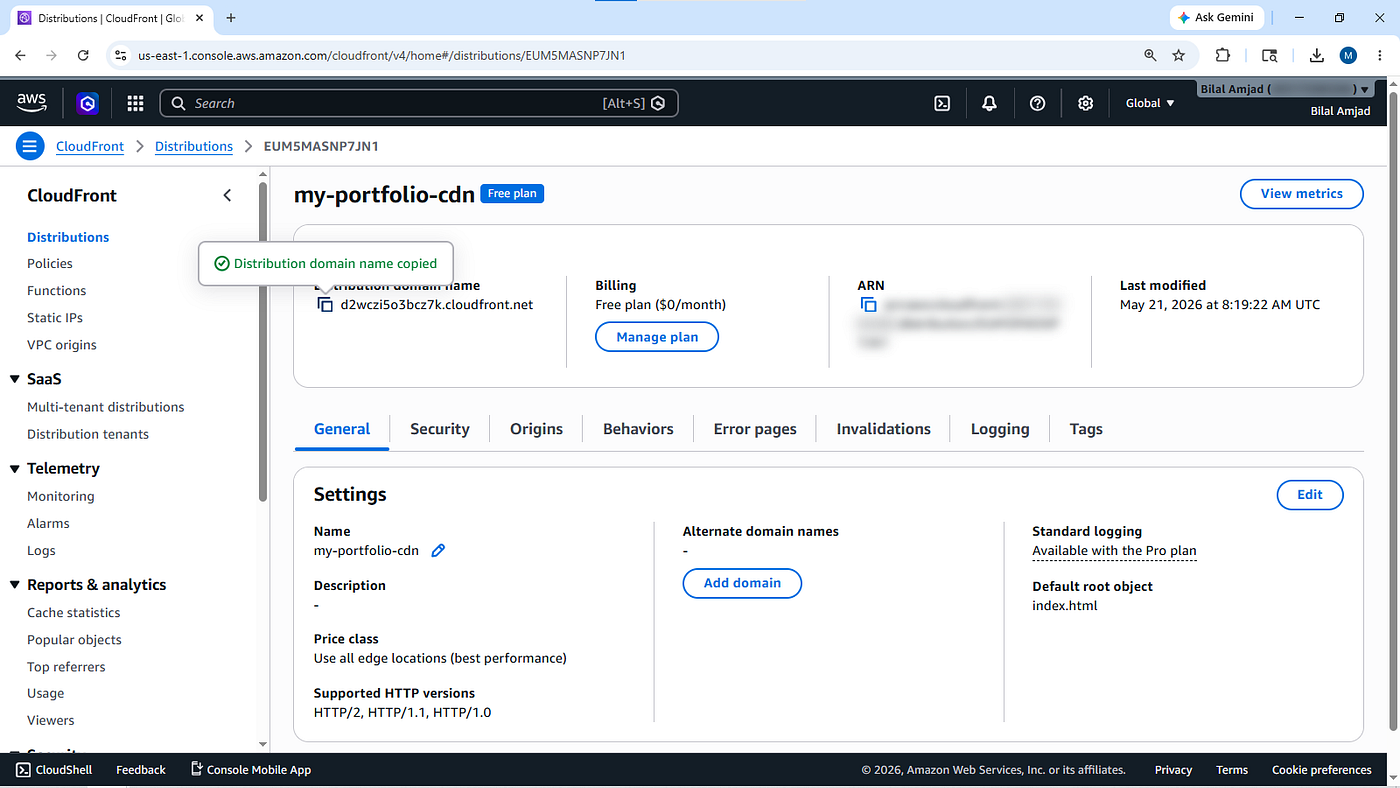
CloudFront will generate a distribution domain like:
d2wczi5o3bcz7k.cloudfront.net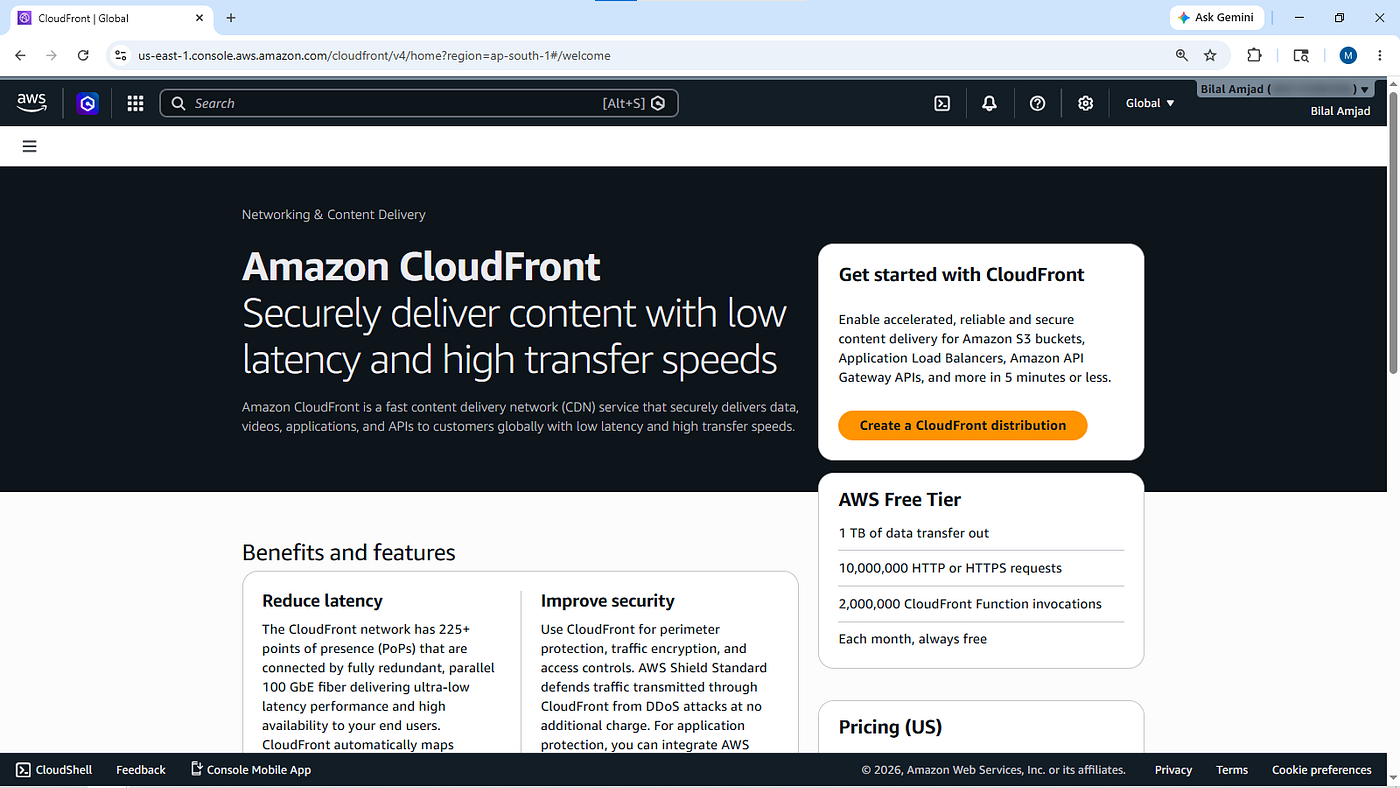
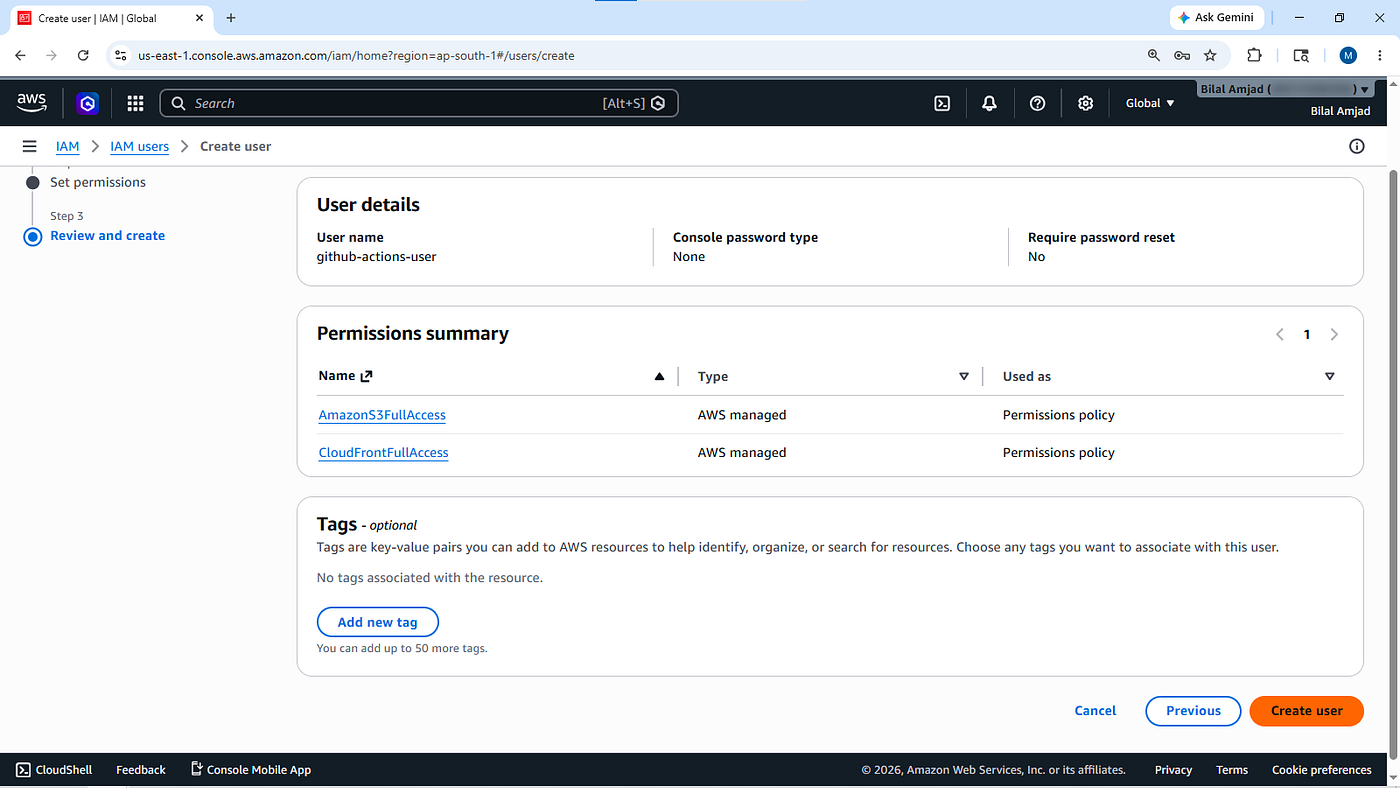
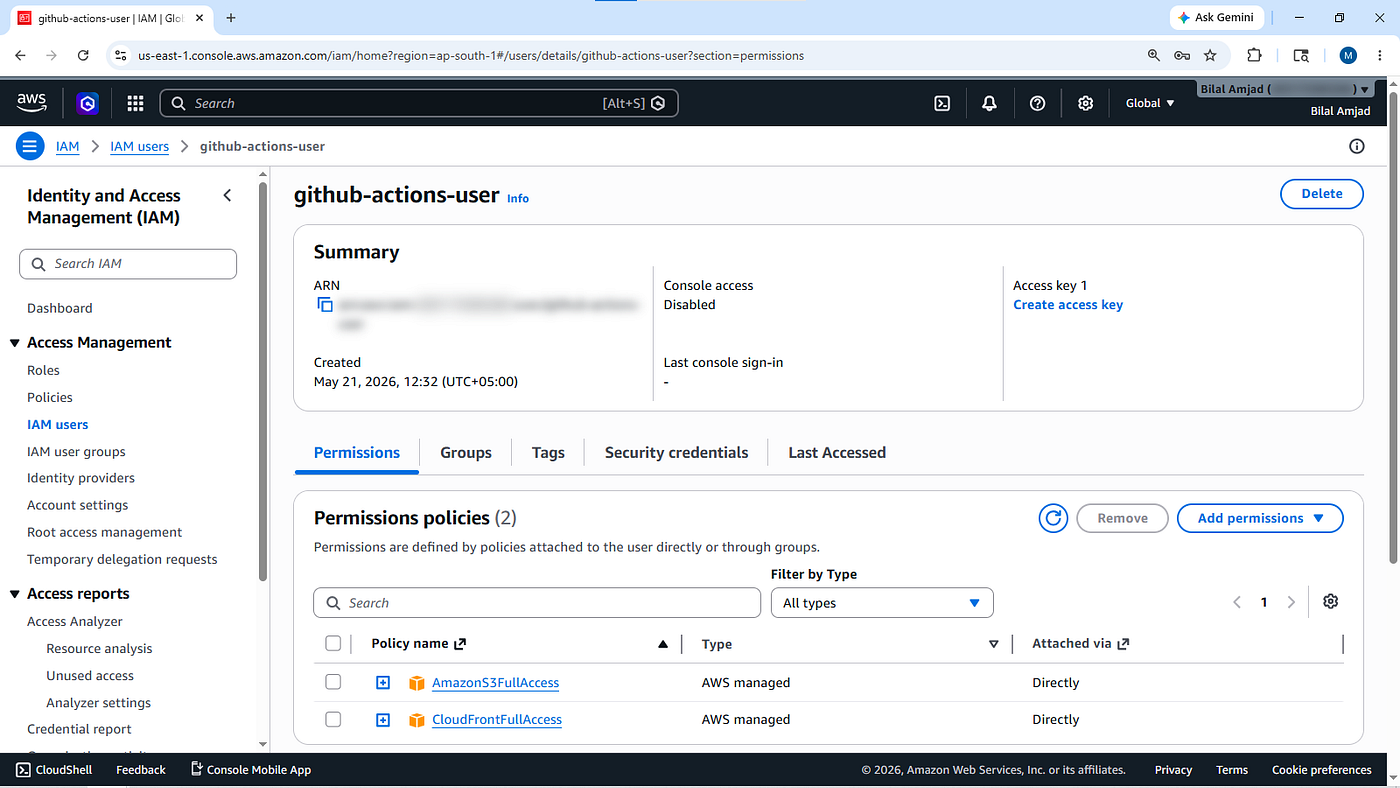
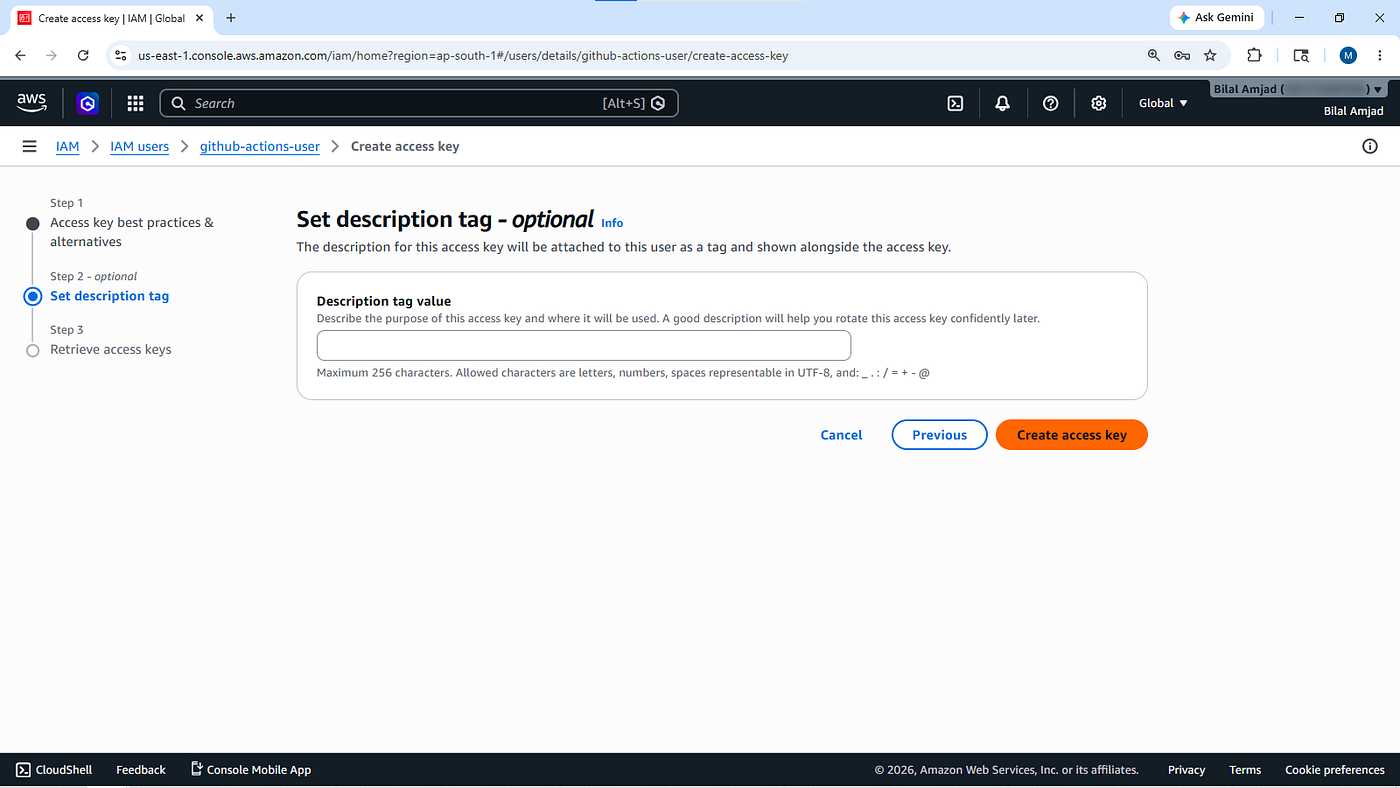
Create IAM User
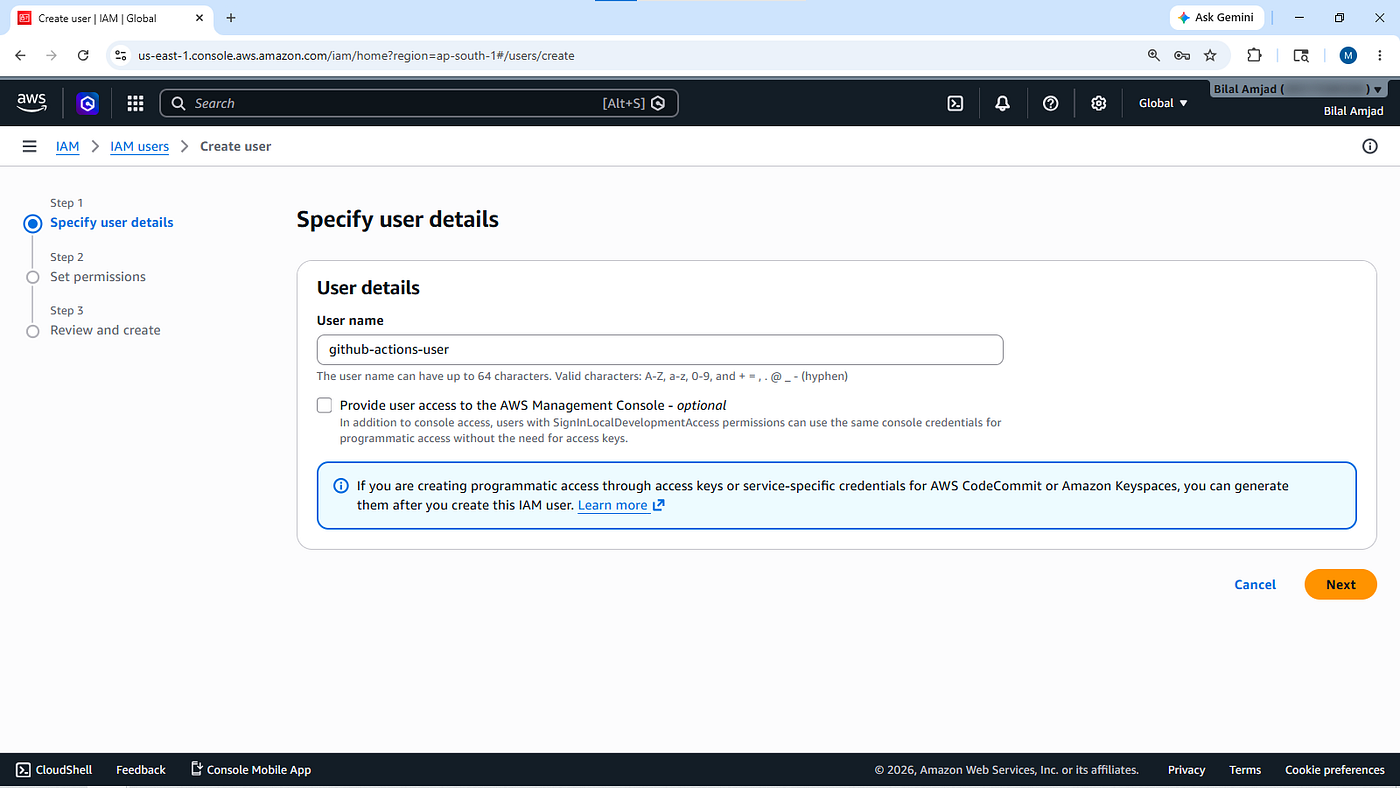
Go to IAM user console:
Create a new IAM user.
Example username:
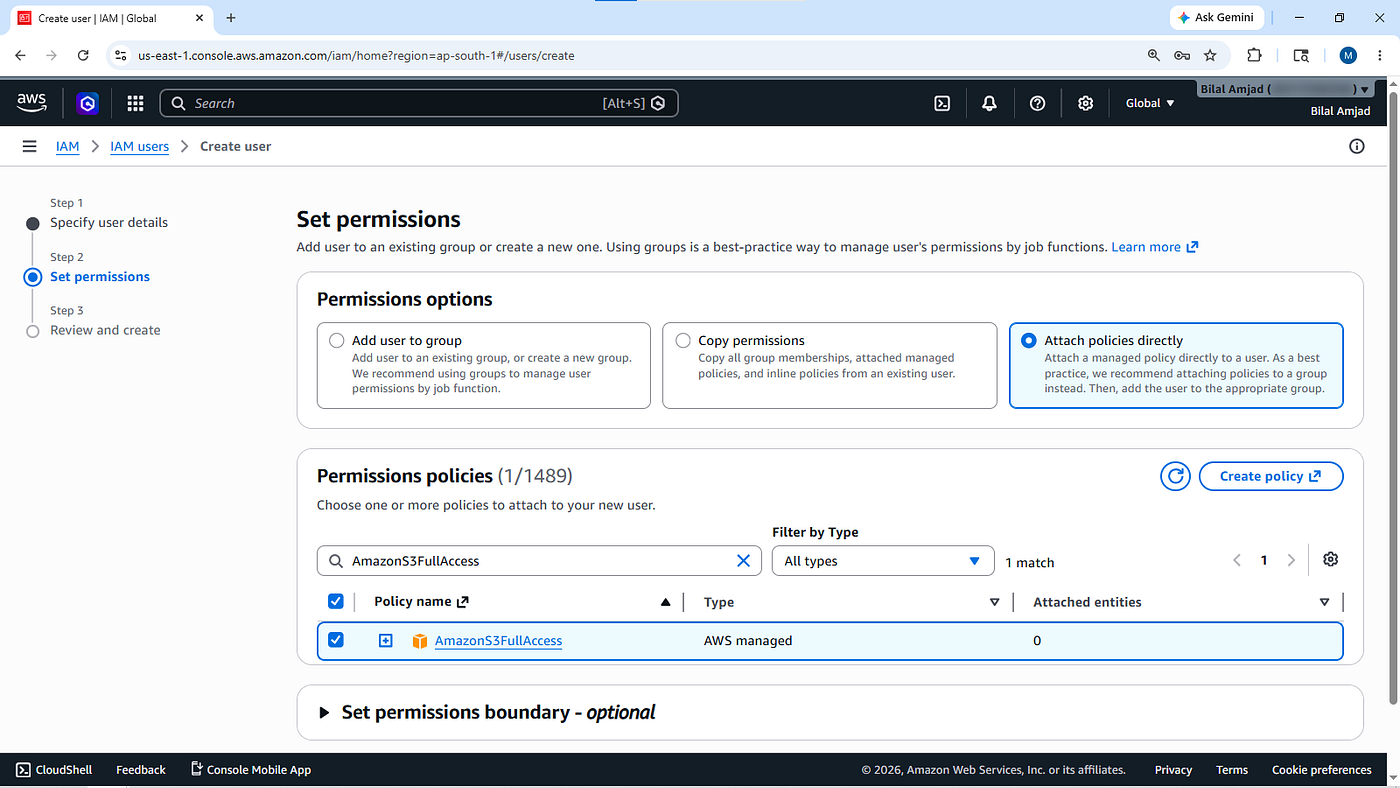
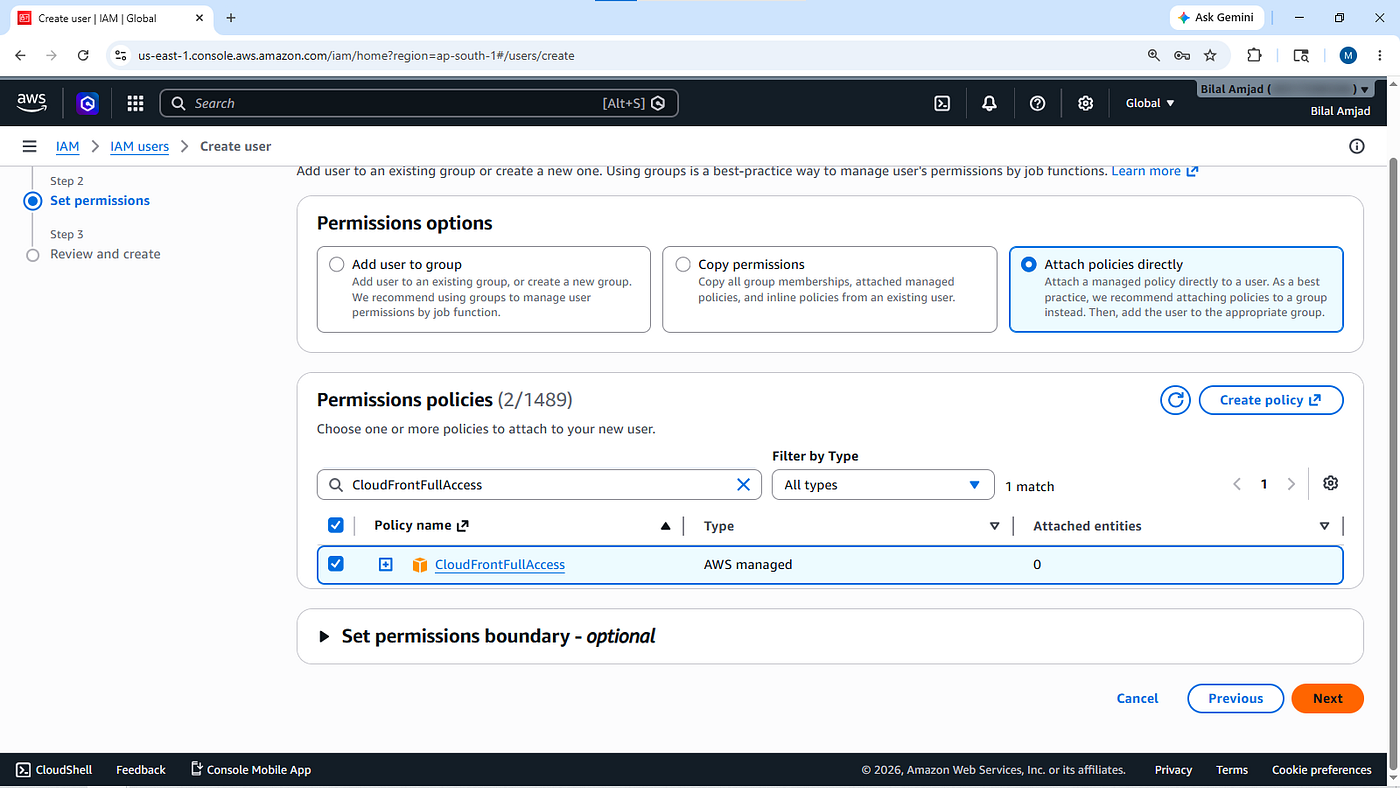
github-actions-userAttach the following permissions:
AmazonS3FullAccess
CloudFrontFullAccess
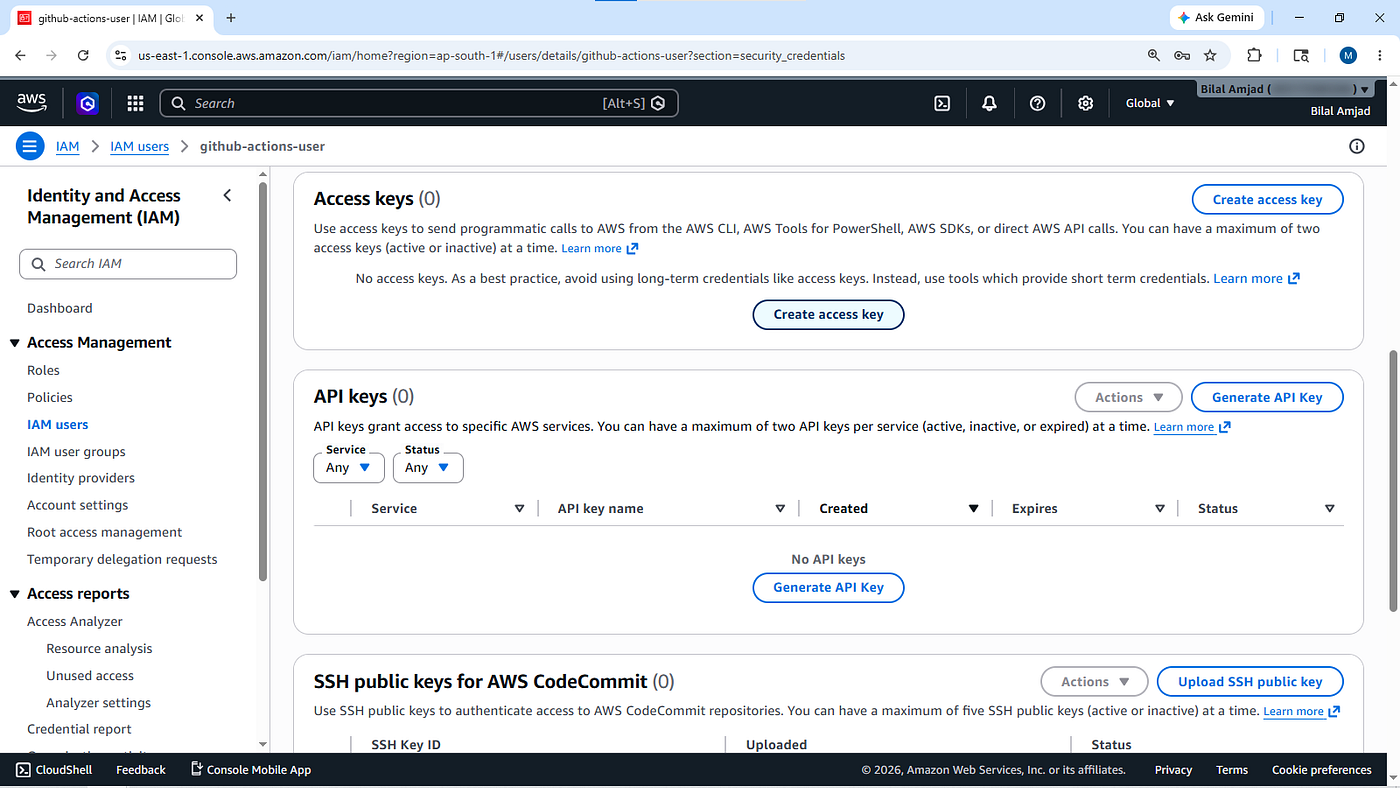
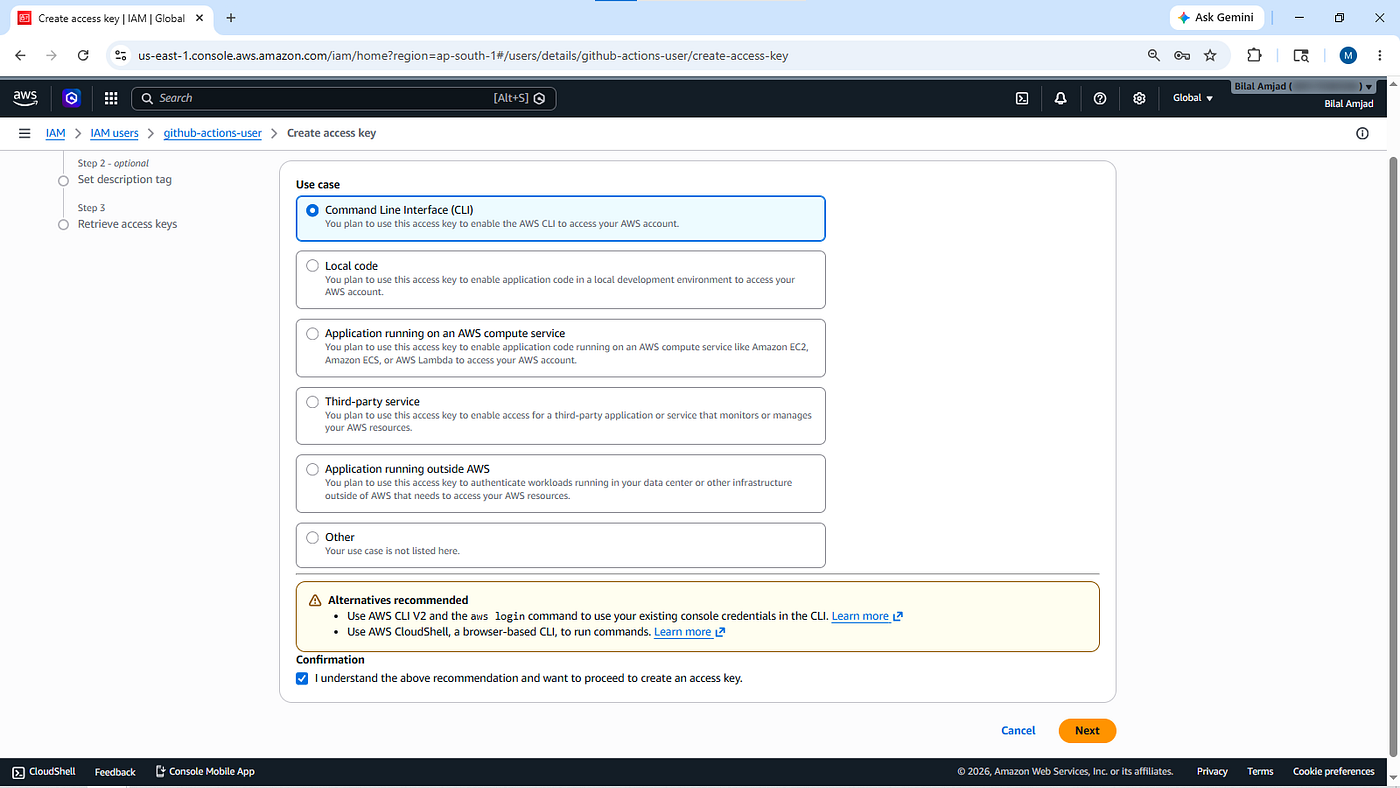
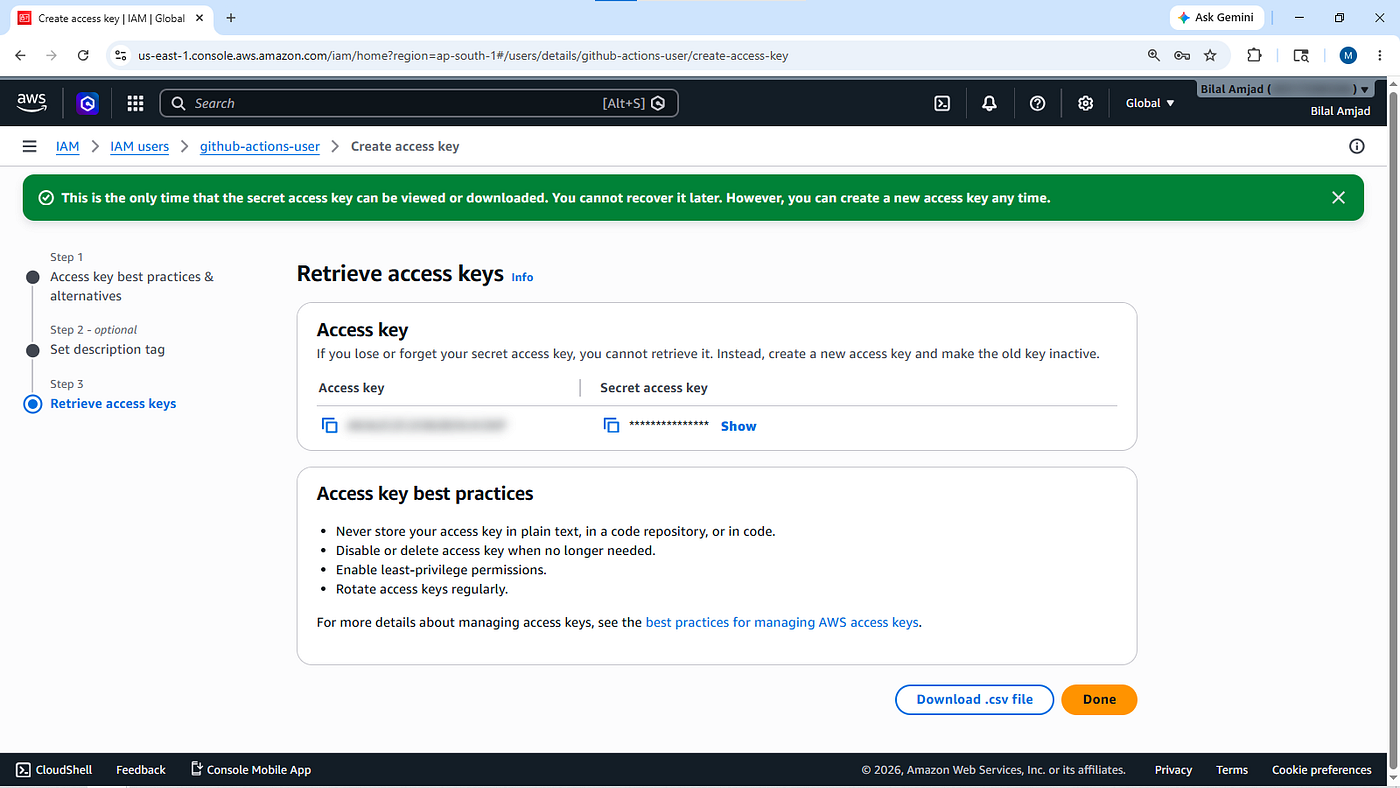
Now create:
- Access Key
- Secret Access Key
Choose:
Command Line Interface (CLI)Download and save the credentials file securely.
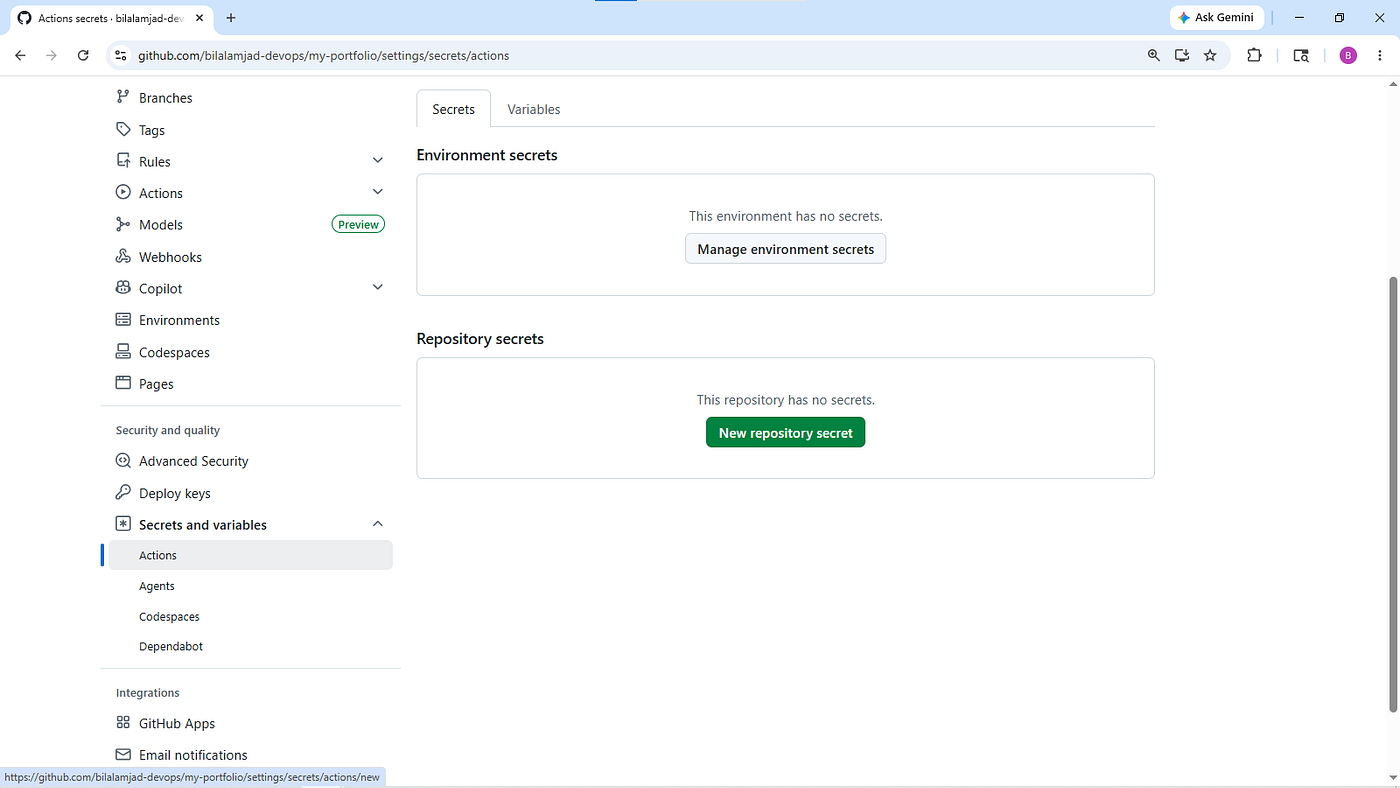
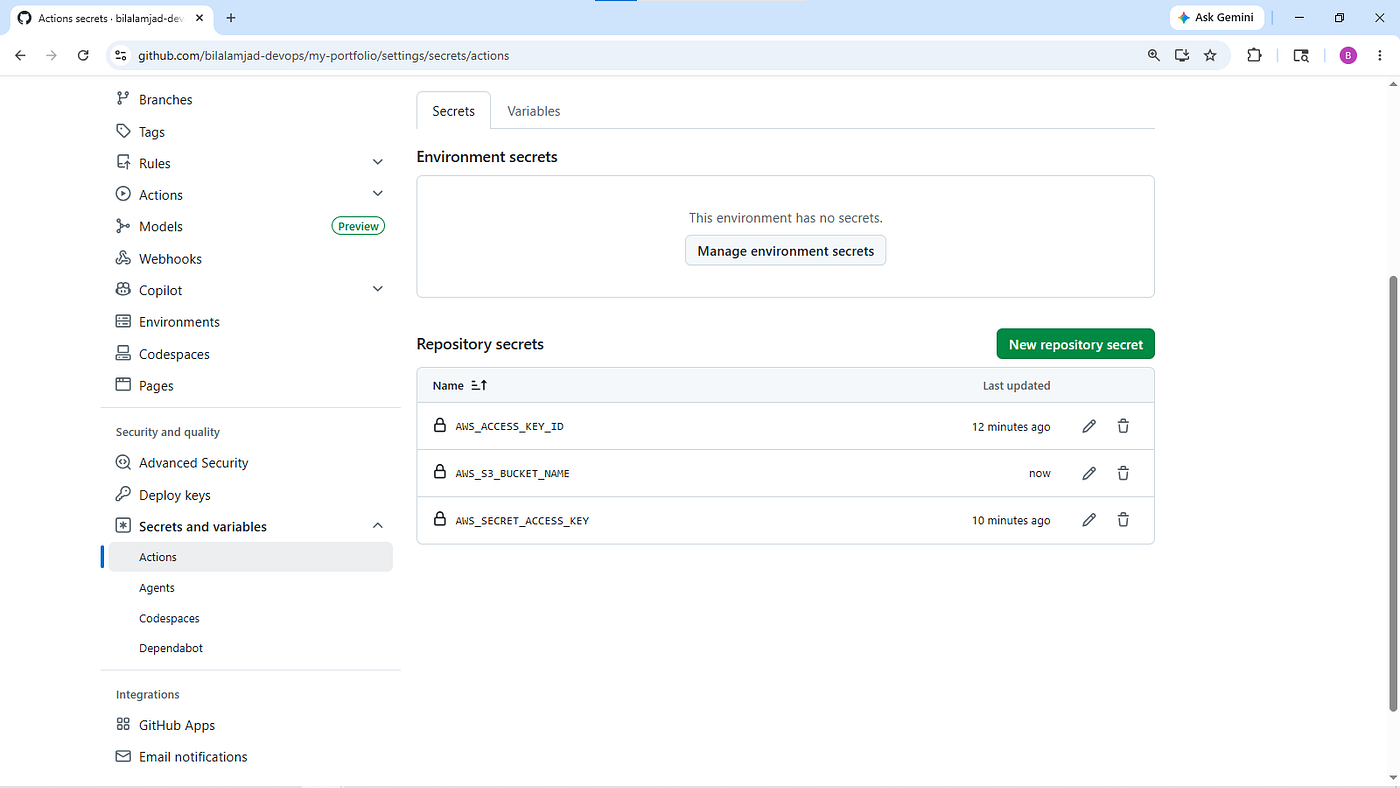
Step 4 — Store Secrets in GitHub Repository
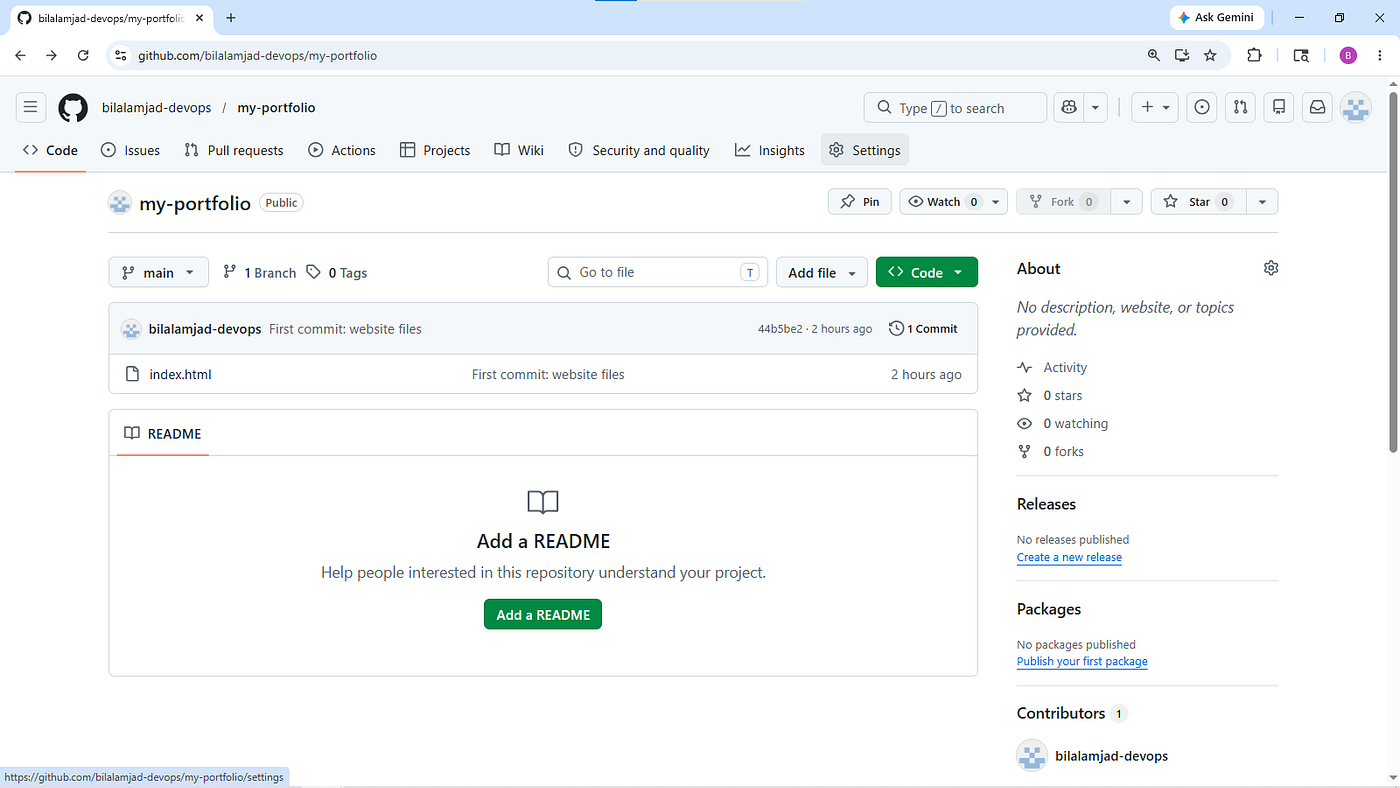
Open your GitHub repository.
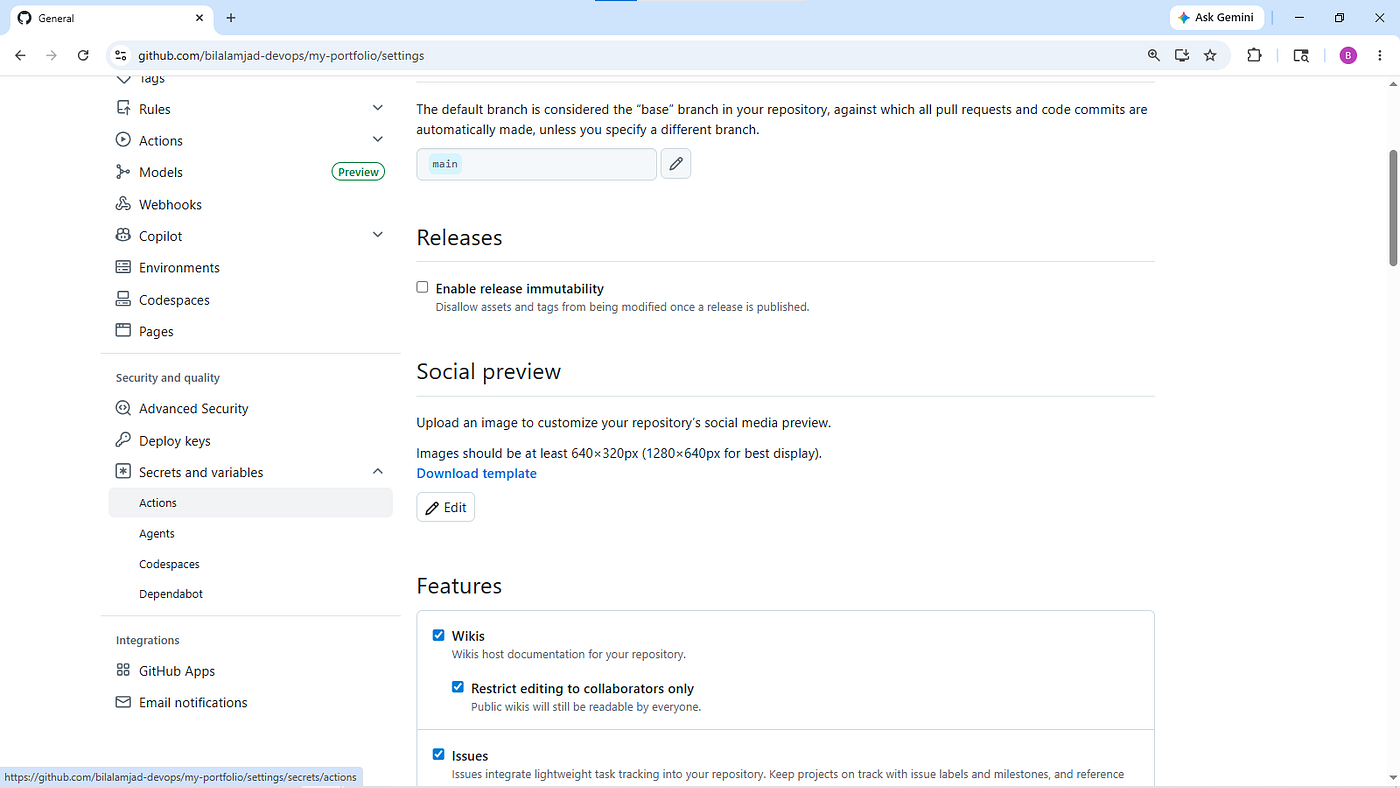
Navigate to:
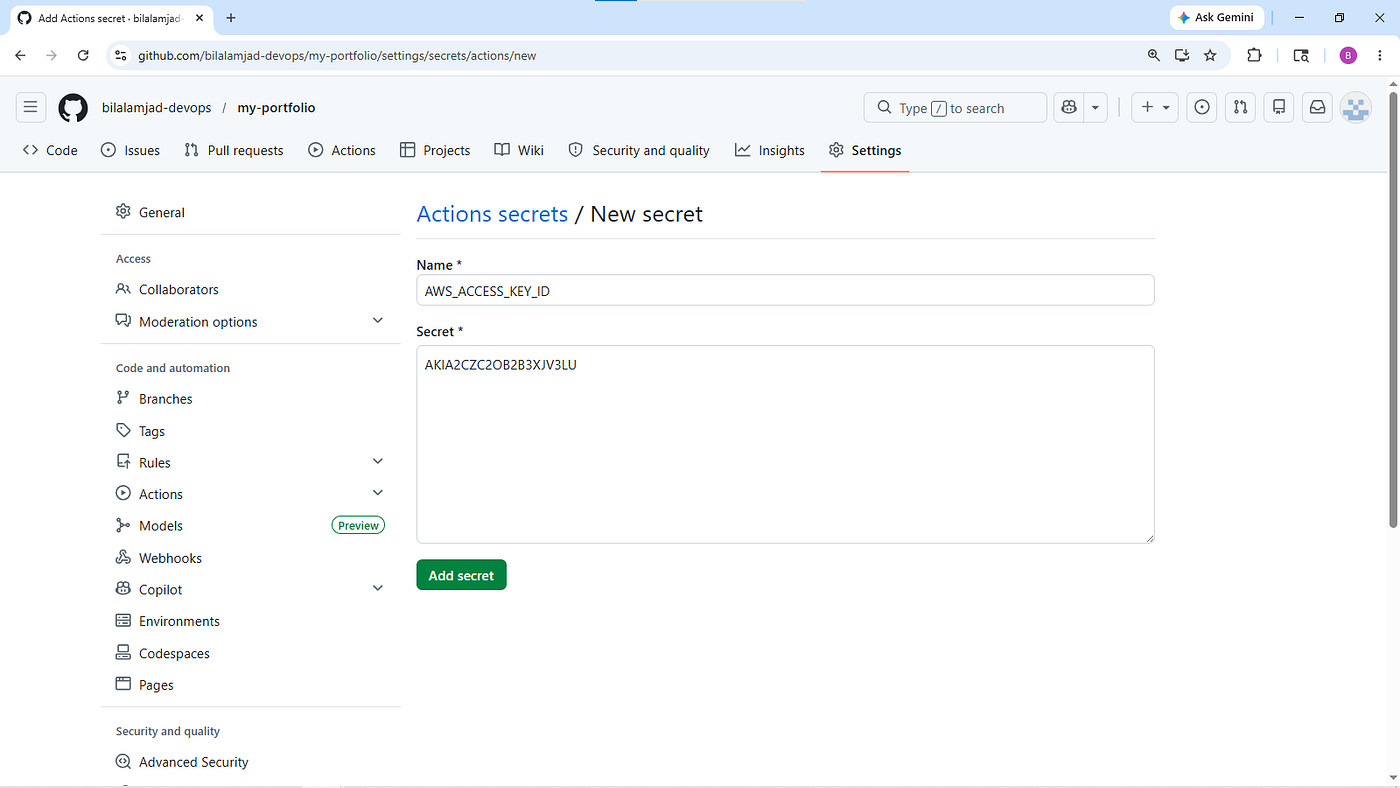
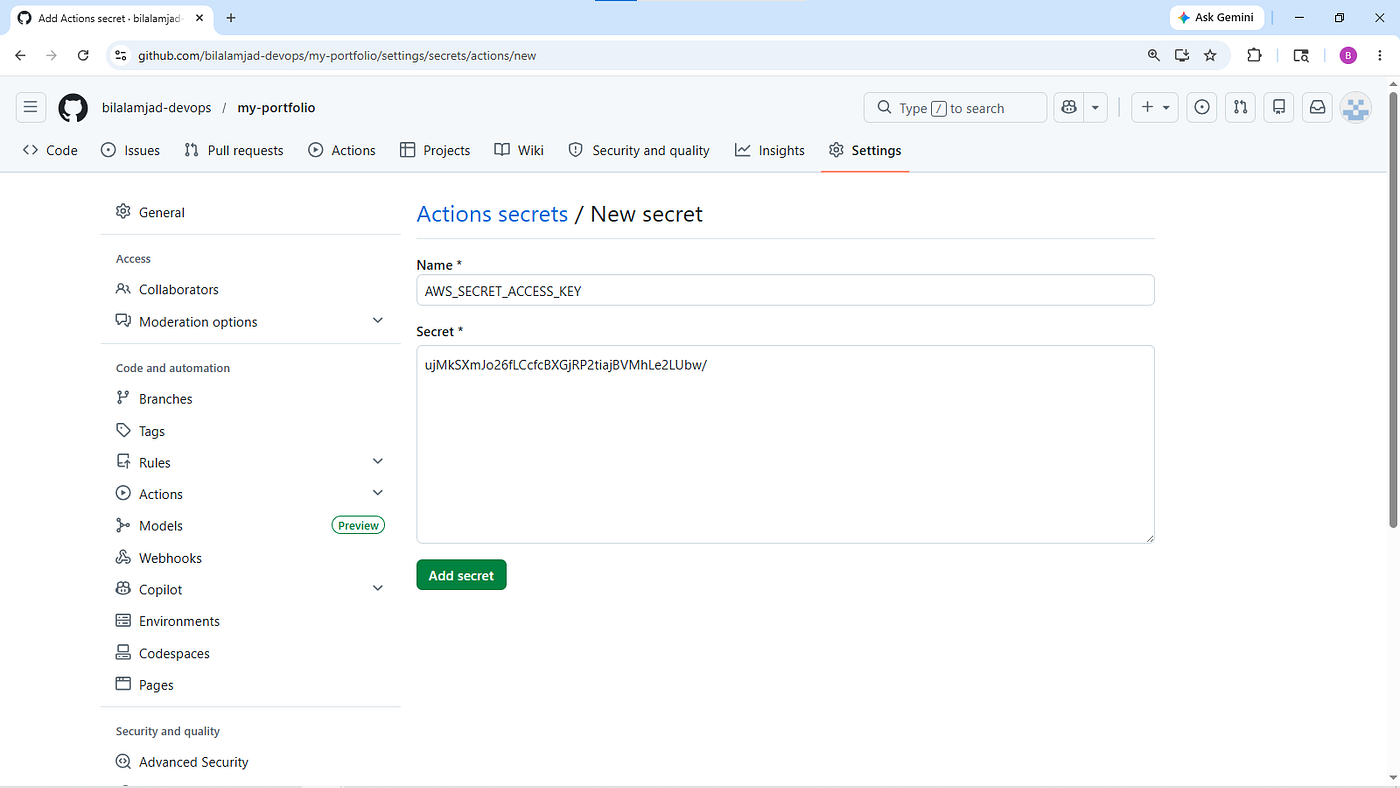
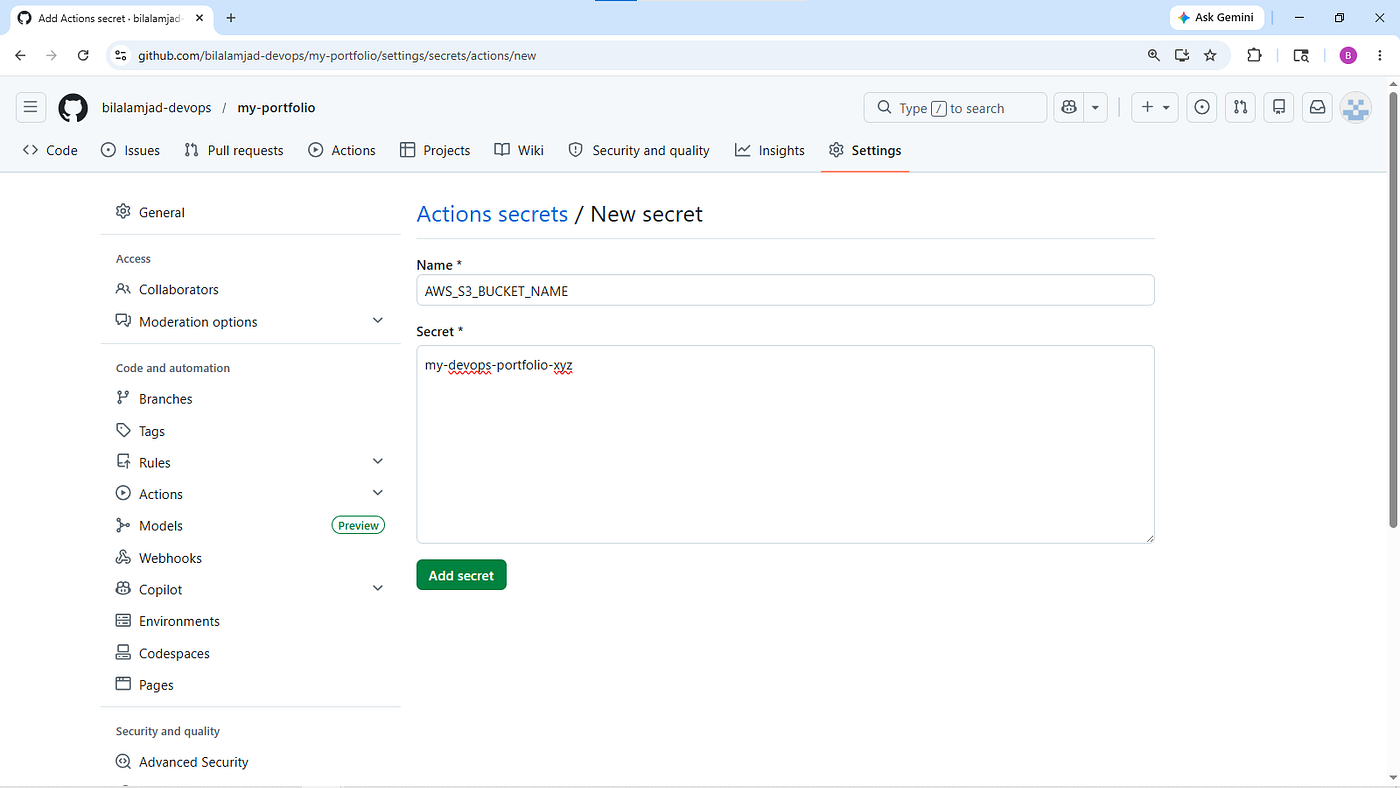
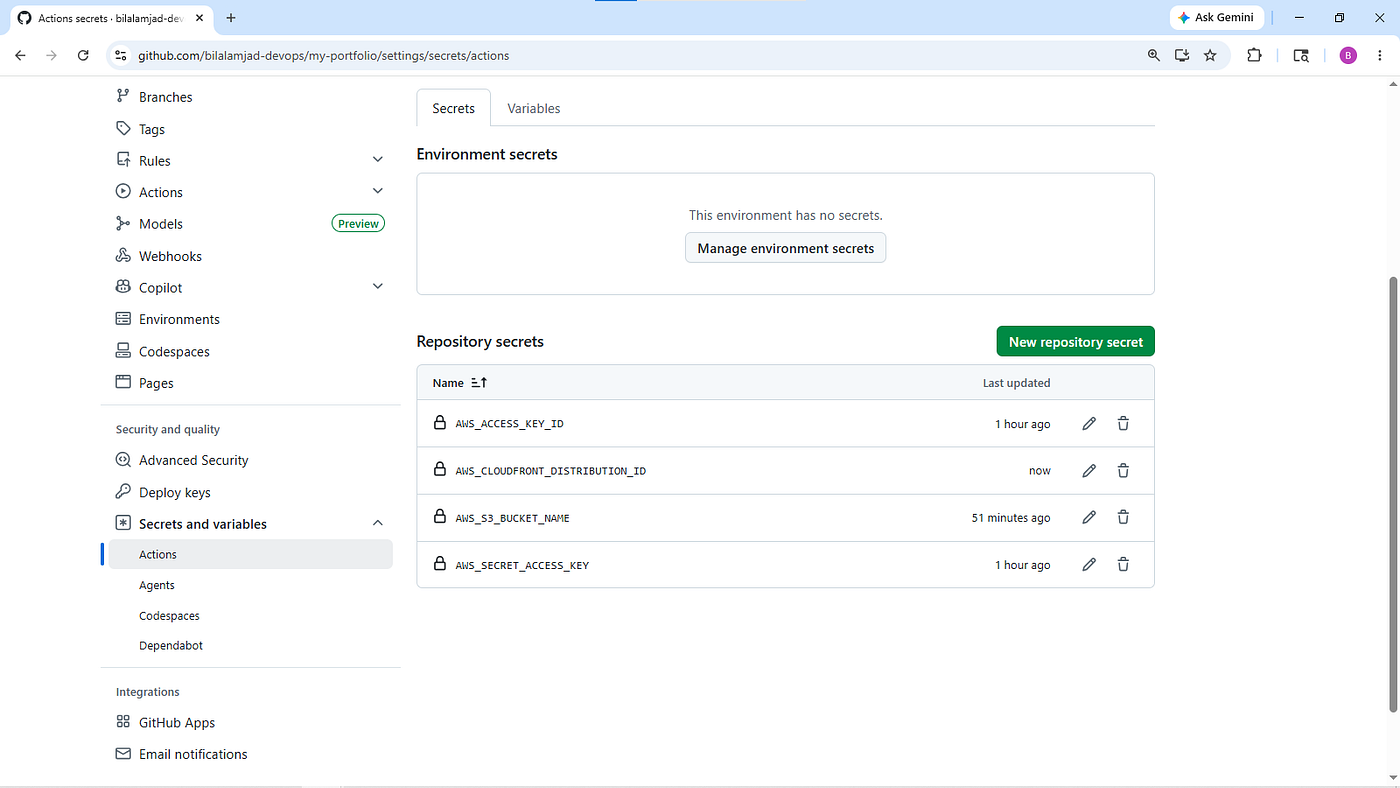
Settings → Secrets and variables → ActionsCreate the following repository secrets:
AWS_ACCESS_KEY_ID
AWS_SECRET_ACCESS_KEY
AWS_S3_BUCKET_NAME
These secrets will be used securely inside GitHub Actions.
Step 5 — Create GitHub Actions Workflow
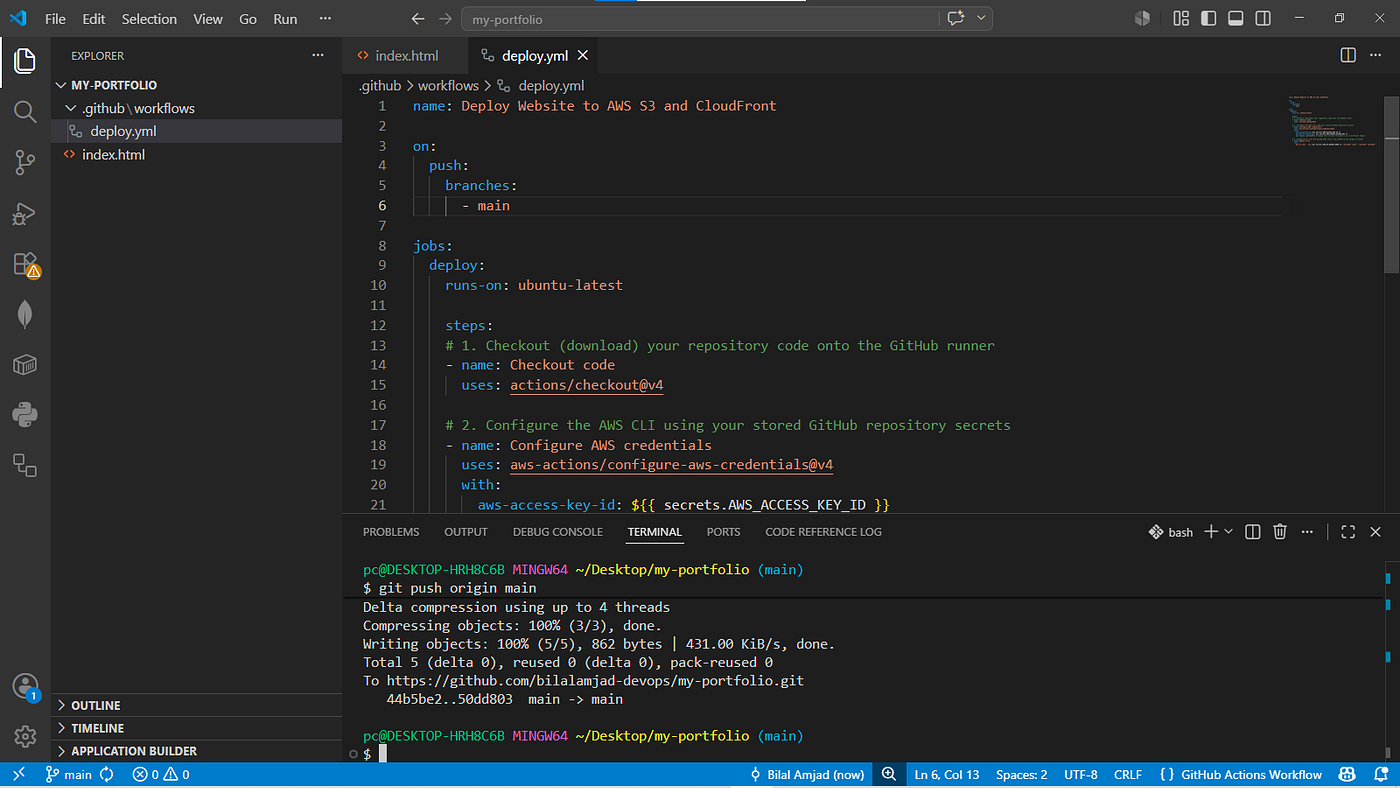
Create the following file:
.github/workflows/deploy.ymlPaste the following content:
name: Deploy Website to AWS S3 and CloudFront

on:
  push:
    branches:
      - main

jobs:
  deploy:
    runs-on: ubuntu-latest

    steps:
    ## Checkout repository code
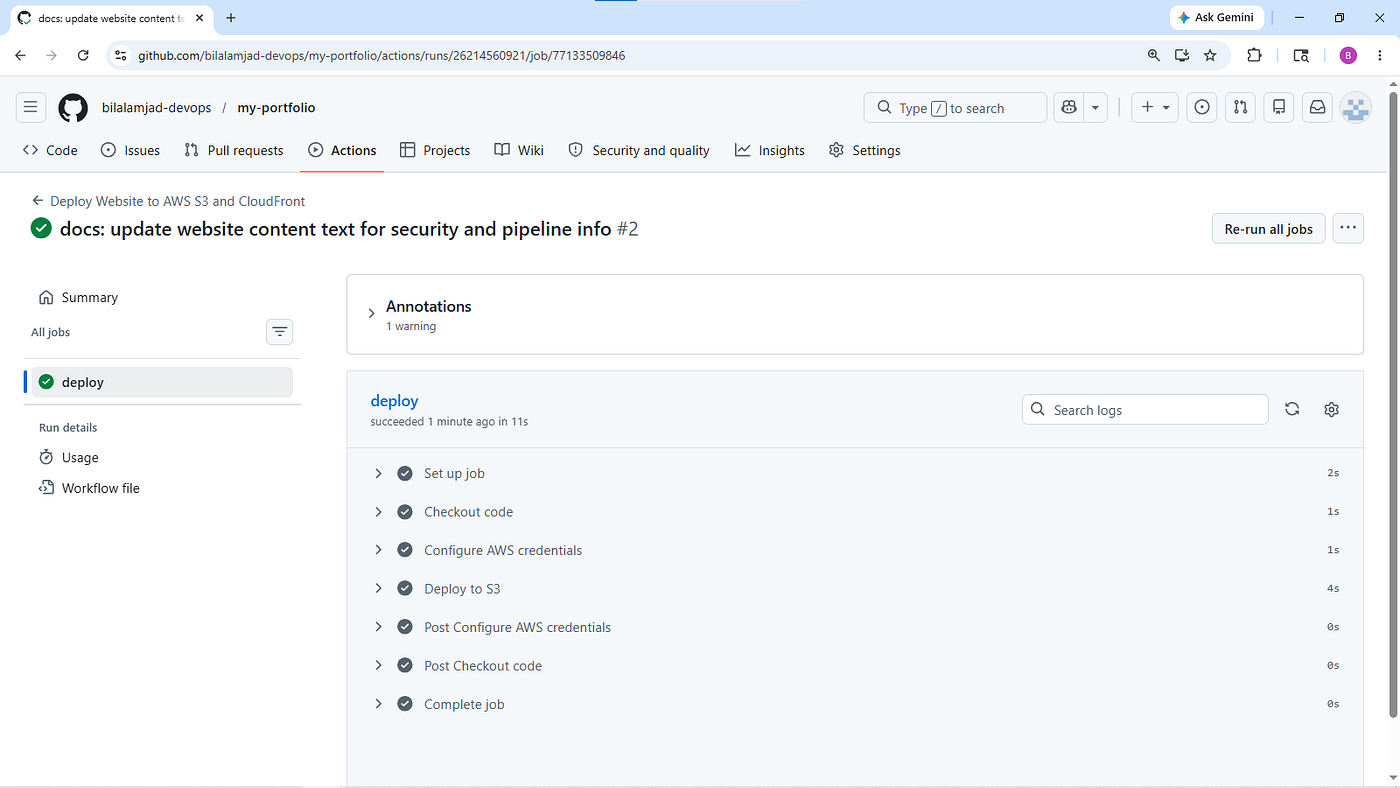
    - name: Checkout code
      uses: actions/checkout@v4

    ## Configure AWS credentials
    - name: Configure AWS credentials
      uses: aws-actions/configure-aws-credentials@v4
      with:
        aws-access-key-id: ${{ secrets.AWS_ACCESS_KEY_ID }}
        aws-secret-access-key: ${{ secrets.AWS_SECRET_ACCESS_KEY }}
        aws-region: ap-south-1

    ## Upload files to S3 bucket
    - name: Deploy to S3
      run: |
        aws s3 sync . s3://${{ secrets.AWS_S3_BUCKET_NAME }} --exclude ".git*" --exclude ".github*"
Please change the AWS region according to your environment.
A better approach is to store the region as a GitHub secret or variable instead of hardcoding it.
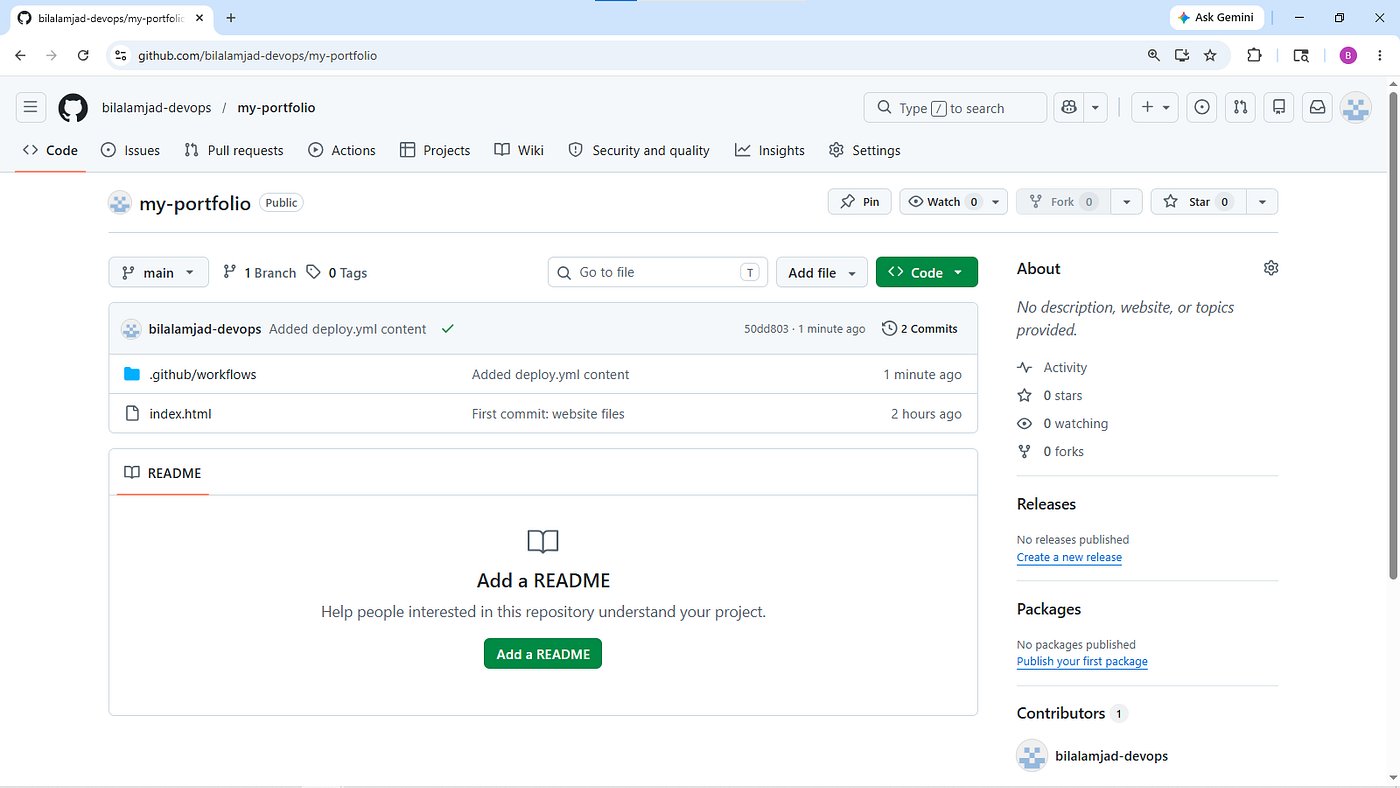
Now push the workflow file:
git add .github/workflows/deploy.yml
git commit -m "Added deploy.yml content"
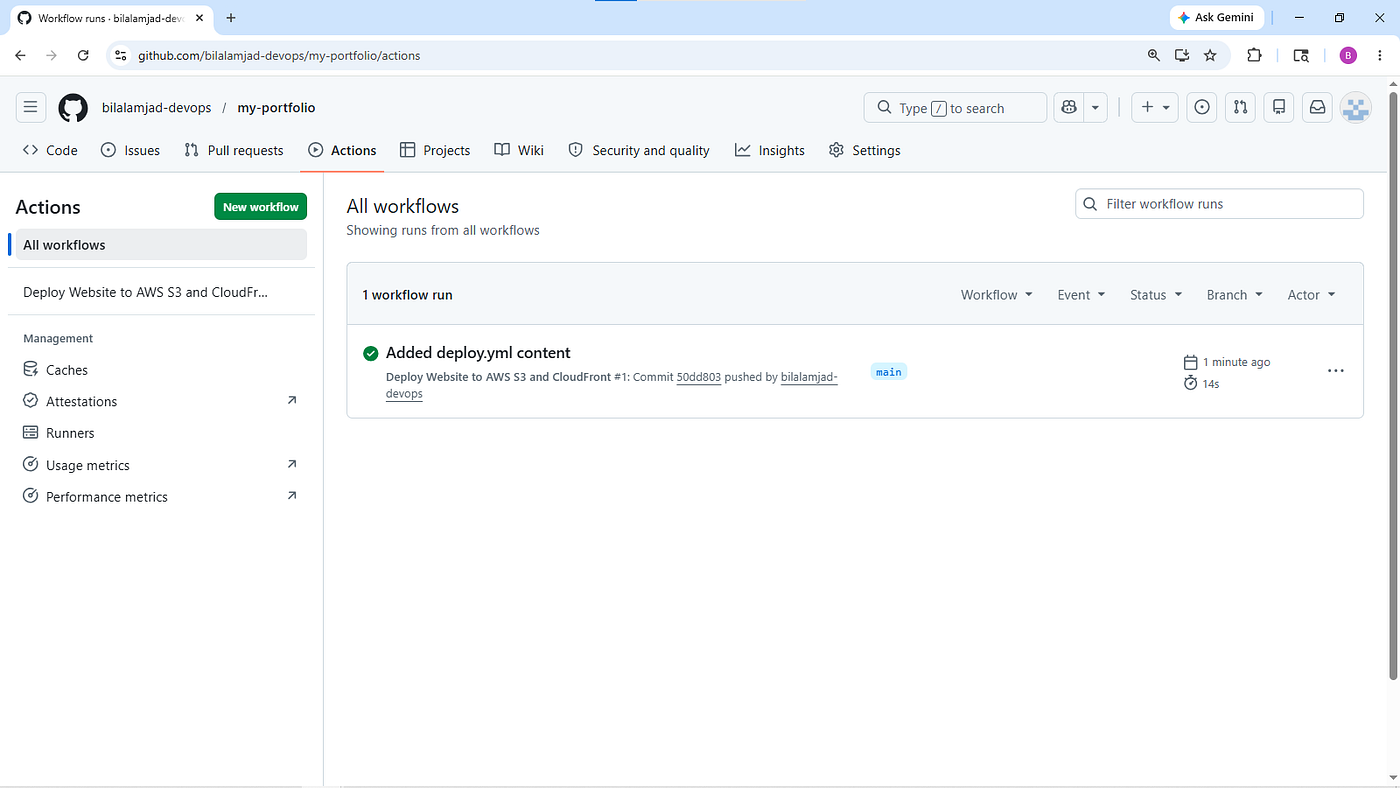
git push origin main
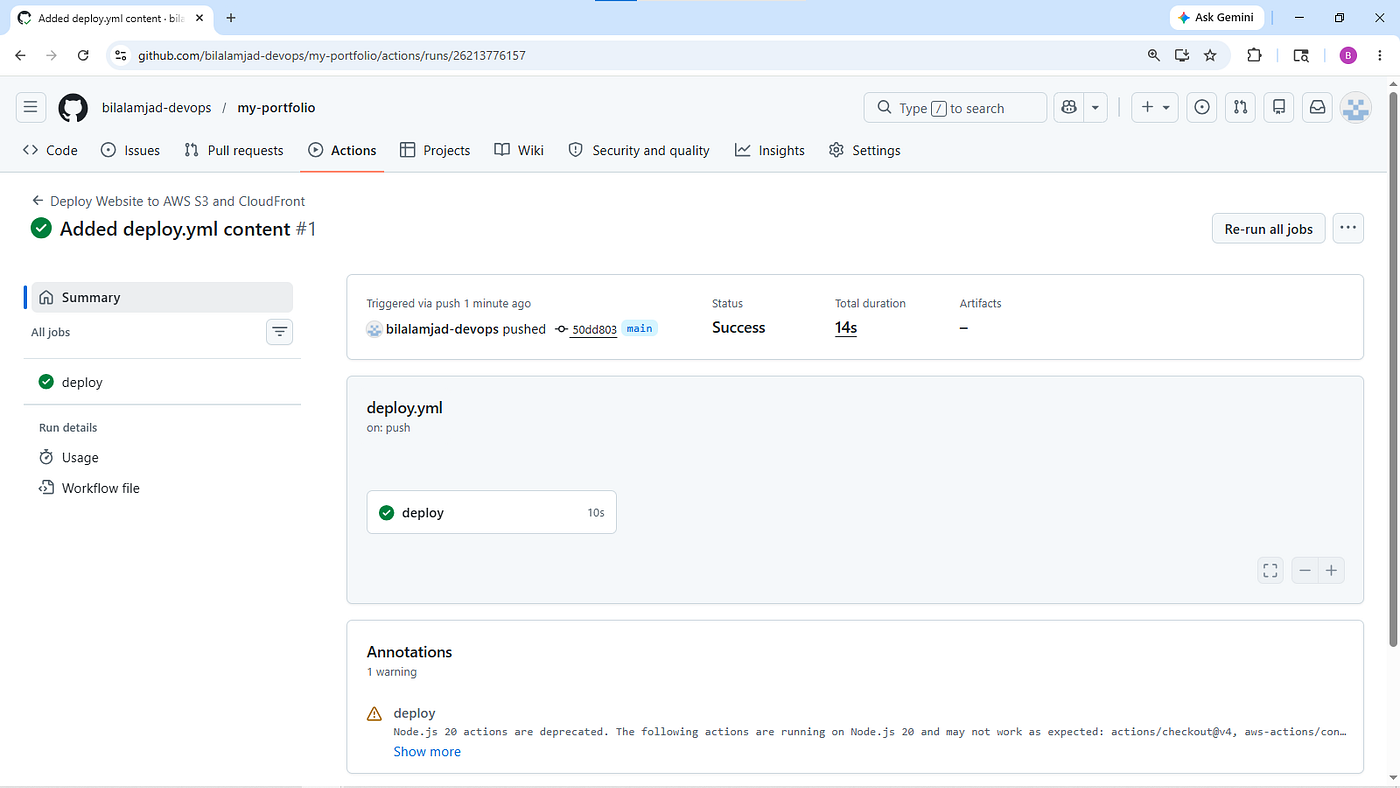
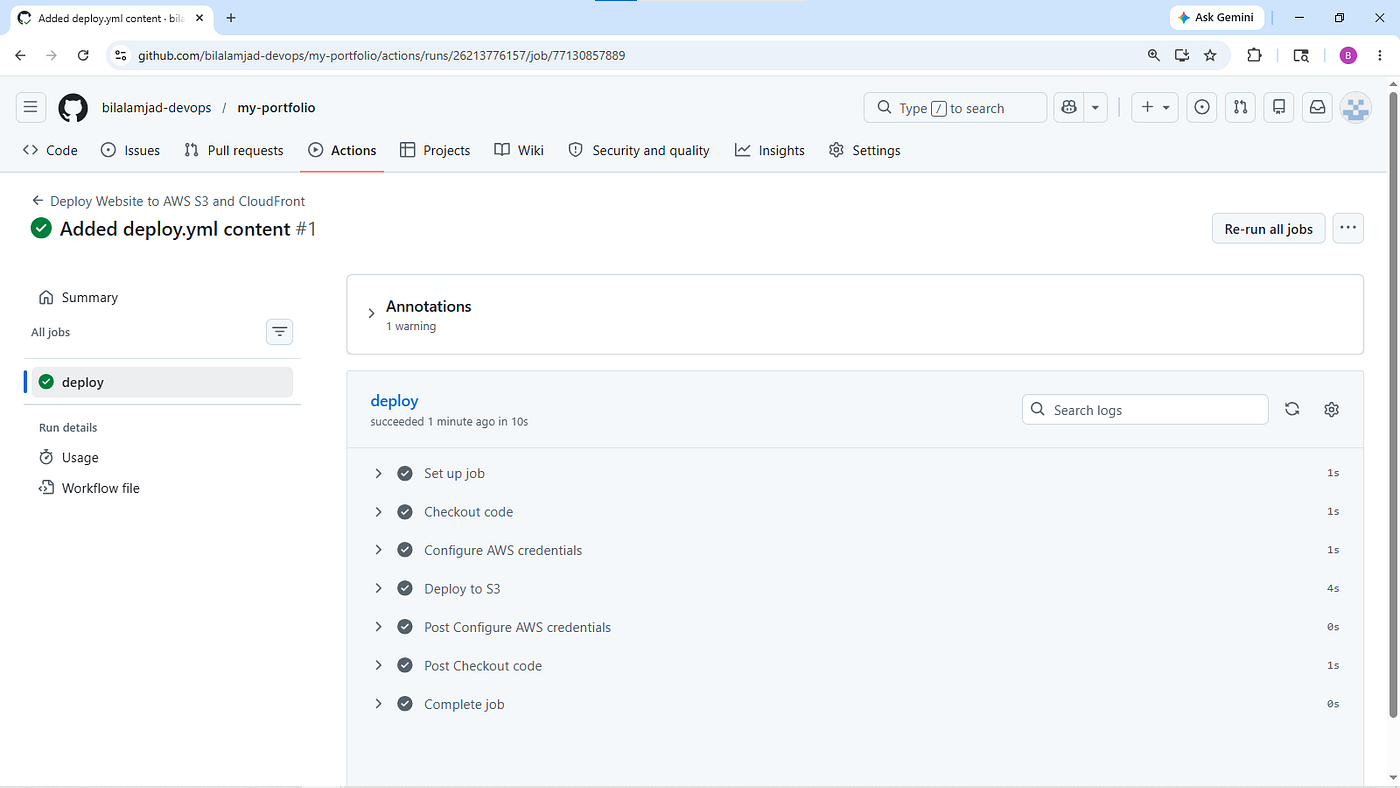
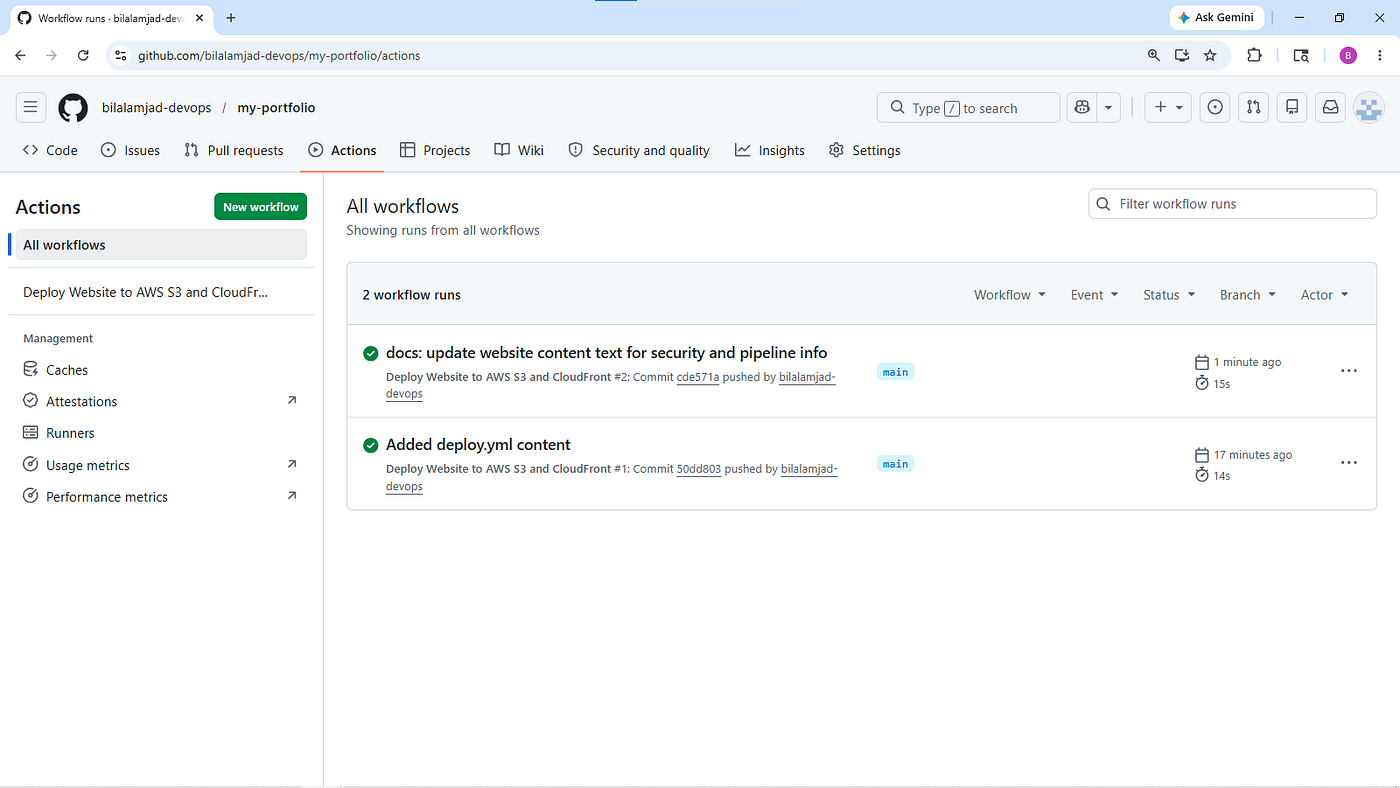
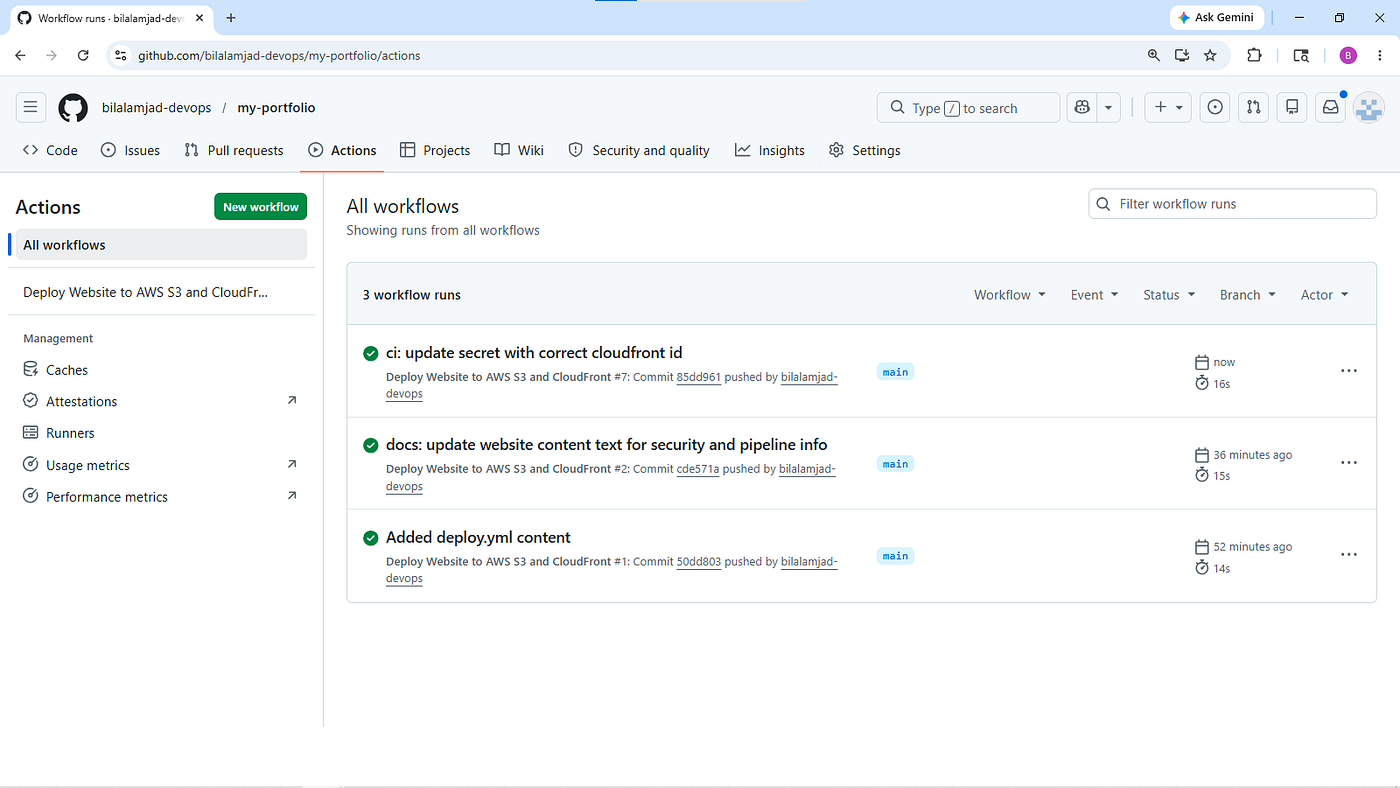
GitHub Actions pipeline will automatically start.
Step 6 — Test Website Deployment
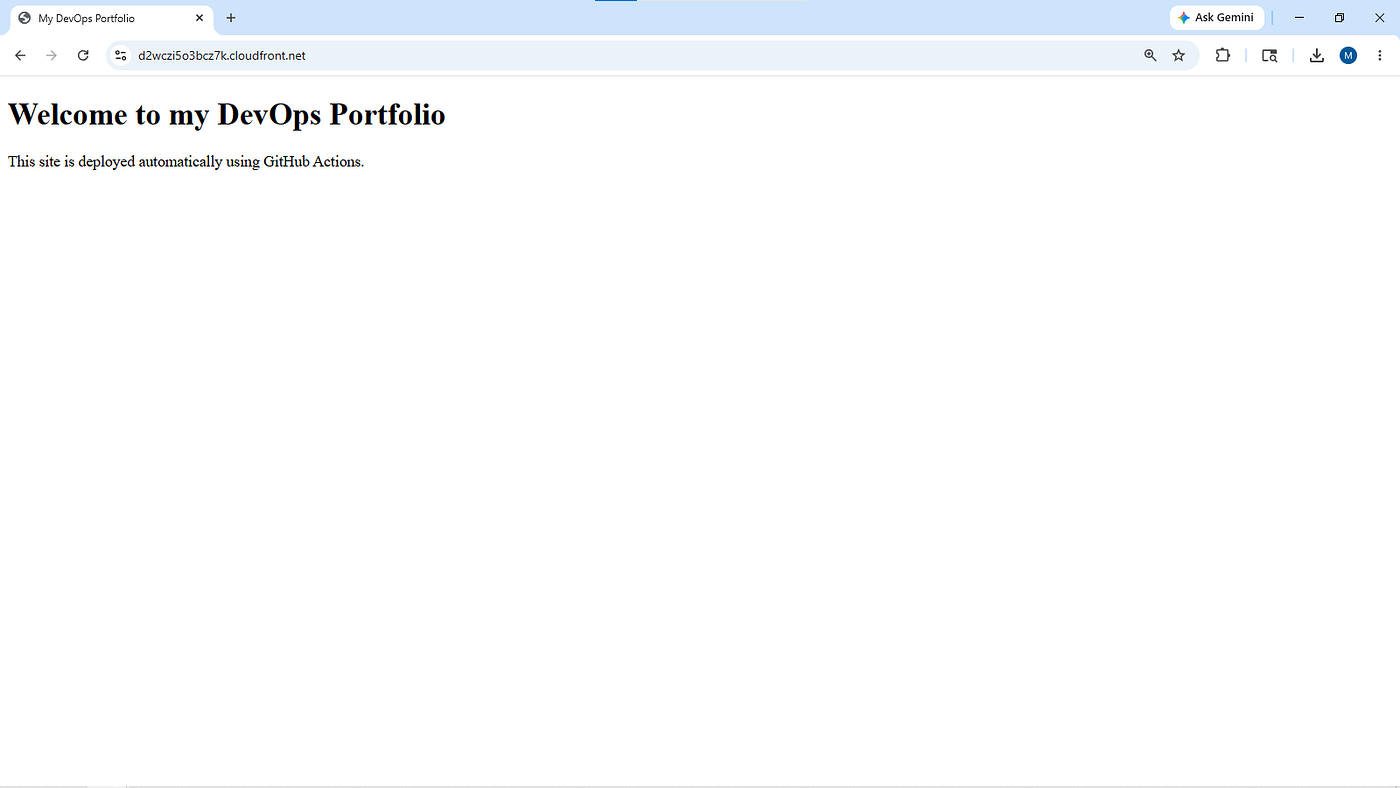
Copy your CloudFront distribution domain and paste it into the browser.
Example:
d2wczi5o3bcz7k.cloudfront.net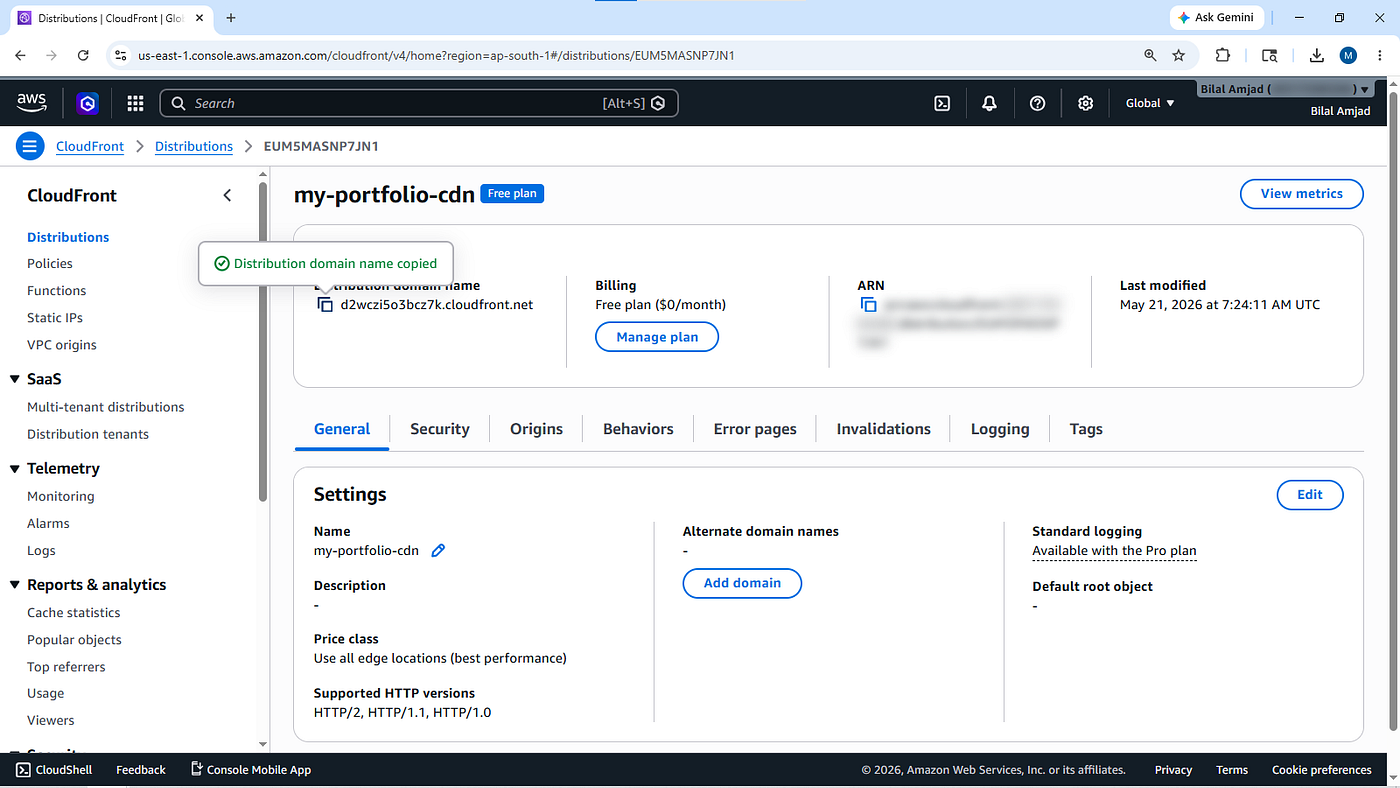
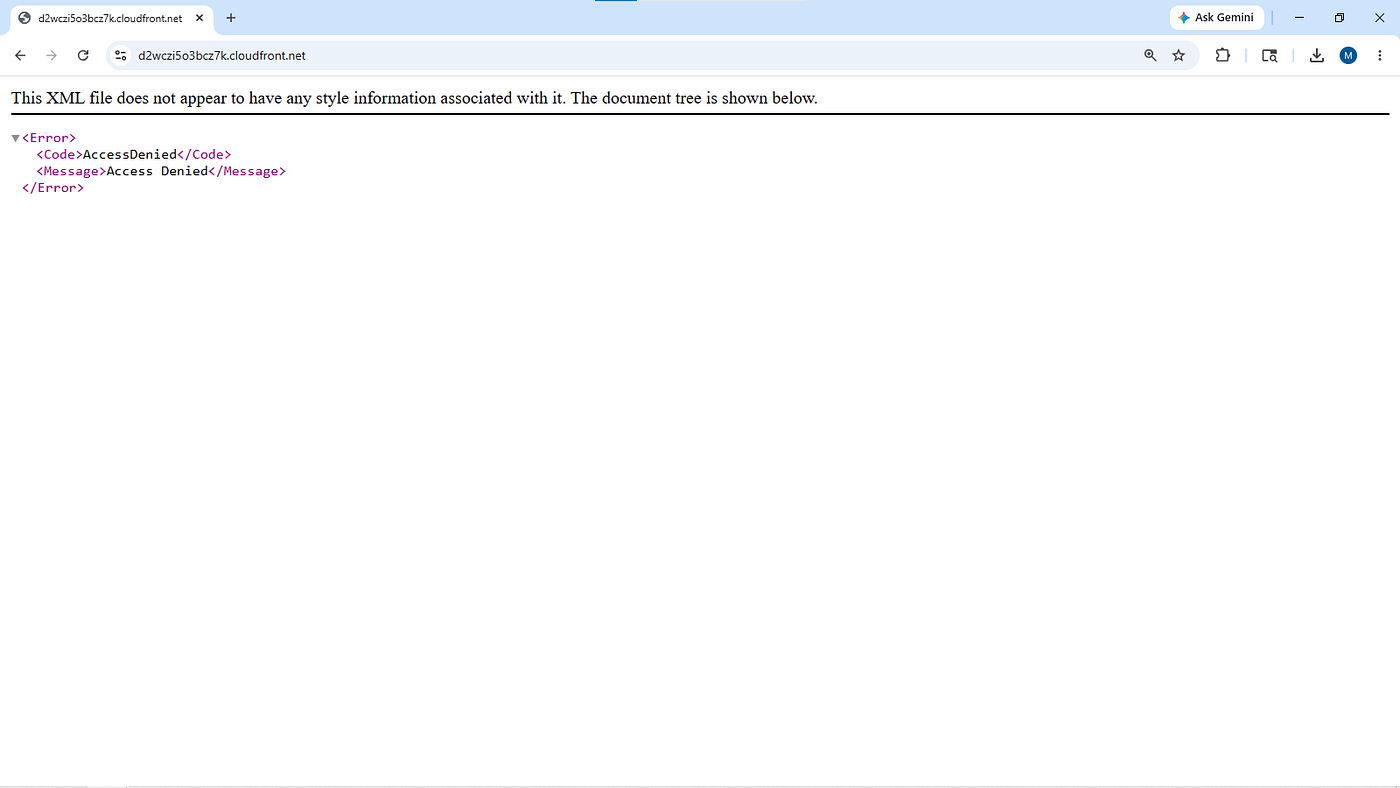
Troubleshooting — Access Denied Error
What is the issue?
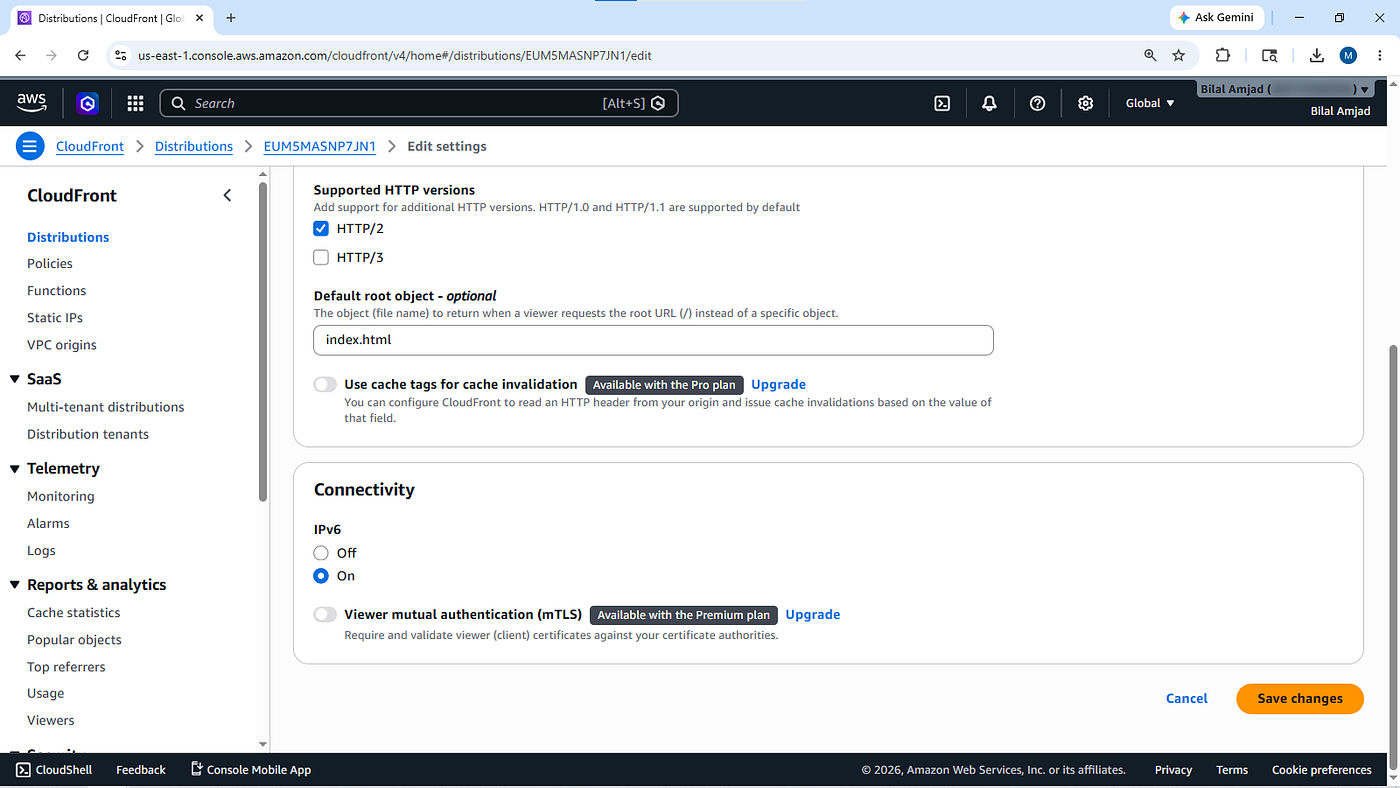
CloudFront does not know which file should be served as the default page.
Solution
Open your CloudFront distribution.
Click:
EditSet:
Default root object:
index.html
Save the changes.
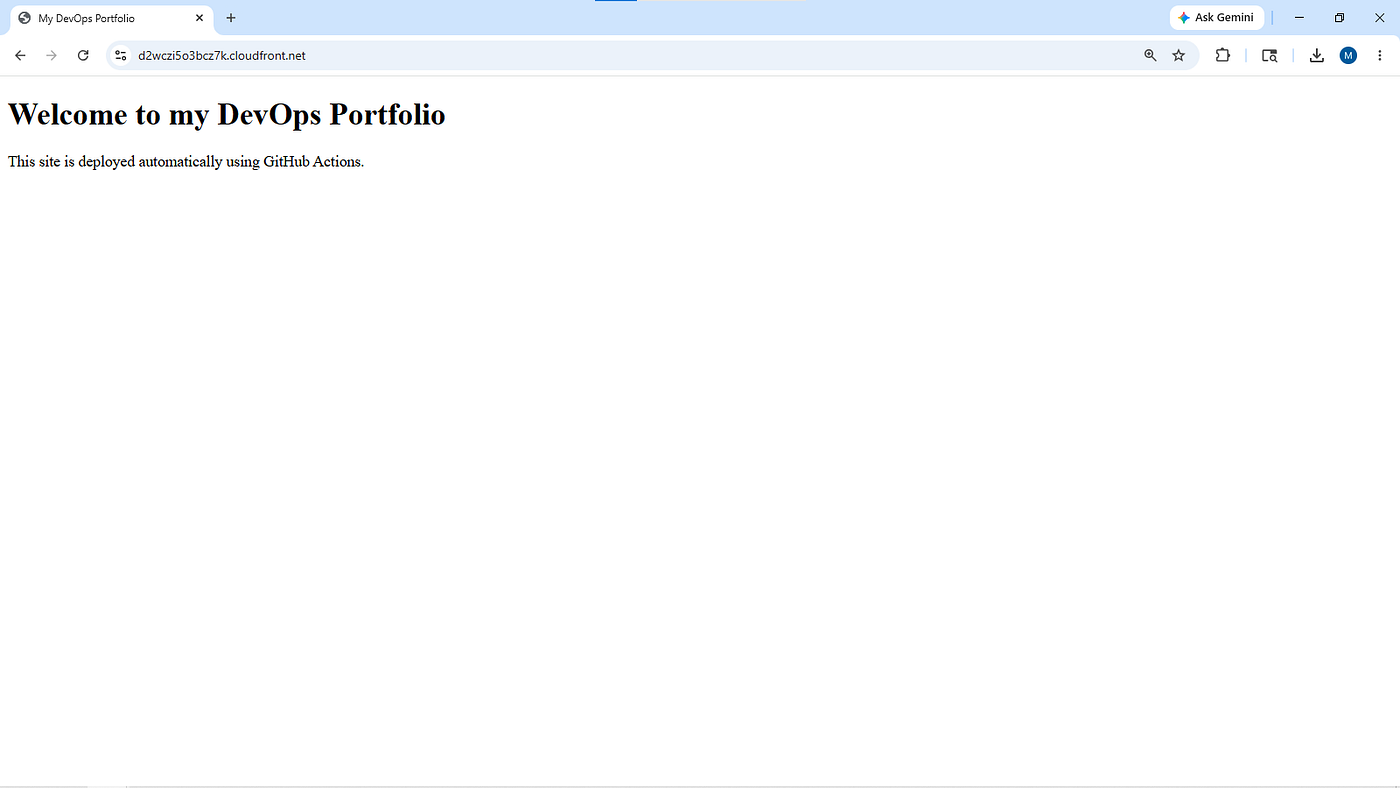
Now refresh the CloudFront URL.
You should see:
Welcome to my DevOps Portfolio
This site is deployed automatically using GitHub Actions.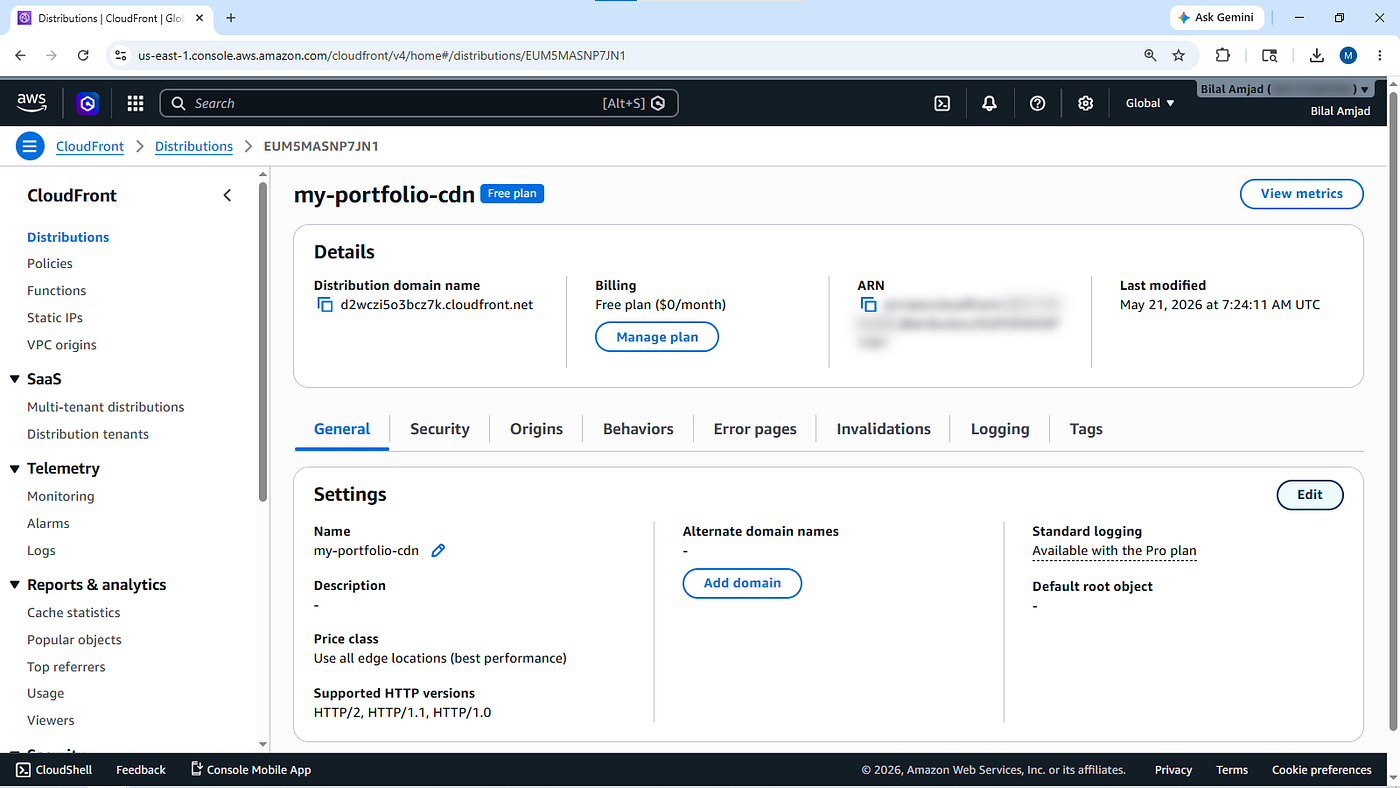
Step 7 — Test Automatic Deployment
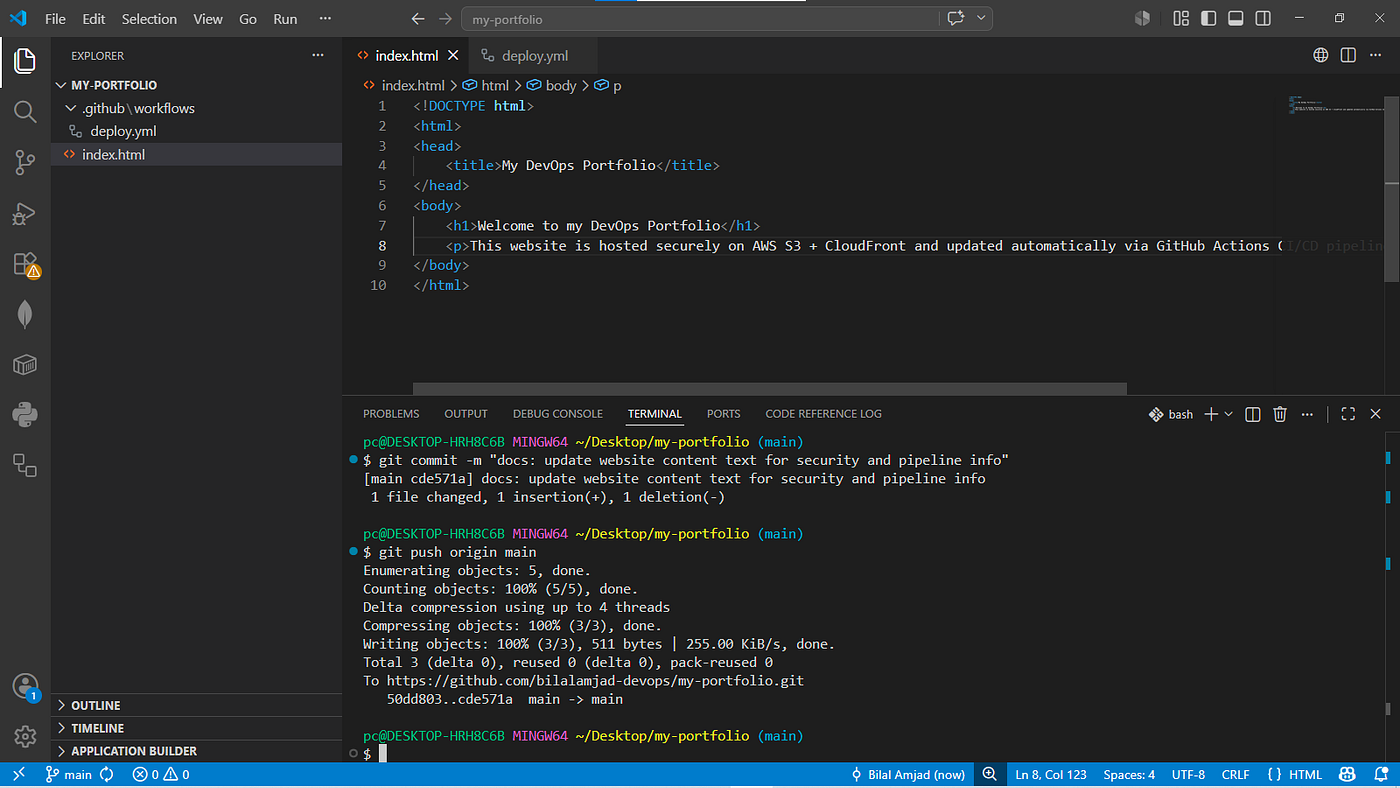
Now change the website content inside index.html.
Example:
<p>
This website is hosted securely on AWS S3 + CloudFront and updated automatically via GitHub Actions CI/CD pipeline.
</p>
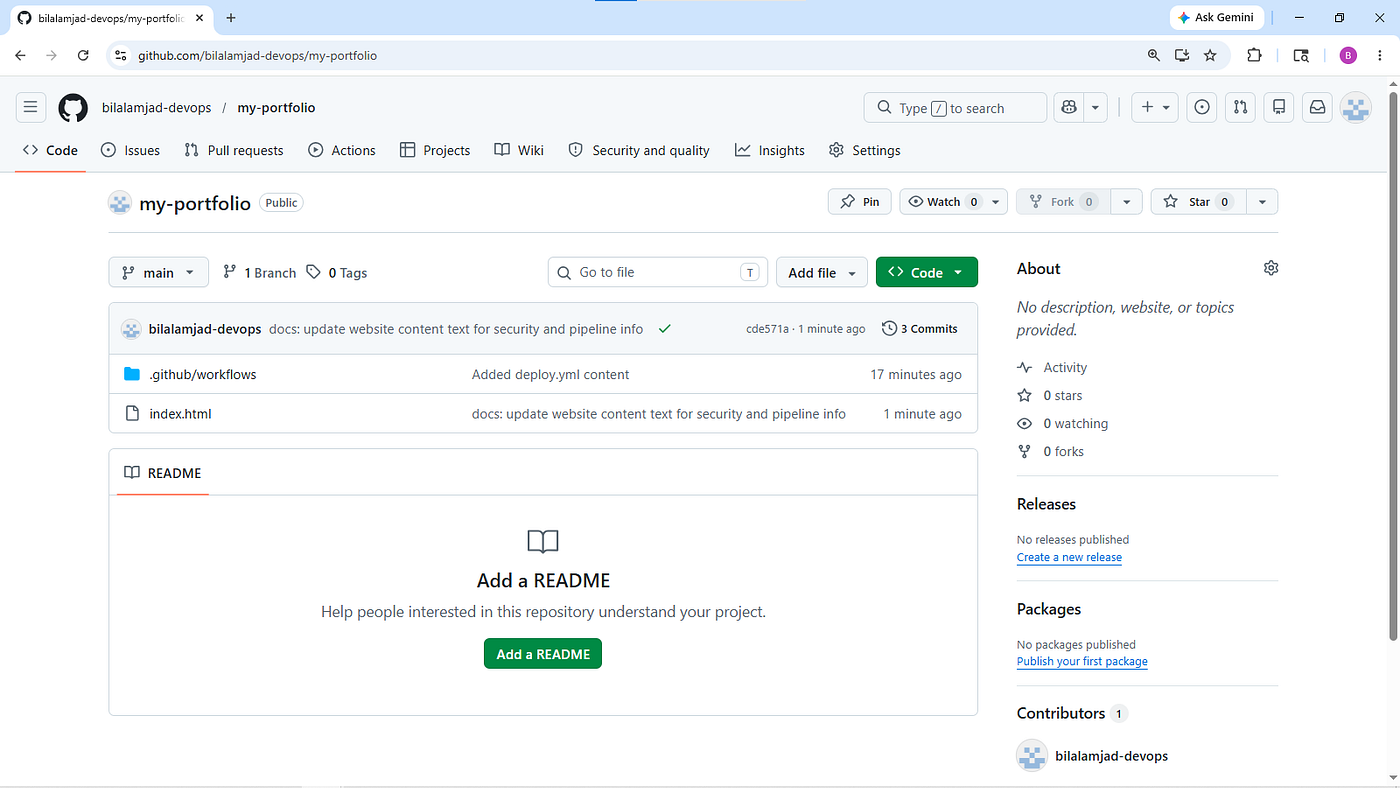
Push the changes:
git add index.html
git commit -m "docs: update website content text for security and pipeline info"
git push origin main
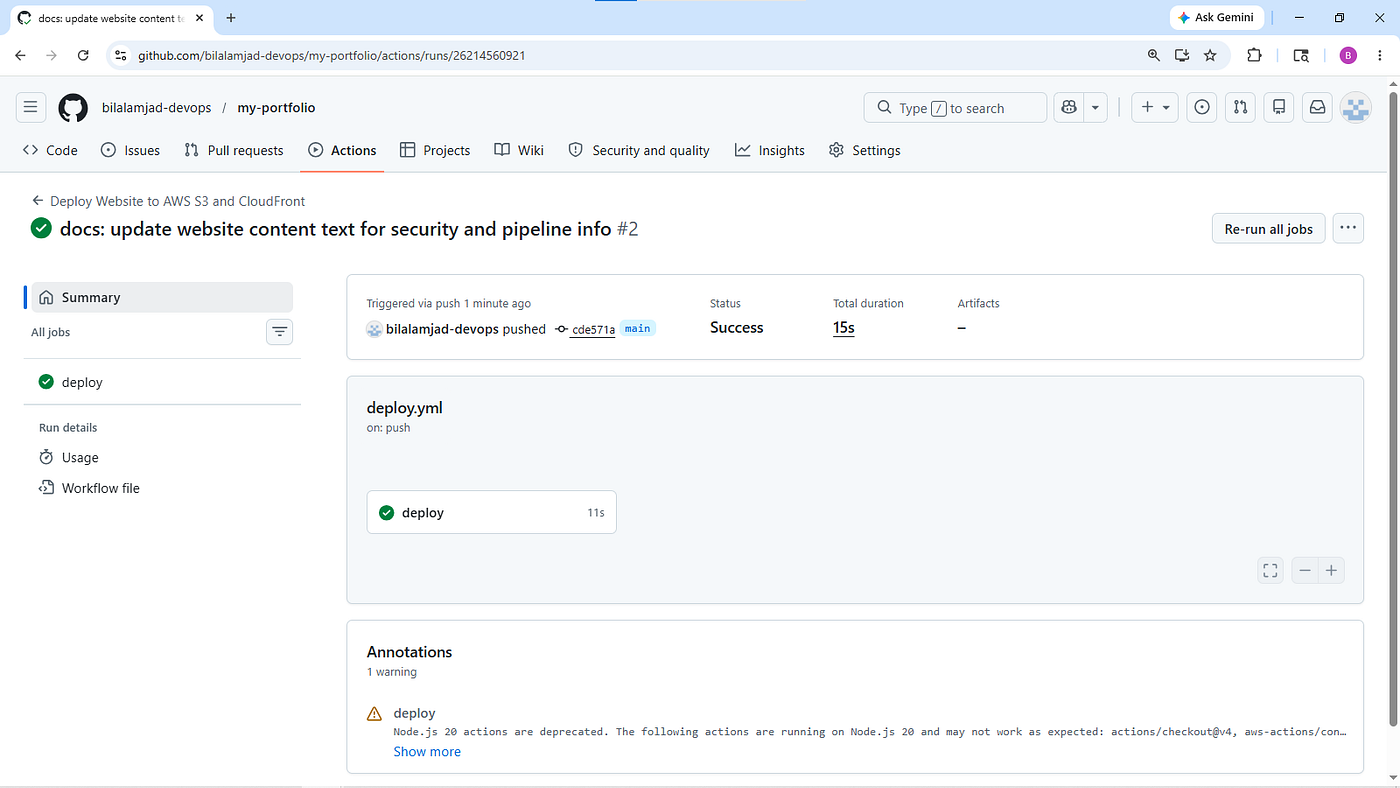
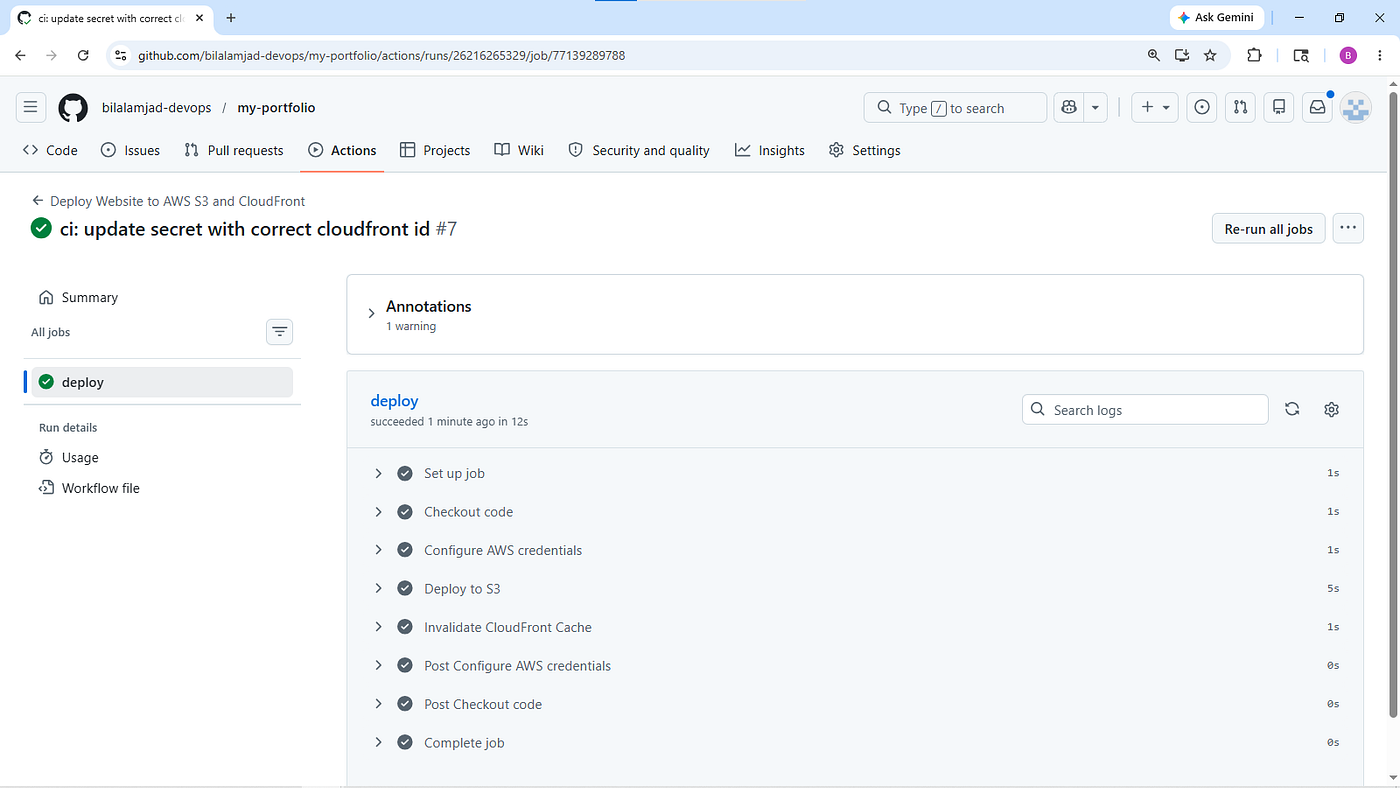
GitHub Actions pipeline will run successfully.
However, after refreshing the CloudFront URL, you may still see old content.
Troubleshooting — Website Changes Are Not Visible
What is the issue?
CloudFront stores cached copies of files in edge locations worldwide to deliver content faster.
Because of caching:
- old website content may continue appearing
- latest S3 updates may not immediately appear
Solution — CloudFront Cache Invalidation
We need to automatically clear CloudFront cache after every deployment.
Step 8 — Add CloudFront Distribution ID Secret
Open your GitHub repository.
Navigate to:
Settings → Secrets and variables → ActionsCreate a new secret:
AWS_CLOUDFRONT_DISTRIBUTION_IDImportant:
Paste your CloudFront Distribution ID, not the CDN domain name.
Example:
E1ABCXYZ12345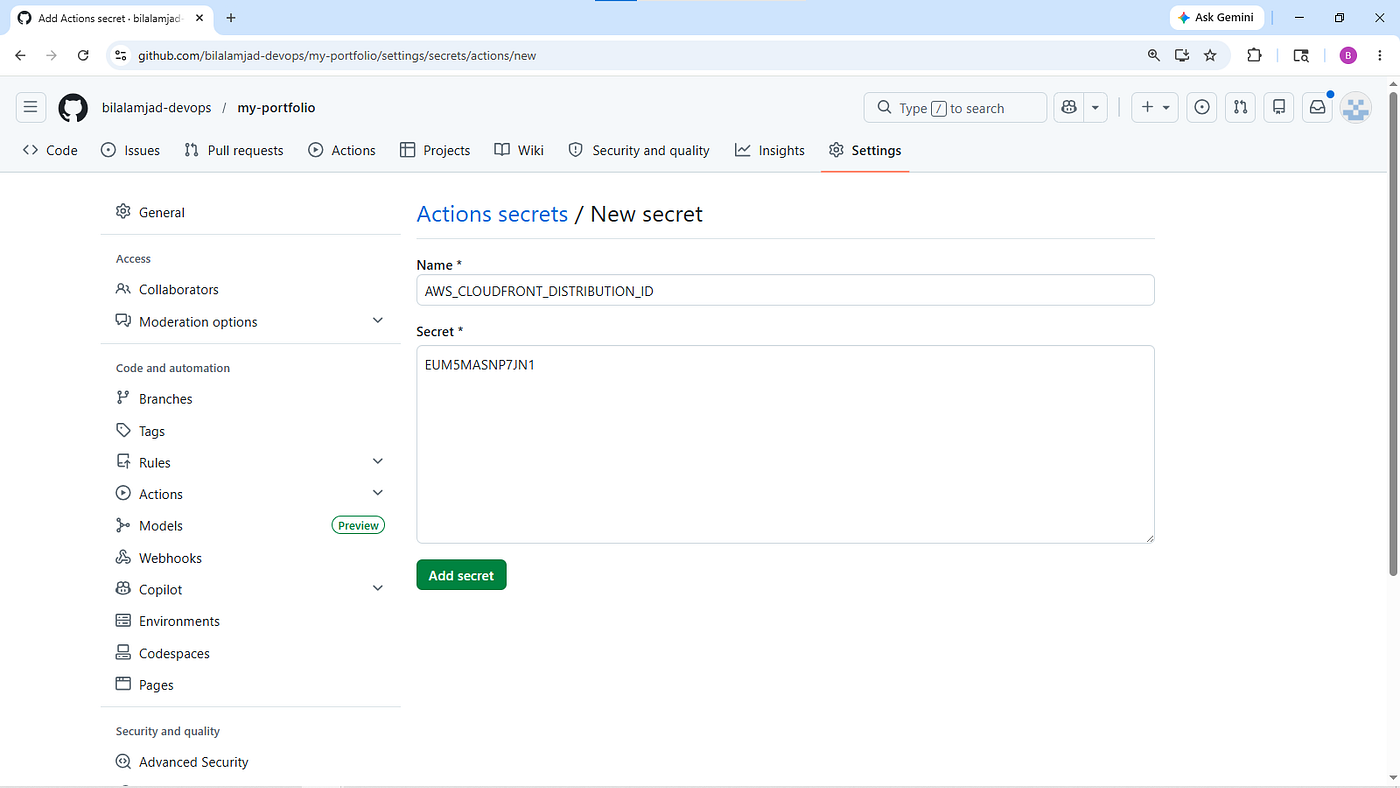
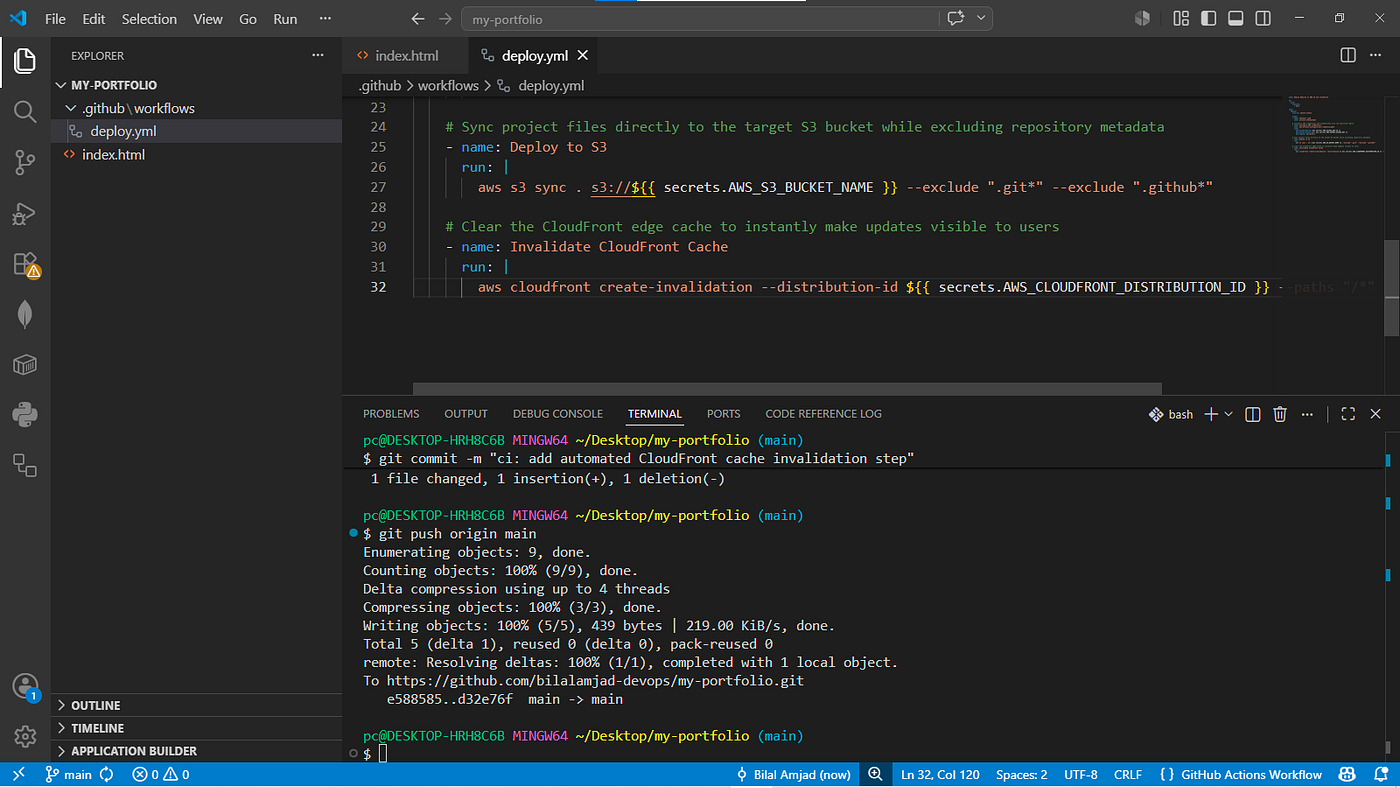
Step 9 — Update deploy.yml
Update your workflow file with CloudFront cache invalidation.
name: Deploy Website to AWS S3 and CloudFront

on:
  push:
    branches:
      - main

jobs:
  deploy:
    runs-on: ubuntu-latest

    steps:
    - name: Checkout code
      uses: actions/checkout@v4

    ## Configure AWS credentials
    - name: Configure AWS credentials
      uses: aws-actions/configure-aws-credentials@v4
      with:
        aws-access-key-id: ${{ secrets.AWS_ACCESS_KEY_ID }}
        aws-secret-access-key: ${{ secrets.AWS_SECRET_ACCESS_KEY }}
        aws-region: ap-south-1

    ## Upload files to S3
    - name: Deploy to S3
      run: |
        aws s3 sync . s3://${{ secrets.AWS_S3_BUCKET_NAME }} --exclude ".git*" --exclude ".github*"

    ## Clear CloudFront cache
    - name: Invalidate CloudFront Cache
      run: |
        aws cloudfront create-invalidation --distribution-id ${{ secrets.AWS_CLOUDFRONT_DISTRIBUTION_ID }} --paths "/*"
Push the updated workflow:
git add .github/workflows/deploy.yml
git commit -m "ci: add automated CloudFront cache invalidation step"
git push origin main
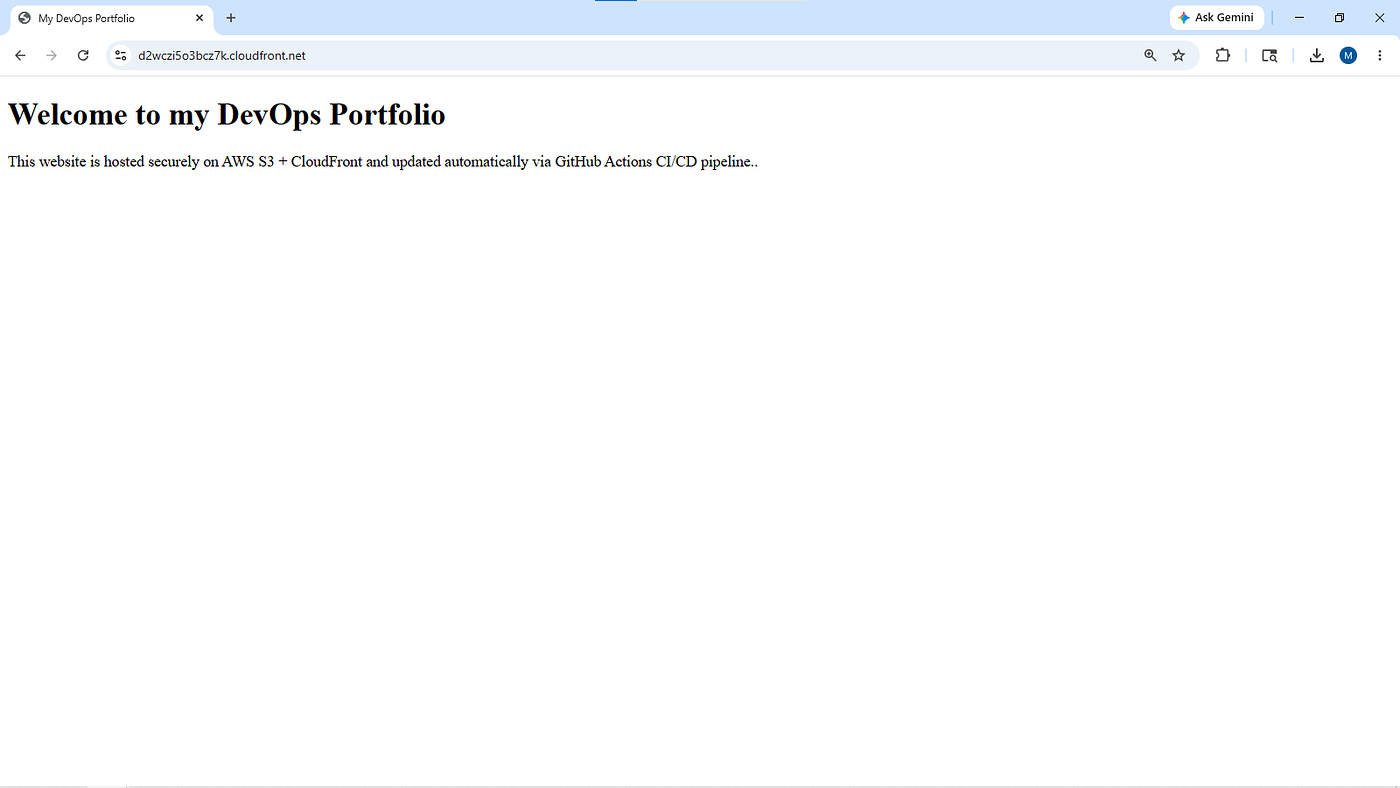
Final Result
Now refresh the CloudFront URL.
You should immediately see the updated website content.
CloudFront cache invalidation forces CloudFront to fetch the latest files directly from S3.
This makes deployments fully automated and ensures users always receive the latest website version.
Cost Optimization
This project is designed using mostly serverless AWS services, which helps reduce infrastructure cost.
Cost-saving decisions
- Used S3 instead of EC2 hosting
- Used CloudFront for low-cost CDN delivery
- Avoided purchasing custom domain for the lab
- Used GitHub Actions free tier
- Deleted resources after testing
Cleanup
To avoid unexpected AWS charges, delete the following resources after completing the lab:
- IAM user
- Access keys
- S3 bucket
- CloudFront distribution
- GitHub repository secrets
Key Learnings
During this project, I learned:
- how CI/CD pipelines automate deployments
- how GitHub Actions integrates with AWS
- how CloudFront caching works
- why cache invalidation is important
- how static websites can be hosted using serverless AWS services
Future Enhancements
This project can be improved further by adding:
- Route53 custom domain
- ACM SSL certificate
- Terraform Infrastructure as Code
- Private S3 bucket with Origin Access Control (OAC)
- Responsive portfolio design
- Security headers
Conclusion
This project demonstrates how modern cloud-native static websites can be deployed automatically using AWS and GitHub Actions.
Even though the website itself is simple, the concepts used in this project are widely used in real production environments:
- CI/CD
- CDN
- deployment automation
- cloud storage
- caching
This is an excellent beginner-friendly DevOps and Cloud project to understand modern deployment workflows.
메타데이터
- post_id
- f40bbe4c79b9
- slug
- automating-static-website-deployment-on-aws-using-s3-cloudfront-and-github-actions-f40bbe4c79b9
- url
- https://medium.com/@bilalamjad-devops/automating-static-website-deployment-on-aws-using-s3-cloudfront-and-github-actions-f40bbe4c79b9
- canonical_url
- https://medium.com/@bilalamjad-devops/automating-static-website-deployment-on-aws-using-s3-cloudfront-and-github-actions-f40bbe4c79b9
- author_url
- https://medium.com/@bilalamjad-devops
- status
- ok
- fetched_at
- 2026-06-09 15:37:30



