I Tried Claude Code (New) Browser (Every Frontend Developer Needs This)
Claude Code has a new browser, and it makes coding visual layouts seamless, a highly useful feature for frontend development.
I Tried Claude Code (New) Browser (Every Frontend Developer Needs This)
Claude Code has a new browser, and it makes coding visual layouts seamless, a highly useful feature for frontend development.
If you have been using Claude Code for frontend work, you write the code, open a separate browser tab, refresh the page, check the output, and switch back to fix whatever looks off.
Claude Code has just added a browser in the app to stop this constant switching between windows.
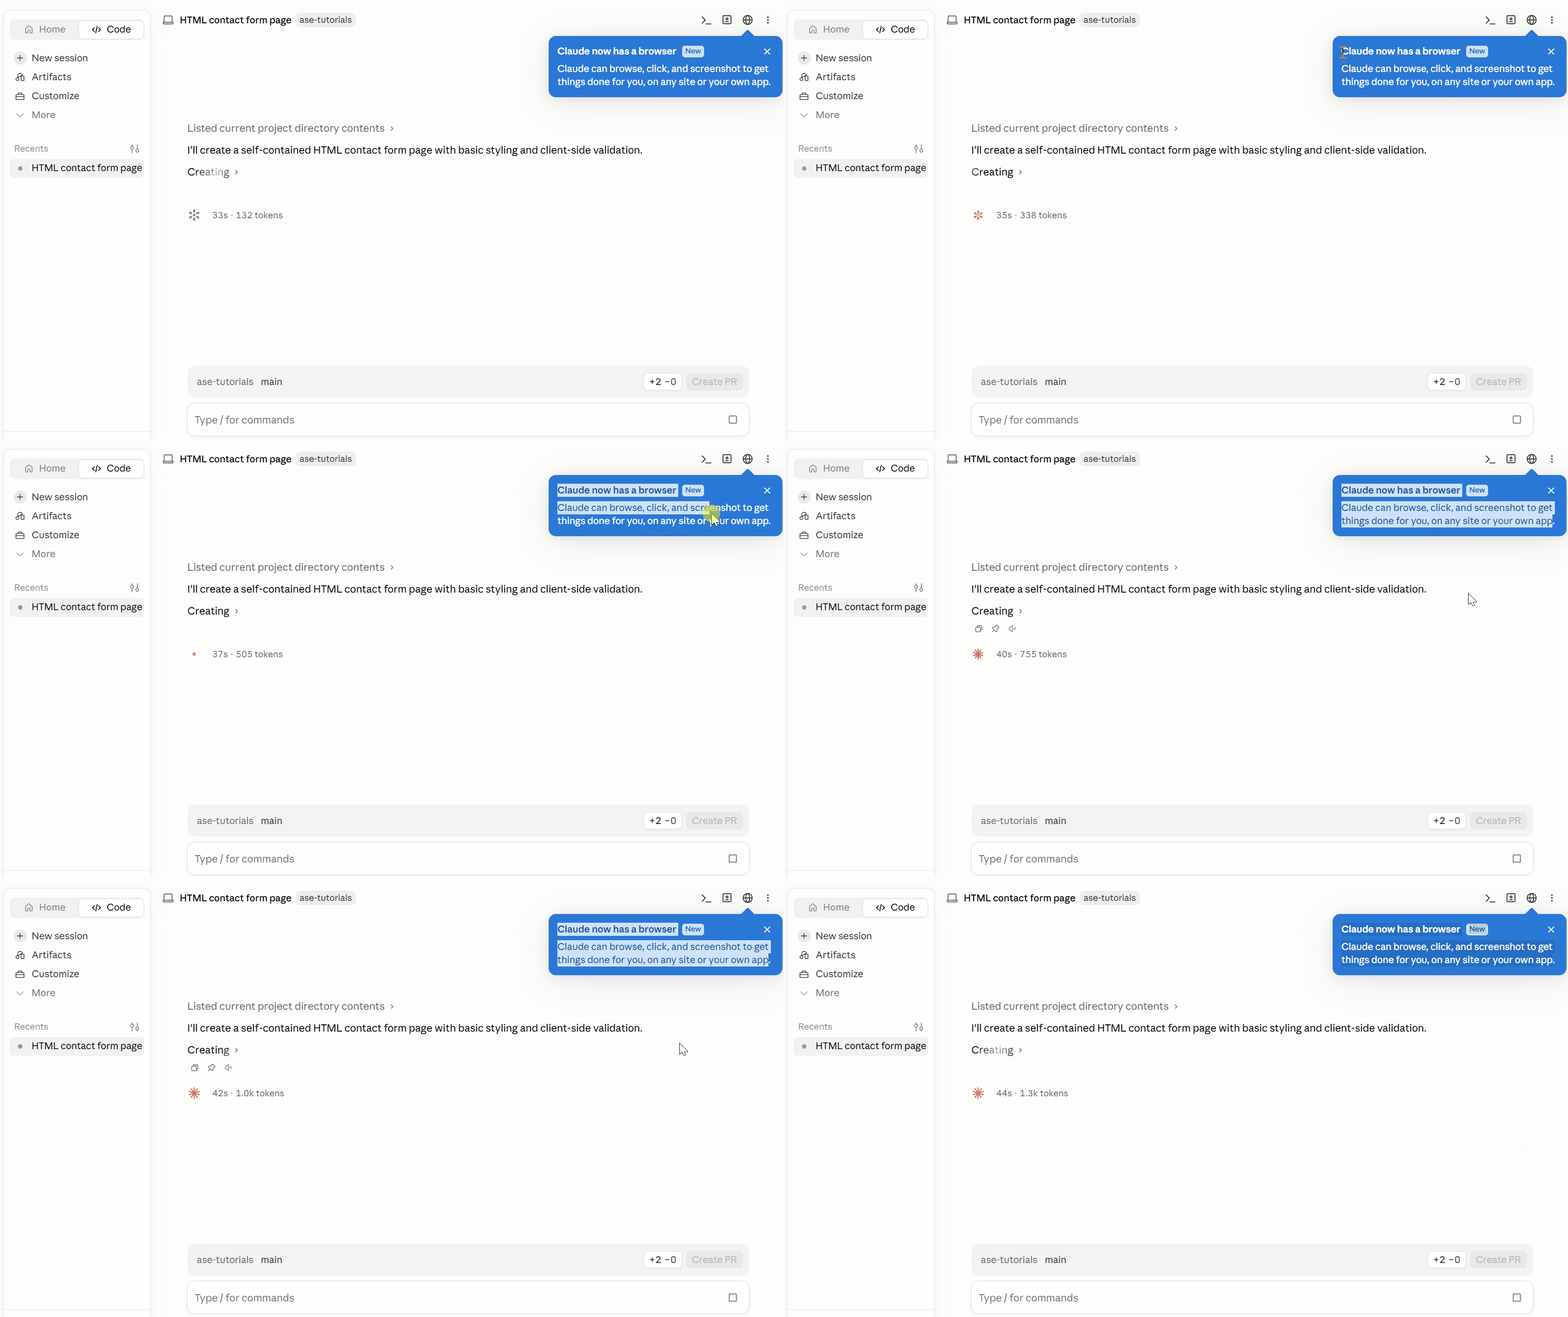
Updated Claude Code app now comes with a browser panel built right into the interface.
The best feature is the ability to select an element or annotate screenshots and feed back into the prompt:
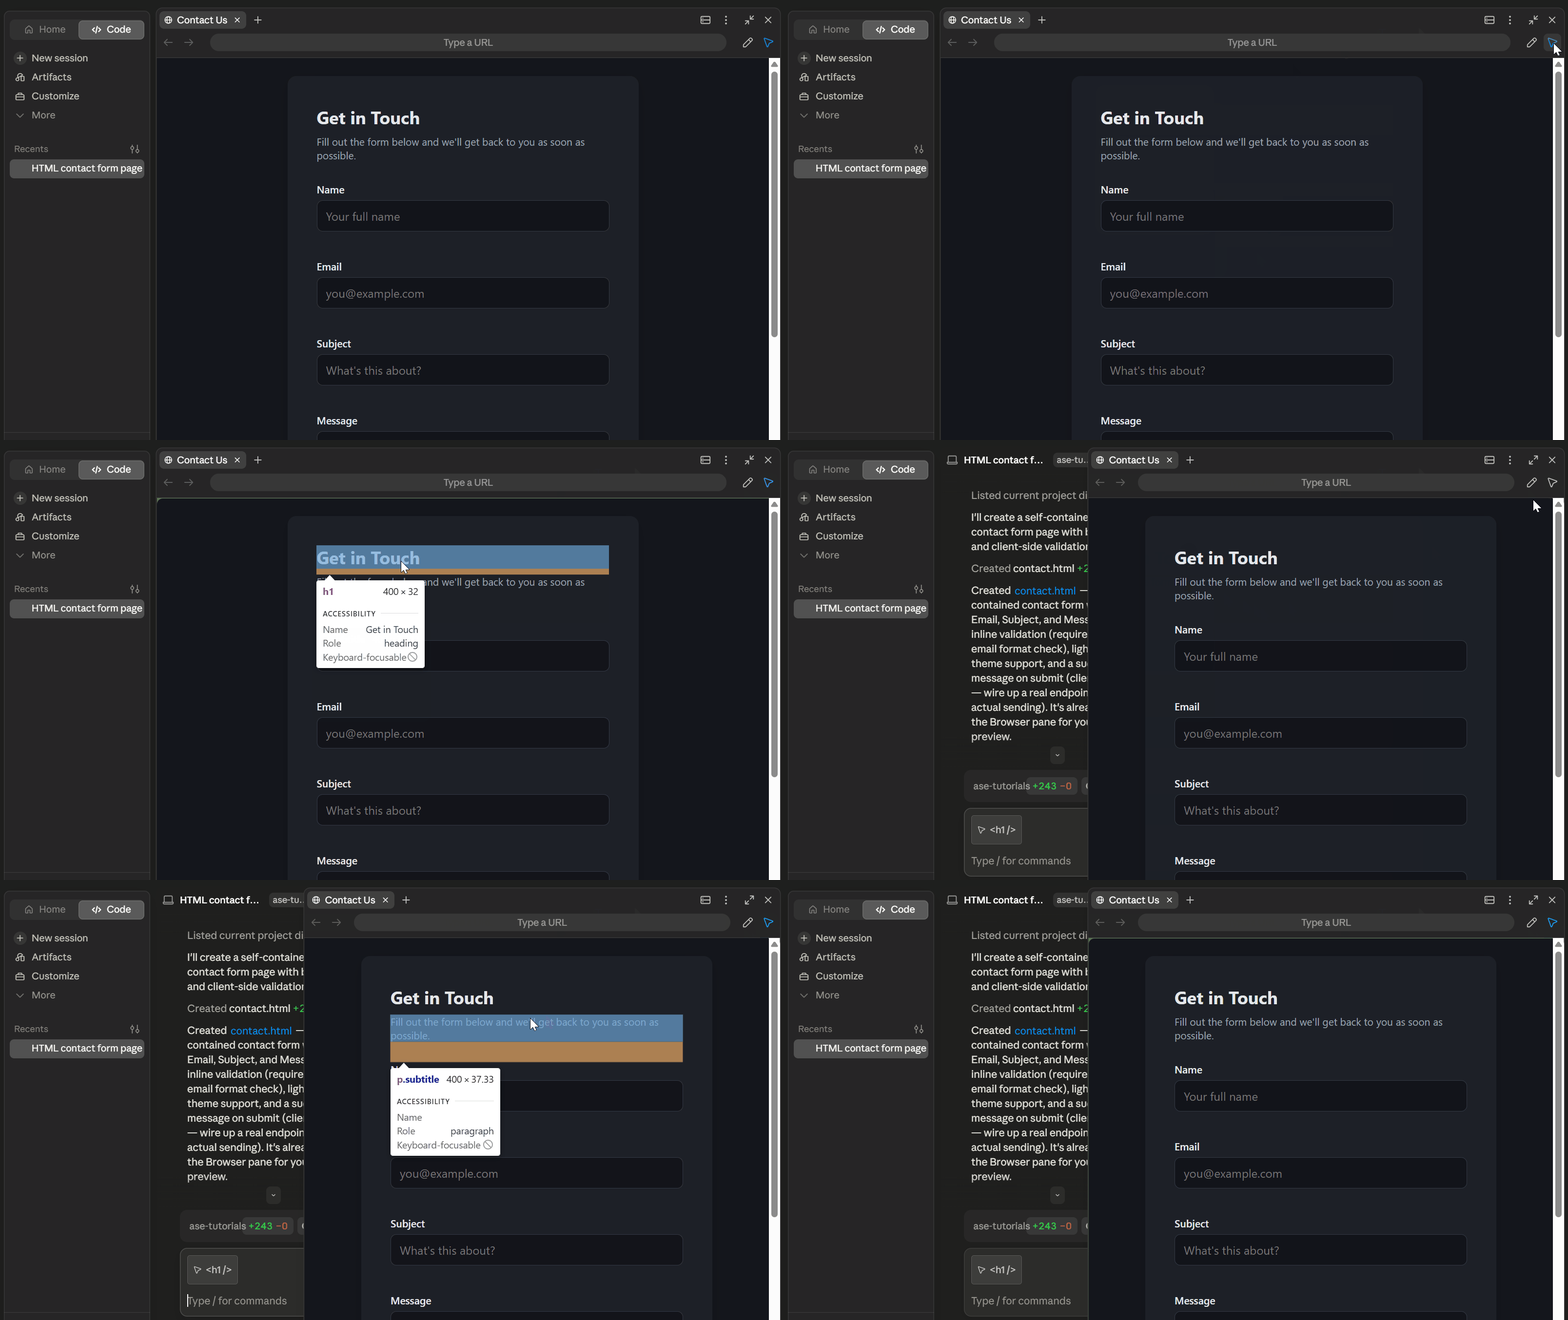
Your code and the live preview are now in the same window, and Claude can take screenshots, click elements, and verify its own output.
I thought this will be a great feature for users who like the Claude Code desktop app; in the terminal I have been using the Claude Code Chrome.
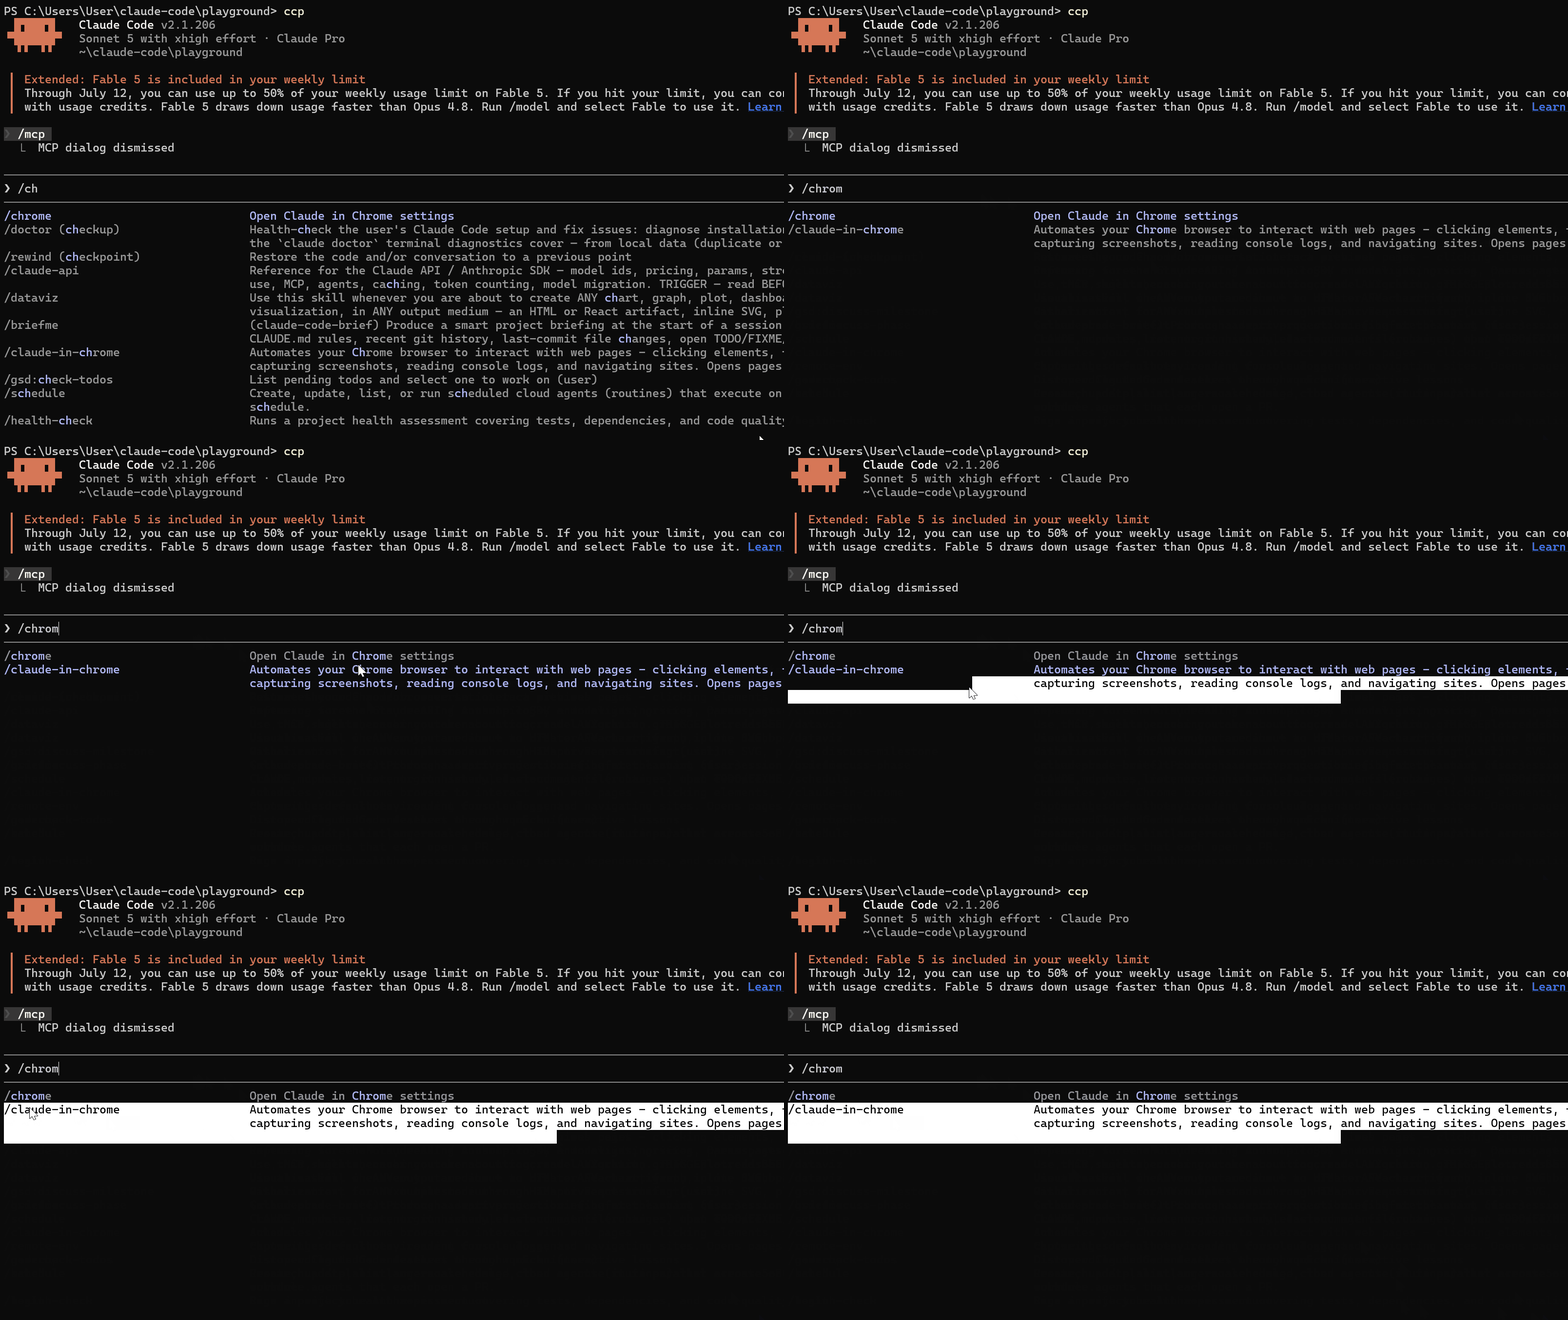
I tested the Claude Code browser by asking Claude to build an HTML contact form page, and the experience was impressive.
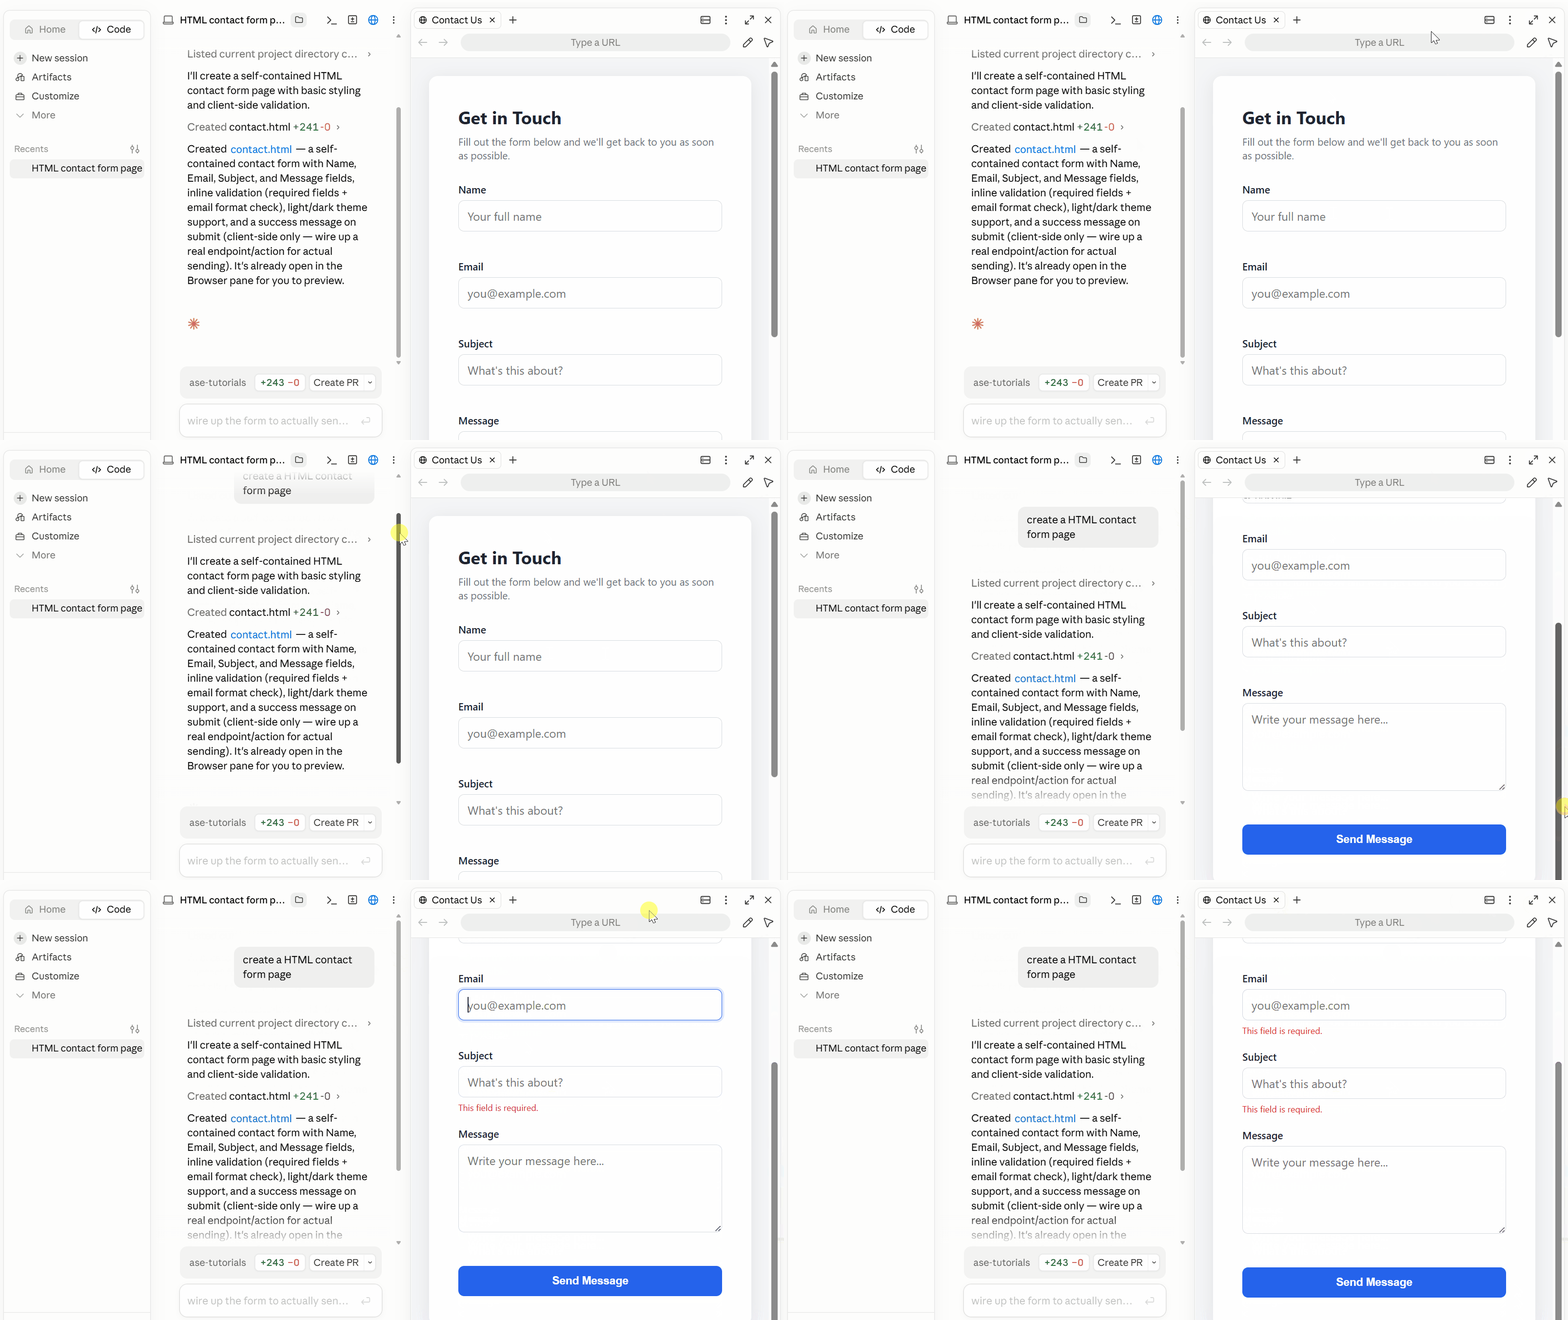
In this article, I will walk you through how the browser works, how Claude uses it to preview and verify its own work, and browser controls available.
What Is the Claude Code Browser?
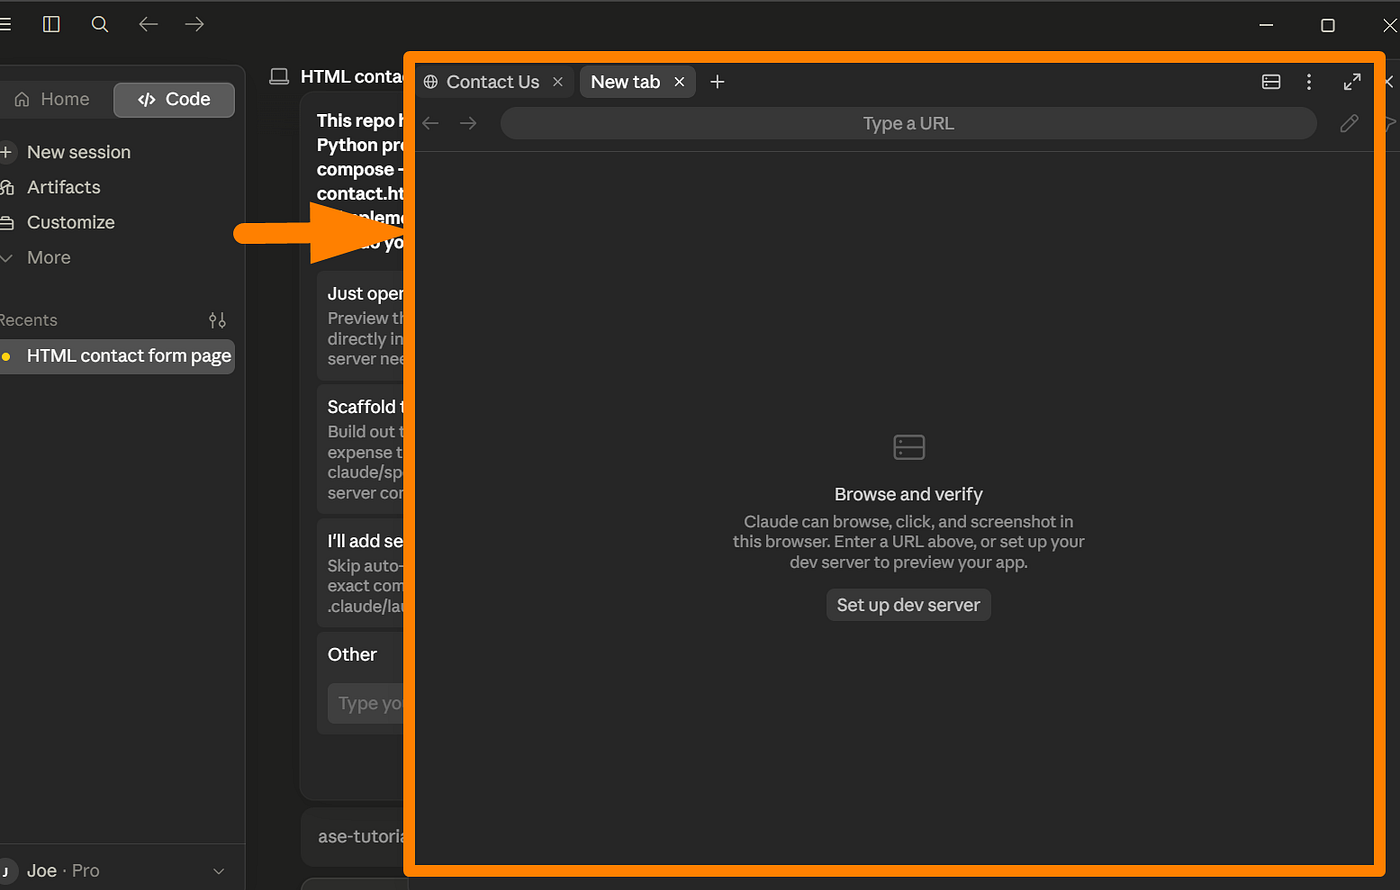
The Claude Code browser is a tabbed browser panel built into the desktop app.
It is located alongside your chat and code in the same window. You can preview your running app there, browse external documentation, or let Claude use it to verify its own output.
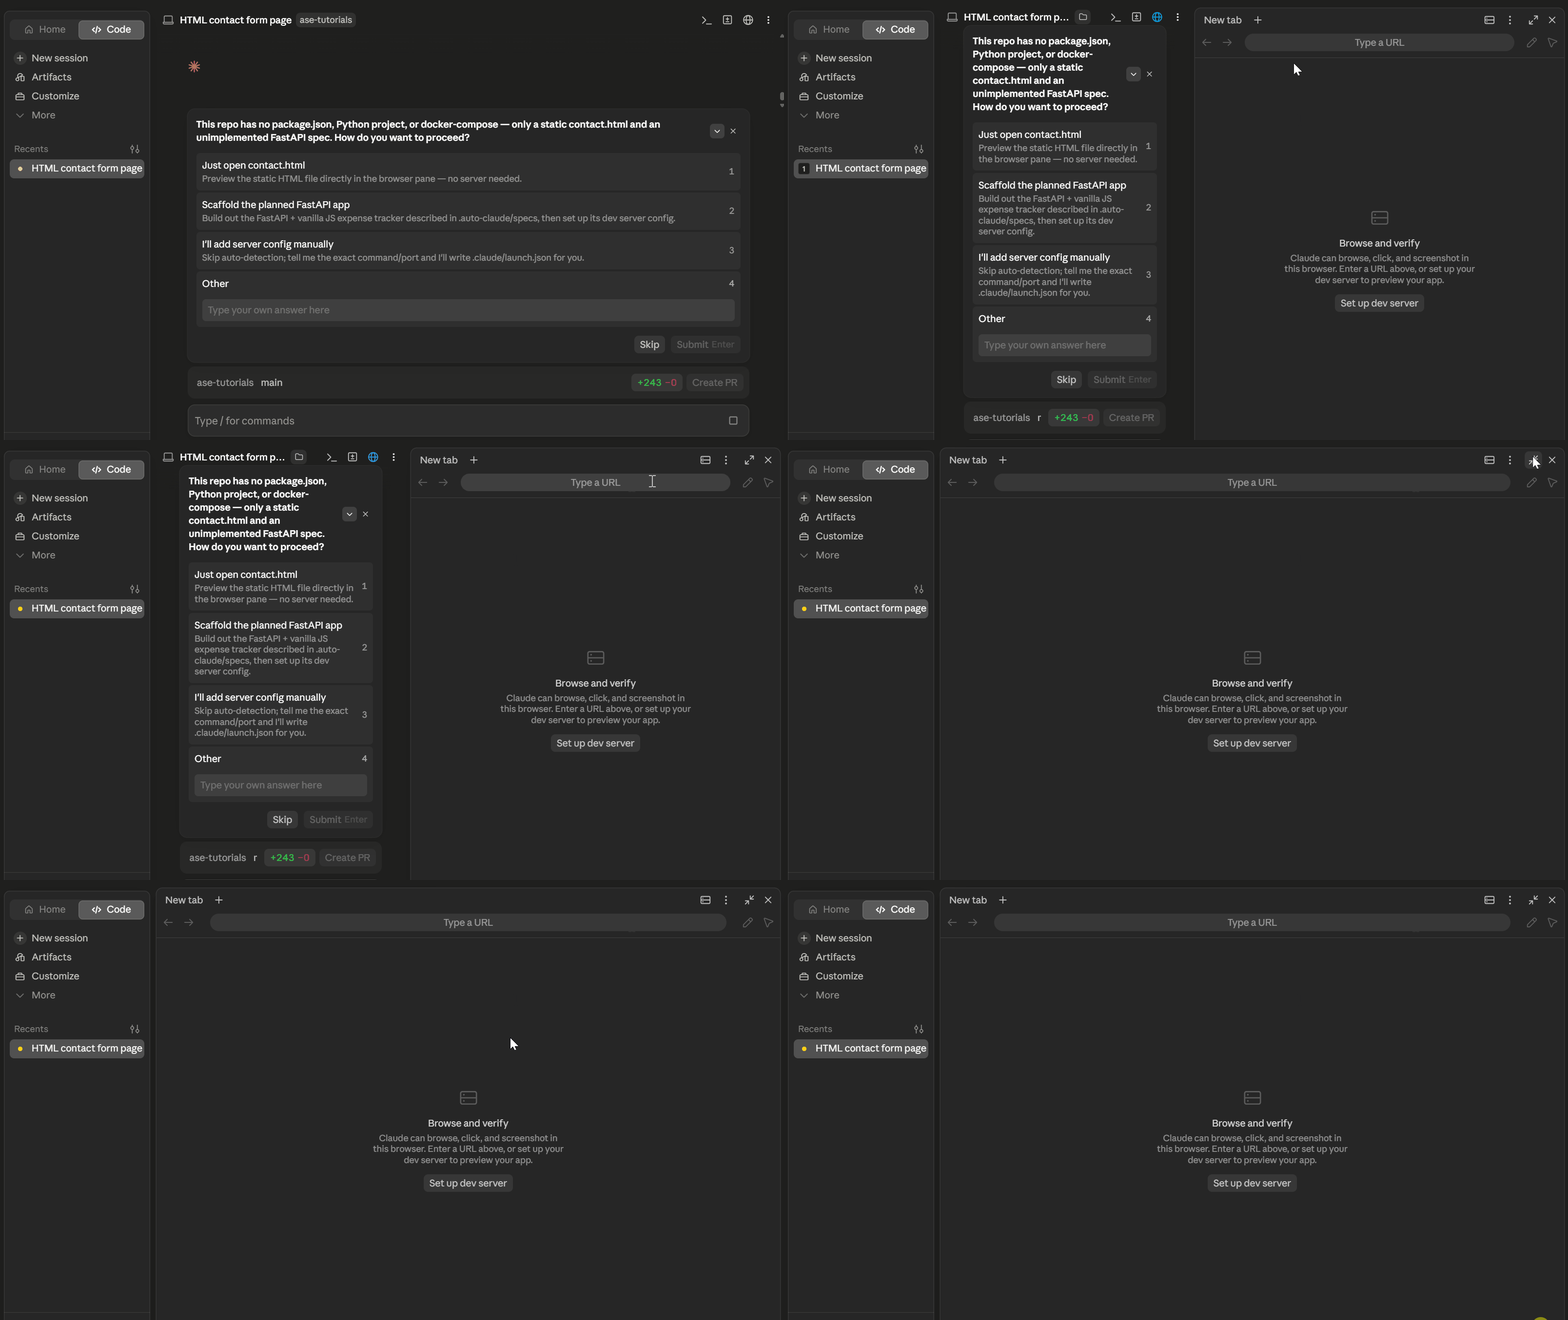
To open it, press Cmd+Shift+B on macOS or Ctrl+Shift+B on Windows. You can also find it under the Views menu in the session toolbar.
When you first open the panel, you will see a “Browse and verify” screen with a Set up dev server button. This is the starting point before Claude connects a running server or loads a URL.
The browser covers two main use cases:
- App preview: Claude starts your dev server and opens the output inside the panel. It then takes screenshots, inspects the page, and verifies its own changes before wrapping up the response.
- External browsing: You can open any URL alongside your running app, whether it’s documentation, an issue tracker, or any site you need to reference while coding.
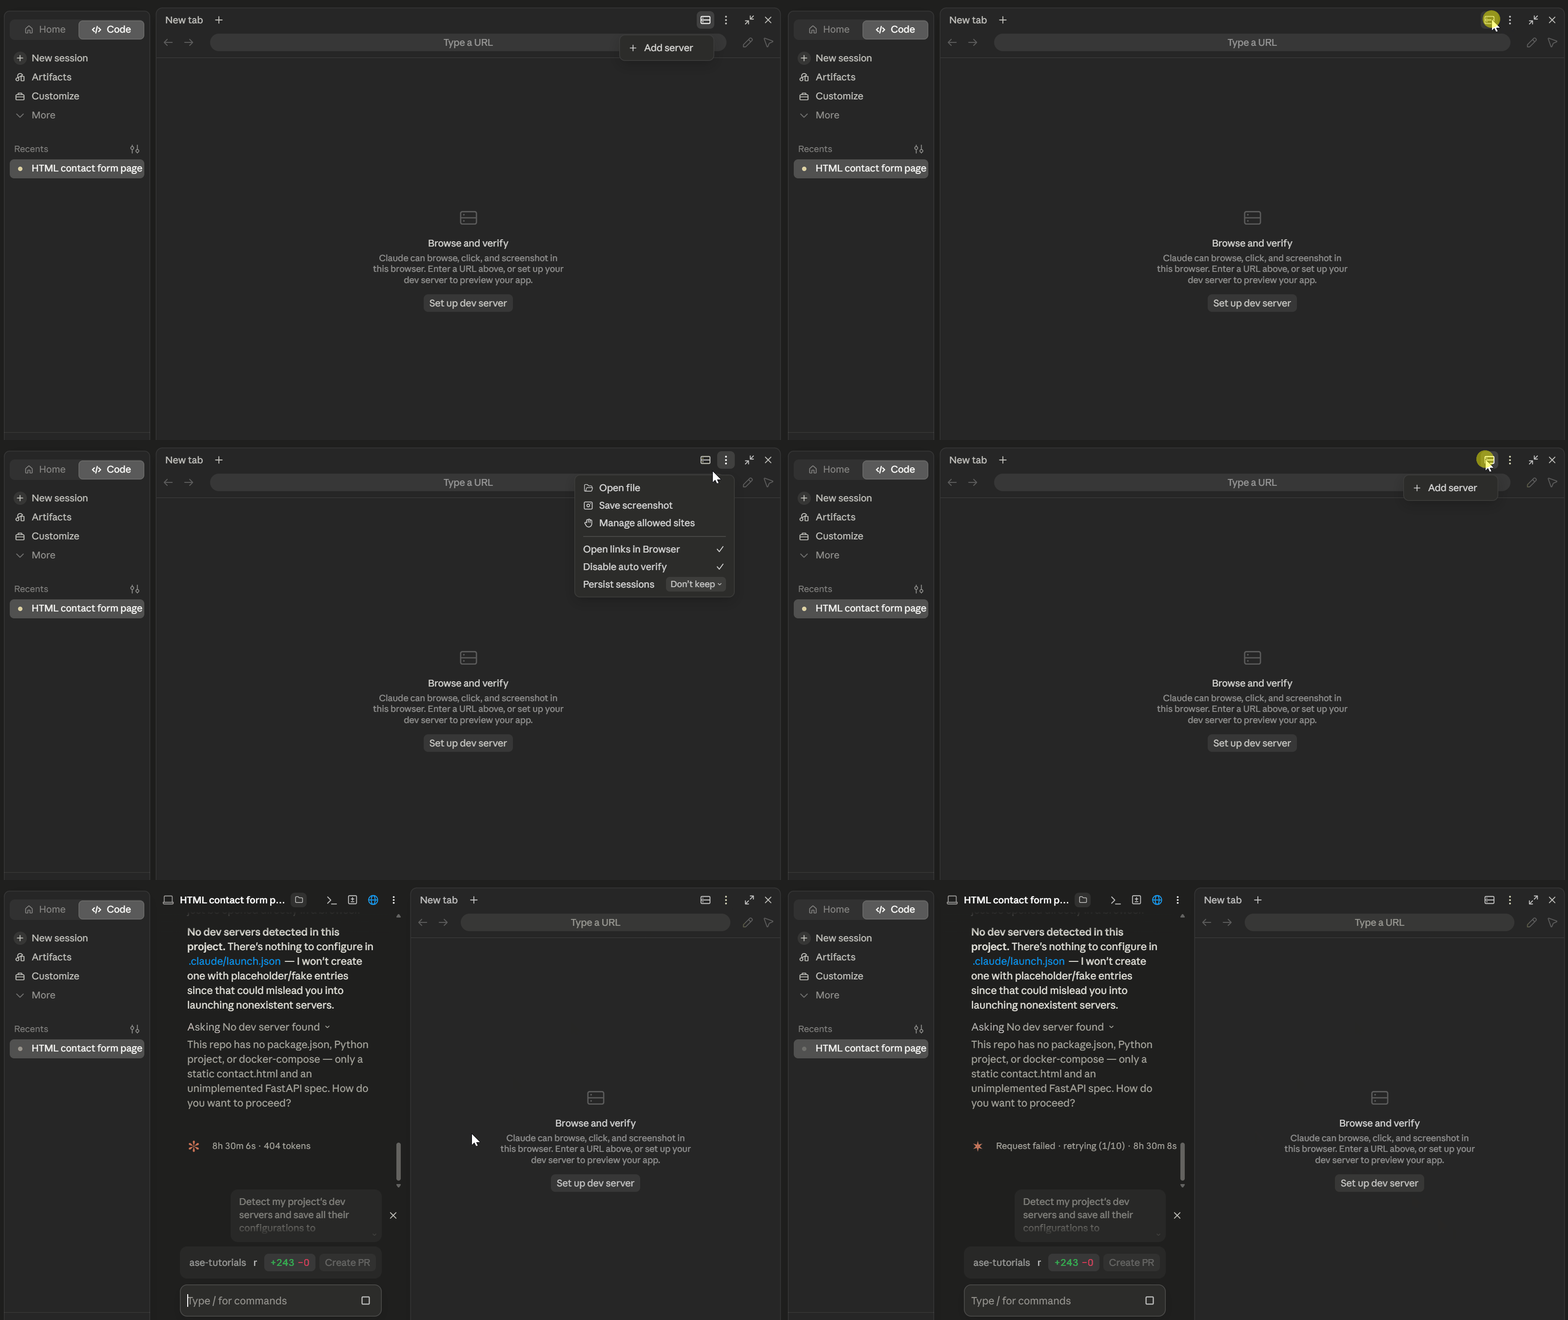
The panel works like a standard browser with tabs. There is a URL bar, navigation buttons, and a tabbed layout similar to what you already use in Chrome or Firefox.
In my test I noted that the browser runs on a clean profile, separate from your personal browser.
None of your saved logins or browsing history carries over which keeps your dev environment isolated from your personal accounts.
Claude Code Browser Test
For my test, I used a simple prompt:
create a HTML contact form pageWithin seconds of Claude starting to work, a blue notification badge appeared in the top-right corner of the window.
That was the browser panel activating for the session. Claude kept working in the background. A few seconds later, it had created the file.
But the first time it hung with a white screen of death and no preview. If you encounter this you simply need to dismiss the notification first.
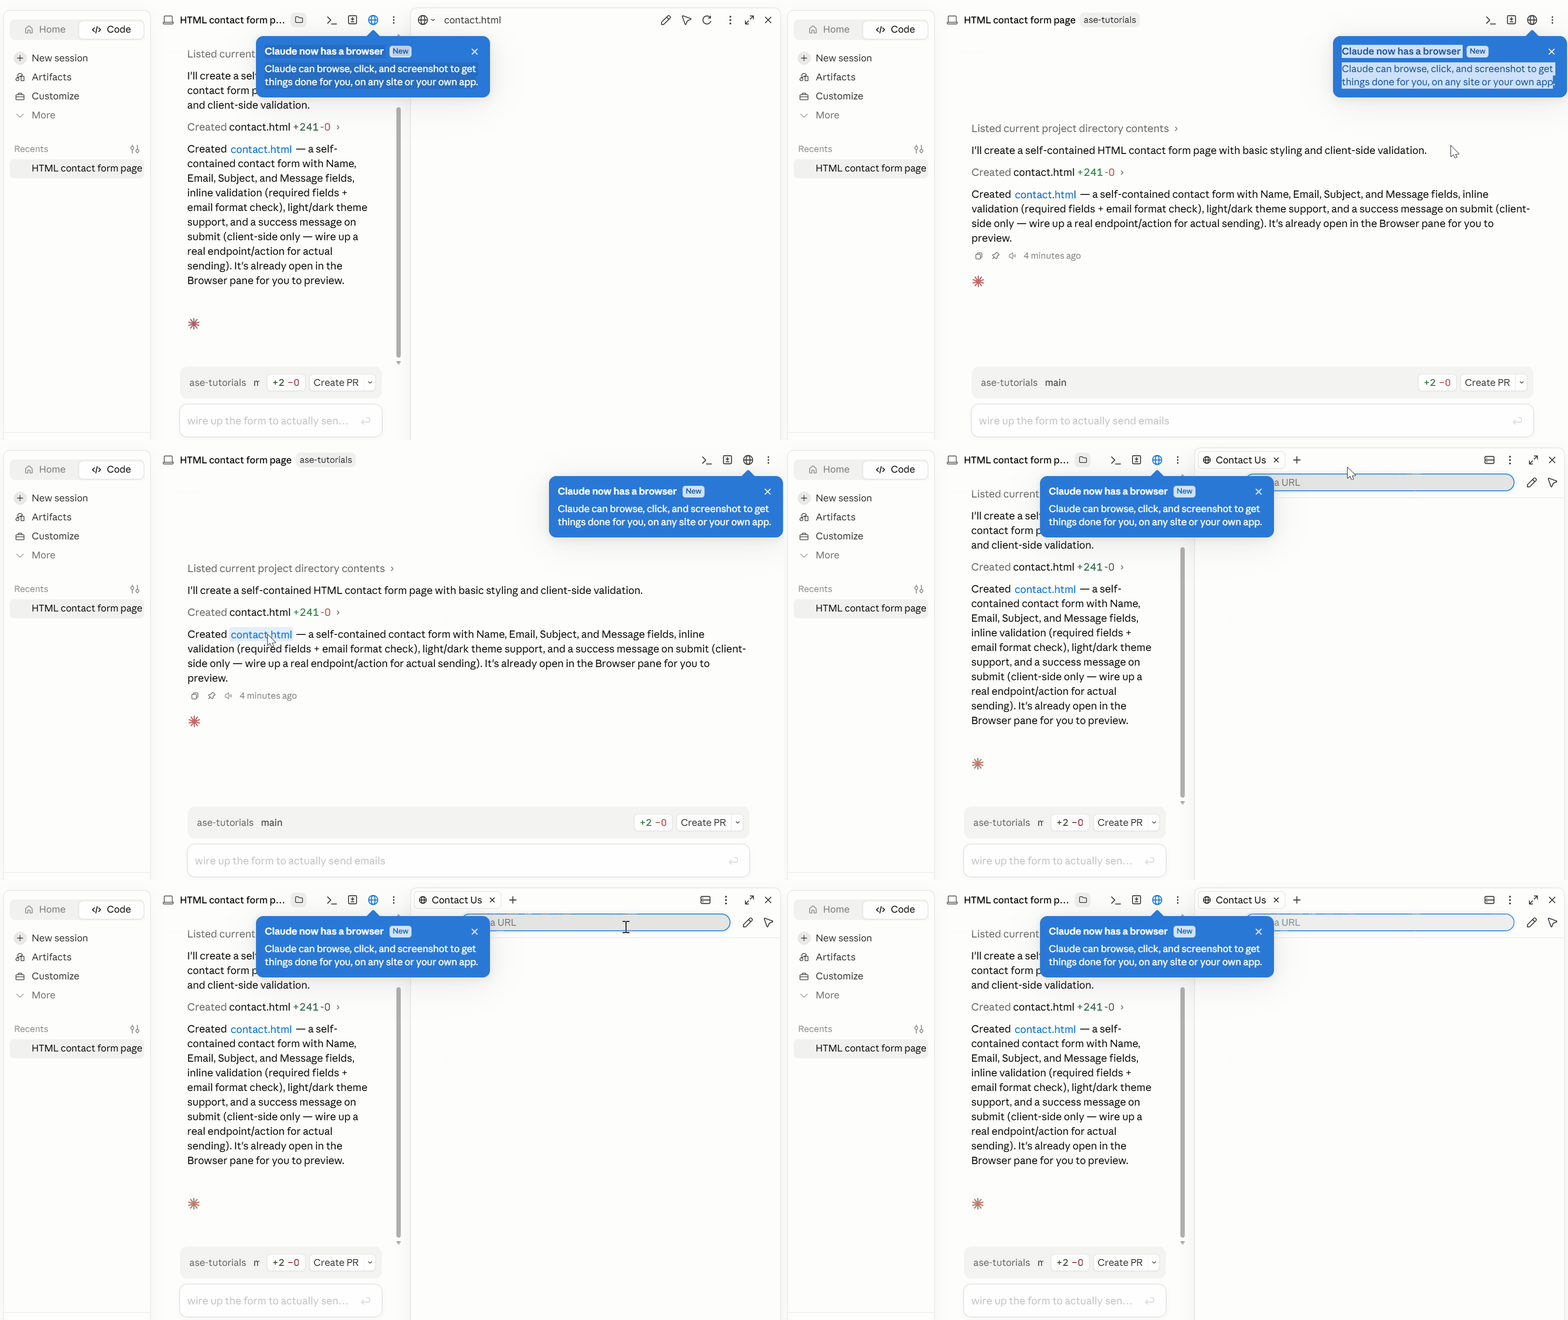
After clearing the notification, the output showed contact.html a complete form with four fields: Name, Email, Subject, and Message.
It also added inline validation, an email format check, light and dark theme support, and a success message on submission.
I discovered that after every file edit, it takes a screenshot of the rendered output, checks for errors, and confirms everything looks correct before finishing the response.
For any project with a UI component, this improves your feedback loop. You can now watch the output update alongside the conversation, without ever leaving the window.
External Browsing, Safety Controls, and Browser Options
The browser panel is a full tabbed browser, and you can open any external URL right next to your running project.
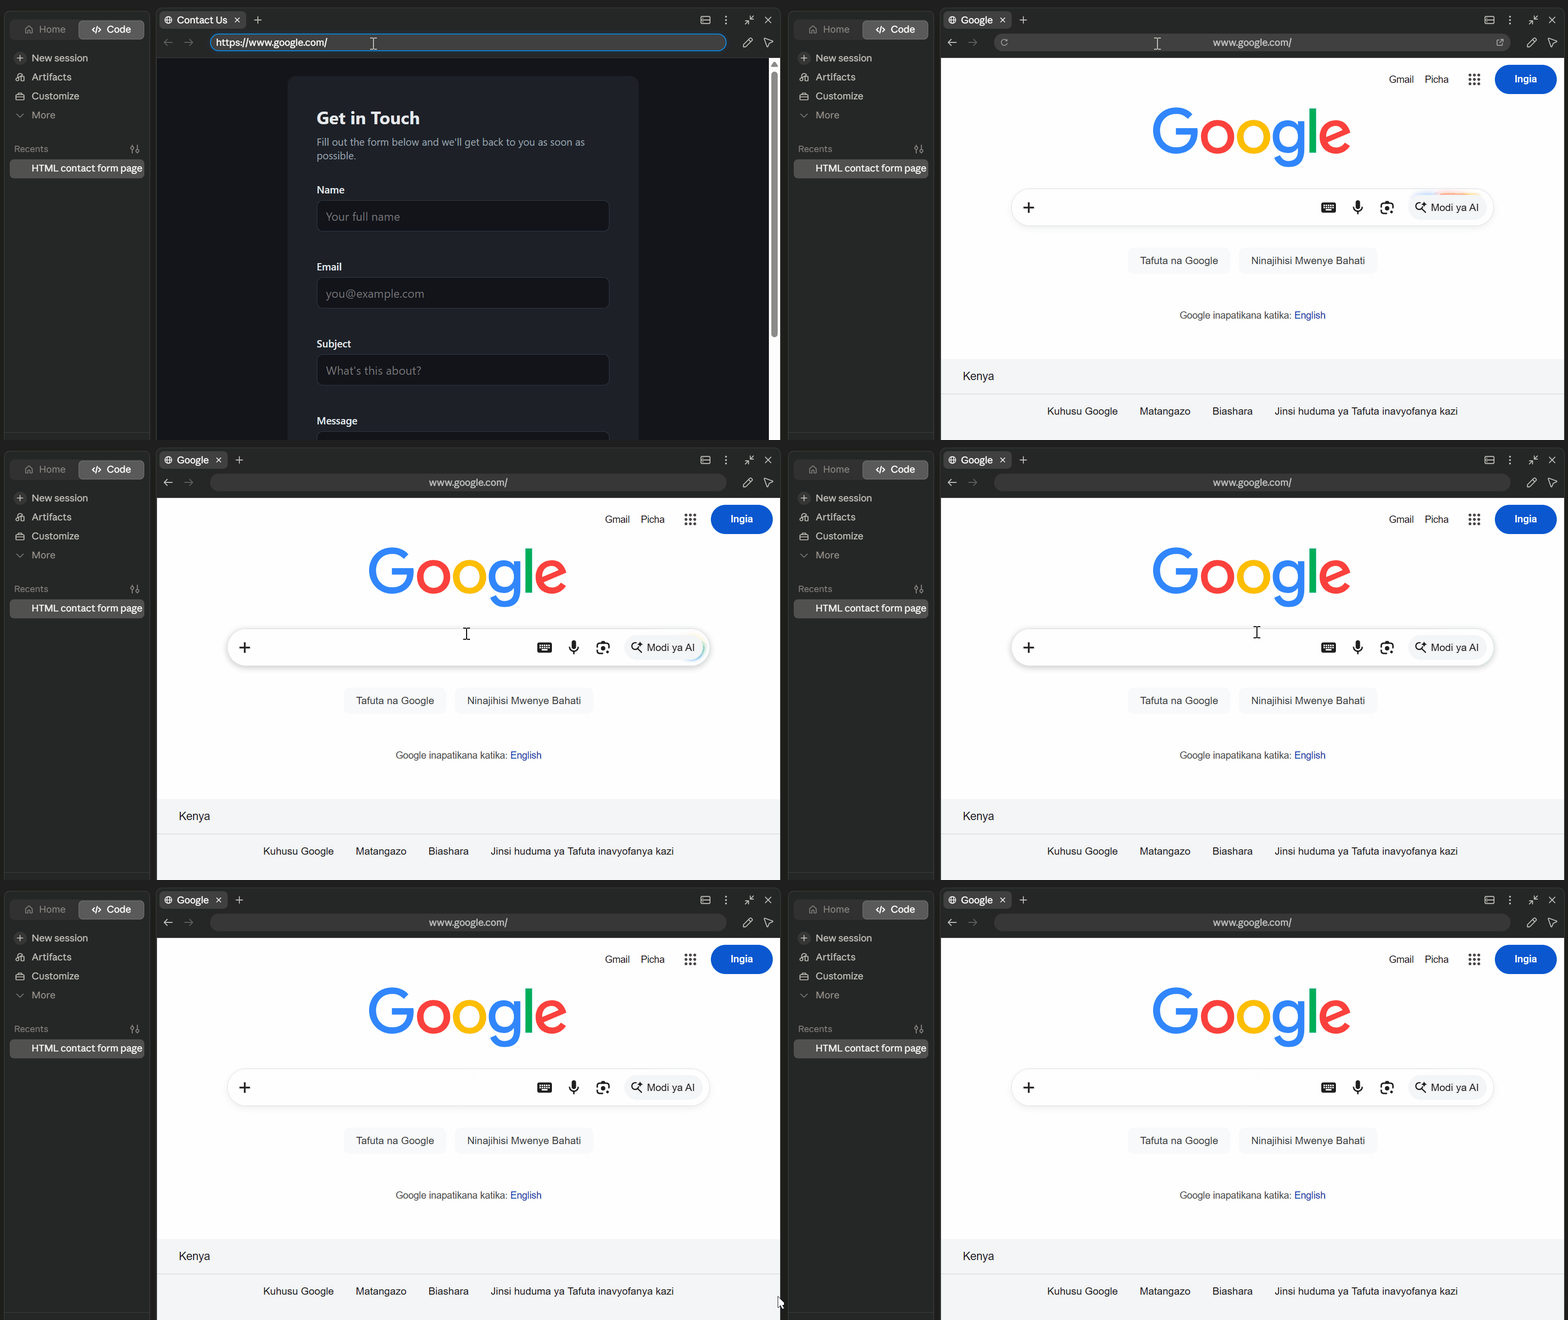
Open the panel with Cmd+Shift+B on macOS or Ctrl+Shift+B on Windows, then type any URL into the address bar.
You can load documentation, GitHub issues, design references, or any site you need while coding, all right alongside the session.
When you click an external link inside the Claude Code chat, a prompt gives you two choices:
- Open it in the browser panel or open it in your default browser
- Hold Cmd on macOS or Ctrl on Windows while clicking if you want to go straight to your system browser without the prompt.
You can also sign in to sites directly inside the panel, including OAuth popup flows like Google sign in, which is useful when you need to test authenticated states during development.
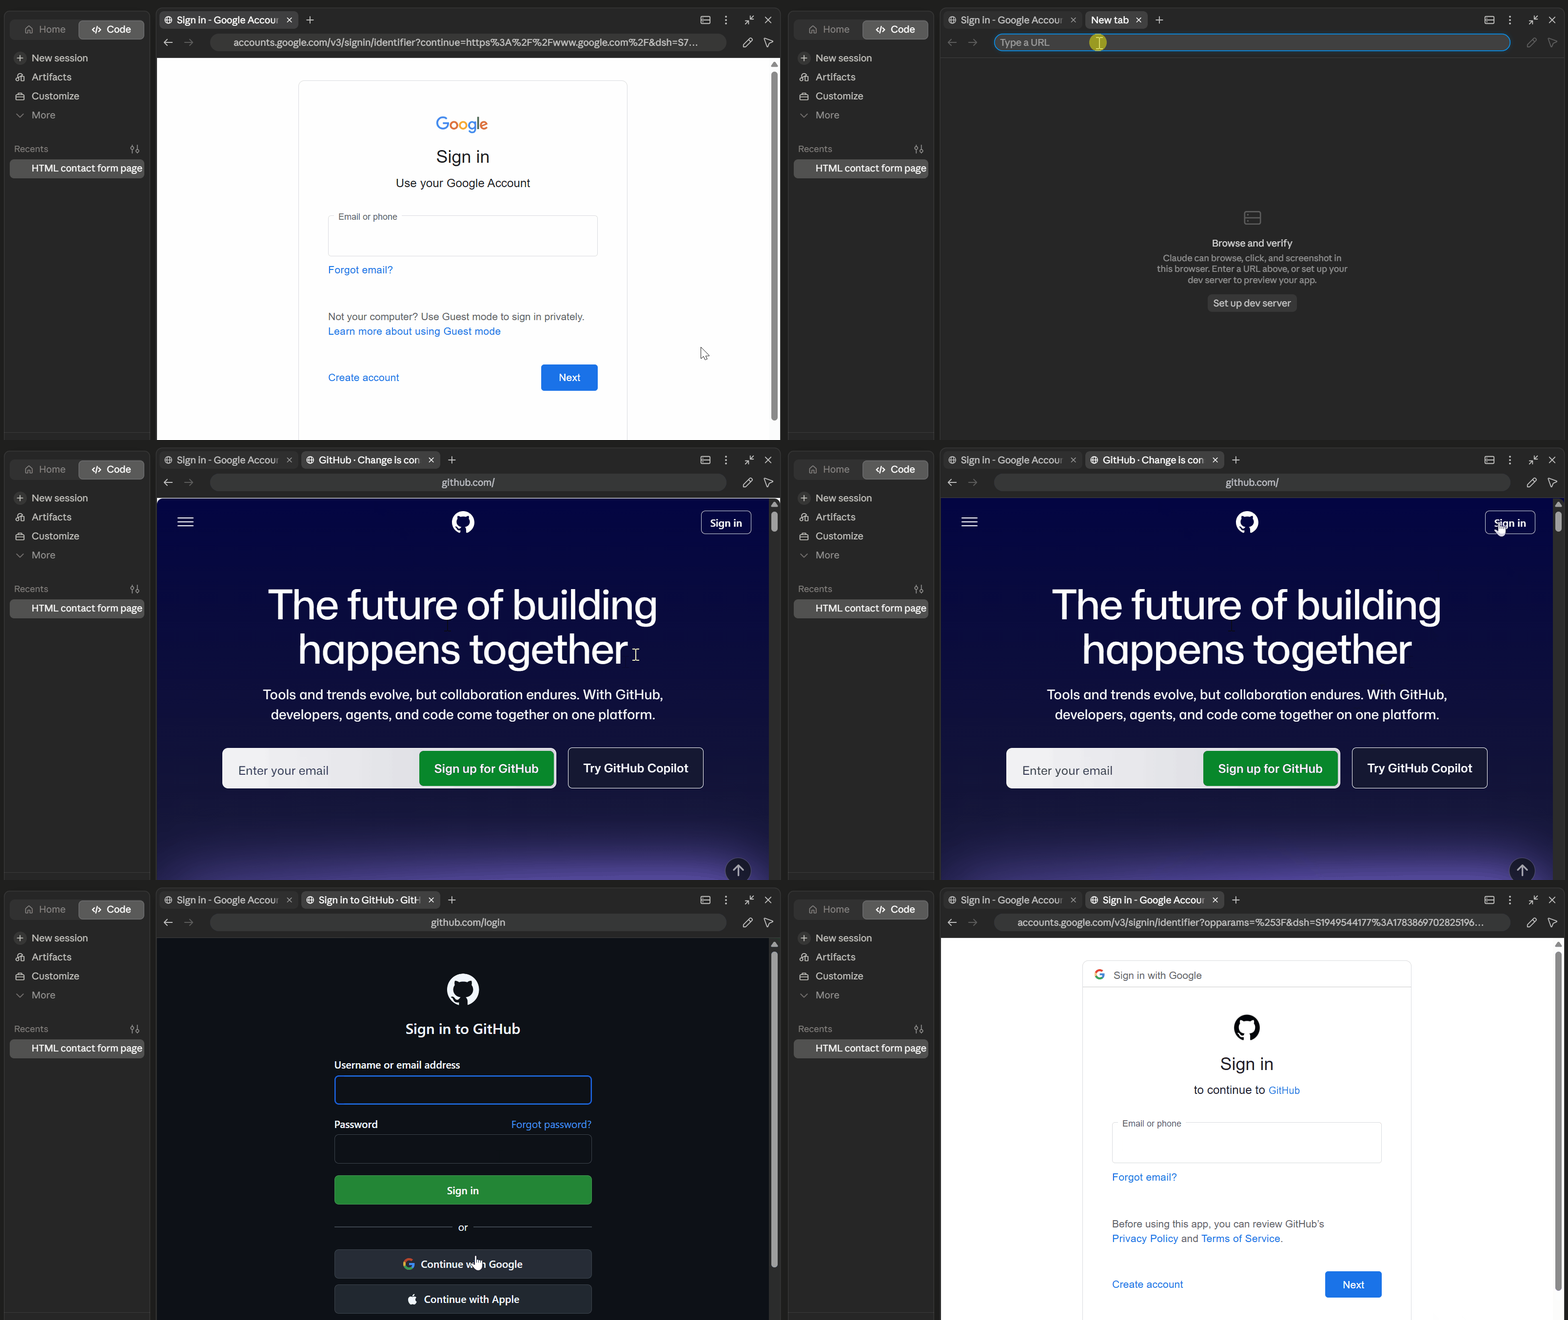
What Happens When Claude Acts on External Pages
Claude can read and interact with external sites using the same tools it uses to verify your own app.
Before it acts on a new site for the first time, a permission card appears and Claude waits for your choice:
- Allow once: approves the action for that visit only
- Always allow: saves the approval for that site on your device
- Deny: blocks the action
Each site requires its own approval, including subdomains. You can revoke any saved approval from Settings at any time.
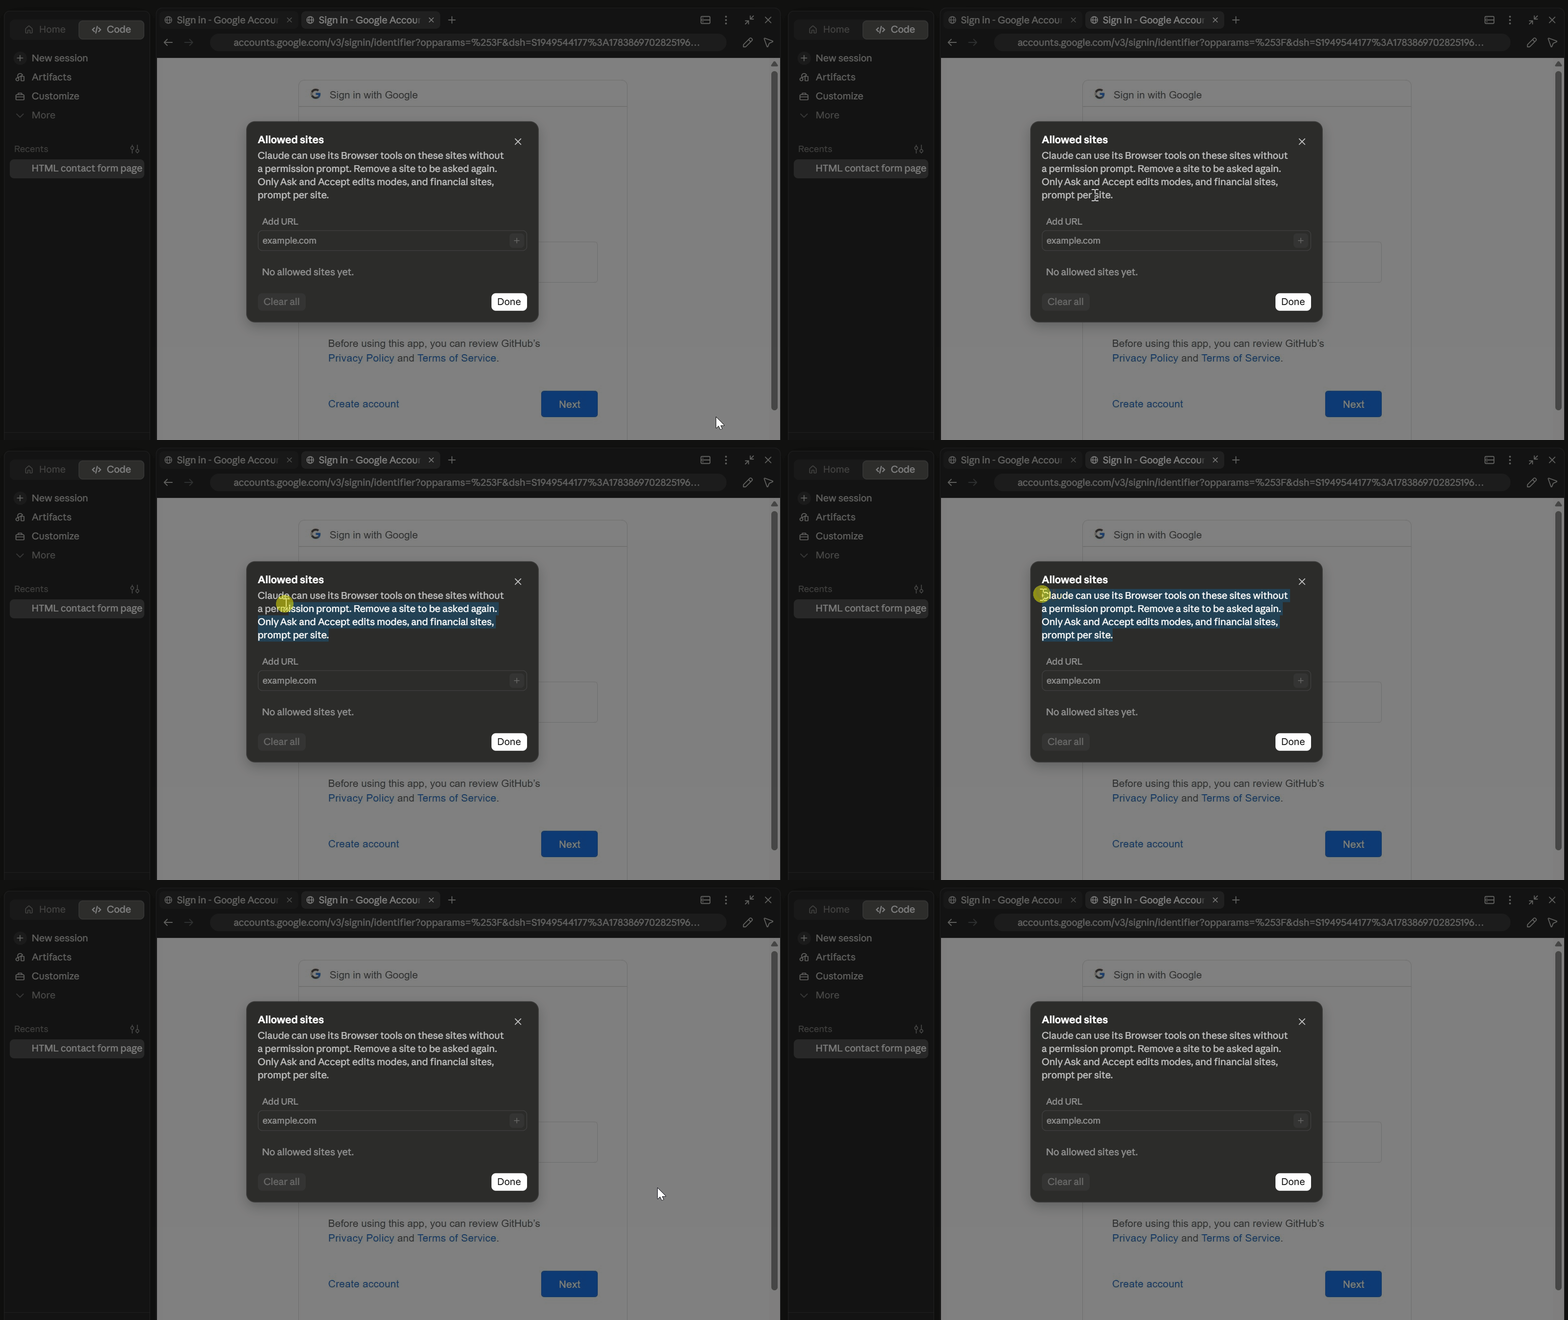
Even on an approved site, Claude will not purchase items, create accounts, or bypass CAPTCHAs without your input.
Browser Menu
The settings menu at the top right of the browser panel gives you access to several useful controls.
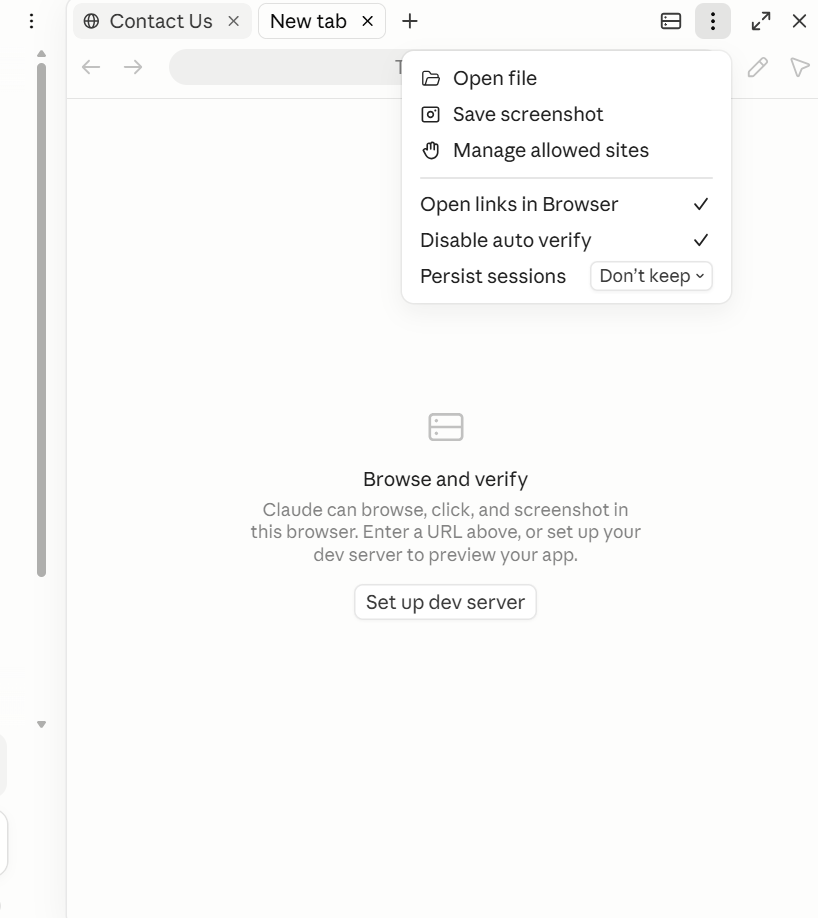
Here is what each option does:
- Open file: loads a local HTML, PDF, image, or video file into the panel without needing a running server
- Save screenshot: captures the current state of whatever is loaded in the panel
- Manage allowed sites: review and revoke any external sites you have previously approved for Claude to act on
- Open links in Browser: toggles whether external links from the chat open in the panel automatically
- Disable auto verify: turns off the automatic verification step after every edit; Claude still has access to the browser but only checks when you explicitly ask
- Persist sessions: keeps cookies and local storage alive across server restarts, so you do not have to log in again during a dev session
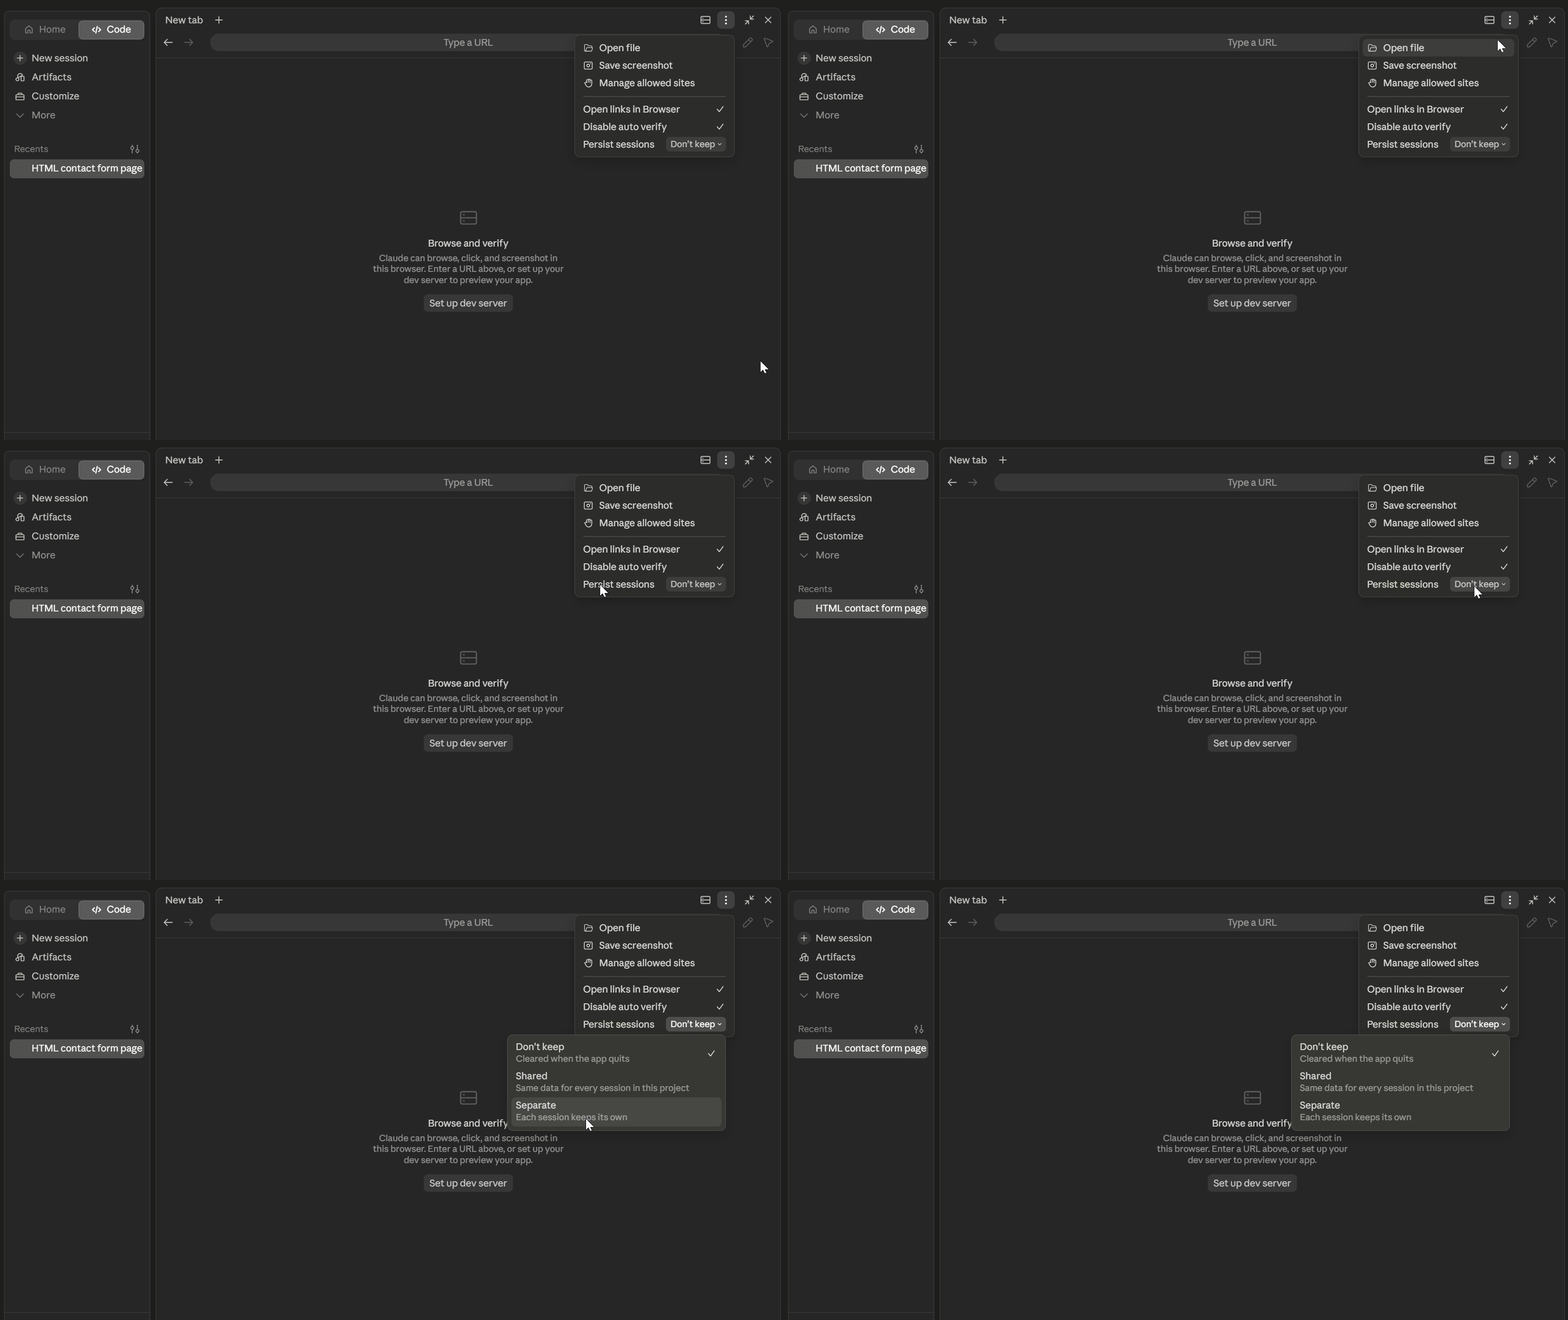
Persist sessions option is useful when your app has a login flow. Without it, every time your dev server restarts, the session state resets and you have to authenticate again from scratch.
Setting Up a Dev Server
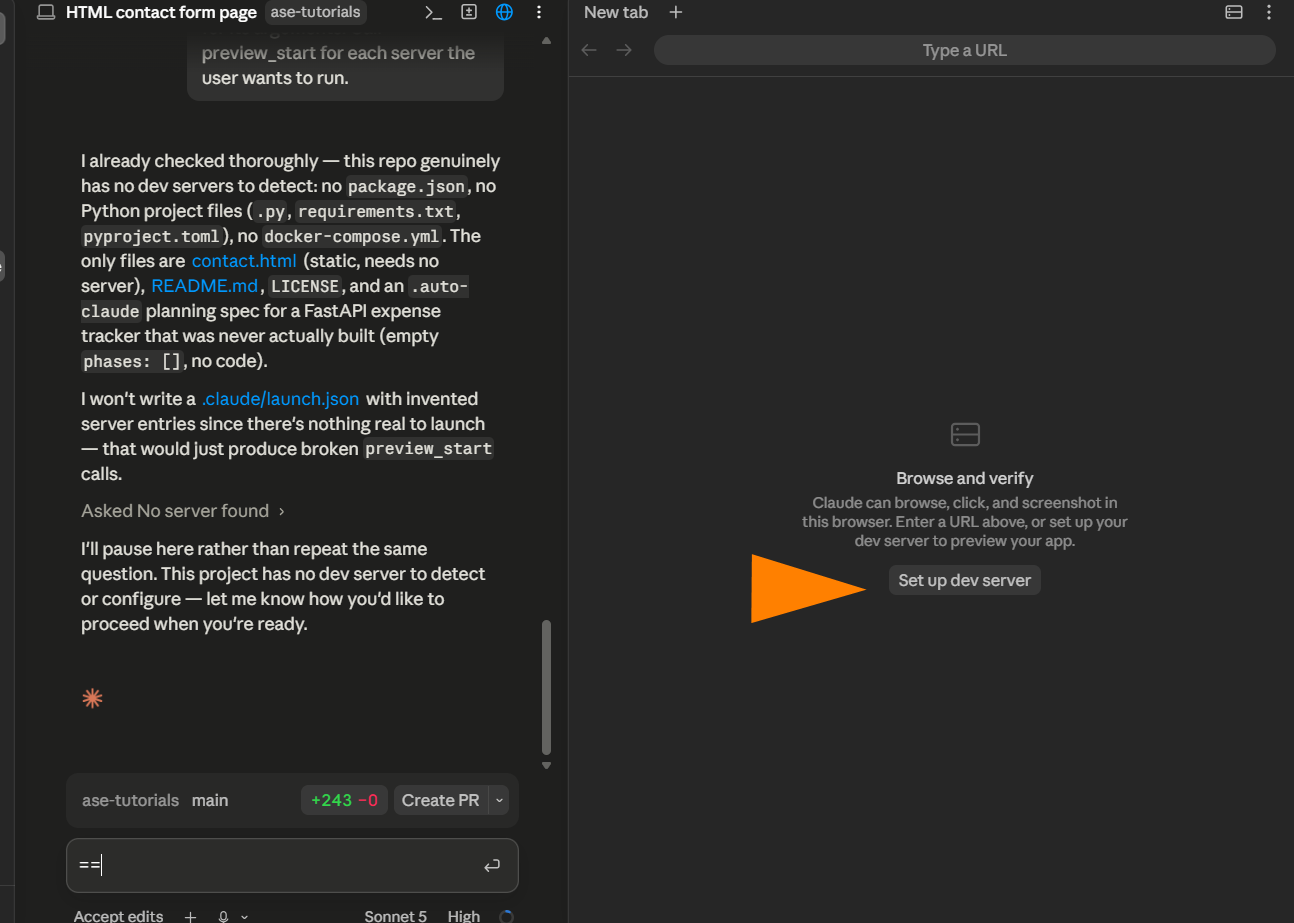
If your project does not have an existing server configuration, the browser panel shows the “Set up dev server” button instead of a live preview.
Clicking it asks Claude to scan your project for any runnable servers.
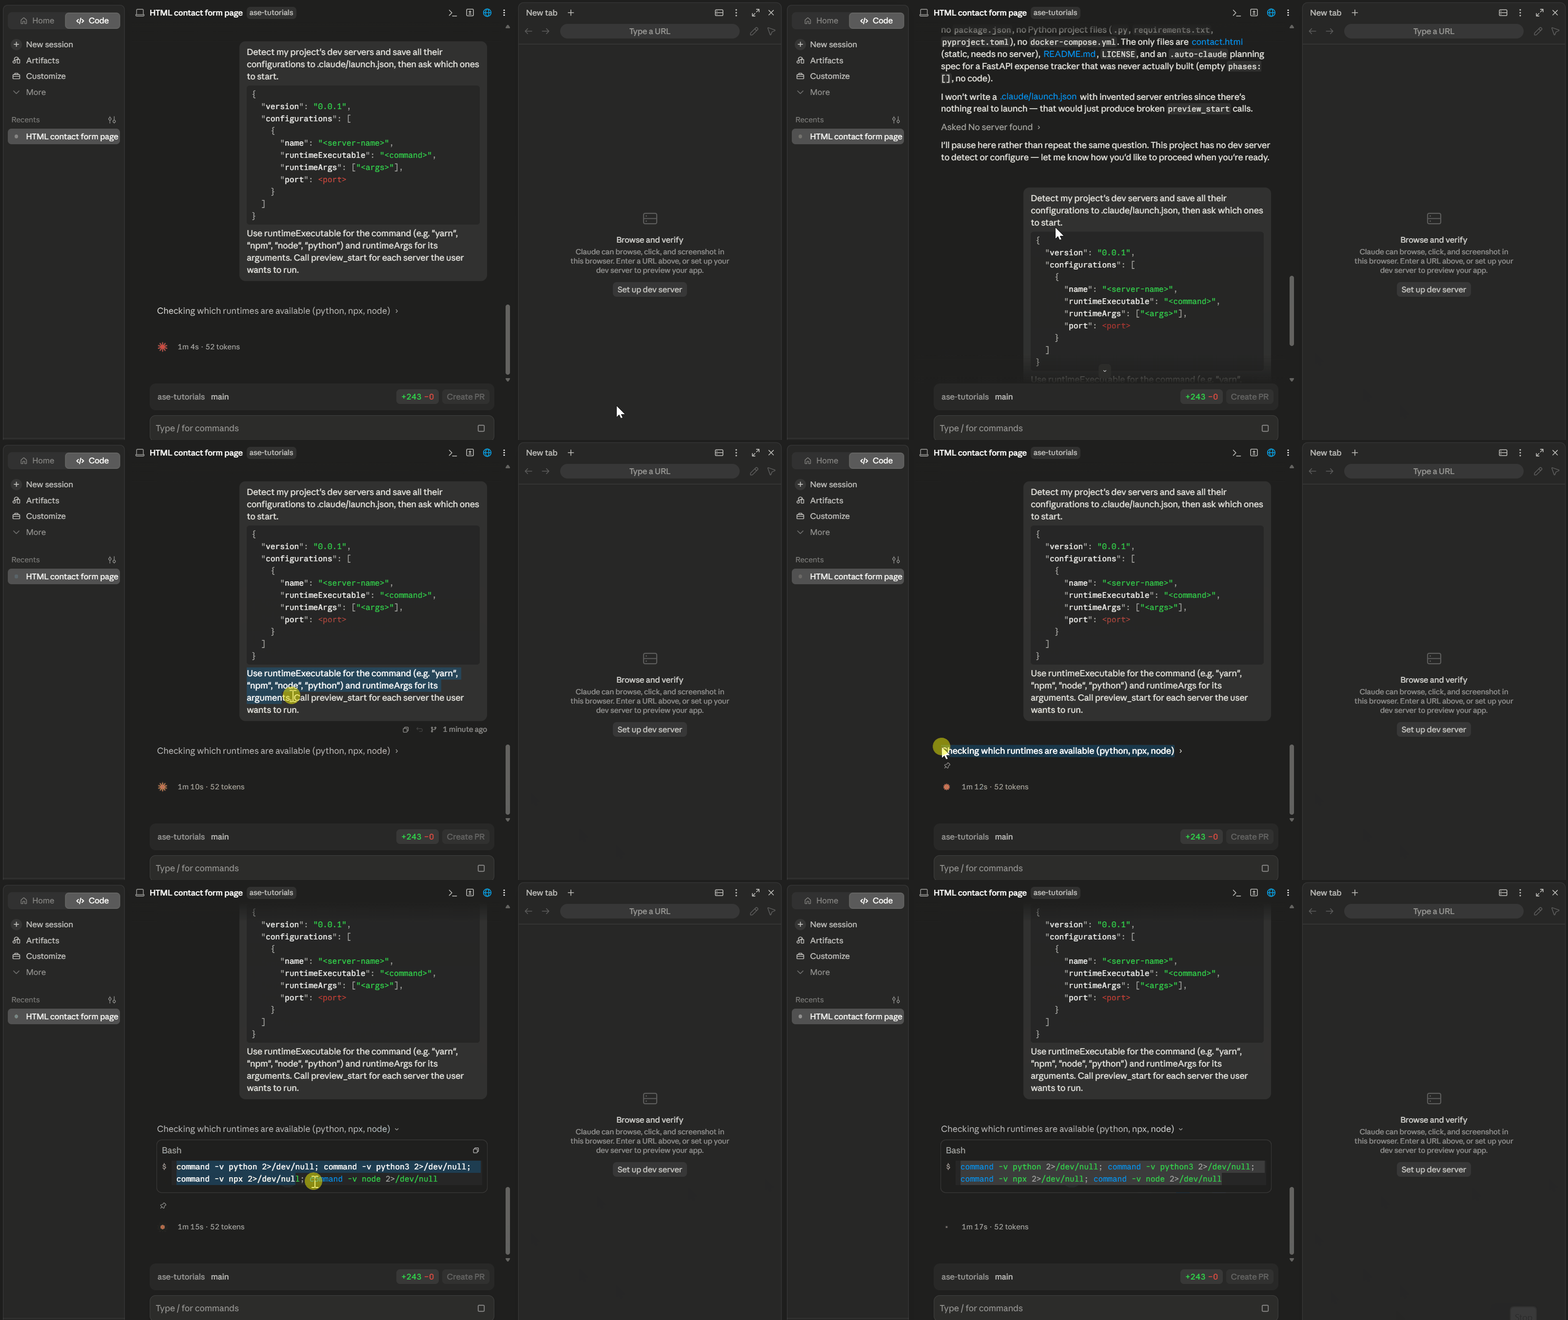
In my case, the project only had a static contact.html file with no package.json, Python project files, and docker-compose.yml.
Claude identified there was nothing to launch and did not attempt to start a server configuration.
When Claude finds no server automatically, it provides the .claude/launch.json format so you can configure one manually.
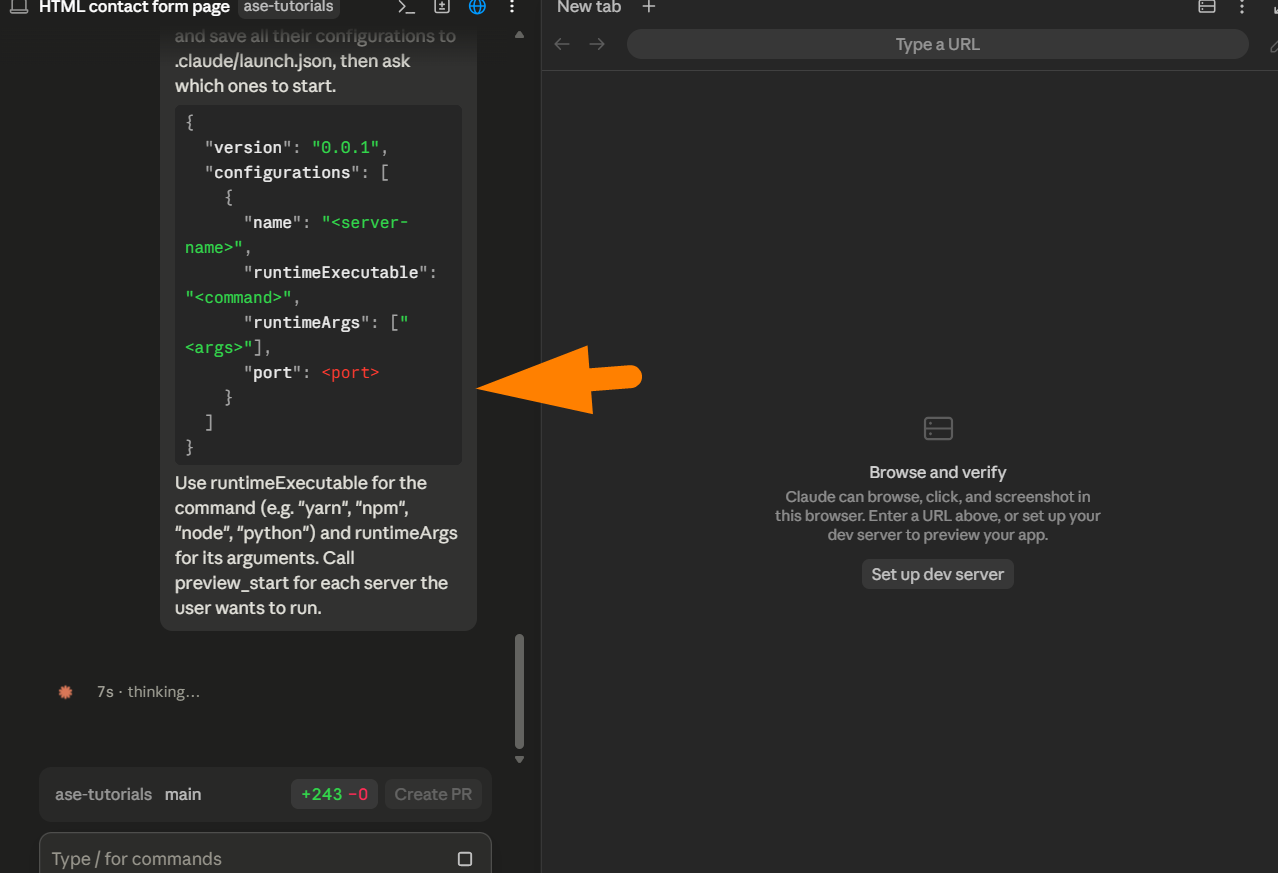
The structure looks like this:
{
  "version": "0.0.1",
  "configurations": [
    {
      "name": "<server-name>",
      "runtimeExecutable": "<command>",
      "runtimeArgs": ["<args>"],
      "port": <port>
    }
  ]
}
Set runtimeExecutable to your runtime such as yarn, npm, node, or python, and runtimeArgs to the arguments that start your server.
Before writing any configuration, Claude checks which runtimes are already installed on your machine. This triggers a permission card.
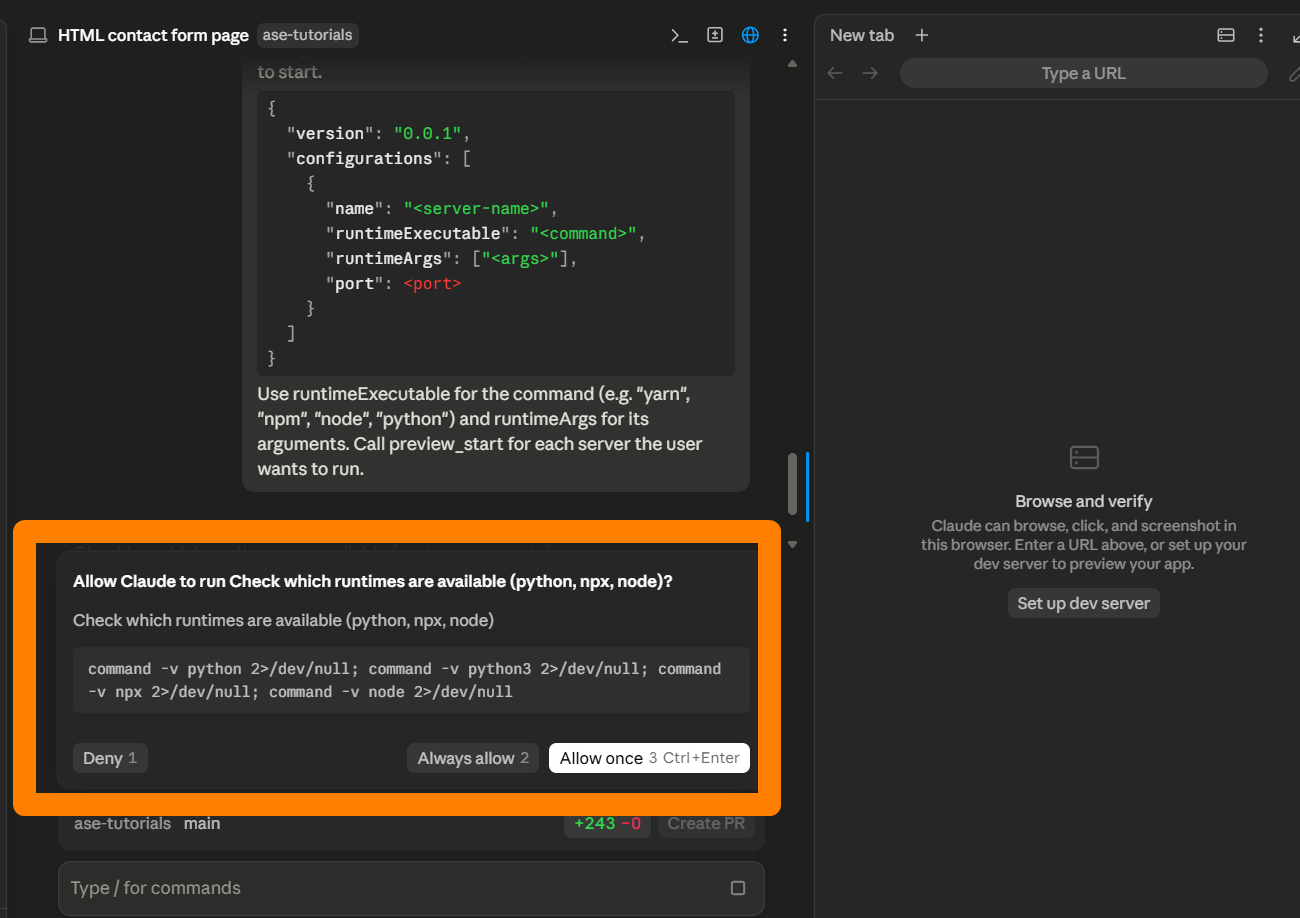
You get three choices: Allow once, Always allow, or Deny. Allow once runs the check for this session only.
Always allow saves the approval so Claude can run similar commands in future sessions without prompting you again.
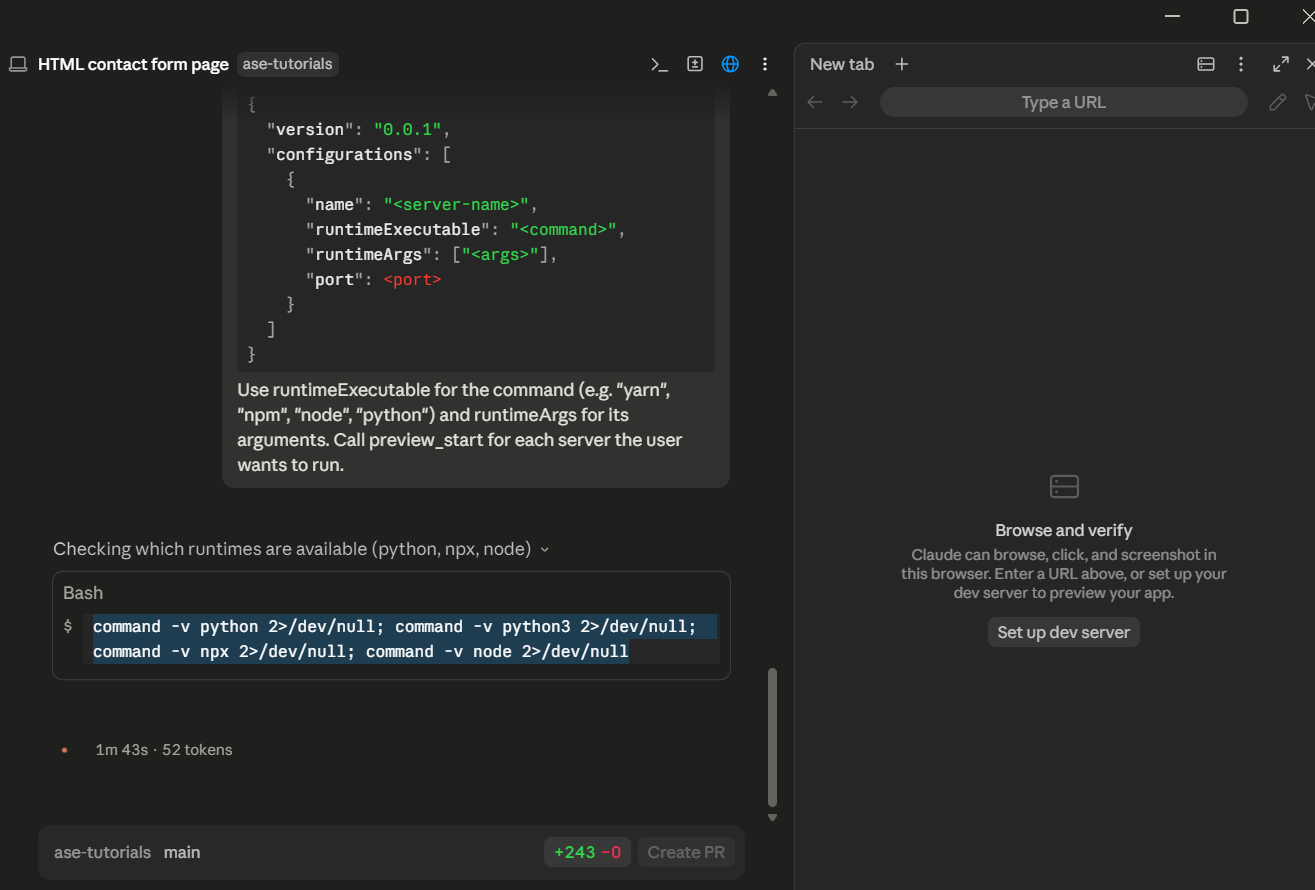
Once approved, Claude runs the check and uses the results to recommend the right runtime for your project.
For projects that only have static HTML files, you can skip the dev server.
Use the Open file option from the browser menu instead, which loads local files into the panel.
Final Thoughts
The built-in Claude Code browser is one of those features that make frontend development workflow easier.
In this test, I discovered the old days of inspecting the element on Chrome are long gone and it’s time we embrace this new workflow.
The automatic verification is another feature I found useful. Claude checking its own output after every edit reduced the code review backlog. Frontend engineers and anyone building UI components this is a must try feature.
Have you tried this new Claude Code browser? Let me know your experience in the comments below
메타데이터
- post_id
- 23df10e8da0f
- slug
- i-tried-claude-code-new-browser-every-frontend-developer-needs-this-23df10e8da0f
- url
- https://medium.com/@joe.njenga/i-tried-claude-code-new-browser-every-frontend-developer-needs-this-23df10e8da0f
- canonical_url
- https://medium.com/@joe.njenga/i-tried-claude-code-new-browser-every-frontend-developer-needs-this-23df10e8da0f
- author_url
- https://medium.com/@joe.njenga
- status
- ok
- fetched_at
- 2026-07-13 06:45:54