Build Your Own Local Web Search Agent in 220 Lines of Python
MCP, SearXNG, and Ollama wired together — with FastMCP, stdio transport, schema adaptation, and multi-server name prefixing.
Build Your Own Local Web Search Agent in 220 Lines of Python
MCP, SearXNG, and Ollama wired together — with FastMCP, stdio transport, schema adaptation, and multi-server name prefixing.
In Part 1 of this series, I showed you how to build a local LLM agent in Python with Ollama, with tools, skills, slash commands, history, compaction, and background loops. In Part 2, I wrapped that agent in a browser-based UI using FastAPI and WebSockets.
So far, the agent has had two tools, both of which lived inside main.py: one to read a file and one to get the current time. This is fine for a demo, but it is also a dead end. Every new capability means another function and another tool schema in the same file.
Therefore, in this article, I will show you how to make the agent talk to external MCP servers instead, and we will give it a real capability while we are at it: web search via SearXNG.
The reason I want MCP in the loop is that it decouples capability from agent. Once the agent speaks MCP, any server that follows the protocol can plug in, without me touching main.py. So, SearXNG today, a calendar tomorrow, a calculator next week. All without rebuilding the agent.
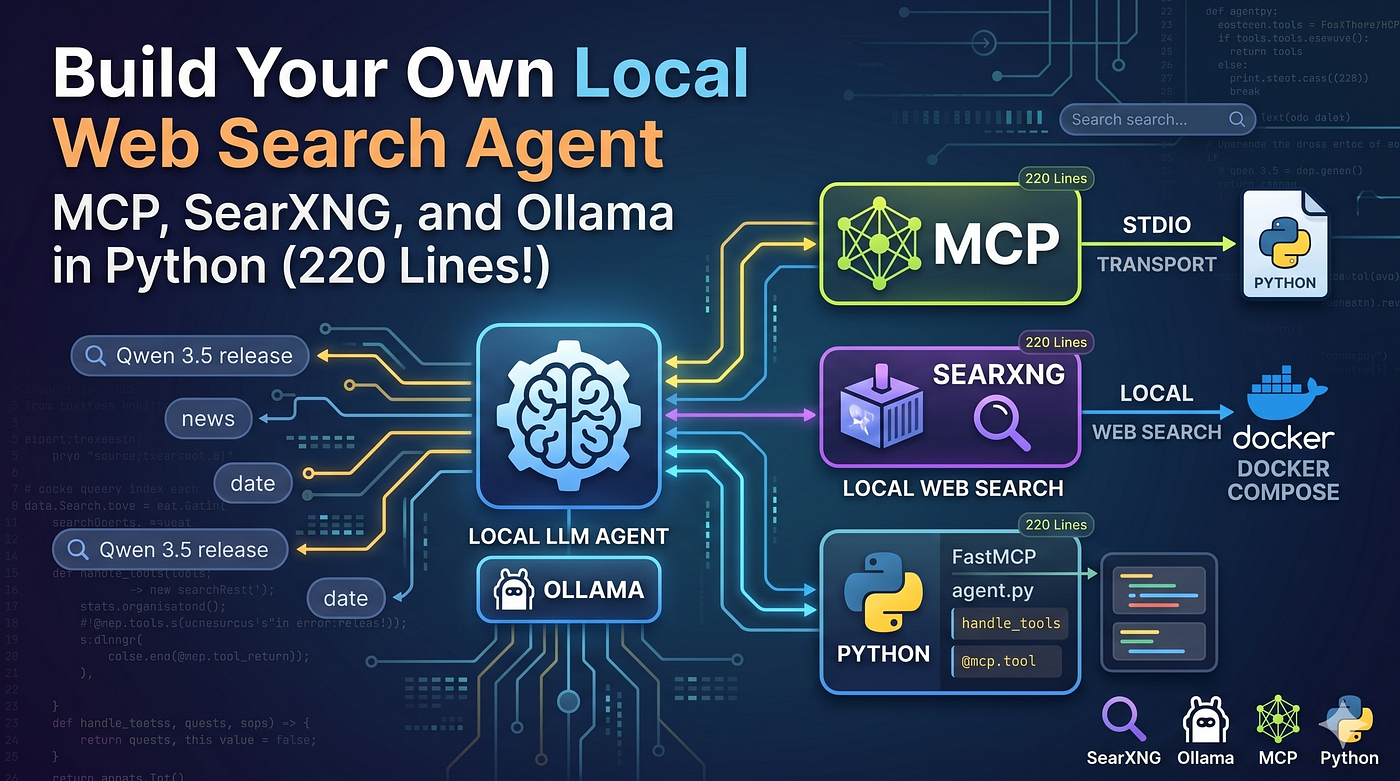
The result of this article is: an MCP server (written in Python with FastMCP) that wraps a local SearXNG container, plus a refactored agent that discovers MCP tools at startup, exposes them to Ollama, and routes tool calls back to the right server. By the end, the agent can answer questions about things that happened yesterday. To keep this article focused on the MCP plumbing, I am going to extend Part 1’s CLI agent here rather than Part 2’s UI.
This writeup is a result of my own experimentation. The structure of the tutorial follows the same incremental pattern as Parts 1 and 2.
Here are the seven stages we will go through:
- Stage 1: Running SearXNG in Docker
- Stage 2: A minimal FastMCP server
- Stage 3: Wrapping SearXNG in the MCP server
- Stage 4: An MCP-aware Agent class
- Stage 5: Converting MCP tools to Ollama’s format
- Stage 6: Routing tool calls back to the right server
- Stage 7: Multiple MCP servers with name prefixing
So, let us get started.
Installation
The full code is on GitHub at jfjensen/local-LLM-agent-mcp-search. Each stage lives in its own subdirectory and is exposed as a console script via pyproject.toml, so you can install once and then run any stage by name.
First, clone the repo and install it in editable mode:
git clone https://github.com/jfjensen/local-LLM-agent-mcp-search.git
cd local-LLM-agent-mcp-search
pip install -e .
This pulls in the mcp Python SDK, ollama, httpx, and python-dotenv, and registers seven console scripts: mcp-search-stage1 through mcp-search-stage7. Each one starts the corresponding stage from the current working directory.
You will also need Docker for the SearXNG container, and Ollama with a model that supports tool calling. I am using qwen3.5:9b, which I have found to be reliable for tool use. So:
ollama pull qwen3.5:9bThe agent stages create history/ folders in the current working directory on first run. So, if you want to keep things separate, it is best to run each stage from its own folder. For example:
mkdir my-session && cd my-session
mcp-search-stage7
So, with the install out of the way, let us go through the stages.
Stage 1: Running SearXNG in Docker
Before we can give the agent search, we need something to search with. I am using SearXNG, which is an open-source metasearch engine that aggregates results from many providers (Google, Bing, DuckDuckGo, Wikipedia, and so on) without tracking the user. It has a clean JSON API, which is exactly what we need.
The most straightforward way to run SearXNG locally is via Docker Compose. Save the following as docker-compose.yml somewhere on disk:
services:
  searxng:
    image: searxng/searxng:latest
    container_name: searxng-mcp
    ports:
      - "8888:8080"
    volumes:
      - ./searxng:/etc/searxng:rw
    environment:
      - SEARXNG_BASE_URL=http://localhost:8888/
    restart: unless-stopped
Then:
docker compose up -dWait a moment for the container to come up, and check that the UI is available at [http://localhost:8888/](http://localhost:8888/).
Here is a step-by-step description of what is going on:
The container:
- We mount a local
./searxng/folder at/etc/searxnginside the container. This is where SearXNG keeps its config, and on first run it will populate it with a defaultsettings.yml. So, on the host side we end up with a folder we can edit.
The port:
- The container listens on 8080 internally, and we expose it on 8888 on the host. If you have something else on 8888 already, change the left side of the port mapping (e.g.
"8889:8080") and remember to use the new port everywhere below.
There is one important thing to note: by default, SearXNG only returns HTML, not JSON. Apparently, this catches a lot of people out. So, to enable the JSON API, edit ./searxng/settings.yml after the first run and find the search: section. Then add json to the formats: list:
search:
  safe_search: 0
  autocomplete: ""
  default_lang: ""
  formats:
    - html
    - json
While we are in settings.yml, also make sure that server.limiter is set to false. The limiter blocks repeated API calls from the same client, which we definitely do not want when an LLM is the one calling it.
Then restart the container:
docker compose restartTo verify that the JSON API works, try this:
curl "http://localhost:8888/search?q=ollama&format=json"You should see a JSON document with a results array.
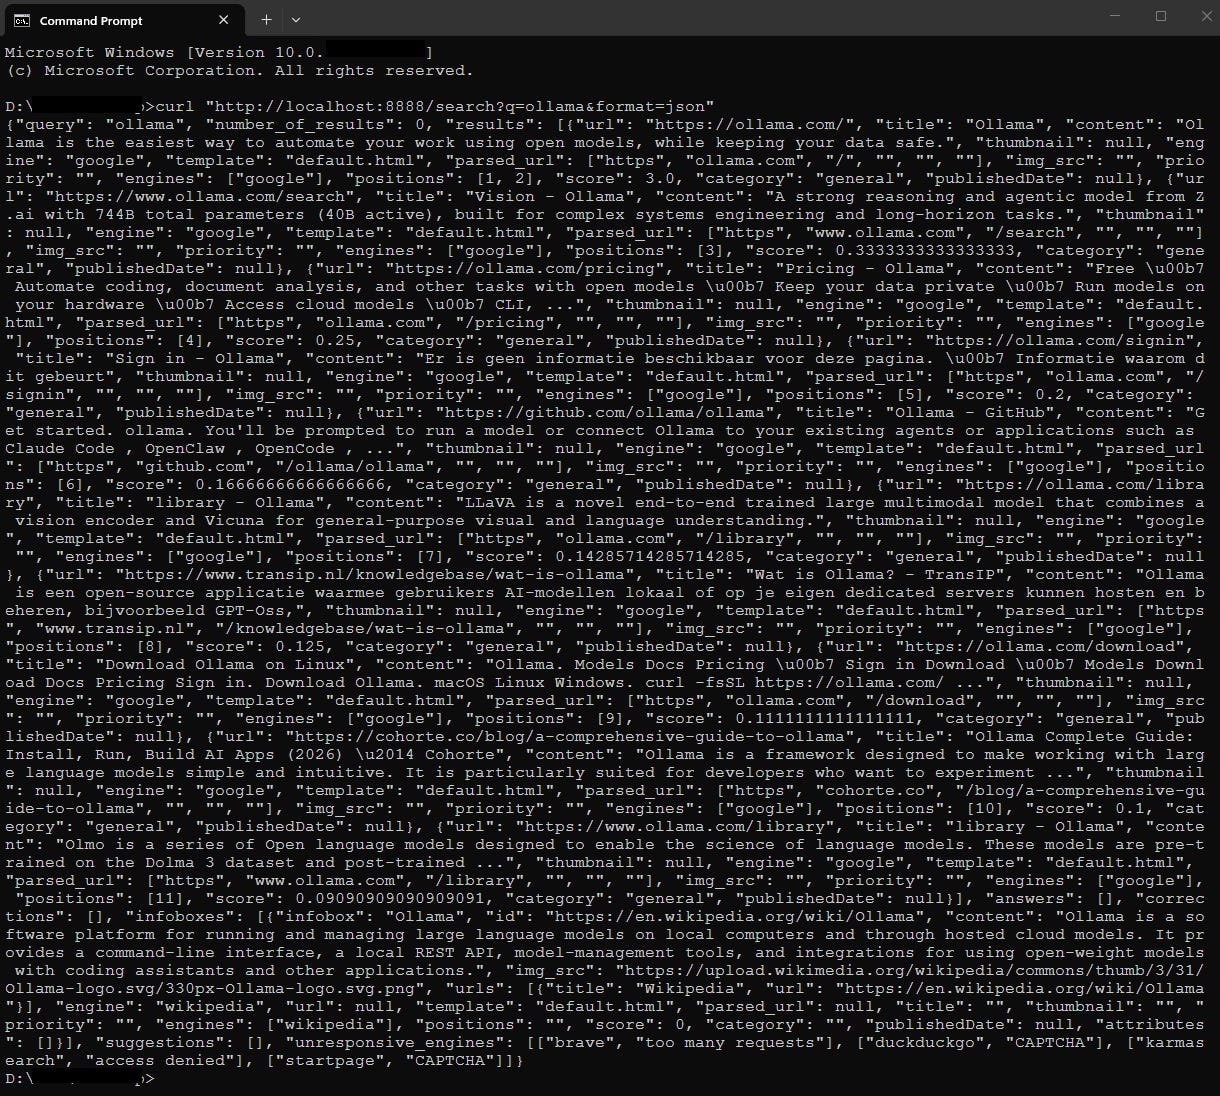
Screenshot of the JSON response from Curl
If you see HTML instead, the format change did not take effect. So, recheck the settings.yml edit and restart.
That is the search engine sorted. Now we need something that can speak MCP on top of it.
Stage 2: A minimal FastMCP server
FastMCP is the high-level interface of the official MCP Python SDK. It is, actually, very pleasant to use. You decorate a function with @mcp.tool(), give it a docstring, and the SDK takes care of generating the JSON Schema, handling the protocol handshake, and serving the tool over stdio or HTTP. So, before we plug SearXNG in, let us write the smallest possible MCP server, just to see the shape of the thing.
Create a file called main.py inside stage2/src/mcp_search_02/:
"""
Stage 2: A minimal FastMCP server with one toy tool.
Run with: mcp-search-stage2
"""

from mcp.server.fastmcp import FastMCP

mcp = FastMCP("search-server")

@mcp.tool()
def echo(text: str) -> str:
    """Echo the input text back. Used for testing the MCP plumbing."""
    return f"You said: {text}"

def chat():
    """Entry-point for the console script."""
    mcp.run(transport="stdio")

if __name__ == "__main__":
    chat()
Here is a step-by-step description of the above code:
The FastMCP instance:
- We create a server named
"search-server". The name is what shows up to MCP clients when they connect.
The @mcp.tool() decorator:
- The decorator registers
echoas a tool. The function signature (text: str) is used to generate a JSON Schema for the tool's input. The docstring becomes the tool's description, which is what the LLM actually reads to decide whether to use the tool.
The chat() function:
- We call
mcp.run(transport="stdio"). This tells the server to read MCP messages from stdin and write responses to stdout. So, the server has no port, no socket; it is just a process that talks to its parent via pipes. This is intentional: stdio transport is the standard way for an MCP server to be embedded in a client. The client spawns the server as a subprocess and communicates with it through the pipes.
One thing to note: because stdio is the transport, you must not write anything else to stdout. print(...) calls in your tool functions will corrupt the protocol stream and the client will give up on you. So, if you want logging, use print(..., file=sys.stderr) or the logging module configured to stderr. This is, again, the kind of thing that catches people out the first time.
A tiny inspector script
To test the server in isolation, the MCP project ships an Inspector tool that you can launch via npx @modelcontextprotocol/inspector. Apparently, on Windows it has some flakiness around stdio connections, and it adds Node as a dependency that we do not otherwise need.
So, instead of the official Inspector, I am going to use a tiny Python script that does the same thing for our purposes: spawn an MCP server over stdio, list its tools, and optionally call one of them.
Save this as inspect_any.py at the top of the repo, next to pyproject.toml:
"""
A tiny CLI MCP inspector. Use it to poke at any of the MCP servers in
this repo without needing the npx-based Inspector.
Examples:
    # List the tools exposed by a server:
    python inspect_any.py mcp_search_02.main
    # Call a tool with simple key=value args (no quoting headaches):
    python inspect_any.py mcp_search_02.main echo --kv text=hello
    # Call a tool with inline JSON:
    python inspect_any.py mcp_search_02.main echo --args '{"text": "hi"}'
    # Call a tool with args read from a JSON file:
    python inspect_any.py mcp_search_02.main echo --args-file args.json
"""
import argparse
import asyncio
import json
import sys
from mcp import ClientSession, StdioServerParameters
from mcp.client.stdio import stdio_client

def parse_kv(pairs: list[str]) -> dict:
    """Parse a list of key=value strings into a dict. Values are tried as
    int, then float, then left as string."""
    out = {}
    for pair in pairs:
        if "=" not in pair:
            raise ValueError(f"Expected key=value, got {pair!r}")
        key, _, value = pair.partition("=")
        try:
            out[key] = int(value)
        except ValueError:
            try:
                out[key] = float(value)
            except ValueError:
                out[key] = value
    return out

async def main(module_name: str, tool_name: str | None, tool_args: dict):
    params = StdioServerParameters(command="python", args=["-m", module_name])
    async with stdio_client(params) as (read, write):
        async with ClientSession(read, write) as session:
            await session.initialize()
            tools = (await session.list_tools()).tools
            print(f"Tools in {module_name}:")
            for t in tools:
                print(f"  - {t.name}: {t.description}")
            if tool_name:
                print(f"\nCalling {tool_name}({tool_args})...")
                result = await session.call_tool(tool_name, tool_args)
                for block in result.content:
                    if hasattr(block, "text"):
                        print(f"\n{block.text}")

if __name__ == "__main__":
    parser = argparse.ArgumentParser()
    parser.add_argument("module", help="MCP server module, e.g. mcp_search_02.main")
    parser.add_argument("tool", nargs="?", help="Tool name to call (omit to just list)")
    parser.add_argument("--args", help="JSON string with the tool arguments")
    parser.add_argument("--args-file", help="Path to a JSON file with the tool arguments")
    parser.add_argument("--kv", nargs="*", default=[], help="key=value pairs")
    ns = parser.parse_args()
    if ns.args:
        tool_args = json.loads(ns.args)
    elif ns.args_file:
        with open(ns.args_file, "r", encoding="utf-8") as f:
            tool_args = json.load(f)
    elif ns.kv:
        tool_args = parse_kv(ns.kv)
    else:
        tool_args = {}
    if sys.platform == "win32":
        asyncio.set_event_loop_policy(asyncio.WindowsProactorEventLoopPolicy())
    asyncio.run(main(ns.module, ns.tool, tool_args))
A few things to note:
- The script spawns the server with
python -m <module>rather than via themcp-search-stage2console-script wrapper. So, you need to run it from inside your activated venv (or with the venv's Python onPATH). On Windows, this also sidesteps a buffering issue with the.exeshim that pip generates for console scripts. - The
WindowsProactorEventLoopPolicyline at the bottom is important. The default asyncio event loop on Windows cannot spawn subprocesses, andstdio_clientwill exit silently without an error if you skip this. So, if your script seems to do nothing at all on Windows, this is almost certainly why. Luckily, the fix is one line. - There are three ways to pass arguments to a tool:
--kvfor simplekey=valuepairs,--argsfor an inline JSON string, and--args-filefor reading a JSON file from disk. Both--kvand--argswork on PowerShell, bash, and zsh.--kvis convenient when the arguments are flat scalars;--argsand--args-fileare what you reach for when the input has nested structure (lists, dicts) that key=value cannot express. So, pick whichever your input shape makes easiest.
So, to confirm Stage 2 works, first just list the tools:
python inspect_any.py mcp_search_02.mainYou should see:

Screenshot of Powershell running the Python MCP inspector script to test the echo MCP server without any parameters
Then call the tool. Either of these works:
python inspect_any.py mcp_search_02.main echo --kv text=hello
python inspect_any.py mcp_search_02.main echo --args '{"text": "hello"}'
Either should produce You said: hello, as you can see below:

Screenshot of Powershell running the Python MCP inspector script to test the echo MCP server with parameters
So, if you see echo in the tool list and you can call it with a string and get the response back, we are good.
So, with the plumbing confirmed, let us replace the toy tool with a real one.
Stage 3: Wrapping SearXNG in the MCP server
Now we replace echo with a search tool that hits SearXNG and returns the top results. The change is small in terms of lines, but it is the moment where the MCP server actually does something useful.
import os
import httpx
from mcp.server.fastmcp import FastMCP

SEARXNG_URL = os.environ.get("SEARXNG_URL", "http://localhost:8888")

mcp = FastMCP("search-server")

@mcp.tool()
def search(query: str, max_results: int = 5) -> str:
    """
    Search the web via a local SearXNG instance.
    Use this tool whenever the user asks about current events, recent news,
    or any topic that requires up-to-date information from the web.

    Returns a list of results, each with a title, URL, and snippet.
    """
    try:
        response = httpx.get(
            f"{SEARXNG_URL}/search",
            params={"q": query, "format": "json"},
            timeout=10.0,
        )
        response.raise_for_status()
    except httpx.HTTPError as e:
        return f"Search failed: {e}. Is SearXNG running at {SEARXNG_URL}?"

    data = response.json()
    results = data.get("results", [])[:max_results]
    if not results:
        return "No results found."

    lines = []
    for i, r in enumerate(results, 1):
        title = r.get("title", "(no title)")
        url = r.get("url", "")
        snippet = r.get("content", "")
        lines.append(f"[{i}] {title}\n    {url}\n    {snippet}")

    return "\n\n".join(lines)

def chat():
    mcp.run(transport="stdio")

if __name__ == "__main__":
    chat()
A few things to note:
- The SearXNG URL is read from an environment variable, with a sensible default. So, if you ran SearXNG on a different port, you can override it without editing code.
- The tool description (the docstring) is explicit about when the agent should use this tool. This is on purpose: an under-described tool gets called too often, and an over-described tool never gets called. The phrase “current events, recent news, or any topic that requires up-to-date information” is what the model reads to make the call. So, this docstring is doing real work, and it is worth tuning.
- We format the results as a plain-text bulleted list, not JSON. The reason is that LLMs read prose more reliably than nested JSON, and we want the model to actually understand what it got back. So, we shape the output for the consumer.
- The
httpx.getis synchronous. FastMCP can handle async functions too, but for a single SearXNG call there is no benefit, and synchronous code is easier to read. If you want to issue multiple queries in parallel later on, switch tohttpx.AsyncClientand make the functionasync def.
You can test this with inspect_any.py again. So, with SearXNG running and the JSON API enabled:
python inspect_any.py mcp_search_03.main search --kv query="qwen 3 release" max_results=3Or, if you prefer JSON:
python inspect_any.py mcp_search_03.main search --args '{"query": "qwen 3 release", "max_results": 3}'You should see three results, each with a title, URL, and snippet:
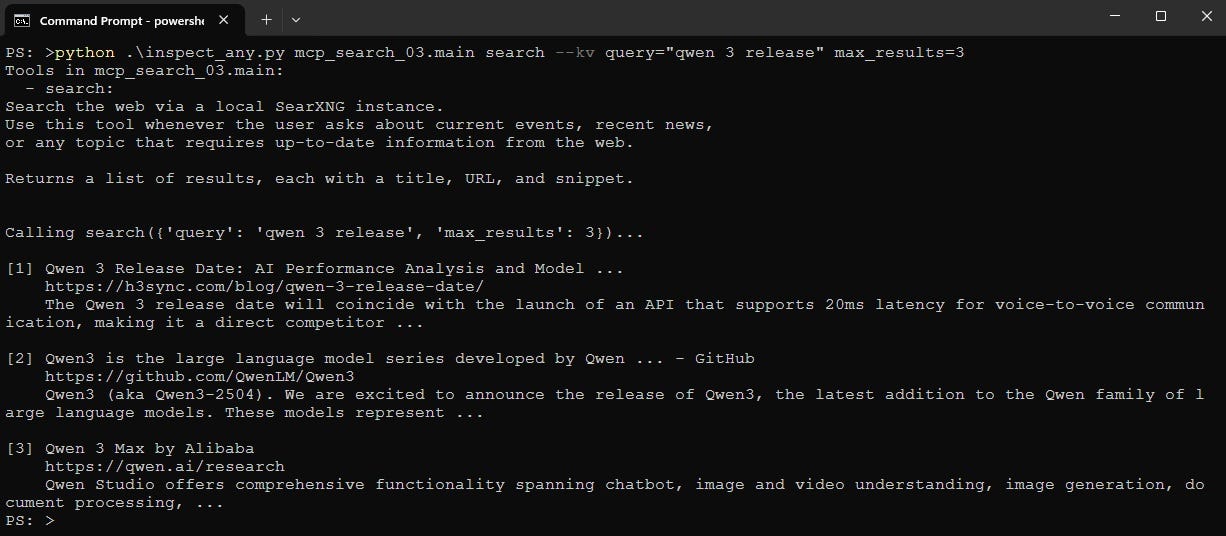
Screenshot of Powershell running the Python MCP inspector script to test the search MCP server
If you get a 403 instead, the JSON format is still not enabled in settings.yml. If you get a connection error, the container is not running, or SEARXNG_URL is pointing at the wrong place.
The MCP server is now feature-complete. The rest of the article is about teaching the agent to use it.
Stage 4: An MCP-aware Agent class
Up to now (in Part 1), our Agent class had its tools hardcoded inside main.py: a module-level tools list, plus a handle_tools method that dispatched on the tool name with a chain of if/elif. This worked when there were two tools, but it does not scale to a world where tools live in external servers and are discovered at runtime.
So, we are going to refactor the agent to:
- Spawn one or more MCP servers as subprocesses on startup.
- Connect to each one via the MCP Python SDK’s
stdio_client. - Discover their tools and store them in memory.
- Convert the MCP tool schemas into the format Ollama expects.
- Route tool calls back to the right server.
Items 4 and 5 are interesting enough that they get their own stages. For now, we focus on the spawn-and-connect part.
The Agent class becomes:
"""
Stage 4: An MCP-aware Agent class that connects to one MCP server at startup.
"""

import asyncio
import json
import os
from contextlib import AsyncExitStack
from datetime import datetime
from typing import Any

from mcp import ClientSession, StdioServerParameters
from mcp.client.stdio import stdio_client

HISTORY_DIR = "history"
if not os.path.exists(HISTORY_DIR):
    os.makedirs(HISTORY_DIR)

class Agent:
    def __init__(self, session_id: str | None = None):
        self.session_id = session_id or datetime.now().strftime("%Y-%m-%d_%H-%M-%S")
        self.history_file = os.path.join(HISTORY_DIR, f"{self.session_id}.json")
        self.messages: list[dict[str, Any]] = []
        self.mcp_session: ClientSession | None = None
        self.mcp_tools: list[Any] = []
        self._exit_stack = AsyncExitStack()

    async def connect(self, command: str, args: list[str]):
        """Spawn an MCP server as a subprocess and connect to it."""
        params = StdioServerParameters(command=command, args=args)
        read, write = await self._exit_stack.enter_async_context(stdio_client(params))
        session = await self._exit_stack.enter_async_context(ClientSession(read, write))
        await session.initialize()

        tools_response = await session.list_tools()
        self.mcp_session = session
        self.mcp_tools = tools_response.tools

        print(f"[SYSTEM] Connected. Tools discovered:")
        for t in self.mcp_tools:
            print(f"  - {t.name}: {t.description}")

    async def close(self):
        await self._exit_stack.aclose()

    def save_history(self):
        with open(self.history_file, "w", encoding="utf-8") as f:
            json.dump(self.messages, f, indent=4, default=str)

async def _main():
    agent = Agent()
    try:
        await agent.connect("mcp-search-stage3", [])
        print("\n[SYSTEM] MCP server connected. Stage 4 ends here.")
        print("[SYSTEM] In Stage 6 we will start using these tools.")
    finally:
        await agent.close()

def chat():
    """Entry-point for the console script."""
    asyncio.run(_main())

if __name__ == "__main__":
    chat()
Here is a step-by-step description of the above code:
The new attributes:
mcp_sessionwill hold theClientSessiononce we have connected. Until then it isNone.mcp_toolsis the list of tools the server reported when we asked it. Each tool is a typed object with.name,.description, and.inputSchemaattributes._exit_stackis anAsyncExitStack. We need it because we are entering two async context managers (stdio_clientandClientSession), and we want their cleanup to run in the right order when the agent shuts down. The exit stack handles this for us.
The connect method:
StdioServerParametersdescribes how to spawn the server. Thecommandis the executable, andargsis the list of arguments. So,connect("mcp-search-stage3", [])would spawn our SearXNG MCP server from Stage 3.stdio_client(params)spawns the subprocess and returns two pipe handles (read and write).ClientSession(read, write)wraps those handles in a session object that speaks MCP.session.initialize()performs the MCP handshake.session.list_tools()asks the server what tools it offers. We store the result for later.
The close method:
- Calls
aclose()on the exit stack, which terminates the subprocess and closes the pipes. Without this, the agent leaks subprocesses on every exit, which is a small but real problem during development.
To actually use this, the CLI loop needs to be async, since connect() is. So, the entry point looks like:
async def _main():
    agent = Agent()
    try:
        await agent.connect("mcp-search-stage3", [])
        # Conversation loop will go here in Stage 6.
        # For now, just discover and exit.
    finally:
        await agent.close()

def chat():
    asyncio.run(_main())
So, with this in place, running mcp-search-stage4 should print the discovered tools and exit.
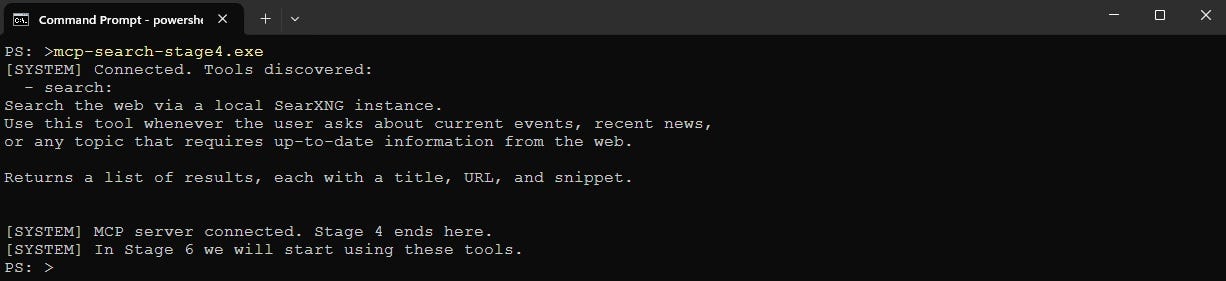
Screenshot of Powershell running the stage 4 MCP search executable
We have not actually called any of them yet; that comes in Stage 6. But we now have a live channel to the MCP server, which is the hard part.
Stage 5: Converting MCP tools to Ollama’s format
There is one annoying bridge we need to build before the agent can call MCP tools: Ollama’s tools parameter expects a specific JSON shape, and MCP's list_tools returns a different one. So, we need a small adapter function.
The Ollama format is the one we used in Part 1:
{
    "type": "function",
    "function": {
        "name": "search",
        "description": "...",
        "parameters": {
            "type": "object",
            "properties": {...},
            "required": [...]
        }
    }
}
And the MCP format, as returned by session.list_tools(), gives us objects with .name, .description, and .inputSchema attributes, where inputSchema is already a JSON Schema dict in the right shape.
So, the conversion is mostly mechanical:
def mcp_tools_to_ollama(mcp_tools: list[Any]) -> list[dict]:
    """Convert an MCP tool list into the format Ollama expects."""
    ollama_tools = []
    for tool in mcp_tools:
        ollama_tools.append({
            "type": "function",
            "function": {
                "name": tool.name,
                "description": tool.description or "",
                "parameters": tool.inputSchema,
            },
        })
    return ollama_tools
A few things to note:
- The
parametersfield on Ollama's side is exactly the JSON Schema that MCP already provides ininputSchema. So, we pass it through unchanged. - The
descriptionfield is what the model reads to decide when to use the tool. If it is empty, we default to an empty string rather thanNone, which Ollama does not like. - This adapter is intentionally dumb. It does not validate, it does not normalize, it just shapes the dict. If a future MCP server returns a tool with a weird schema, we want it to surface as an Ollama error rather than be silently filtered.
We add this function at module level in main.py. Then, in the chat loop, we call it once after agent.connect(...) and stash the result on the agent:
agent.ollama_tools = mcp_tools_to_ollama(agent.mcp_tools)So, with this in place, we can now pass agent.ollama_tools to ollama.chat and the model will see all the MCP server's tools as if they were native Ollama tools.
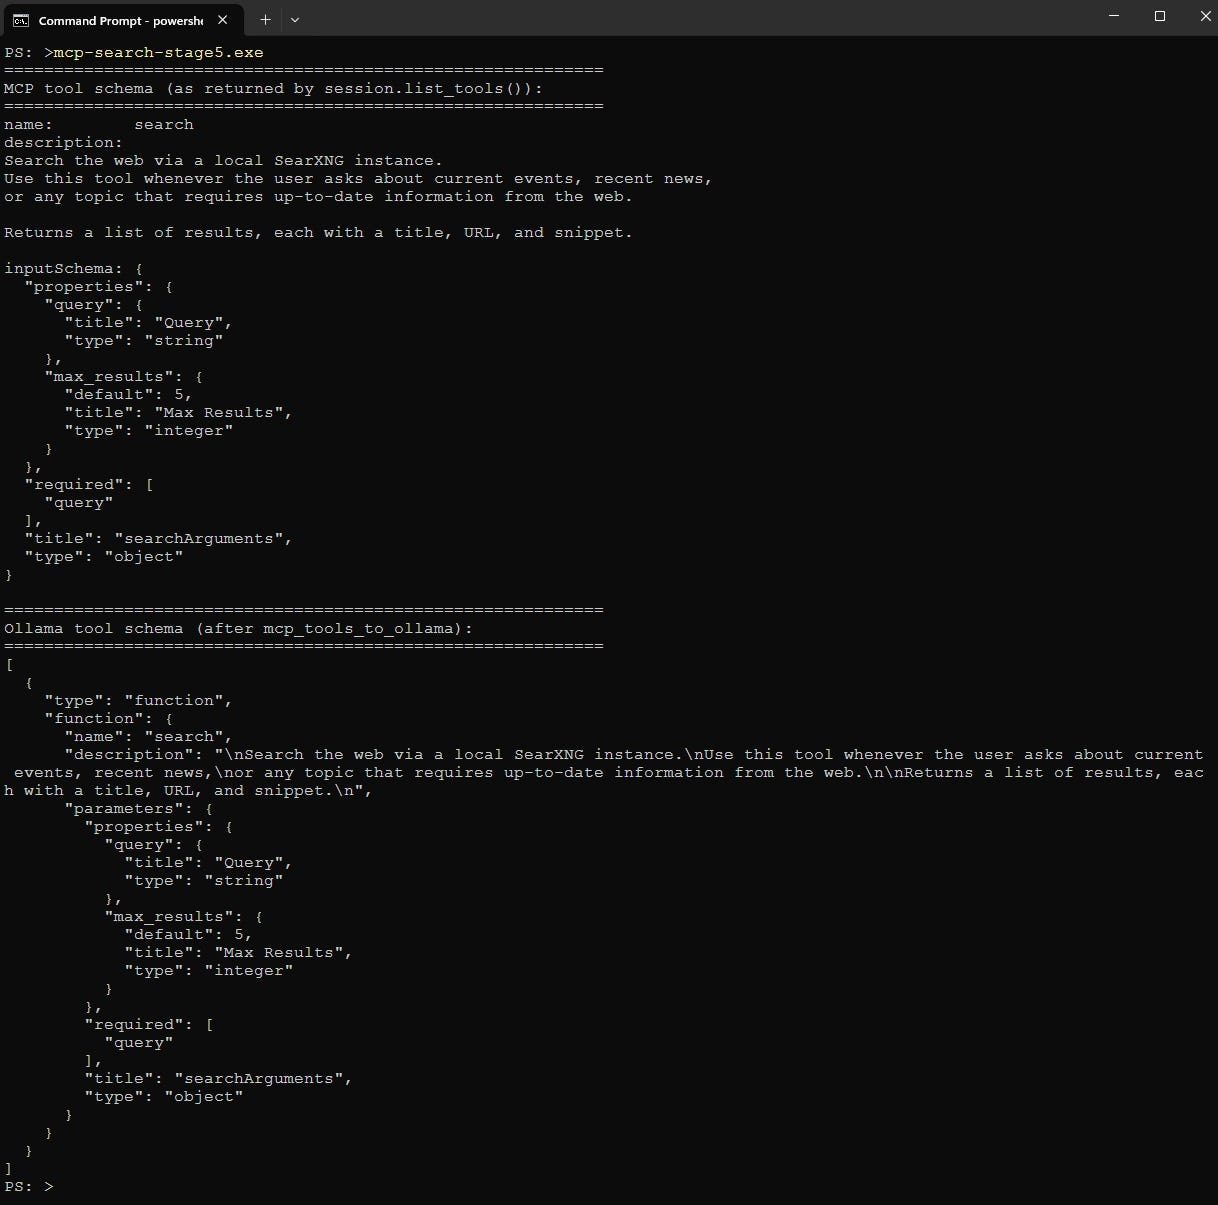
Screenshot of Powershell running the stage 5 MCP search executable
Stage 6: Routing tool calls back to the right server
Now we put it together. When the model decides to call a tool, we need to:
- Look up which MCP server owns the tool.
- Call the tool via that server’s
ClientSession. - Append the result to the message list as a
'tool'role message. - Call the model again so it can produce a final answer.
For now we only have one server, so step 1 is trivial: it is always agent.mcp_session. We will generalize it in Stage 7.
The new handle_tools is async, because the MCP call_tool is async:
class Agent:
    # ... __init__, connect, close, save_history as before ...

    async def handle_tools(self, tool_calls) -> dict:
        for tool in tool_calls:
            name = tool.function.name
            args = tool.function.arguments or {}
            try:
                result = await self.mcp_session.call_tool(name, args)
                # MCP results come as a list of content blocks; collect their text.
                text = ""
                for block in result.content:
                    if hasattr(block, "text"):
                        text += block.text
            except Exception as e:
                text = f"Tool error: {e}"
            if len(text) > 4000:
                text = text[:1000] + "\n...[TRUNCATED]...\n" + text[-1000:]
            self.messages.append({"role": "tool", "content": text})
        resp = ollama.chat(
            model=MODEL_NAME, messages=self.messages, tools=self.ollama_tools,
        )
        return {"role": "assistant", "content": resp["message"]["content"]}
Here is a step-by-step description:
The call_tool call:
self.mcp_session.call_tool(name, args)sends a request over the stdio pipe and waits for the response. The arguments come from the model exactly as it produced them. So, if the model invented a field, the MCP server will reject it.
The result handling:
- MCP responses are not just strings; they are a list of “content blocks”, which can be text, images, or embedded resources. For a search tool, all of them are text, so we concatenate the
.textattributes. Thehasattrcheck is defensive: if a future tool returns an image, we just skip it for now.
The error handling:
- If anything goes wrong (server died, tool not found, schema mismatch), we catch the exception and write the error message back as the tool result. The model sees this and usually does something sensible like apologizing or trying a different query. This is much better than crashing the agent.
The truncation:
- Same 4000-character truncation we used in Part 1. Search results can be long, especially if the model asks for many of them.
The follow-up call:
- After all the tool results are in, we call the model again with the updated message list. The model now has the search results in its context and produces a final answer.
The full chat loop looks like this:
async def _main():
    agent = Agent()
    try:
        await agent.connect("mcp-search-stage6", [])
        agent.ollama_tools = mcp_tools_to_ollama(agent.mcp_tools)

        print(f"--- Agent session: {agent.session_id} ---")
        print("Type 'quit' to exit.\n")

        while True:
            user_input = input("You: ").strip()
            if not user_input or user_input.lower() in ("quit", "exit"):
                break

            agent.messages.append({"role": "user", "content": user_input})

            resp = ollama.chat(
                model=MODEL_NAME,
                messages=agent.messages,
                tools=agent.ollama_tools,
            )
            msg = resp["message"]

            if hasattr(msg, "tool_calls") and msg.tool_calls:
                agent.messages.append({"role": "assistant", "tool_calls": msg.tool_calls})
                final = await agent.handle_tools(msg.tool_calls)
                print(f"Assistant: {final['content']}\n")
                agent.messages.append(final)
            else:
                print(f"Assistant: {msg.content}\n")
                agent.messages.append({"role": "assistant", "content": msg.content})

            agent.save_history()
    finally:
        await agent.close()
So, with this in place, you can run mcp-search-stage6 and ask the agent something like "When did freepik change its name into magnific?" (because this happened recently). The model will figure out that it needs to search, call the search tool via MCP, get the results back from SearXNG, and produce a coherent answer. It is, frankly, a nice moment when it works.
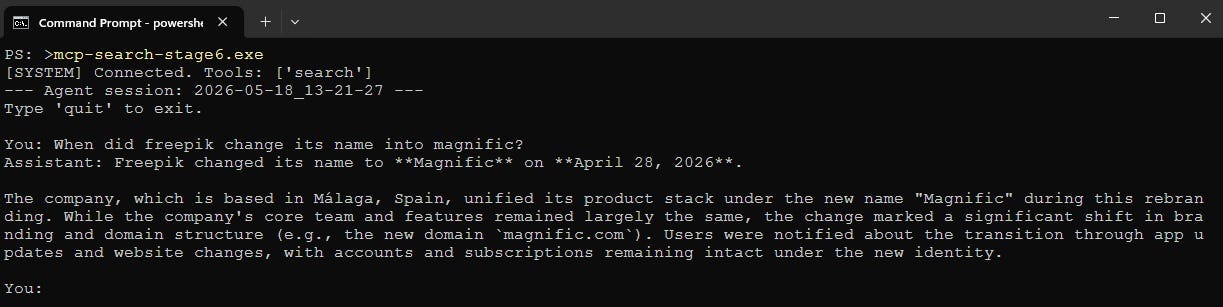
Screenshot of Powershell running the stage 6 MCP search executable, showing a successful online search
Making the agent actually use the tools
In practice, “when it works” is doing a lot of heavy lifting in that sentence. Local LLMs are inconsistent about tool use. The model sees a question, decides whether to call a tool, and the decision is not always the right one. Sometimes it answers from its own (possibly stale) memory when it should have searched. Sometimes it generates malformed tool arguments. Sometimes it just ignores the tool altogether.
So, before we add a second MCP server in Stage 7, let us look at a tweak that significantly improves tool-calling reliability for local models.
The agent currently has no system prompt at all. So, the model decides about tools entirely on its own, reading only the tool descriptions and the user message. A short, explicit system prompt helps a lot. Add this at module level:
SYSTEM_PROMPT = """You are an assistant with access to a web search tool.
For any question about current events, recent news, specific people,
recent product releases, prices, or anything that may have changed
since your training data, you MUST use the search tool. Do not guess
from memory.
For general knowledge questions that are clearly timeless (math,
definitions, syntax, well-known historical facts), answer directly
without using a tool."""
A few things to note:
- The MUST framing is deliberate. The model reads this as a hard constraint, not a soft suggestion. So, vague language like “you should use the tool when appropriate” gets ignored, while “you MUST use the tool for X” actually moves the needle.
- The list of triggers is concrete. Apparently, models pick up on examples better than abstract criteria. So, “current events, prices, releases” is more effective than “anything time-sensitive”.
- The list of non-triggers is also there. Without it, you get the opposite problem: the agent calls the search tool for “what is 2+2”, which wastes time and looks silly.
We do not want to store the system prompt inside agent.messages, because then it would be persisted to the history file and become awkward to tweak between runs. So, we add a method that builds the message list on the fly:
class Agent:
    # ... other methods ...

    def build_messages_for_model(self) -> list[dict[str, Any]]:
        return [{"role": "system", "content": SYSTEM_PROMPT}] + self.messages
And then we replace every messages=agent.messages and messages=self.messages in the ollama.chat calls with the builder version:
resp = ollama.chat(
    model=MODEL_NAME,
    messages=agent.build_messages_for_model(),
    tools=agent.ollama_tools,
)
This is the same pattern Part 2 used to inject the active skill as a system message. So, if you have followed the series, this should feel familiar.
Stage 7: Multiple MCP servers with name prefixing
One MCP server is useful. Multiple is where the architectural payoff actually shows up. So, in this final stage we extend the agent to connect to several servers at once.
The main problem is name collisions. If you have two MCP servers and they both expose a tool called search, the agent has no way to tell them apart, and Ollama definitely does not. So, we prefix every tool name with its server name when we register it, and strip the prefix when we route the call back.
The Agent changes in three places. First, the connection state becomes a dict instead of a single field:
class Agent:
    def __init__(self, session_id: str | None = None):
        # ... as before ...
        self.mcp_sessions: dict[str, ClientSession] = {}
        self.mcp_tools_by_server: dict[str, list[Any]] = {}
        self._tool_to_server: dict[str, str] = {}
Second, connect takes a server name and stores the session under it:
async def connect(self, name: str, command: str, args: list[str]):
    params = StdioServerParameters(command=command, args=args)
    read, write = await self._exit_stack.enter_async_context(stdio_client(params))
    session = await self._exit_stack.enter_async_context(ClientSession(read, write))
    await session.initialize()

    tools = (await session.list_tools()).tools
    self.mcp_sessions[name] = session
    self.mcp_tools_by_server[name] = tools
    for t in tools:
        prefixed = f"{name}_{t.name}"
        self._tool_to_server[prefixed] = name
    print(f"[SYSTEM] Connected to '{name}'. Tools: {[t.name for t in tools]}")
Third, the Ollama-format adapter applies the prefix:
def mcp_tools_to_ollama(agent: "Agent") -> list[dict]:
    out = []
    for server_name, tools in agent.mcp_tools_by_server.items():
        for tool in tools:
            out.append({
                "type": "function",
                "function": {
                    "name": f"{server_name}_{tool.name}",
                    "description": tool.description or "",
                    "parameters": tool.inputSchema,
                },
            })
    return out
A few things to note:
- The prefix is
<server_name>_<tool_name>. Sosearch-server'ssearchtool becomessearch-server_searchfrom the model's perspective. Some models do not love hyphens in tool names; if you hit issues, swap the underscores for something else, or normalize server names to use underscores only. - The
_tool_to_serverdict is the routing table. The prefixed name is the key; the unprefixed server name is the value. So, given a tool call, we know which session to send it to. - We pass the agent itself into the adapter, which is a bit unusual. The reason is that the prefixing logic now needs access to multiple agent fields at once, and pulling them all out into arguments makes the call site ugly.
Finally, handle_tools does the lookup and strips the prefix before calling:
async def handle_tools(self, tool_calls) -> dict:
    for tool in tool_calls:
        prefixed_name = tool.function.name
        args = tool.function.arguments or {}
        server_name = self._tool_to_server.get(prefixed_name)
        if not server_name:
            text = f"Unknown tool: {prefixed_name}"
        else:
            real_name = prefixed_name[len(server_name) + 1:]  # +1 for the underscore
            session = self.mcp_sessions[server_name]
            try:
                result = await session.call_tool(real_name, args)
                text = ""
                for block in result.content:
                    if hasattr(block, "text"):
                        text += block.text
            except Exception as e:
                text = f"Tool error on {server_name}: {e}"
        if len(text) > 4000:
            text = text[:1000] + "\n...[TRUNCATED]...\n" + text[-1000:]
        self.messages.append({"role": "tool", "content": text})
    resp = ollama.chat(
        model=MODEL_NAME,
        messages=self.build_messages_for_model(),
        tools=self.ollama_tools,
    )
    return {"role": "assistant", "content": resp["message"]["content"]}
To demonstrate this, I add a second toy MCP server that exposes a get_current_datetime tool. The code is the same shape as Stage 3 but with one tiny tool. So, the startup section of _main becomes:
await agent.connect("search-server", "mcp-search-stage3", [])
await agent.connect("clock-server", "mcp-clock", [])
agent.ollama_tools = mcp_tools_to_ollama(agent)
And now the agent can field both “what time is it?” and “what happened in the news today?” without any code change in the Agent class itself. Adding a third server is just one more agent.connect line.
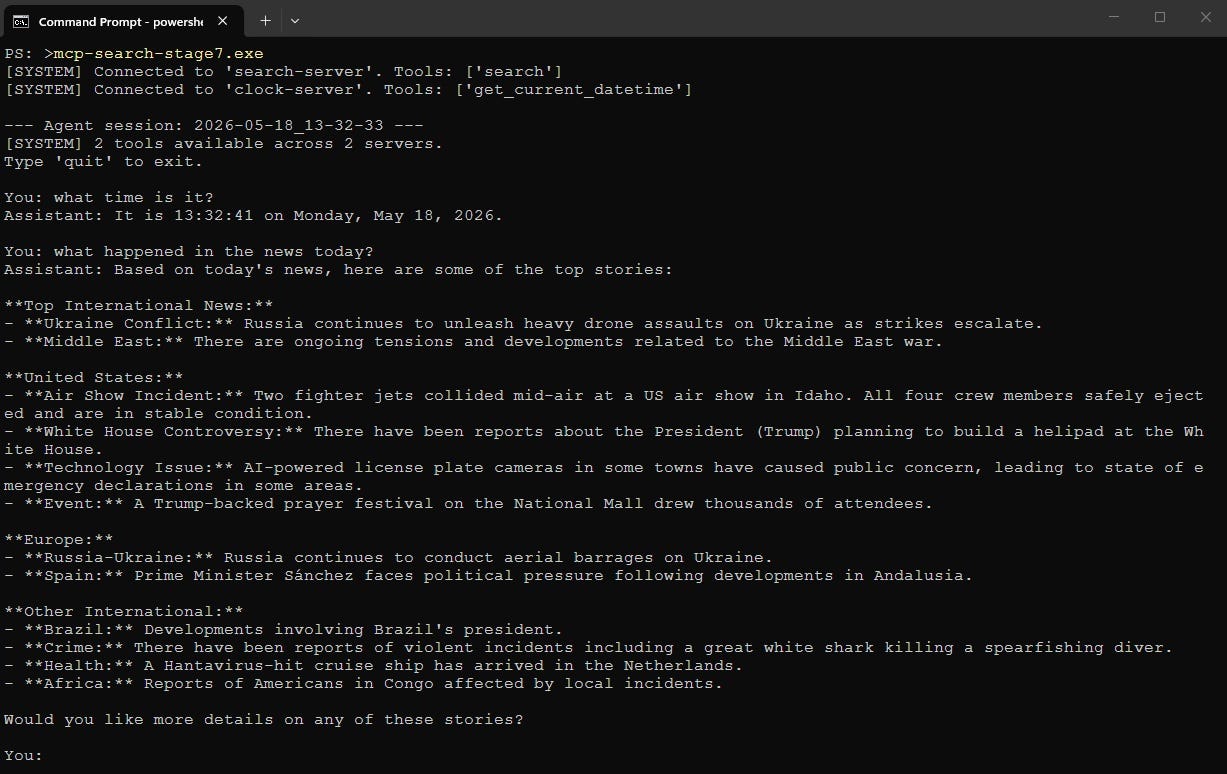
Screenshot of Powershell running the stage 7 MCP search executable, showing the date and a successful online search
So, with this in place, the agent is now genuinely extensible. Any MCP server that follows the protocol can be plugged in. The existing MCP ecosystem includes servers for filesystems, GitHub, Git, calendars, calculators, and many more, all of which become available to your agent the moment you connect to them.
Putting it all together
Putting all of this together, we end up with a small Python package containing seven stages: one for SearXNG setup, two for the MCP server, and four for the agent’s MCP integration. The total size of the final stage is around 220 lines of Python, plus the docker-compose for SearXNG.
import asyncio
import json
import os
from contextlib import AsyncExitStack
from datetime import datetime
from typing import Any

import ollama
from mcp import ClientSession, StdioServerParameters
from mcp.client.stdio import stdio_client

MODEL_NAME = "qwen3.5:9b"
HISTORY_DIR = "history"
if not os.path.exists(HISTORY_DIR):
    os.makedirs(HISTORY_DIR)

SYSTEM_PROMPT = """You are an assistant with access to a web search tool.
For any question about current events, recent news, specific people,
recent product releases, prices, or anything that may have changed
since your training data, you MUST use the search tool. Do not guess
from memory.
For general knowledge questions that are clearly timeless (math,
definitions, syntax, well-known historical facts), answer directly
without using a tool."""

class Agent:
    def __init__(self, session_id: str | None = None):
        self.session_id = session_id or datetime.now().strftime("%Y-%m-%d_%H-%M-%S")
        self.history_file = os.path.join(HISTORY_DIR, f"{self.session_id}.json")
        self.messages: list[dict[str, Any]] = []
        self.mcp_sessions: dict[str, ClientSession] = {}
        self.mcp_tools_by_server: dict[str, list[Any]] = {}
        self._tool_to_server: dict[str, str] = {}
        self.ollama_tools: list[dict] = []
        self._exit_stack = AsyncExitStack()

    async def connect(self, name: str, command: str, args: list[str]):
        """Spawn an MCP server and register its tools under `name`."""
        params = StdioServerParameters(command=command, args=args)
        read, write = await self._exit_stack.enter_async_context(stdio_client(params))
        session = await self._exit_stack.enter_async_context(ClientSession(read, write))
        await session.initialize()

        tools = (await session.list_tools()).tools
        self.mcp_sessions[name] = session
        self.mcp_tools_by_server[name] = tools

        for t in tools:
            prefixed = f"{name}_{t.name}"
            self._tool_to_server[prefixed] = name

        print(f"[SYSTEM] Connected to '{name}'. Tools: {[t.name for t in tools]}")

    def rebuild_ollama_tools(self):
        """Recompute `ollama_tools` from the current set of MCP servers."""
        out = []
        for server_name, tools in self.mcp_tools_by_server.items():
            for tool in tools:
                out.append({
                    "type": "function",
                    "function": {
                        "name": f"{server_name}_{tool.name}",
                        "description": tool.description or "",
                        "parameters": tool.inputSchema,
                    },
                })
        self.ollama_tools = out

    def build_messages_for_model(self) -> list[dict[str, Any]]:
        return [{"role": "system", "content": SYSTEM_PROMPT}] + self.messages

    async def close(self):
        await self._exit_stack.aclose()

    def save_history(self):
        with open(self.history_file, "w", encoding="utf-8") as f:
            json.dump(self.messages, f, indent=4, default=str)

    async def handle_tools(self, tool_calls) -> dict:
        for tool in tool_calls:
            prefixed_name = tool.function.name
            args = tool.function.arguments or {}

            server_name = self._tool_to_server.get(prefixed_name)
            if not server_name:
                text = f"Unknown tool: {prefixed_name}"
            else:
                real_name = prefixed_name[len(server_name) + 1:]
                session = self.mcp_sessions[server_name]
                try:
                    result = await session.call_tool(real_name, args)
                    text = ""
                    for block in result.content:
                        if hasattr(block, "text"):
                            text += block.text
                except Exception as e:
                    text = f"Tool error on {server_name}: {e}"

            if len(text) > 4000:
                text = text[:1000] + "\n...[TRUNCATED]...\n" + text[-1000:]
            self.messages.append({"role": "tool", "content": text})

        resp = ollama.chat(
            model=MODEL_NAME,
            messages=self.build_messages_for_model(),
            tools=self.ollama_tools,
        )
        return {"role": "assistant", "content": resp["message"]["content"]}

async def _main():
    agent = Agent()
    try:
        # Connect to two MCP servers. Add more lines here to plug in more.
        await agent.connect("search-server", "mcp-search-stage3", [])
        await agent.connect("clock-server", "mcp-clock", [])
        agent.rebuild_ollama_tools()

        print(f"\n--- Agent session: {agent.session_id} ---")
        print(f"[SYSTEM] {len(agent.ollama_tools)} tools available across "
              f"{len(agent.mcp_sessions)} servers.")
        print("Type 'quit' to exit.\n")

        while True:
            try:
                user_input = input("You: ").strip()
            except (EOFError, KeyboardInterrupt):
                break
            if not user_input or user_input.lower() in ("quit", "exit"):
                break

            agent.messages.append({"role": "user", "content": user_input})

            resp = ollama.chat(
                model=MODEL_NAME,
                messages=agent.build_messages_for_model(),
                tools=agent.ollama_tools,
            )
            msg = resp["message"]

            if hasattr(msg, "tool_calls") and msg.tool_calls:
                agent.messages.append({
                    "role": "assistant", "tool_calls": msg.tool_calls,
                })
                final = await agent.handle_tools(msg.tool_calls)
                print(f"Assistant: {final['content']}\n")
                agent.messages.append(final)
            else:
                print(f"Assistant: {msg.content}\n")
                agent.messages.append({"role": "assistant", "content": msg.content})

            agent.save_history()
    finally:
        await agent.close()

def chat():
    asyncio.run(_main())

if __name__ == "__main__":
    chat()
What we have:
- A local SearXNG container with a working JSON API.
- An MCP server (FastMCP) that wraps SearXNG and exposes a
searchtool. - An MCP-aware Agent class that spawns MCP servers as subprocesses, discovers their tools, and routes tool calls back over stdio.
- A clean adapter that converts MCP tool schemas into Ollama’s tool format.
- Name prefixing so multiple MCP servers can coexist without colliding.
There is plenty of room to extend this. For example: connecting to community MCP servers like the filesystem server so the agent can read and write files via MCP instead of via the hardcoded tool in Part 1, adding a real config file so server endpoints are not hardcoded in _main, or moving from stdio to Streamable HTTP transport so the MCP servers can run on a different machine.
For me, the value of this stage is that the agent stopped being a closed system. Every tool used to be a line of Python in main.py. Now every tool is an external service that the agent discovers at startup. So, the agent can grow without growing the agent itself.
References
- The full code: jfjensen/local-LLM-agent-mcp-search
- MCP Python SDK and FastMCP quickstart
- SearXNG documentation and the Search API reference
- Ollama Python library
- searxng-docker, the upstream docker setup
- Part 1 of this series: *Build Your Own Claude Code in 250 Lines of Python*
- Part 2 of this series: *Build Your Own Claude Code Web UI in 280 Lines of Python*

This story is published on Generative AI. Connect with us on LinkedIn and follow Zeniteq to stay in the loop with the latest AI stories.
Subscribe to our newsletter and YouTube channel to stay updated with the latest news and updates on generative AI. Let’s shape the future of AI together!

메타데이터
- post_id
- a4eac8bdf5ec
- slug
- build-your-own-local-web-search-agent-in-220-lines-of-python-a4eac8bdf5ec
- url
- https://generativeai.pub/build-your-own-local-web-search-agent-in-220-lines-of-python-a4eac8bdf5ec
- canonical_url
- https://generativeai.pub/build-your-own-local-web-search-agent-in-220-lines-of-python-a4eac8bdf5ec
- author_url
- https://medium.com/@jesfinkjensen
- status
- ok
- fetched_at
- 2026-06-09 15:37:30