Making Edge-to-Edge UI Actually Work in Android with Kotlin
Edge-to-edge UI isn’t just a trend. It’s been quietly creeping into Android’s design language ever since gesture navigation took over. If…
Making Edge-to-Edge UI Actually Work in Android with Kotlin
Edge-to-edge UI isn’t just a trend. It’s been quietly creeping into Android’s design language ever since gesture navigation took over. If your app still stops short at the status bar or avoids drawing behind the navigation bar, it’s starting to look — and feel — dated.
In this post, I’ll walk through the real process of making edge-to-edge work properly, without fighting the system too much. I’ll also share a reusable inset-handling extension that makes layouts behave the way they should on modern devices.Please refer this link to read official docs.
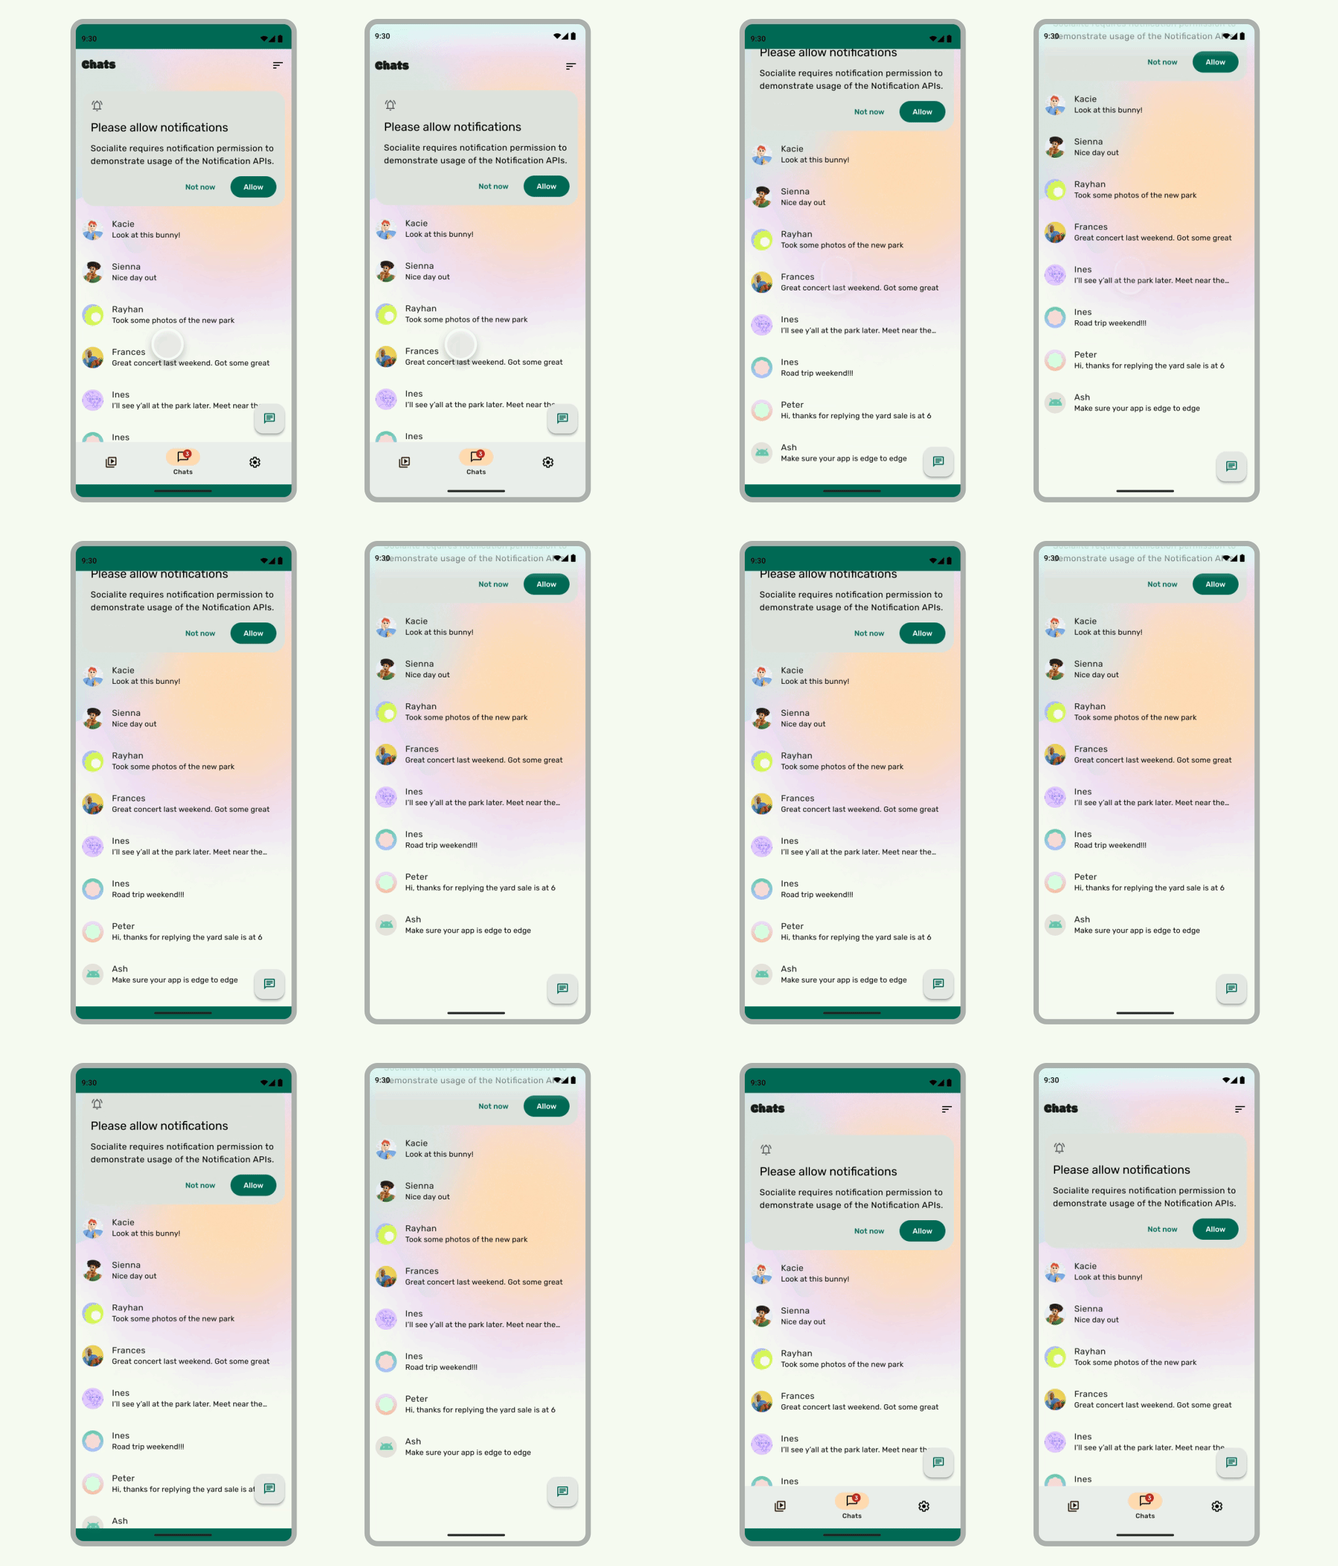
Why Edge to Edge Ui?
A lot of phones have curved edges or no bezels at all. With the old nav buttons gone and gesture navigation the default, there’s no excuse for leaving empty space below your content. Drawing behind the system bars makes your UI feel more immersive — less like a box floating in the middle of the screen.
It also gives you more room, especially on devices with limited vertical height.
First Step: Let Go of fitsSystemWindows
You’ll need to tell the system: “I’ll handle insets myself.”
That means doing this at the start of your activity:
WindowCompat.setDecorFitsSystemWindows(window, false)Or, if you’re on Jetpack Core 1.6.0+, just call:
enableEdgeToEdge(window)This disables automatic padding and lets your layout draw behind the bars. But it also means you have to be smart about not letting things get overlapped.
Controlling Bar Appearance
With content behind the bars, transparency is key. In your theme:
<item name="android:statusBarColor">@android:color/transparent</item>
<item name="android:navigationBarColor">@android:color/transparent</item>
Then, make sure icons are visible (light or dark depending on your background):
WindowInsetsControllerCompat(window, window.decorView).apply {
    isAppearanceLightStatusBars = true
    isAppearanceLightNavigationBars = true
}
Dark text/icons on a white background? Set true. Bright background? Set false. Don’t overthink it—just match your UI.
Here’s the Trick: Handle Insets Yourself
This is the part that usually trips people up. If you don’t apply padding based on the insets, your toolbar or buttons will get pushed under the system bars — and stay there.
I use a simple extension function like this:
fun View.applyEdgeToEdgePadding(
    applyTop: Boolean = true,
    applyBottom: Boolean = true,
    applyStart: Boolean = false,
    applyEnd: Boolean = false
) {
    ViewCompat.setOnApplyWindowInsetsListener(this) { view, insets ->
        val bars = insets.getInsets(WindowInsetsCompat.Type.systemBars())
        view.setPadding(
            if (applyStart) bars.left else view.paddingLeft,
            if (applyTop) bars.top else view.paddingTop,
            if (applyEnd) bars.right else view.paddingRight,
            if (applyBottom) bars.bottom else view.paddingBottom
        )
        insets
    }
    ViewCompat.requestApplyInsets(this)
}
Then just call it:
binding.root.applyEdgeToEdgePadding()If you only want to offset the top (like for a toolbar), pass applyBottom = false.
A Layout Example That Actually Works
Let’s say you have a CoordinatorLayout with a toolbar and a RecyclerView. Here’s what you want:
<androidx.coordinatorlayout.widget.CoordinatorLayout
    android:id="@+id/root"
    android:layout_width="match_parent"
    android:layout_height="match_parent">
<com.google.android.material.appbar.AppBarLayout
        android:layout_width="match_parent"
        android:layout_height="wrap_content"
        android:fitsSystemWindows="true">
        <com.google.android.material.appbar.MaterialToolbar
            android:layout_width="match_parent"
            android:layout_height="?attr/actionBarSize"
            android:background="?attr/colorSurface" />
    </com.google.android.material.appbar.AppBarLayout>
    <androidx.recyclerview.widget.RecyclerView
        android:id="@+id/list"
        android:layout_width="match_parent"
        android:layout_height="match_parent"
        android:clipToPadding="false" />
</androidx.coordinatorlayout.widget.CoordinatorLayout>
Now you just add:
binding.list.applyEdgeToEdgePadding(applyTop = false, applyBottom = true)Watch Out for Gesture Navigation
On Android 10+, that bottom area is sensitive. You probably don’t want to drop buttons there unless you offset them for gesture insets:
ViewCompat.setOnApplyWindowInsetsListener(myButton) { view, insets ->
    val gestureInset = insets.getInsets(WindowInsetsCompat.Type.systemGestures())
    view.setPadding(0, 0, 0, gestureInset.bottom)
    insets
}
That’s especially important for media controls, bottom sheets, etc.
What About Older Devices?
This setup mainly matters from Android 10 (API 29) upward. You can safely check:
if (Build.VERSION.SDK_INT >= Build.VERSION_CODES.Q) {
    WindowCompat.setDecorFitsSystemWindows(window, false)
} else {
    // fallback
}
You don’t need full edge-to-edge on older APIs. Just don’t break anything.
Fullscreen Mode for Media
If you’re building a viewer or video player, try going fully immersive:
WindowCompat.setDecorFitsSystemWindows(window, false)
WindowInsetsControllerCompat(window, window.decorView).apply {
    hide(WindowInsetsCompat.Type.systemBars())
    systemBarsBehavior = WindowInsetsControllerCompat.BEHAVIOR_SHOW_TRANSIENT_BARS_BY_SWIPE
}
It hides everything, but users can swipe bars back in.
Final Thoughts
Edge-to-edge isn’t hard once you understand the rules. The hardest part is knowing what not to do — like using fitsSystemWindows and hoping everything just works.
Modern Android is all about content that flows behind system UI, adjusts intelligently to gestures, and makes full use of the screen. Once you set it up right, it just feels better.
Use the extension, apply insets properly, and test on a device with gesture navigation. That’s it.
메타데이터
- post_id
- 0483bf5d9a98
- slug
- making-edge-to-edge-ui-actually-work-in-android-0483bf5d9a98
- url
- https://medium.com/@esracangungor/making-edge-to-edge-ui-actually-work-in-android-0483bf5d9a98
- canonical_url
- https://medium.com/@esracangungor/making-edge-to-edge-ui-actually-work-in-android-0483bf5d9a98
- author_url
- https://medium.com/@esracangungor
- status
- ok
- fetched_at
- 2026-07-27 05:39:41