Reading CSV Files and Adding Data to a Database Using WSO2 Micro Integrator
In the world of enterprise integration, efficiently managing and transferring data between various systems is a critical task. One common…
Reading CSV Files and Adding Data to a Database Using WSO2 Micro Integrator
In the world of enterprise integration, efficiently managing and transferring data between various systems is a critical task. One common scenario is reading data from CSV files and inserting it into a database. WSO2 Micro Integrator (MI) provides a robust, scalable, and flexible solution for this task, making it easy to automate the process with minimal code.
Prerequisites
To follow this tutorial, you need the following:
- MySQL server installed
- WSO2 Micro Integrator (version 4.4.0) — Download here
- Visual Studio Code (VS Code) installed
- WSO2 Micro Integrator extension in VS Code
Setting Up the MySQL Database
- Install MySQL (if not already installed)
- Create a Database and Table:
CREATE DATABASE Employees;
USE Employees;
CREATE TABLE Employees (
    EmployeeNumber int(11) NOT NULL AUTO_INCREMENT,
    FirstName varchar(255) NOT NULL,
    LastName varchar(255) DEFAULT NULL,
    Email varchar(255) DEFAULT NULL,
    Salary varchar(255) DEFAULT NULL,
    PRIMARY KEY (EmployeeNumber)
);
Creating a WSO2 Micro Integrator Project in VS Code
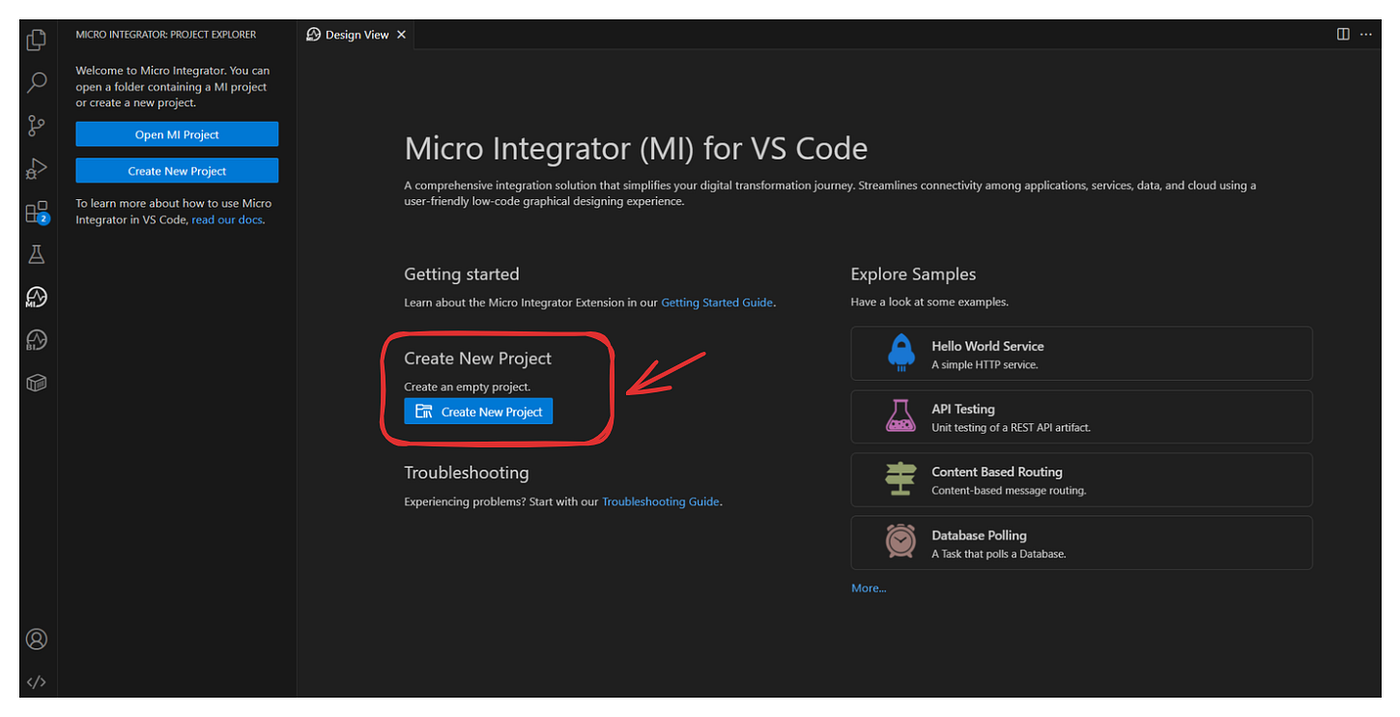
- Open VS Code and the Micro Integrator Extension
- Click Create New Project as shown in the image below.
Step 1: Create a New Project
To get started, you first need to create a new project in your WSO2 Micro Integrator workspace. Follow these steps:
- Enter the Project Name as ReadCSVsaveDB (or any name you prefer).
- Select the Micro Integrator runtime version as 4.4.0.
- Choose the Project Directory (e.g., c:\mi).
- Click Create to initialize the project.
This step sets up the basic project structure, including folders for sequences, endpoints, and data services that we will use later.
Step 2: Creating the File Event Listener
Once the project is created, you will see the Add Artifact pane. To add the event listener for processing CSV files:
- Click Event Integration under the Create an Integration section.
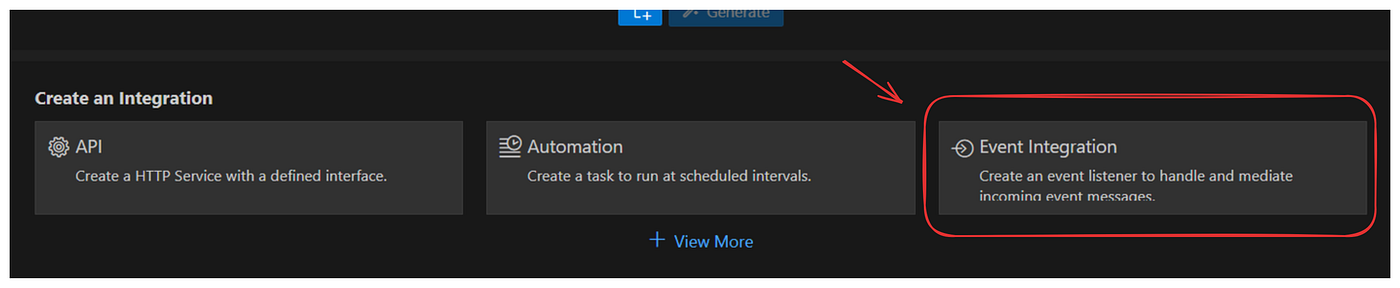
- Select File as the event source.

Step 3: Configuring the File Event Integration
Next, configure the file event listener with the following settings:
Basic Section
- Event Integration Name:
DataFileProcessInboundEP - Automatically Generate Sequence: Keep this option checked.
- Folder Name: Create a folder named in for incoming files.
- Path URL: Set the file path to
file:C:\wso2\mi\samples\file\in(where your CSV files will be stored). - Polling Interval:
1000(to check for new files every second). - Content Type:
text/plain - FileNamePattern:
.*\.csv(to only process CSV files)

Action Section
- Action After Process:
Move - Move After Process: Create a folder named out and set the path to
file:C:\wso2\mi\samples\file\out(for successfully processed files). - Move After Failure: Create another folder named error and set the path to
file:C:\wso2\mi\samples\file\error(for files that failed to process). - Move Timestamp Format:
yyyy.MMMMM.dd hh.mm.ss aaa(to add a timestamp to moved files for better tracking).
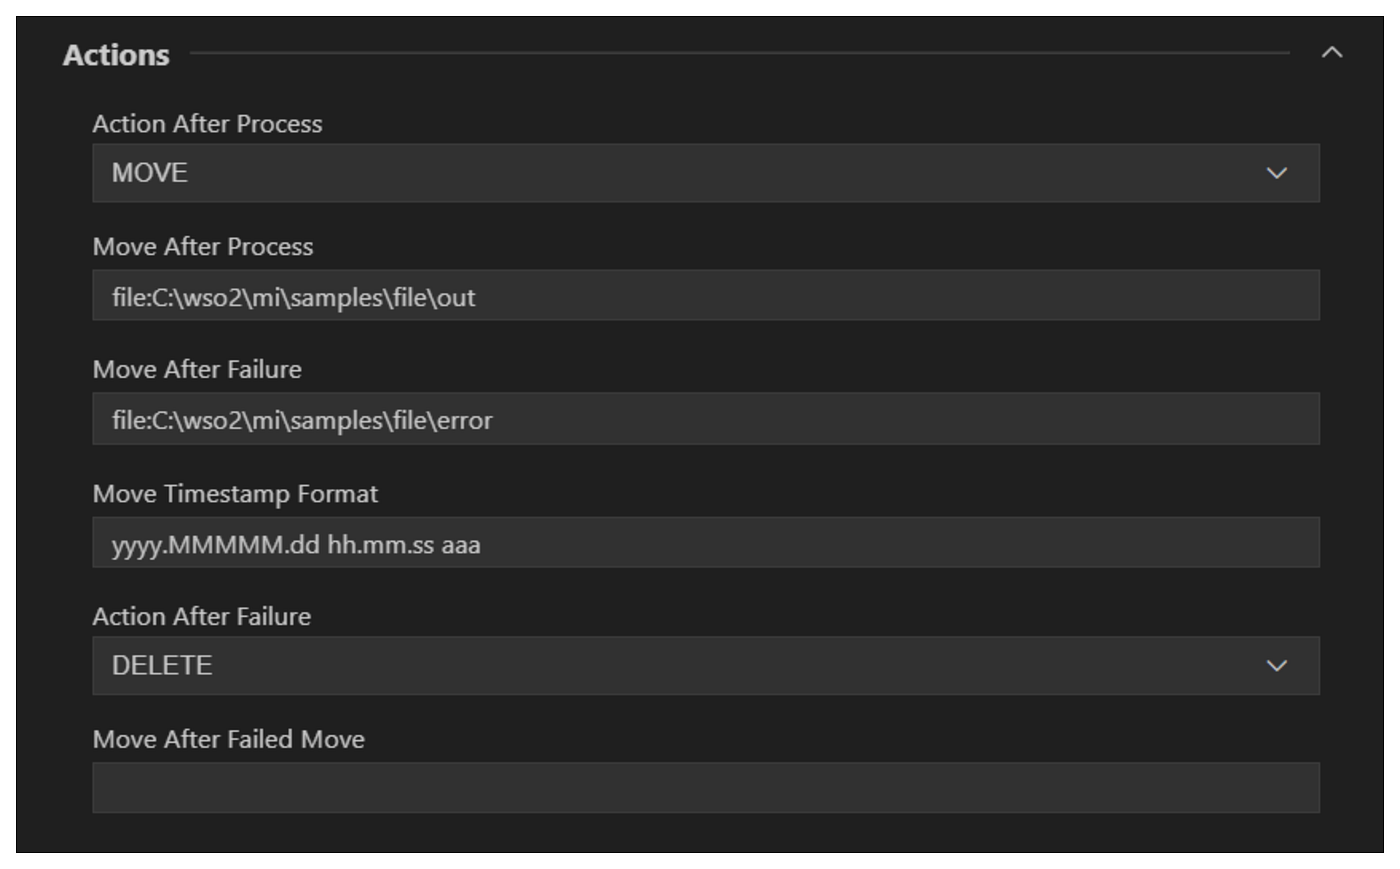
Finally, click the Create button to complete the file event integration setup. This will prepare the listener to process CSV files from the in folder, move successful files to the out folder, and handle errors gracefully by moving failed files to the error folder.
Step 4: Creating the Data Service
To create the data service for saving CSV data to a MySQL database, refer to this article on building data services with WSO2 Micro Integrator and MySQL. This guide provides a step-by-step approach to create a data service with a POST resource for saving data efficiently.

this code like below
<data name="EmployeeDataService" serviceNamespace="" serviceGroup="" transports="http https" disableStreaming="true">
    <description/>
    <config id="EmployeeDatasource">
        <property name="driverClassName">com.mysql.jdbc.Driver</property>
        <property name="url">jdbc:mysql://localhost:3306/Employees</property>
        <property name="username">username</property>
        <property name="password">password</property>
    </config>
    <query id="insert_employees_query" useConfig="EmployeeDatasource">
        <sql>INSERT INTO Employees (FirstName, LastName, Email, Salary) VALUES (?,?,?,?)</sql>
        <param name="FirstName" ordinal="1" paramType="SCALAR" sqlType="STRING" type="IN"/>
        <param name="LastName" ordinal="2" paramType="SCALAR" sqlType="STRING" type="IN"/>
        <param name="Email" ordinal="3" paramType="SCALAR" sqlType="STRING" type="IN"/>
        <param name="Salary" ordinal="4" paramType="SCALAR" sqlType="STRING" type="IN"/>
    </query>
    <resource method="POST" path="employees">
        <call-query href="insert_employees_query">
            <with-param name="FirstName" query-param="FirstName"/>
            <with-param name="LastName" query-param="LastName"/>
            <with-param name="Email" query-param="Email"/>
            <with-param name="Salary" query-param="Salary"/>
        </call-query>
    </resource>

</data>
Step 5: Confirming the Project Structure
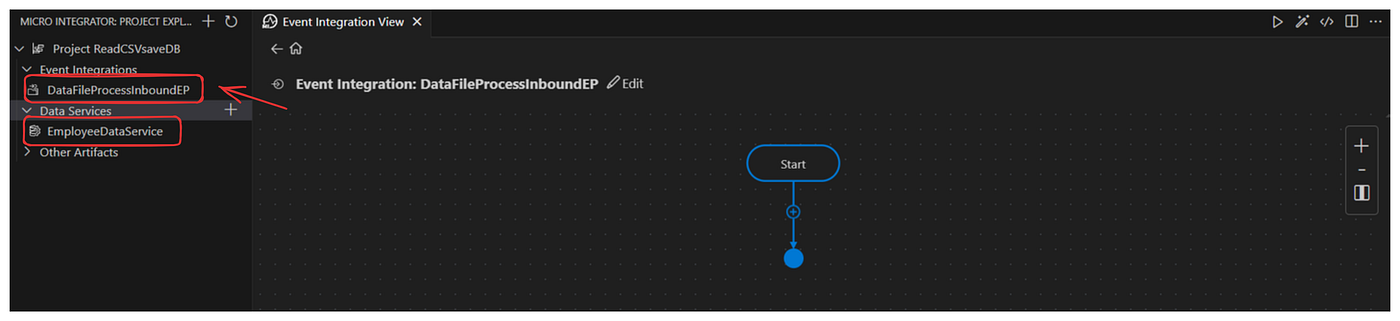
After completing the previous steps, you should see both the DataFileProcessInboundEP event integration and the EmployeeDataService under Data Services in your project explorer, as shown in the image below.
Step 6: Creating the Sequence for Data Processing
Next, we will create the sequence to process the incoming CSV files:
- Click on DataFileProcessInboundEP to start creating the sequence.
- Click the + icon to add a new mediator.
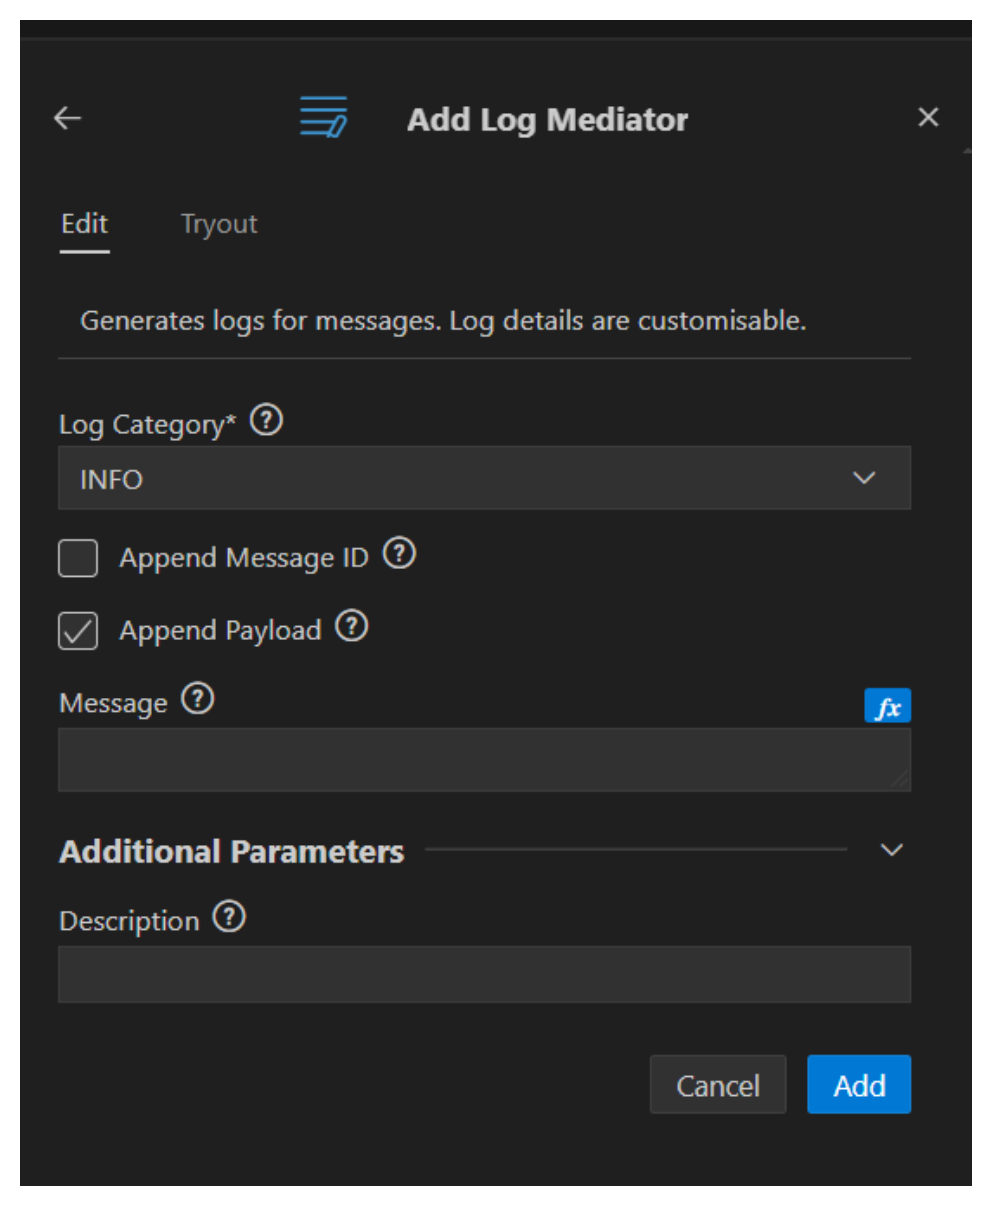
- Add a Log Mediator and check the Append Payload option to log the CSV file data to the console. This will help you verify the raw data before further processing.
-
Click the + icon again to add another mediator.
-
Search for CSV and download the CSVtoXML mediator if not already available.

- Add the CSVtoXML mediator and update its values as follows:
- Description: Convert CSV file to XML (or any custom description you prefer).
- Separator:
,(since our CSV files are comma-separated)
CSV Transformation Settings
- Skip Columns: Set this if you want to skip certain columns in the data.
- Skip Data Rows: Set this if you want to skip specific rows in the data.
XML Output Settings
- Tag Names:
FirstName,LastName,Email,Salary - Root Element Tag:
_postemployees - Group Element Tag:
Employee

- Click Submit to save the configuration.
This will convert the incoming CSV file data to XML, which you can then log using another Log Mediator to verify the transformation before sending it to the database.

Step 7: Call the Data Service
Next, call the data service:
- Click the + icon in the sequence.
- Search for Call Dataservice and select it.

- Under Properties:
- Set Data Service Name to EmployeeDataService (created in Step 4).
- Set Source Type to Body.
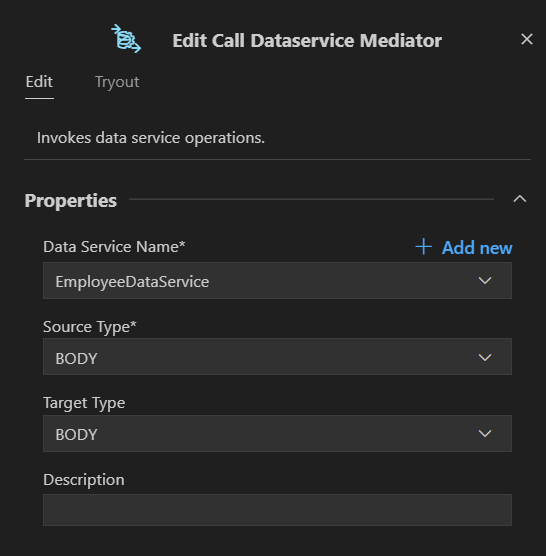
- Click Add to save the configuration.
Step 8: Run and Test the Integration
With the sequence complete, it’s time to run and test the full flow:
- Build and Deploy the Project:
- Click Build in WSO2 Integration Studio.
- Once the build is successful, click Deploy to push the project to the Micro Integrator runtime.
2. Prepare Test Data:
- Create a sample CSV file (
employees.csv) with the following content:
John,Doe,john.doe@example.com,50000
Jane,Smith,jane.smith@example.com,60000
Bob,Johnson,bob.johnson@example.com,55000- Save this file in the in folder (e.g.,
C:\wso2\mi\samples\file\in).
3. Start the Micro Integrator:
- Run the Micro Integrator from the command line or through the Integration Studio.
4. Check Logs for Data Processing:
- Monitor the console logs to verify that the CSV data is being read, converted to XML, and passed to the data service.
- If successful, the CSV data should be stored in the MySQL database.
5. Verify Database Data:
- Open your MySQL database and run a SELECT query to confirm that the data has been correctly saved.
6. Verify File Movement:
- Ensure that the processed file has moved to the out folder and any error files are in the error folder.
Conclusion
Congratulations! You have successfully created a complete integration solution for reading CSV files and saving the data to a MySQL database using WSO2 Micro Integrator. This approach demonstrates the power of WSO2’s integration capabilities, making it an excellent choice for real-time data processing in enterprise systems.
메타데이터
- post_id
- 07b672989c06
- slug
- reading-csv-files-and-adding-data-to-a-database-using-wso2-micro-integrator-07b672989c06
- url
- https://medium.com/@aruna_pb/reading-csv-files-and-adding-data-to-a-database-using-wso2-micro-integrator-07b672989c06
- canonical_url
- https://medium.com/@aruna_pb/reading-csv-files-and-adding-data-to-a-database-using-wso2-micro-integrator-07b672989c06
- author_url
- https://medium.com/@aruna_pb
- status
- ok
- fetched_at
- 2026-07-31 10:12:53