Building a Scalable React Codebase with ESLint, Prettier & Husky
In any collaborative React project, code consistency is usually the first thing to break.
Building a Scalable React Codebase with ESLint, Prettier & Husky
In any collaborative React project, code consistency is usually the first thing to break.
When multiple developers contribute to the same codebase, small differences start creeping in — missing semicolons, inconsistent indentation, different quote styles. None of these are major problems individually, but together they create noisy Git diffs and unnecessary code review comments.
Instead of debating tabs vs spaces in every PR, we can automate these decisions.
A small upfront investment in linting, formatting, and Git hooks saves time every single day. It allows your team to focus on logic and architecture rather than syntax and styling.
Let’s break down how to set this up properly.
The Architecture of Code Quality
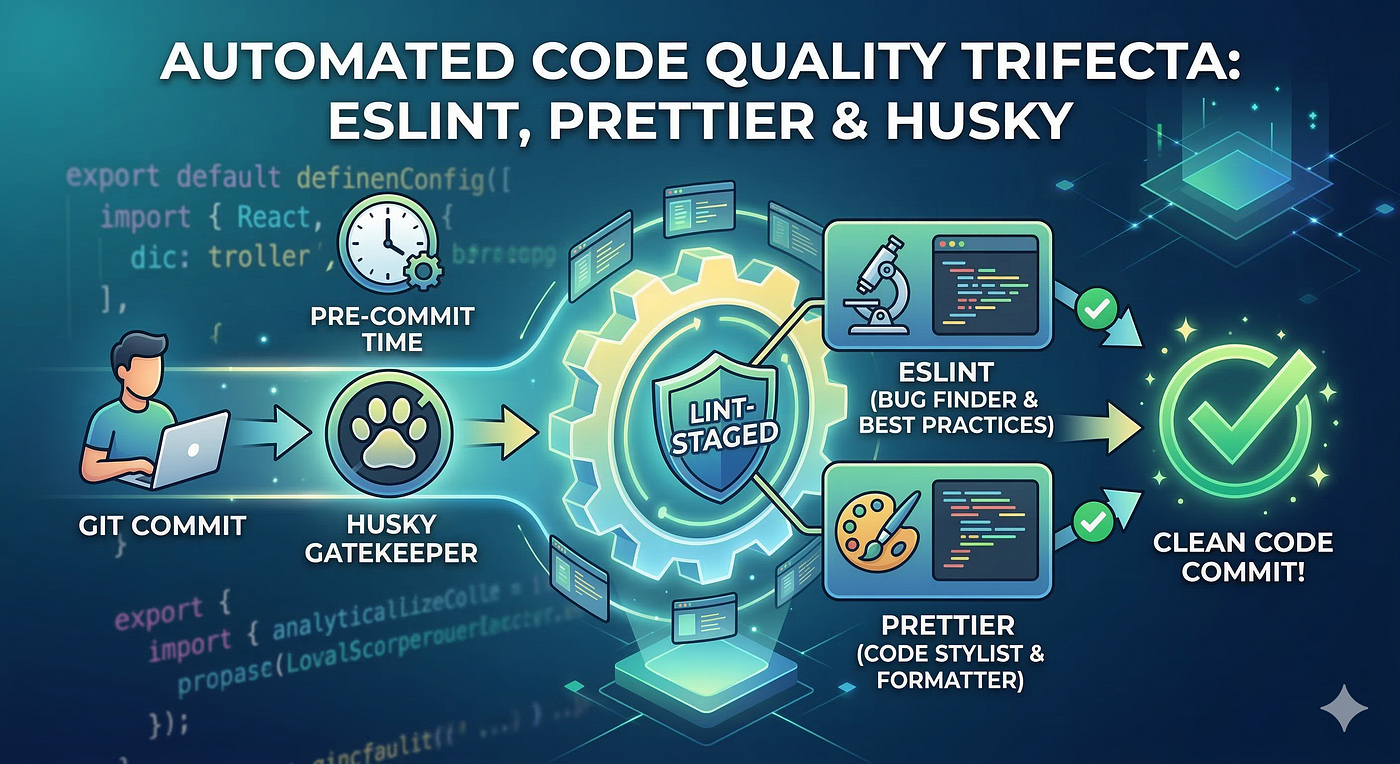
To maintain a clean and consistent codebase, I like to think in terms of three layers:
1) ESLint — The Brain
ESLint analyzes your code for:
- Potential bugs
- Bad patterns
- Security issues
- React best practices
It enforces logic-level correctness.
2) Prettier — The Stylist
Prettier handles:
- Spacing
- Indentation
- Line breaks
- Quotes
- Trailing commas
It removes subjective formatting decisions completely.
3) Husky + lint-staged — The Gatekeepers
These tools ensure:
- No badly formatted code gets committed
- No lint errors sneak into your repository
They automate enforcement at commit time.
1. Initial Setup and Installation
We need the core engines, the React-specific rules, the bridge between ESLint and Prettier, and the automation tools.
Install the Packages
Run the following in your project root:
npm install --save-dev \
  eslint @eslint/js @eslint/json @eslint/markdown @eslint/css \
  eslint-plugin-react eslint-plugin-prettier eslint-config-prettier \
  prettier \
  husky lint-staged
Configure the Automation (package.json)
Update your package.json to include the Husky "prepare" script and the lint-staged configuration.
{
  "scripts": {
    "prepare": "husky install"
  },
  "lint-staged": {
    "*.{js,jsx,css,json,md}": [
      "prettier --write",
      "eslint --fix"
    ]
  }
}
Why this matters: The prepare script ensures that every time a developer runs npm install, Husky is automatically set up on their local machine. lint-staged is critical because it ensures we only lint the files we are currently changing, keeping the process fast even in large apps.
2. Configuring ESLint (The Modern Flat Config)
ESLint recently moved to a “Flat Config” system (eslint.config.mjs). This is more performant and easier to debug than the old .eslintrc files.
Create eslint.config.mjs in your root directory:
JavaScript
import js from "@eslint/js";
import globals from "globals";
import pluginReact from "eslint-plugin-react";
import css from "@eslint/css";
import pluginPrettier from "eslint-plugin-prettier";
import configPrettier from "eslint-config-prettier";
import { defineConfig } from "eslint/config";

export default defineConfig([
  {
    files: ["**/*.{js,mjs,cjs,jsx}"],
    plugins: { js },
    extends: ["js/recommended"],
    languageOptions: { globals: globals.browser }
  },
  // React-specific rules (Hooks, JSX, etc.)
  pluginReact.configs.flat.recommended,

  // Run Prettier as an ESLint rule
  pluginPrettier.configs.recommended,

  // Disable any ESLint rules that would conflict with Prettier
  configPrettier,

  {
    files: ["**/*.css"],
    plugins: { css },
    language: "css/css",
    extends: ["css/recommended"]
  },
]);
Deep Dive: How the layers interact
**eslint-plugin-react**: Checks for React-specific errors, like missing keys in lists or incorrect Hook usage.**eslint-plugin-prettier*: This allows Prettier to run inside* the ESLint process. When you runeslint --fix, it doesn't just fix code logic; it also formats the file.**eslint-config-prettier**: This is essential. It turns off all ESLint rules that are unnecessary or might conflict with Prettier. It ensures there is only "one source of truth" for formatting.
3. Prettier Configuration
Create a .prettierrc file. This is where you define your team's visual identity.
{
  "printWidth": 100,
  "tabWidth": 2,
  "singleQuote": true,
  "trailingComma": "all",
  "jsxSingleQuote": true,
  "endOfLine": "auto"
}
4. Setting up the Git Gatekeeper (Husky)
Now we connect everything to Git. We want to ensure that no developer can commit code unless it passes our quality checks.
Initialize and Link Husky
Run these commands to create the pre-commit hook:
npx husky install
npx husky add .husky/pre-commit "npx lint-staged"
chmod +x .husky/pre-commit
The file .husky/pre-commit should now contain:
#!/bin/sh
. "$(dirname "$0")/_/husky.sh"

npx lint-staged
5. The Workflow in Action: A Real-World Scenario
Once this setup is live, the developer experience transforms from manual checking to “automatic guardrails.” Let’s look at a typical scenario:
The “Before” State
Imagine you are working fast and accidentally leave some “dirty” code in App.jsx:
- You used double quotes instead of single quotes.
- You have an unused variable
const data = 10;. - Your indentation is a mess because you copy-pasted a snippet.
The “Seamless” Commit
When you go to save your work, the automation takes over:
- Stage the file:
git add src/App.jsx - Attempt the commit:
git commit -m "feat: add user dashboard" - The “Gatekeeper” (Husky) wakes up: Husky intercepts the command and triggers
lint-staged. - Auto-Fixing: * Prettier instantly rewrites your double quotes to single quotes and fixes the messy indentation.
- ESLint sees the unused variable. If it’s a “warning,” it might let it pass; if it’s an “error,” it will stop the commit.
The Feedback Loop
Your terminal will show a clean, transparent progress bar:
✔ Preparing lint-staged...
✔ Running tasks for *.jsx...
  ✔ prettier --write
  ✔ eslint --fix
✔ Applying modifications...
✔ Cleaning up temporary files...
[main 7a2b3c] feat: add user dashboard
What if there is a “Hard” Error?
If you have a syntax error (like a missing closing brace }), the commit will fail immediately.
The Benefit: You catch the mistake in 2 seconds on your local machine, rather than waiting 10 minutes for the CI/CD pipeline to fail or, worse, having a teammate find it during a code review.
- For the Developer: You don’t have to worry about formatting. Just write code, and the tool will “clean up” behind you.
- For the Reviewer: You never have to leave a comment saying “please fix indentation” again. You only review the logic.
Summary
By combining ESLint, Prettier, and Husky, you transform code quality from a “manual chore” into an “automated standard.” The result is a codebase that is easier to read, easier to maintain, and significantly more professional.
메타데이터
- post_id
- 07ea4b97de1e
- slug
- building-a-scalable-react-codebase-with-eslint-prettier-husky-07ea4b97de1e
- url
- https://medium.com/@djrajpara/building-a-scalable-react-codebase-with-eslint-prettier-husky-07ea4b97de1e
- canonical_url
- https://medium.com/@djrajpara/building-a-scalable-react-codebase-with-eslint-prettier-husky-07ea4b97de1e
- author_url
- https://medium.com/@djrajpara
- status
- ok
- fetched_at
- 2026-06-12 07:40:50