One Login, Many Sources: OIDC SSO with multiple Identity Providers (KEYCLOAK)
Why multiple OpenID Identity Providers?
One Login, Many Sources: OIDC SSO with multiple Identity Providers (KEYCLOAK)
Why multiple OpenID Identity Providers?
In many architectures, each application (or tenant) wants to keep control over its own identity source. This means they want to authenticate and authorize users through their own OpenID Connect-compliant provider, not some centralized, shared IdP.
By using multiple OpenID providers, we allow each application to:
- Maintain isolation of its identity domain
- Use its own IdP as both authentication and authorization server
- Avoid coupling to a central identity platform or user base
The only requirement is that their IdP must speak OpenID Connect. That’s the beauty of standardization: Keycloak doesn’t care whether it’s Azure AD, Google, or a home-grown OIDC server — as long as it speaks the protocol, it can be plugged in.
This approach enables federated SSO without enforcing identity centralization, while still giving users a unified login entry point.
Key Concepts
- Identity Provider (IdP) : System that authenticates users and holds their session. It owns the user credentials (or use an external datastore like LDAP), manages login policies, MFA, and session lifecycle. Once a user logs in, the IdP issues an ID Token (and optionally an Access Token) that confirms the user’s identity.
- Identity Broker : Middle layer that doesn’t authenticate users directly but delegates that job to external IdPs. It act as Relying Party toward upstrem IdPs, and as an IdP toward application that trust it.The ownership of the user session remains with the upstream IdP. The broker handles only a local session, used to issue its own token and manage access to the relying applications.
- Backchannel logout : This is the secret sauce behind a reliable multi-IdP SSO architecture. Defined in the OpenID Connect Back-Channel Logout 1.0 specification, backchannel logout allows an upstream Identity Provider to inform a relying party or broker (like Keycloak) that a user session has ended — via a direct, back-channel HTTP request, with no user interaction or browser involvement.
- Well-Known OIDC (Discovery URL): An endpoint defined by the OpenID Connect specification that exposes all metadata needed to integrate with an Identity Provider.
Backchannel logout is what keeps distributed SSO honest. No browser hacks, no half-logouts — just clean session termination, end to end.

High-Level Architecture
To demonstrate the full flexibility of OpenID Connect and Keycloak, we’ll use a setup with three Keycloak instances — each playing a distinct role in the identity flow.
- Keycloak Master act as an identity provider (http://idp-master.local:8081).
- Keycloak A acts as an identity broker for application A (http://broker-a.local:8082).
- Keycloak B acts as another identity broker for application B (http://broker-b.local:8083).
Configuring Keycloak Master (IdP)
To configure Keycloak Master correctly, we need two key URLs for each broker (client):
- Redirect URI : This must be where keycloak master will send users back after authentication flow. In this example we will use: http://broker-a.local:8082/ for broker A and http://broker-b.local:8083/ for broker B.
- Backchannel logout URL : Is the endpoint that Keycloak Master will call when user session ends. Following Keycloak Official Documentation, the formati is <schema><URL>/realms/{realm-name}/protocol/openid-connect/logout/backchannel-logout so in our case are:
http://broker-a.local:8082/realms/realmappa/protocol/openid-connect/logout/backchannel-logout
http://broker-b.local:8083/realms/realmappb/protocol/openid-connect/logout/backchannel-logout
Now we can create client.
- Client A (4appA)

and in the same page deactivate Front Channel Logout

Go to the Credentials tab of the client and generate a Client Secret. This secret, together with the Client ID, will be used later to configure the Identity Provider on Keycloak A.
- Client B (4AppB)

and in the same page deactivate Front Channel Logout

Go to the Credentials tab of the client and generate a Client Secret. This secret, together with the Client ID, will be used later to configure the Identity Provider on Keycloak B.
In realm settings get OpenID well known url of master keycloak :

Configuring Keycloak A and B as Identity Brokers
Now that Keycloak Master is ready to act as an OpenID Connect Identity Provider, we can configure Keycloak A and Keycloak B to use it as their upstream IdP.
On each broker instance — http://broker-a.local:8082 and http://broker-b.local:8083 — we assume that a realm already exists and is actively used by the corresponding application.
- Navigate to Identity Providers and create a new provider using OpenID Connect v1.0. (I’m using the generic OIDC option for this example, but in this case, I could also use Keycloak OpenID Connect, since both sides run on Keycloak.)
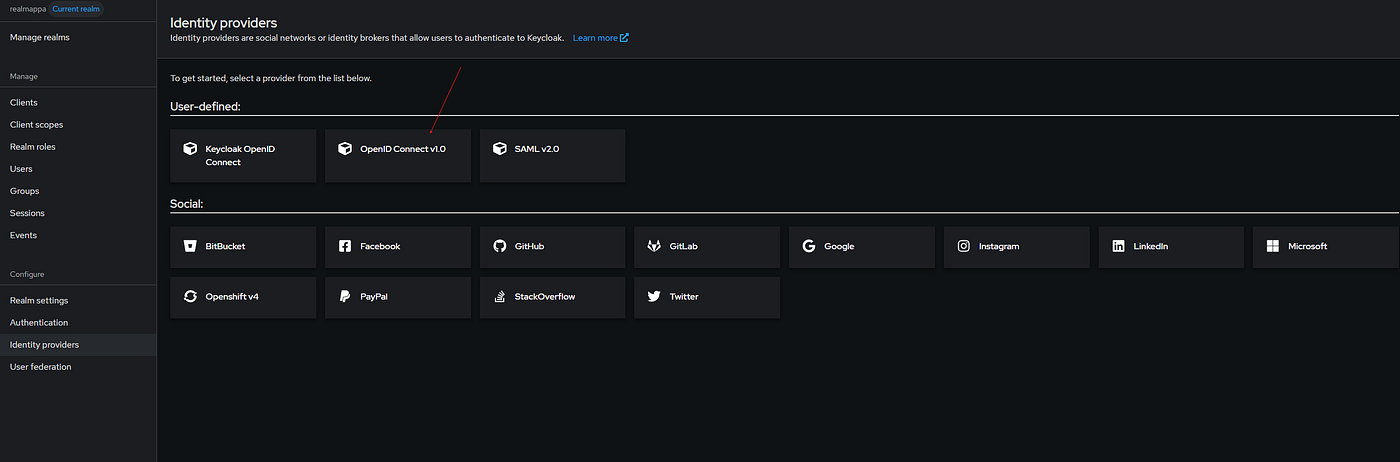
- Fill the Alias, Discovery Endpoint, Client ID, and Client Secret using the values from Keycloak Master . The Client ID and Client Secret should match the credentials of the client that was specifically created on the Master for each application.
This is example for app A

- Navigate to Authentication, click on the flow currently used for the Authorization Code flow, and edit the Identity Provider Redirector step.
In the Default Identity Provider field, enter the alias you set earlier when configuring the Identity Provider (e.g.,
idp-master).

Sequence diagram (login A and then B and logout)
메타데이터
- post_id
- 08cf3cd13c78
- slug
- one-login-many-sources-oidc-sso-with-multiple-identity-providers-keycloak-08cf3cd13c78
- url
- https://medium.com/@raf.lucca/one-login-many-sources-oidc-sso-with-multiple-identity-providers-keycloak-08cf3cd13c78
- canonical_url
- https://medium.com/@raf.lucca/one-login-many-sources-oidc-sso-with-multiple-identity-providers-keycloak-08cf3cd13c78
- author_url
- https://medium.com/@raf.lucca
- status
- ok
- fetched_at
- 2026-06-25 12:15:08