How to access Sharepoint Site using Microsoft Graph?
1. Issue with AppRegNew
How to access Sharepoint Site using Microsoft Graph?
1. Issue with AppRegNew
In January 2024, I encountered an issue with my current SharePoint App — its credential key had expired, leaving me unable to access the SharePoint Site via API.

I tried to use the old method using ACS AppRegNew by this link but it didn’t work. Compounding the problem, I discovered that this old method is set to be deprecated in April 2026. Hence, it’s necessary to seek out an alternative solution to address this issue promptly.
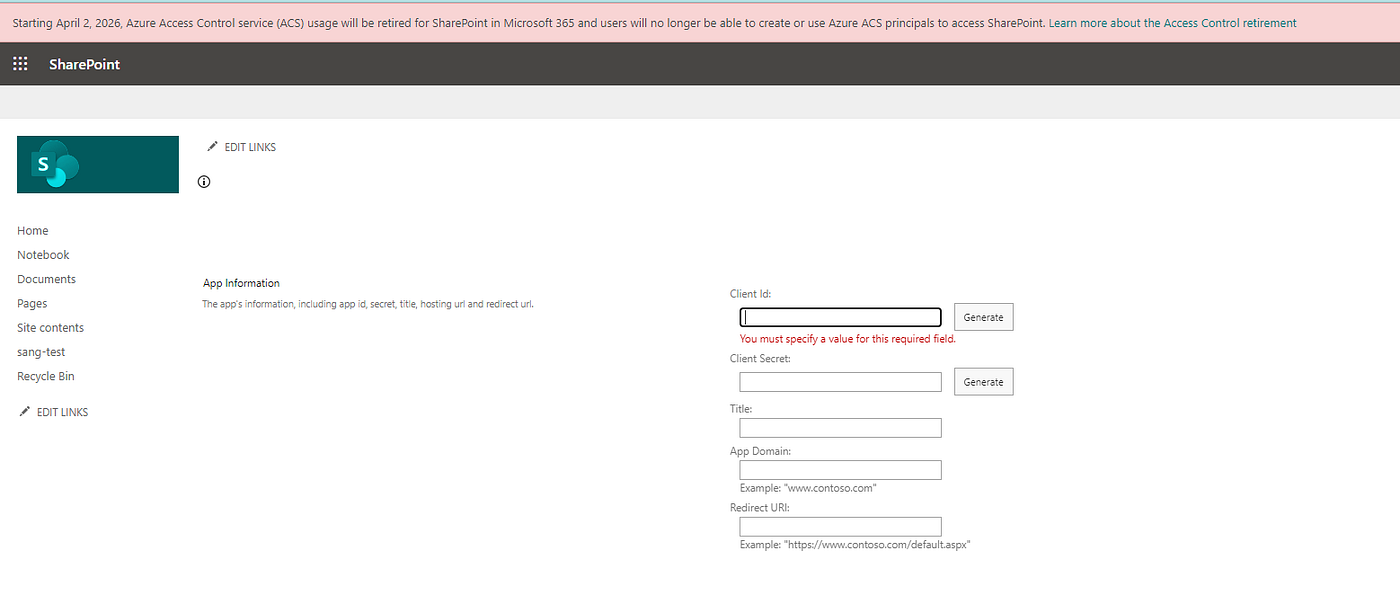
The old code:
<AppPermissionRequests AllowAppOnlyPolicy="true">
<AppPermissionRequest Scope="http://sharepoint/content/SiteCollection" Right="FullControl" />
</AppPermissionRequests>
2. Solution with Microsoft Graph
Seeking a workaround, I’ve found the recommended solution from Microsoft using the new method through Microsoft Graph, accessible via this link. The detailed steps are as follows:
2.1. Create an App for controlling Sharepoint Site
- Access Azure Portal: https://portal.azure.com/#home
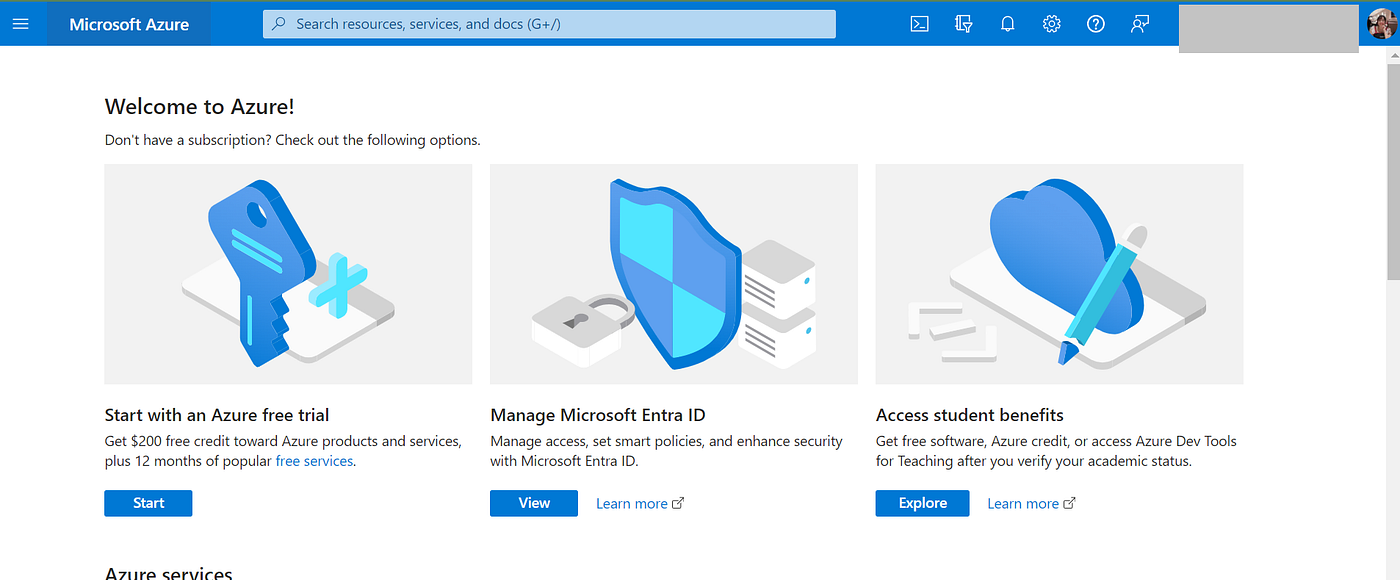
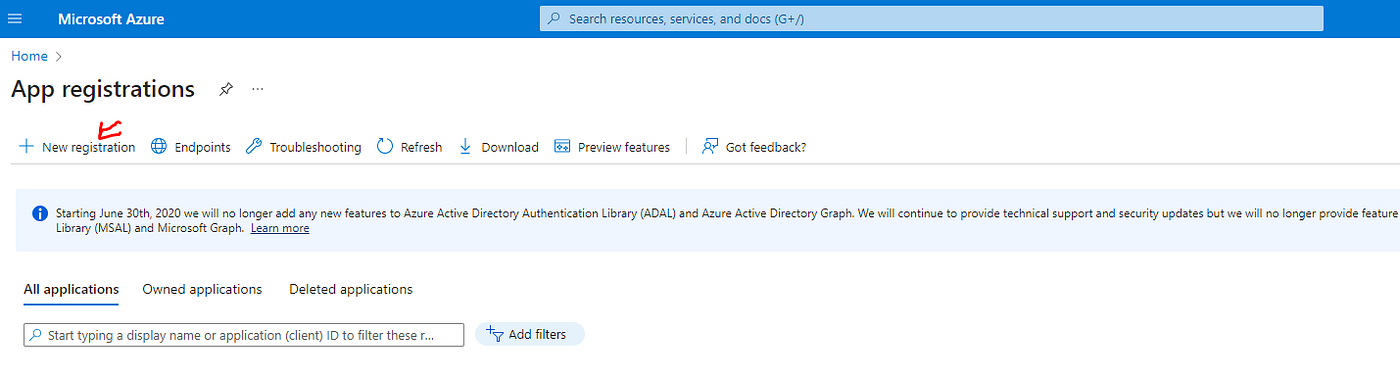
- Select App Registrations → New Registration:
- Select option Single tenant:
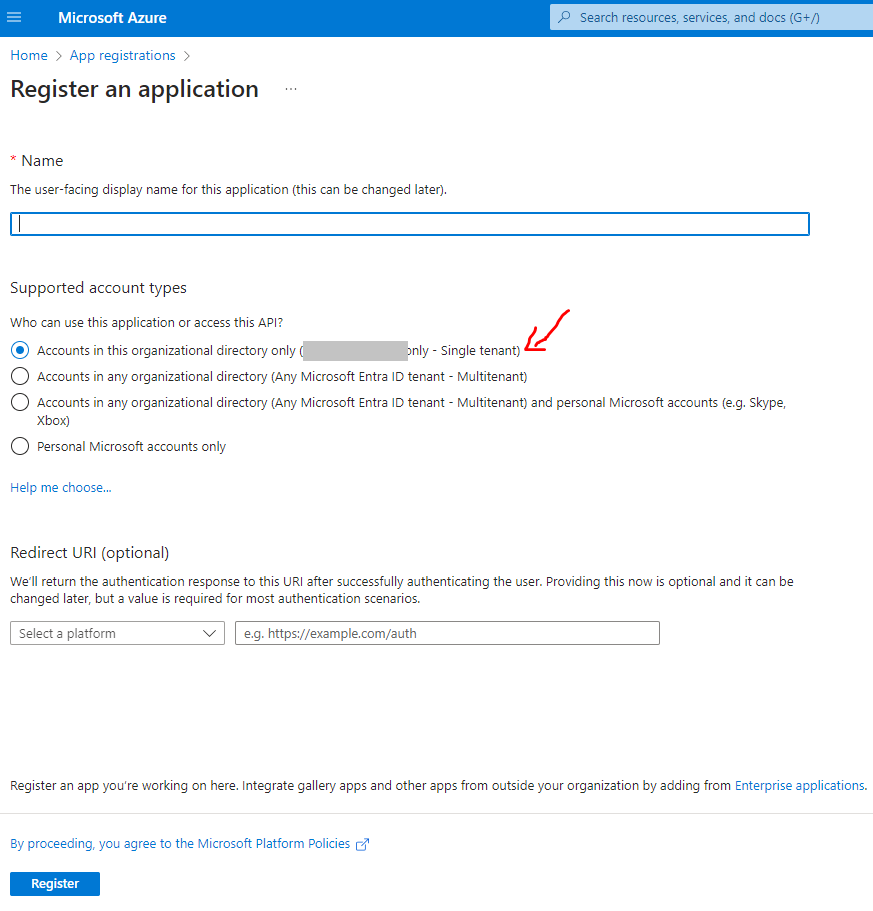
After finishing Registration, your app is created. In my example, it is Test-Sharepoint-Access.
In Overview, we will get tenant_id and client_id as in the image below. These credentials will be used for the Authentication Step.

2.2. Assign Permission for the App to access the Sharepoint Site
2.2.1. API Permission
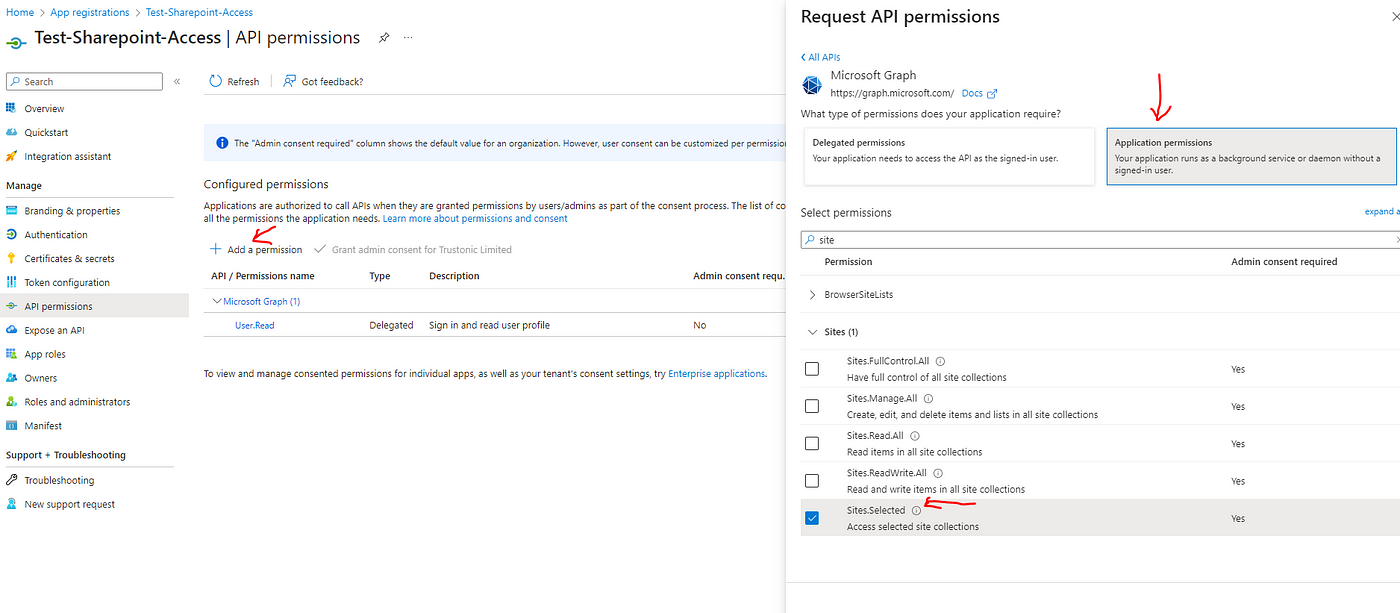
- Microsoft Graph Permission: Add new permission → Microsoft Graph → Application Permission → Site Selected. This option allows app-only access to a specific Sharepoint Site (selected site).
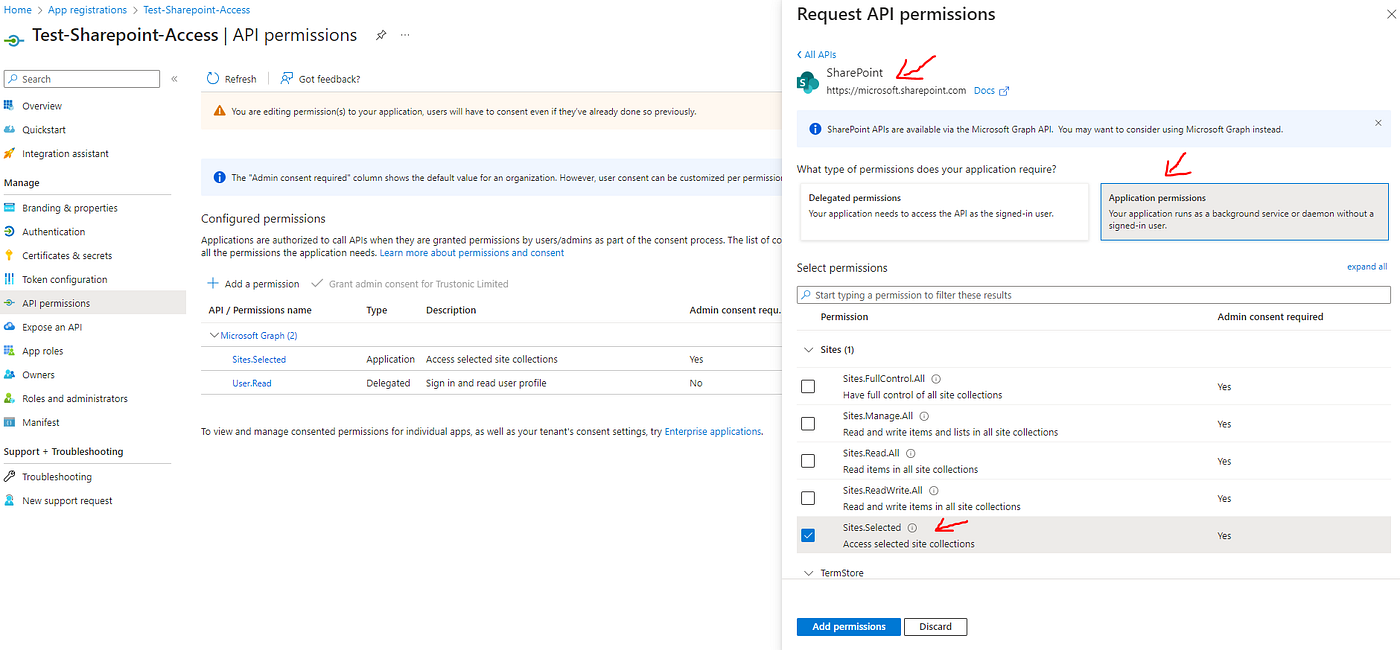
- Sharepoint Online Permission: Add new permission → Sharepoint → Application Permission → Site Selected. This option allows app-only access to a specific Sharepoint Site (selected site).
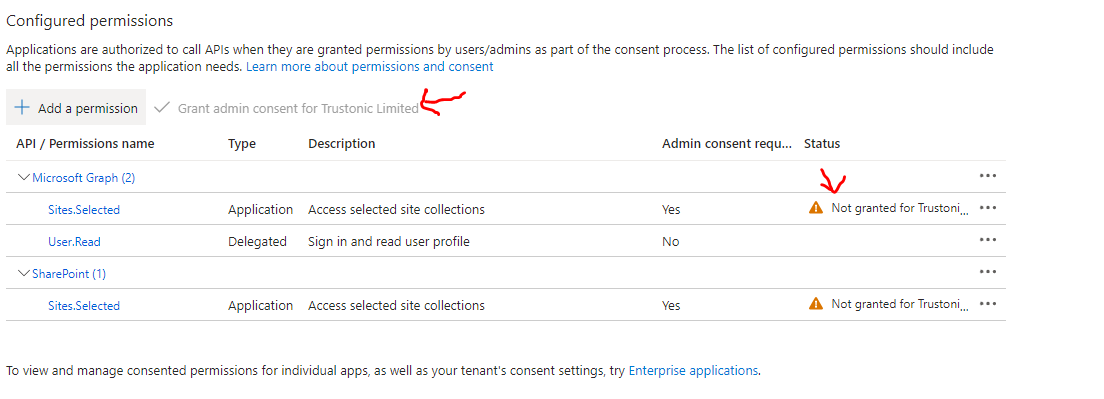
Ask Azure Portal Admin (or IT support) to grant admin consent for your tenant (Your Company Limited) as in the image below. You also can do this by yourself if your account is Microsoft Admin.
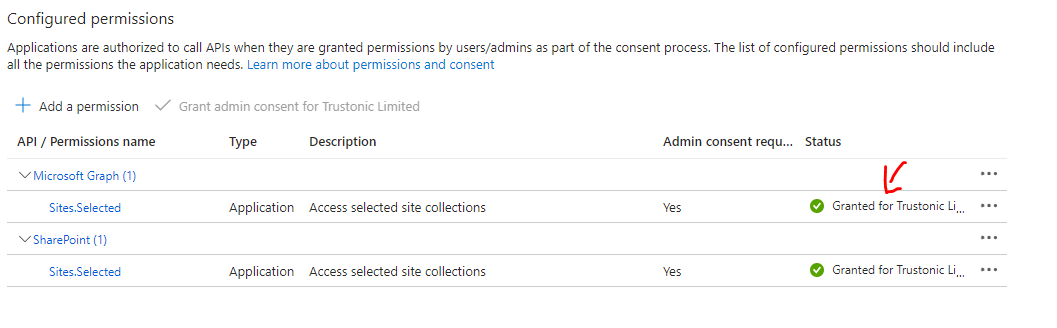
After granting permission, the status column should be green as below:
2.2.2. Assign the App to the selected Sharepoint Site by using PnP PowerShell
- Open PowerShell (recommended to use version >= 7.x to run code) in local.
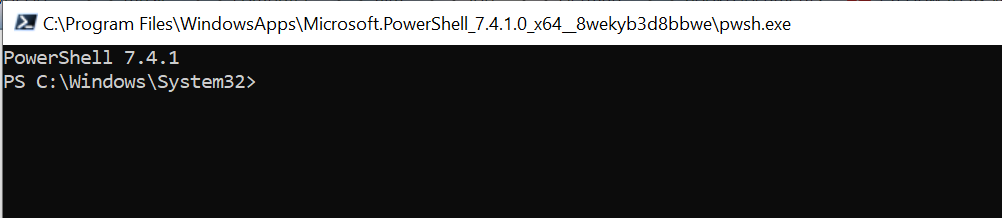
- If you haven’t PnP PowerShell locally, use the following command to install it:
### Install PnP PowerShell in local PowerShell:
Install-Module PnP.PowerShell -Scope CurrentUser
Install-Module SharePointPnPPowerShellOnline -Scope CurrentUser- Connect Sharepoint Site Online:
### Connect Sharepoint Online:
$devAsiaP = "https://trustonic.sharepoint.com/sites/FinanceReporting"
Connect-PnPOnline -Url $devAsiaP- Verify connection:
### Verify connection:
Get-PnPSite- Grant permission (Permissions Write) for the selected site.
### Grant permission for selected site:
Grant-PnPAzureADAppSitePermission -AppId "{client_id}" -DisplayName "{app_name}" -Permissions Write -Site https://trustonic.sharepoint.com/sites/FinanceReporting- Granted permission successfully:
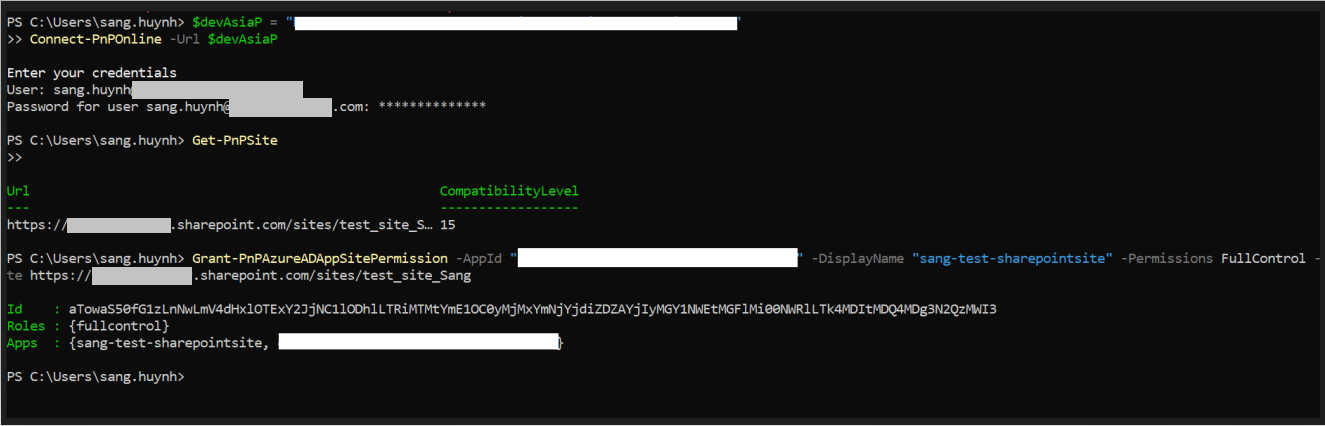
After this step, our created app already has permission to control the selected Sharepoint Site.
2.3. Generate Credentials with Certificate
There are two ways to use Credentials for accessing Sharepoint Site including the secret key method and the certificate method.
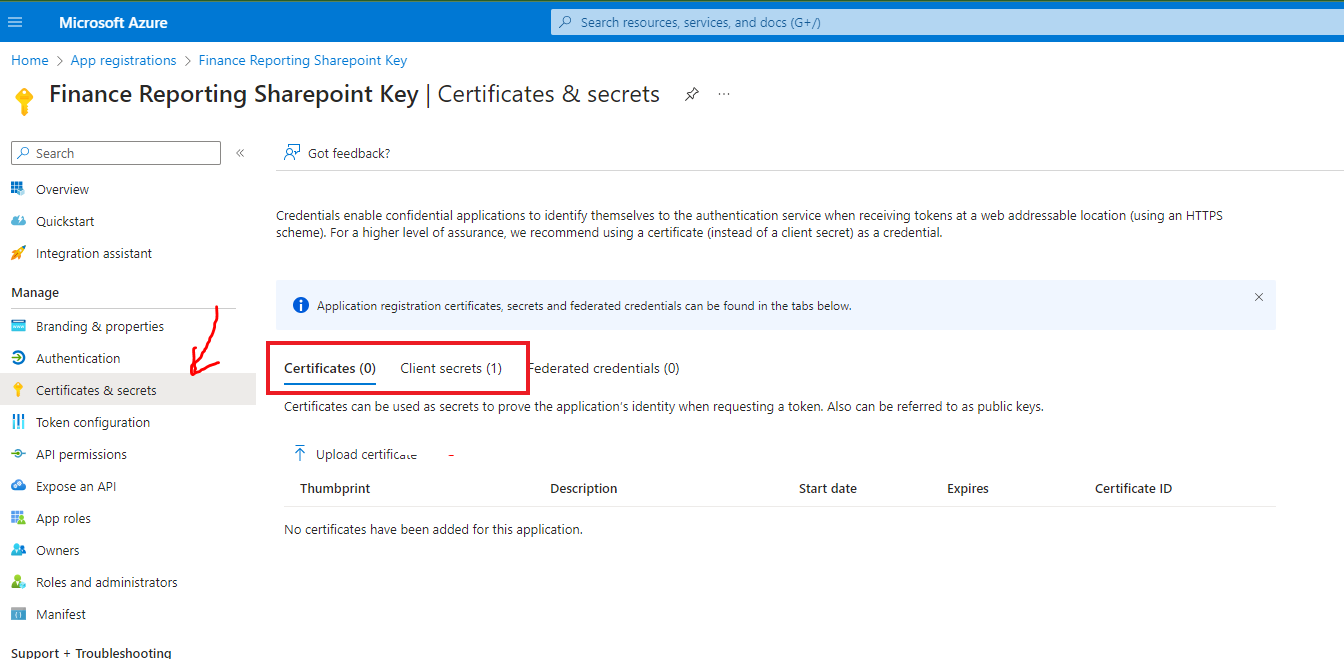
However, the secret key authentication method did not work in my case. Then, I did some research and got the recommendation to use the certificate method as this link — Client credentials.
- Generate a key:
openssl genrsa -out server.pem 2048
- Create a certificate request:
openssl req -new -key server.pem -out server.csr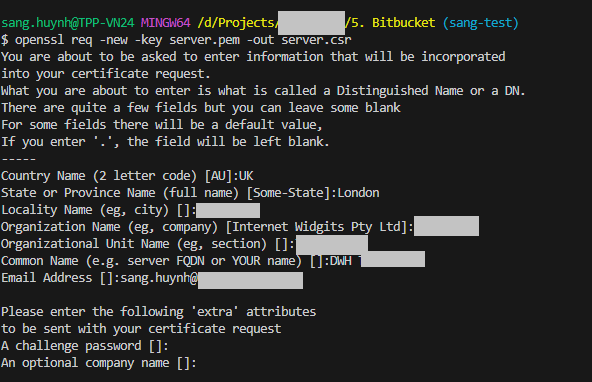
- Generate a certificate:
openssl x509 -req -days 365 -in server.csr -signkey server.pem -out server.crt
Your certificates are saved as below:

2.4. Upload certificate on Azure Portal
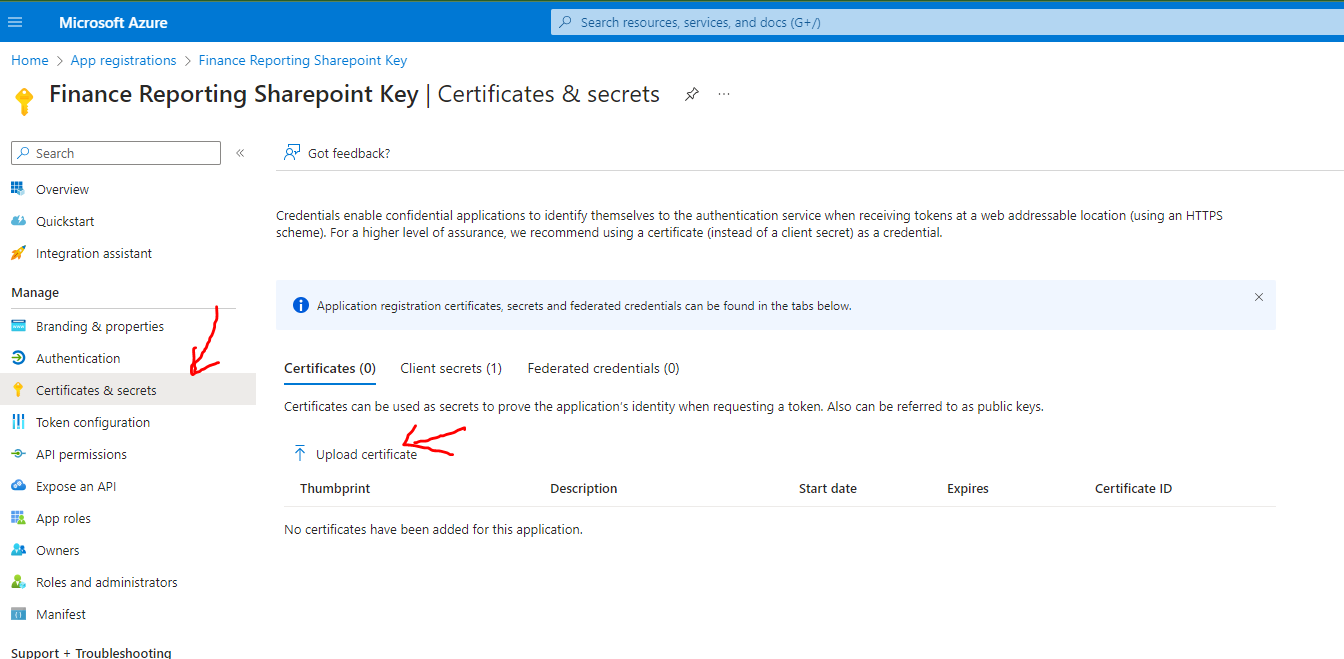
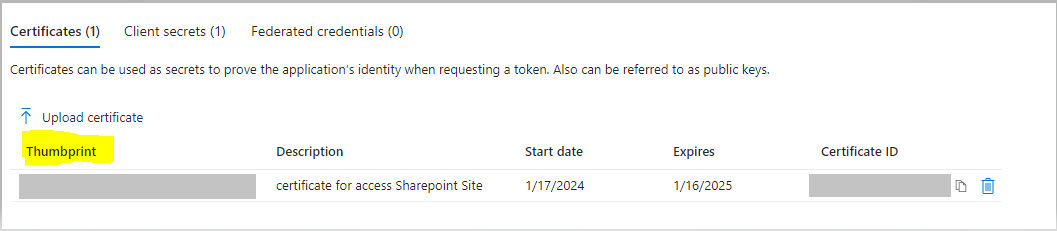
You will have to upload this certificate (server.crt) on Azure Portal in your application settings. Once you save this certificate, the portal will give you the thumbprint of this certificate which is needed in the acquire token call. The key will be the server.pem key you generated in the first step.
Detail Steps: Azure Portal → App Registration → Select your App → Certificates & Secrets (on the left menu) → Upload server.crt file
2.5. Use certificates to access Sharepoint
Now you can create the credential for the client credential flow using the certificate in ADAL Python as follows:
client_credentials = {
    "client_id": <your app id>,
    "thumbprint": <thumbprint of cert file>,
    "certificate": <server.pem>
 }
from office365.sharepoint.client_context import ClientContext
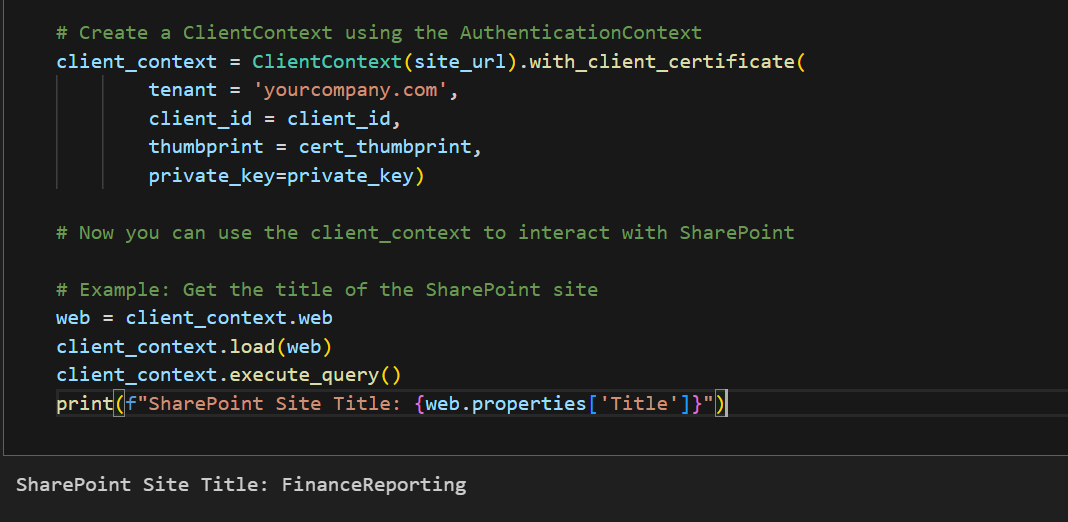
# Create a ClientContext using the AuthenticationContext
client_context = ClientContext(site_url).with_client_certificate(
tenant = 'yourcompany.com',
client_id = client_id,
thumbprint = cert_thumbprint,
private_key=private_key)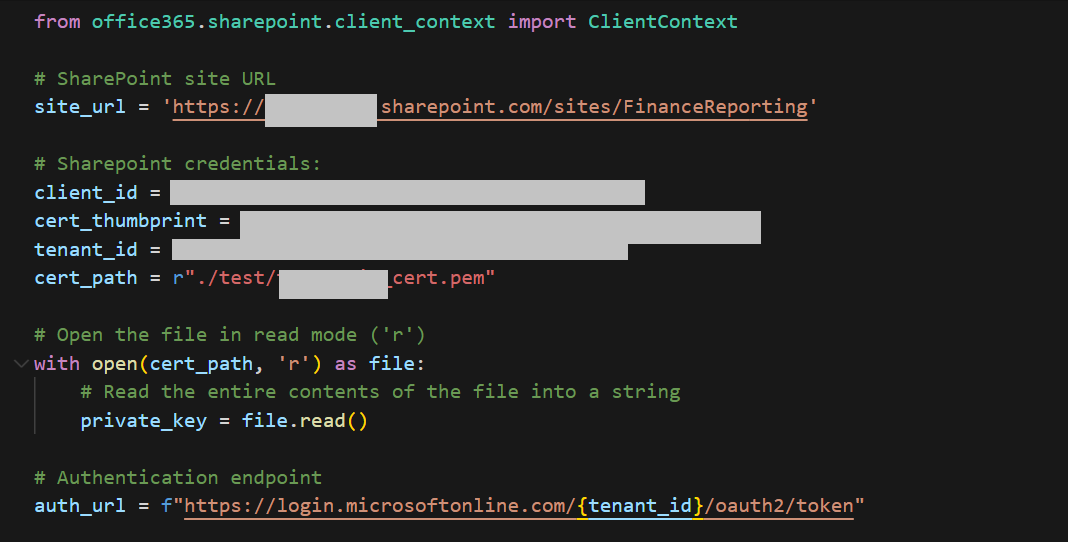
**THANKS FOR READING!***
***References:
- https://devblogs.microsoft.com/microsoft365dev/controlling-app-access-on-specific-sharepoint-site-collections/
- https://docs.informatica.com/integration-cloud/cloud-data-integration-connectors/current-version/microsoft-sharepoint-online-connector/introduction-to-microsoft-sharepoint-online-connector/administration-of-microsoft-sharepoint-online-connector/generate-the-client-id-and-client-secret.html
- https://www.youtube.com/watch?v=SNIF3zCYNUk
- https://github.com/AzureAD/azure-activedirectory-library-for-python/wiki/Client-credentials#client-credentials-with-certificate
메타데이터
- post_id
- 08d20311c61c
- slug
- how-to-access-sharepoint-site-using-microsoft-graph-08d20311c61c
- url
- https://medium.com/@sanghuynh_73086/how-to-access-sharepoint-site-using-microsoft-graph-08d20311c61c
- canonical_url
- https://medium.com/@sanghuynh_73086/how-to-access-sharepoint-site-using-microsoft-graph-08d20311c61c
- author_url
- https://medium.com/@sanghuynh_73086
- status
- ok
- fetched_at
- 2026-07-21 22:45:11


