When XPath Isn’t Enough: Detecting Canvas-Based UI Elements Using OpenCV and Node.js
As automation engineers, first instinct when interacting with a web application is to inspect the element and locate it using CSS…
When XPath Isn’t Enough: Detecting Canvas-Based UI Elements Using OpenCV and Node.js
As automation engineers, first instinct when interacting with a web application is to inspect the element and locate it using CSS selectors, XPath, IDs, or accessibility attributes.
Most of the time, that’s exactly the right approach.
However, modern web applications increasingly use technologies such as Canvas and WebGL to render interactive content. While these technologies provide smoother graphics and better performance, they also introduce a challenge for automation engineers: the objects users interact with may no longer exist as HTML elements. I recently encountered this exact problem while experimenting with a map-based interface. The requirement was simple:
Check if an specific element is present on the map
Naturally, I opened Chrome DevTools and inspected the marker.
Instead of finding an <img>, <div>, or <button>, DevTools highlighted only the map's <canvas> element.
That meant there was no XPath to write.
No CSS selector.
No DOM element.
The marker existed only as pixels on the screen.
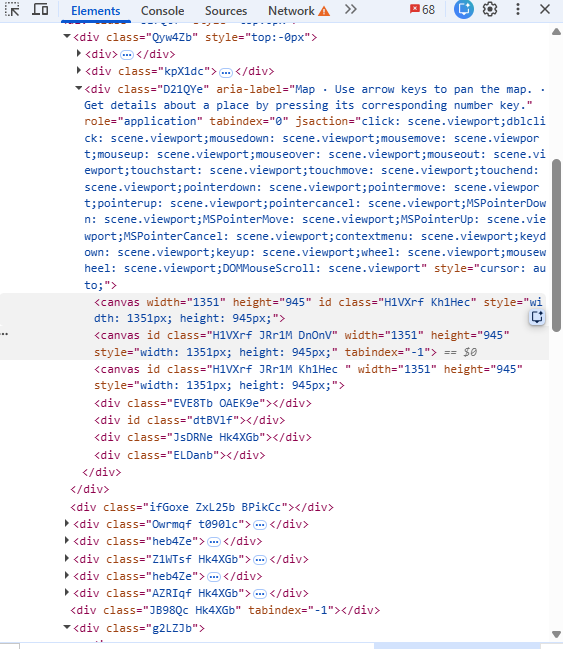
inspecting element on google maps
The Problem
Suppose we have the following map.(example taken from google map)
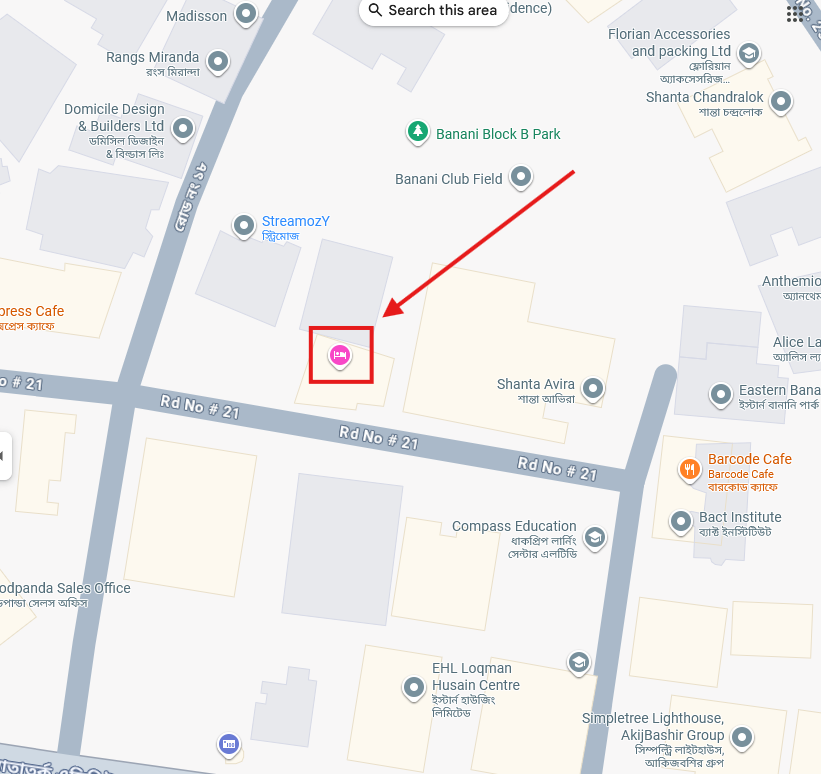
Our test needs to verify that the pink location marker is displayed.
The obvious approach is to inspect the marker.
Unfortunately, the inspection result looks something like this:
<canvas></canvas>The marker isn’t an HTML element.
It’s part of the image rendered inside the canvas.
Since Selenium and WebdriverIO operate on the DOM, they have no knowledge of the individual objects drawn inside that canvas.
This is where traditional locators reach their limit. The Idea
Instead of searching the DOM, why not search the image?
Computer vision libraries like OpenCV allow us to compare images and locate a smaller image (called a template) inside a larger one.
In our case:
- the entire map screenshot becomes the source image
- the pink marker becomes the template image
OpenCV scans every possible position in the screenshot and calculates how closely the template matches that region.
If the confidence score is high enough, we know the marker exists. Preparing the Images
For this example, I used two images.
1. Canvas Screenshot
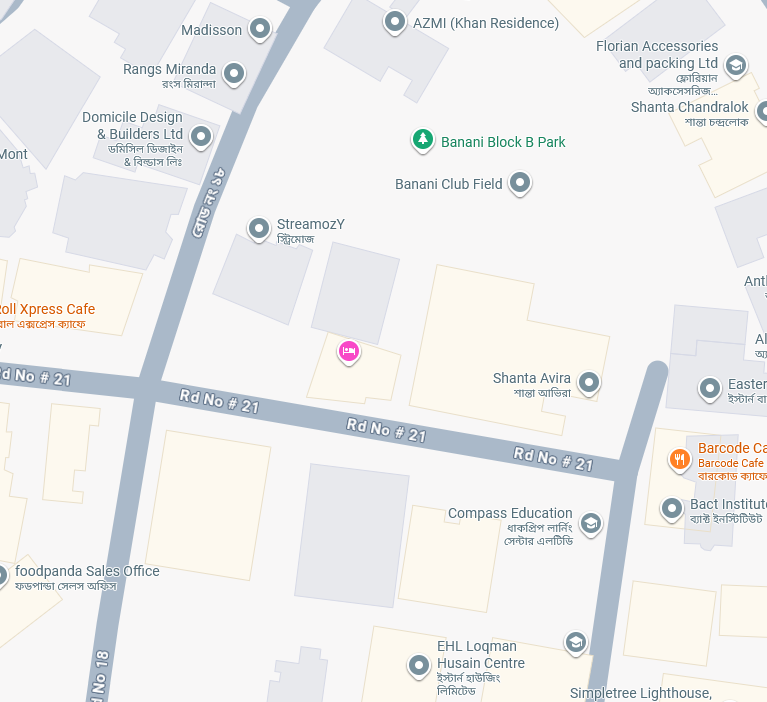
canvas.png
2. Template Image

target.png
The template is simply a cropped version of the marker we want to locate.
Implementation
We’ll use two libraries:
npm install @techstark/opencv-js
npm install jimp
(the opencv version that worked for me is — npm install @techstark/opencv-js@4.12.0-release.1)
- OpenCV performs the image recognition.
- Jimp loads and saves image files.
Let’s start by loading both images.
const src = cv.matFromImageData(
    (await Jimp.read("canvas.png")).bitmap
);

const template = cv.matFromImageData(
    (await Jimp.read("target.png")).bitmap
);
src represents the full screenshot, while template contains the marker we want to find.
Next, we perform template matching.
let result = new cv.Mat();

cv.matchTemplate(
    src,
    template,
    result,
    cv.TM_CCOEFF_NORMED
);
This function compares the template against every possible location in the source image and produces a matrix of similarity scores. The highest score represents the best candidate.
const { maxVal, maxLoc } = cv.minMaxLoc(result);Here:
maxValis the confidence score.maxLoccontains the coordinates of the best match.
To avoid false positives, we define a minimum confidence threshold.
if (maxVal < 0.8) {
    console.log("Element not found.");
}
If the confidence exceeds the threshold, we draw a rectangle around the detected marker.
cv.rectangle(
    src,
    new cv.Point(maxLoc.x, maxLoc.y),
    new cv.Point(
        maxLoc.x + template.cols,
        maxLoc.y + template.rows
    ),
    new cv.Scalar(0,255,0,255),
    2
);
Finally, we save the annotated image.
new Jimp({ width: src.cols, height: src.rows, data: Buffer.from(src.data) })
    .write("output/detected-icon.png");
console.log(`✅ Found at (${maxLoc.x}, ${maxLoc.y}) — confidence: ${(maxVal * 100).toFixed(2)}%`);
console.log(`✅ Saved to output/detected-icon.png`);
Result
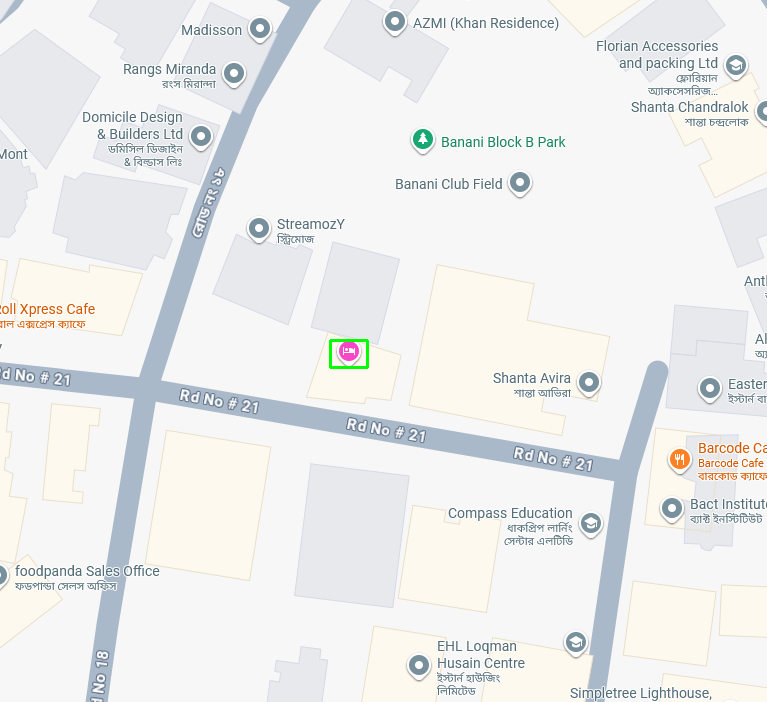
detected-icon.png
The marker is successfully detected.
The coordinates returned by OpenCV can now be used to:
- verify that the marker exists
- click the marker using browser actions
- perform visual assertions
- compare expected and actual map states
Instead of relying on the DOM, we’re interacting with the application using its visual representation.
When Should You Use This Approach?
OpenCV is not a replacement for Selenium or WebdriverIO locators.
If an element exists in the DOM, continue using CSS selectors or XPath — they’re simpler, faster, and easier to maintain.
However, image-based detection becomes valuable when you’re dealing with interfaces that render their content as pixels rather than HTML elements.
Some examples include:
- Canvas-rendered maps
- WebGL applications
- Charts and dashboards
- Canvas-based drawing tools
- PDF image validation
- Remote desktop applications
- Desktop applications streamed to the browser
In these scenarios, OpenCV complements traditional automation rather than replacing it.
Traditional UI automation works exceptionally well when applications expose meaningful DOM elements. But as more modern interfaces move toward Canvas and WebGL rendering, there are cases where XPath simply isn’t an option.
By combining WebdriverIO with OpenCV, we can extend our automation toolkit beyond the DOM and validate visual elements that would otherwise be inaccessible.
Computer vision shouldn’t be your first choice — but when the UI is nothing more than pixels, it can be exactly the right one.
code: complete source code: https://gist.github.com/sadia-neela/52eb81093f256f5ac9c259a72faff120
메타데이터
- post_id
- 11268462eec8
- slug
- when-xpath-isnt-enough-detecting-canvas-based-ui-elements-using-opencv-and-node-js-11268462eec8
- url
- https://medium.com/@neela08/when-xpath-isnt-enough-detecting-canvas-based-ui-elements-using-opencv-and-node-js-11268462eec8
- canonical_url
- https://medium.com/@neela08/when-xpath-isnt-enough-detecting-canvas-based-ui-elements-using-opencv-and-node-js-11268462eec8
- author_url
- https://medium.com/@neela08
- status
- ok
- fetched_at
- 2026-07-08 22:45:43