Midjourney Animation Tutorial (Edition 4)
Building Scenes: From Still Image to Cinematic Motion
Midjourney Animation Tutorial (Edition 4)
Building Scenes: From Still Image to Cinematic Motion
Up to now, we’ve explored thinking like a director (Edition 1) and constructing cinematic shots (Edition 2 & Edition 3). In this edition, we’ll bring everything together: building a complete scene from scratch and preparing it for animation using the Two-Step Method.
This workflow helps you go from a core narrative idea → cinematic still → motion-ready sequence, keeping the process manageable, readable, and intentional.
Step 1 — Story Foundations: Defining the Core Moment
The first step is identifying the story moment — a single meaningful instant. Think in terms of who, what, where, and why, and organize your scene using layers: foreground, midground, background.
1.1 Define the Core Moment Ask three questions:
- Who is the subject? A young adult violinist (gender-neutral).
- What are they doing? Playing passionately.
- Why does this moment matter? Expresses human emotion and musical intensity.
If this isn’t clear, motion will feel vague — no matter how advanced the animation.
1.2 Determine the Environment The environment supports the subject without distracting. Minimalism matters: extra objects compete for attention once motion begins.
1.3 Add Supporting Elements Supporting objects or characters add depth without stealing focus.
1.4 Map Foreground, Midground, and Background This layer framework ensures clarity for motion. Foreground elements are primary; midground adds context; background establishes location.
Example: A Violinist at Dusk
Core Story Image
- Who: Young adult violinist
- Action: Playing passionately
- Why: Conveys emotion, musical expression, and environment connection
- Where: Street corner at dusk — cobblestone pavement, neon cafe sign, passing pedestrians, trash bin near lamp post
- Supporting Elements: Secondary pedestrians, environmental cues, subtle architectural features
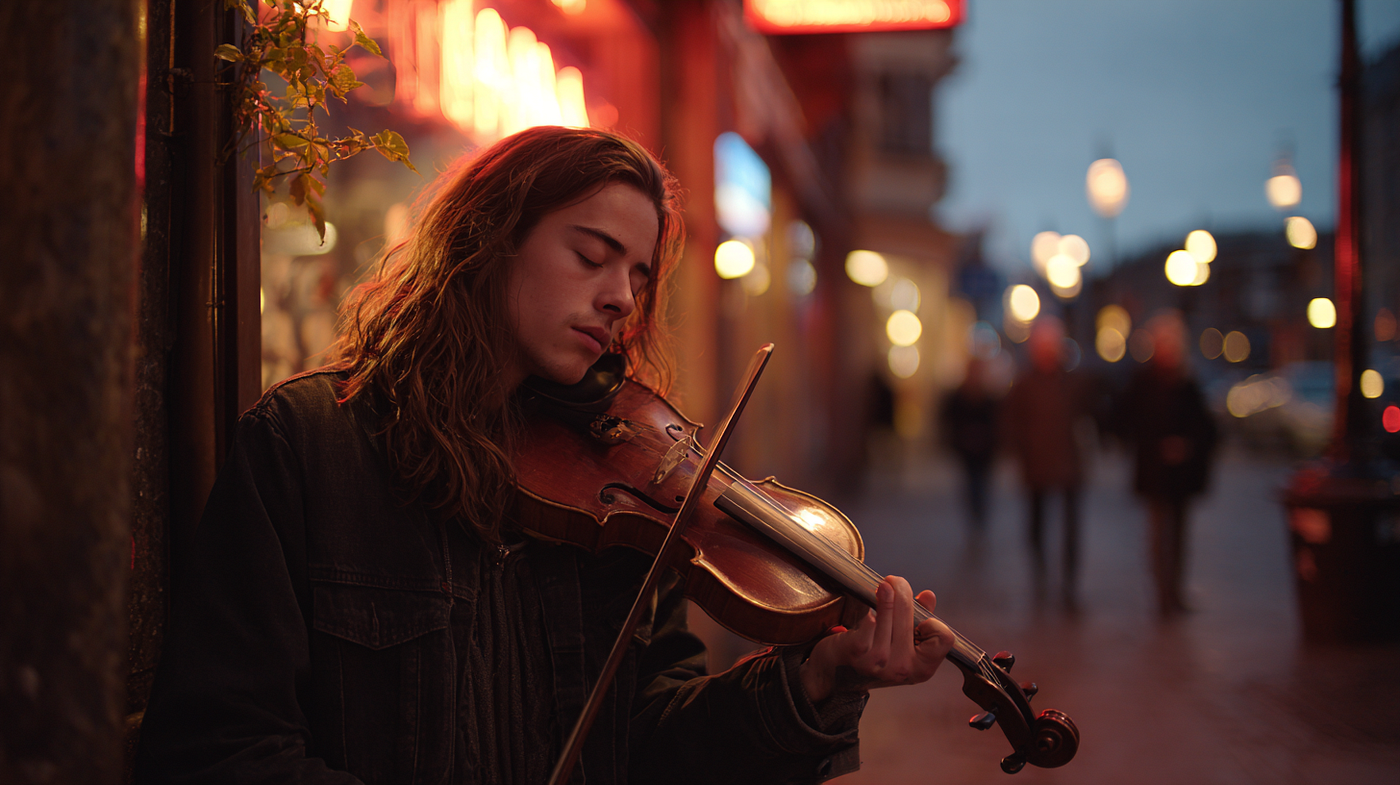
Realistic photograph, medium shot of a young adult violinist playing passionately. Street corner at dusk, cobblestone pavement, neon cafe sign flickering, blurred pedestrians passing, trash bin near lamp post. Foreground: violinist; Midground: pedestrians & neon sign; Background: street & buildings. — ar 16:9 — raw — stylize 150
Layer mapping:
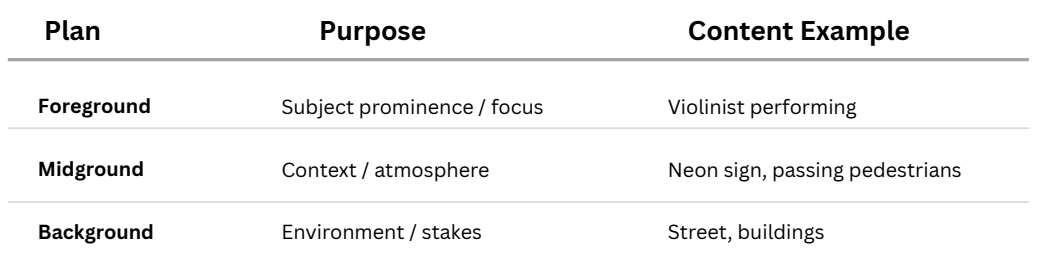
This image defines the story and spatial structure, but is intentionally light on camera, lighting, and atmosphere — it’s the blueprint.
Step 2 — Still Image Direction: Preparing for Motion
Once the core moment is set, turn it into a cinematic still ready for motion. Flesh out camera, framing, lens, lighting, atmosphere, and implied motion, while keeping the layer structure intact.
Visualizing the Violinist Scene
- Camera & Framing: Close-up, eye-level, 50mm lens, centered on the violinist
- Lighting & Mood: Warm neon glow highlights the violinist; soft ambient streetlight adds depth
- Atmosphere & Motion Cues: Blurred pedestrians, subtle movement in leaves, slight haze for cinematic depth
- Layers: Foreground/midground/background maintained for independent motion later
Example Cinematic Still
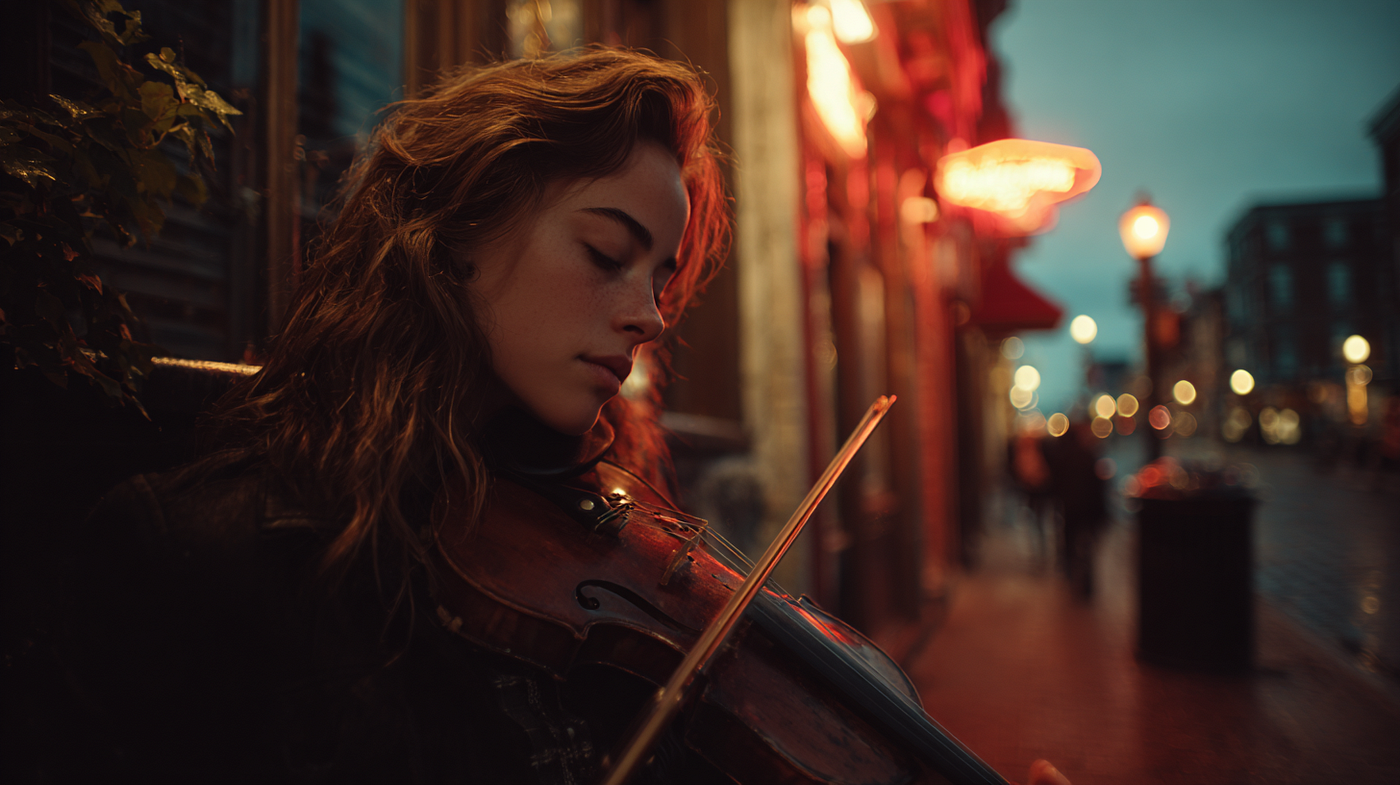
Prompt Example: [Subject + Action/ Pose] Realistic photograph of a young adult violinist playing passionately, long brown hair, dark jacket, eyes closed in concentration. Camera: Close-up, eye-level, 50mm lens, centered framing. Environment: Street corner at dusk, cobblestone pavement, neon cafe sign flickering, pedestrians walking past (blurred), trash bin near lamp post, subtle background buildings. Lighting: Warm neon glow on violinist, soft ambient streetlight, natural contrast with shadows. Atmosphere: Cinematic, realistic textures, subtle motion in leaves and pedestrians, slight depth haze in distance. — ar 16:9 — raw — stylize 150
This still locks in everything motion will rely on. Separating Step 1 (planning) and Step 2 (cinematic detailing) ensures your animation is structured, readable, and emotionally compelling.

Step 3 — Motion Adaptation: Bringing the Scene to Life
With the cinematic still ready, introduce motion. Motion should enhance the story moment, not replace it. Using the Two-Step Method, steps are:
- Base Still Image: Use the cinematic still from Step 2. Layers are locked.
- Apply Motion to Each Layer Independently:
Camera Movement Examples:
- Subtle dolly or zoom → emphasize emotional intensity
- Pan/Tilt → reveal environment or narrative cues
- Rack focus → shift attention between layers
Subject Movement:
- Violinist swaying naturally
- Hair and clothing responding to breeze
Environmental Motion:
- Pedestrians walking past, blurred
- Neon sign flickering
- Leaves shifting slightly
Example Motion Adaption Video link

Motion Prompt Example: Camera slowly dollies from medium shot to slight close-up on violinist, keeping neon signs and pedestrians visible. Violinist head gently tilts while playing, bow moving naturally. Soft ambient wind moves leaves, neon sign flickers subtly, cinematic motion blur. Maintain realistic lighting and textures, preserve depth across fore/mid/back planes.
The motion now extends the logic of your still image, ensuring every move has narrative and emotional purpose.
Bringing It All Together
This workflow highlights the Two-Step Method clearly:
- Step 1 — Define: Core story moment, layers, minimal narrative cues
- Step 2 — Cinematic Still: Flesh out visual details, camera, lighting, atmosphere, and implied motion
- Step 3 — Motion Adaptation: Animate purposefully, using layers, camera movement, and subtle subject/environment motion
Following these steps, you move from concept → cinematic still → animation-ready scene, making Midjourney animations structured, readable, and emotionally resonant.
Final Thoughts
If you’re experimenting with AI animation, I’d love to see your results — what works, what surprises, and what challenges you.
For structured learning, I turned this research into a 53-page eBook with templates, 30+ finished prompts, example generations, workflows, and checklists for Midjourney motion and cinematic control.
It’s not about “prettier videos” — it’s about intention, direction, and readability, so the model doesn’t decide everything for you.
Medium-only discount: 40% off with code PSNPSEB. Click the link to auto-apply.
메타데이터
- post_id
- 11e7621b784f
- slug
- midjourney-animation-tutorial-edition-4-11e7621b784f
- url
- https://medium.com/@ruby.tw/midjourney-animation-tutorial-edition-4-11e7621b784f
- canonical_url
- https://medium.com/@ruby.tw/midjourney-animation-tutorial-edition-4-11e7621b784f
- author_url
- https://medium.com/@ruby.tw
- status
- ok
- fetched_at
- 2026-07-14 21:42:00