Cloud Computing — AWS — Part 10
Same/Cross Region Replication — What is SRR/CRR — Use of SRR/CRR?
Cloud Computing — AWS — Part 10

Same/Cross Region Replication — What is SRR/CRR — Use of SRR/CRR?
In AWS, Same Region Replication (SRR) replicates data within the same region, while Cross Region Replication (CRR) replicates data across different AWS regions. Both ensure high availability, disaster recovery, and data redundancy. SRR is typically used for regional resilience, while CRR helps with global distribution and compliance needs.
Let’s first create two buckets:

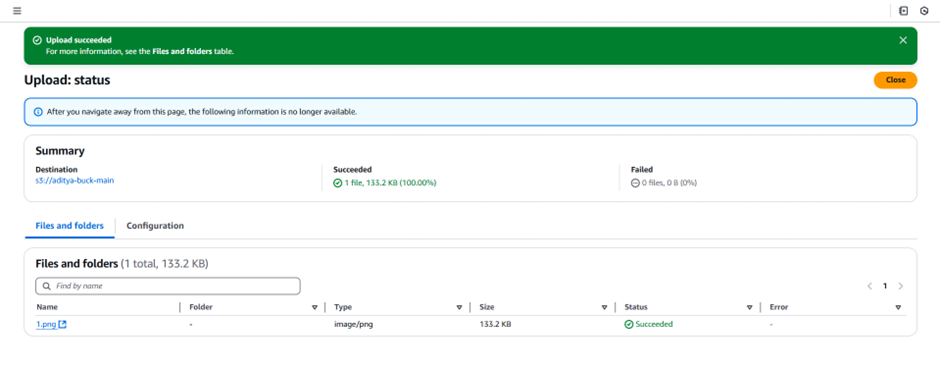
Now, uplad one file to the “aditya-buck-main” bucket:
Now, how to enable this replication?
Open the bucket, and go to the management section of it:

We can see the option of “replication rules”:

Click on “Create replication rule”: following window will appear:

Clearly, it asks us to enable the versioning, so just enable it: (for both buckets) then fill the form

Scroll down to select the destination bucket:

Select the destination bucket:

Then select the IAM role:

Then click on the orange button at bottom of the page.
Now upload one more file to the “aditya-bucket-main”:
You will find that it get repicated to the “aditya-bucket-replica” bucket.
AWS S3 — Configure Logging in S3 Bucket — How to Enable S3 Logging
To enable S3 bucket logging, go to the AWS S3 console, select your bucket, navigate to the “Properties” tab, and under “Server access logging,” click “Edit.” Enable logging, choose a target bucket to store logs, and save changes. Logs track access requests for auditing and troubleshooting.
It’s generally a better idea to store logs in a different bucket for the following reasons:
-
Security: Separates logs from the original data, reducing the risk of accidental modification or deletion.
-
Access Control: Allows you to set stricter permissions on the log bucket, ensuring only authorized users can view or manage logs.
-
Performance: Keeps logging activity separate from the primary data, minimizing potential performance impacts.
-
Compliance: Some compliance frameworks require logs to be stored in isolated locations for integrity and audit purposes.
Create two buckets:

Open the “main” bucket, scroll down to reach the “server access logging” section:

Click on the “edit” button, following screen will appear:

Now, specify the destination and scroll down to click the “orange button”.

AWS S3 — Storage Classes — Standard — Infrequent — Glacier
In AWS S3, storage classes refer to different types of data storage options, each with varying cost structures, durability, availability, and retrieval times. They are designed to optimize data storage based on access patterns and use cases. Common S3 storage classes include:
-
Standard — For frequently accessed data.
-
Infrequent Access (IA) — For data accessed less often.
-
Glacier — For long-term archival data with retrieval delays.
-
Glacier Deep Archive — For rarely accessed, low-cost archival data.
Choosing the appropriate storage class helps optimize cost and performance based on data usage.
Standard: AWS S3 Standard is designed for frequently accessed data. It offers low-latency and high-throughput performance, making it ideal for applications that require immediate access to data, such as websites, mobile apps, and big data analytics.
Infrequent Access: S3 Infrequent Access (IA) is designed for data that is less frequently accessed but needs to be retrieved quickly when required. It offers lower storage costs but higher retrieval fees, suitable for backups and archival data.
Glacier: S3 Glacier is an archival storage solution with extremely low storage costs. It’s optimized for data that is rarely accessed and requires retrieval times ranging from minutes to hours, making it ideal for long-term data storage and compliance archives.
AWS S3 — Storage Classes — Configure Storage Class
Create a bucket:

Now, let’s upload a file into it:

Scroll down to reach the portion “properties” and then go to the “storage class”:

Then click on the upload button at the bottom right corner:

Simplify Data Lifecycle Management with AWS S3
AWS S3 simplifies data lifecycle management by offering features like versioning, automated data tiering, and lifecycle policies. These tools enable efficient storage, cost management, and data retention. Users can automatically move data to lower-cost storage classes, archive it, or delete it based on predefined rules, streamlining operations.
Where can we find this option to do so? In the management section of the bucket:

The following window will appear:

Fill it like this: (or as per the requirement)

Scroll down to see the following option:

Cost Efficiency and Performance with AWS Intelligent Tiering for S3
AWS Intelligent Tiering automatically moves data between different storage classes based on access patterns, optimizing cost efficiency. It monitors data usage and transfers objects to lower-cost tiers when not frequently accessed, ensuring performance while reducing storage costs. Ideal for unpredictable or unknown access patterns.
Where can we find this option?
This option is present at the properties section of the object.
We can add the rule as per our choice.
What is CORS and How To Enable IT in S3
CORS (Cross-Origin Resource Sharing) is a security feature implemented by browsers that allows or restricts web applications running at one origin to make requests for resources from a different origin. It enables controlled access to resources hosted on different domains, preventing malicious activities like cross-site request forgery (CSRF).
We need to first create a public bucket:

Then go to the policy generator, and create a policy:

Copy the generated policy:

Then paste it as bucket policy:

Now, for this bucket enable the static website hosting:

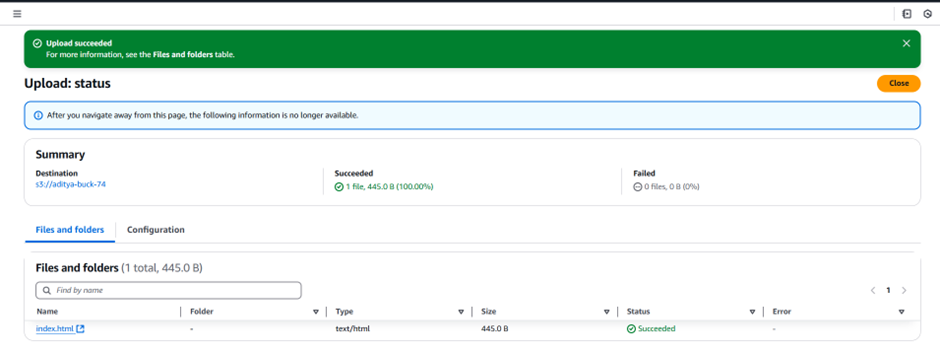
Then click on save changes, then upload the index.html to this bucket:
Then go to the peoperties of the bucket and open the link of the bucket:

Following page will occur:

What is Presigned URL in S3
A presigned URL in AWS S3 allows temporary, secure access to a private S3 object. It is generated by an AWS user with appropriate permissions, providing a time-limited link to upload or download files without needing direct access to AWS credentials. The URL expires after a specified duration.
Where can we find this option to assign presigned URL? Create a bucket and upload an object in it, then, click on the object:

Following window will appear:

To use the option of presigned URL we need to go to the section of Object actions:
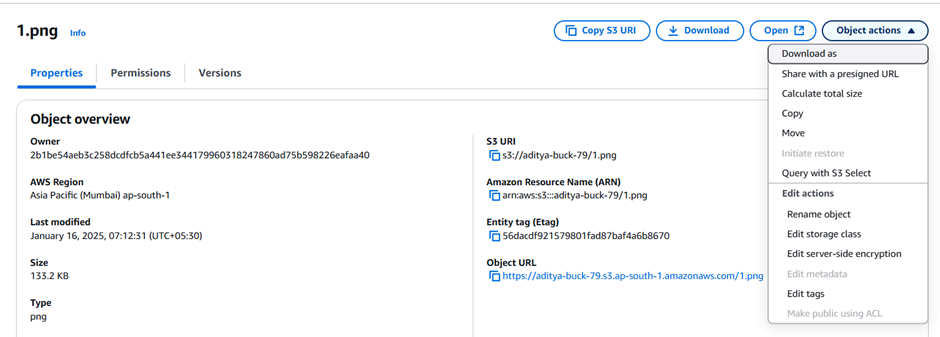
Following pop-up will appear: fill it as per requirement

Securing Your AWS S3 Data: At Rest, Server-Side, and Client-Side Encryption
Securing AWS S3 data involves three main encryption approaches:
-
At Rest Encryption: Protects data stored in S3. AWS provides options like SSE-S3 (Server-Side Encryption with S3 managed keys), SSE-KMS (with AWS Key Management Service), and SSE-C (customer-provided keys).
-
Server-Side Encryption: Data is encrypted automatically by AWS when it’s uploaded to S3, without requiring changes from the user. It ensures encryption during storage.
-
Client-Side Encryption: Data is encrypted before it is uploaded to S3, typically by the client application. The client manages the encryption keys, giving them control over the encryption process.
These methods ensure data confidentiality, integrity, and protection against unauthorized access.
Can we access an uploaded object with both HTTP and HTTPS? Yes, we can.
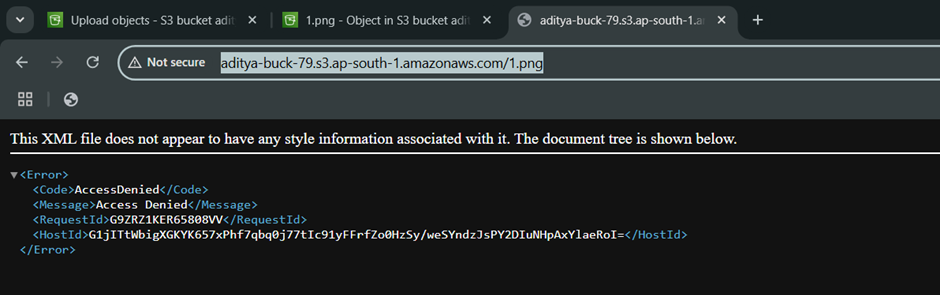
Here, we can see that we used HTTPS:

While here we used HTTP:
Contact Me: 📧 Email: adii.utsav@gmail.com 🔗 LinkedIn: https://www.linkedin.com/in/aditya-kumar-3241b6286/ 💻 GitHub: https://github.com/Rememberful
메타데이터
- post_id
- 1349ba2acbd3
- slug
- cloud-computing-aws-part-10-1349ba2acbd3
- url
- https://medium.com/@adii.utsav/cloud-computing-aws-part-10-1349ba2acbd3
- canonical_url
- https://medium.com/@adii.utsav/cloud-computing-aws-part-10-1349ba2acbd3
- author_url
- https://medium.com/@adii.utsav
- status
- ok
- fetched_at
- 2026-07-13 13:01:55




