Keycloak: The Complete Guide to Open-Source Identity and Access Management (with FastAPI & Golang…
If you’ve ever built a web application, you know that authentication and authorization are two of the hardest things to get right. Rolling…
Keycloak: The Complete Guide to Open-Source Identity and Access Management (with FastAPI & Golang Examples)
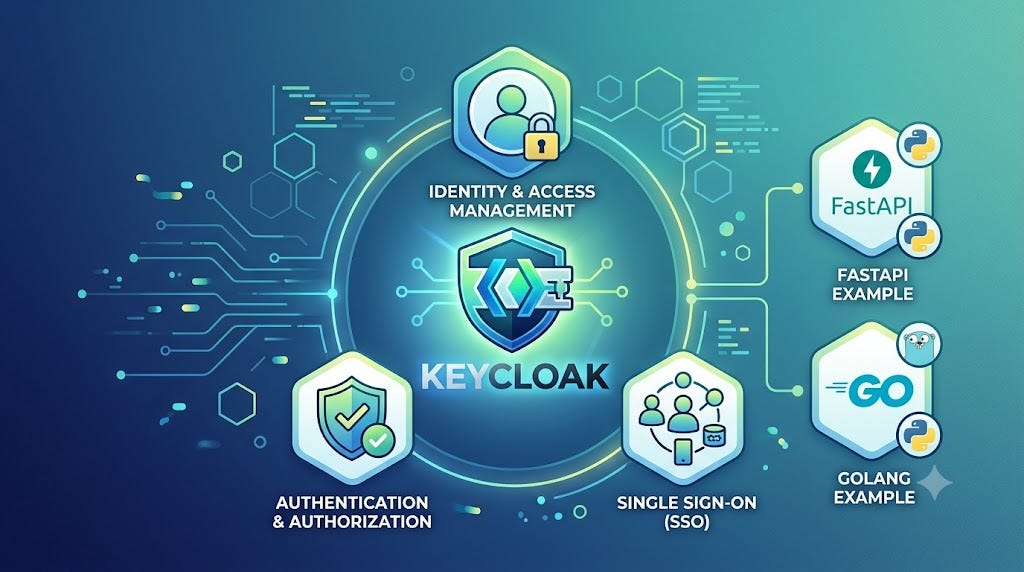
If you’ve ever built a web application, you know that authentication and authorization are two of the hardest things to get right. Rolling your own auth system is a security minefield — password hashing, token management, session handling, brute-force protection, multi-factor authentication… the list goes on. This is exactly where Keycloak shines.In this comprehensive guide, we’ll explore what Keycloak is, why it has become the de facto standard for open-source Identity and Access Management (IAM), and — most importantly — how to integrate it with two of the most popular backend stacks today: **Python’s FastAPI and [Golang’s ](https://mjmjmj.name/category/golang/)net/http**.
Table of Contents:
- What is Keycloak?
- Core Concepts You Must Understand
- Setting Up Keycloak with Docker
- Integrating Keycloak with FastAPI
- Integrating Keycloak with Golang
- Role-Based Access Control (RBAC)
- Best Practices for Production
What is Keycloak?
Keycloak is an open-source Identity and Access Management solution developed by Red Hat and now a CNCF incubating project. It provides out-of-the-box support for:
- Single Sign-On (SSO) and Single Logout
- OpenID Connect (OIDC), OAuth 2.0, and SAML 2.0
- User Federation (LDAP and Active Directory)
- Social Login (Google, GitHub, Facebook, etc.)
- Multi-Factor Authentication (MFA)
- Fine-grained Authorization Services
- Admin Console & Account Management UI
Instead of writing authentication logic in every microservice, you delegate it to Keycloak. Your services simply validate tokens — that’s it.
Core Concepts You Must Understand
Before diving into code, let’s clarify the terminology. Getting these right will save you hours of confusion:

The OIDC Flow in a Nutshell
For a typical API-backend scenario, the flow looks like this:
- User → authenticates with Keycloak (login page or direct grant)
- Keycloak → issues an Access Token (JWT)
- User → calls your API with: Authorization: Bearer <token>
- Your API → validates the JWT signature against Keycloak’s public keys (JWKS)
- Your API → checks roles/claims → serves the response
The critical insight: your API never sees a password. It only verifies cryptographically signed tokens.
Setting Up Keycloak with Docker
The fastest way to get started is Docker. Create a docker-compose.yml:
services:
  postgres:
    image: postgres:16
    environment:
      POSTGRES_DB: keycloak
      POSTGRES_USER: keycloak
      POSTGRES_PASSWORD: kc_password
    volumes:
      - kc_pgdata:/var/lib/postgresql/data

  keycloak:
    image: quay.io/keycloak/keycloak:26.0
    command: start-dev
    environment:
      KC_DB: postgres
      KC_DB_URL: jdbc:postgresql://postgres:5432/keycloak
      KC_DB_USERNAME: keycloak
      KC_DB_PASSWORD: kc_password
      KC_BOOTSTRAP_ADMIN_USERNAME: admin
      KC_BOOTSTRAP_ADMIN_PASSWORD: admin
    ports:
      - "8080:8080"
    depends_on:
      - postgres

volumes:
  kc_pgdata:
Run it:
docker compose up -dThen open http://localhost:8080 and log in with admin/admin.
Initial Configuration
- Create a Realm → name it
myapp - Create a Client:
- Client ID:
myapp-api - Client authentication: ON (confidential client)
- Valid redirect URIs:
http://localhost:8000/*
- Create a Realm Role → e.g.,
adminanduser - Create a User → set a password under the Credentials tab, and assign roles under Role Mapping
Important endpoints for the myapp realm:
Discovery: http://localhost:8080/realms/myapp/.well-known/openid-configuration
Token: http://localhost:8080/realms/myapp/protocol/openid-connect/token
JWKS: http://localhost:8080/realms/myapp/protocol/openid-connect/certs
Integrating Keycloak with FastAPI
Let’s build a FastAPI service that validates Keycloak-issued JWTs.
Install Dependencies
pip install fastapi uvicorn python-jose[cryptography] httpxProject Structure
fastapi-keycloak/
├── main.py
├── auth.py
└── config.py
config.py — Configuration
from pydantic_settings import BaseSettings

class Settings(BaseSettings):
    keycloak_url: str = "http://localhost:8080"
    realm: str = "myapp"
    client_id: str = "myapp-api"
    client_secret: str = "your-client-secret"

    @property
    def jwks_url(self) -> str:
        return f"{self.keycloak_url}/realms/{self.realm}/protocol/openid-connect/certs"

    @property
    def issuer(self) -> str:
        return f"{self.keycloak_url}/realms/{self.realm}"

settings = Settings()
auth.py — Token Validation Logic
This is the heart of the integration. We fetch Keycloak’s JWKS (JSON Web Key Set), cache it, and use it to verify the token signature:
import httpx
from fastapi import Depends, HTTPException, status
from fastapi.security import HTTPAuthorizationCredentials, HTTPBearer
from jose import JWTError, jwt

from config import settings

bearer_scheme = HTTPBearer()

# Simple in-memory JWKS cache
_jwks_cache: dict | None = None

async def get_jwks() -> dict:
    """Fetch and cache Keycloak's public keys."""
    global _jwks_cache
    if _jwks_cache is None:
        async with httpx.AsyncClient() as client:
            resp = await client.get(settings.jwks_url)
            resp.raise_for_status()
            _jwks_cache = resp.json()
    return _jwks_cache

async def get_current_user(
    credentials: HTTPAuthorizationCredentials = Depends(bearer_scheme),
) -> dict:
    """Validate the JWT and return its decoded claims."""
    token = credentials.credentials
    jwks = await get_jwks()

    try:
        # Find the matching public key by 'kid' (Key ID)
        unverified_header = jwt.get_unverified_header(token)
        key = next(
            (k for k in jwks["keys"] if k["kid"] == unverified_header["kid"]),
            None,
        )
        if key is None:
            raise HTTPException(
                status_code=status.HTTP_401_UNAUTHORIZED,
                detail="Unknown signing key",
            )

        payload = jwt.decode(
            token,
            key,
            algorithms=["RS256"],
            issuer=settings.issuer,
            audience="account",  # adjust based on your client config
        )
        return payload

    except JWTError as exc:
        raise HTTPException(
            status_code=status.HTTP_401_UNAUTHORIZED,
            detail=f"Invalid token: {exc}",
            headers={"WWW-Authenticate": "Bearer"},
        )

def require_role(role: str):
    """Dependency factory for role-based access control."""
    async def role_checker(user: dict = Depends(get_current_user)) -> dict:
        realm_roles = user.get("realm_access", {}).get("roles", [])
        if role not in realm_roles:
            raise HTTPException(
                status_code=status.HTTP_403_FORBIDDEN,
                detail=f"Role '{role}' required",
            )
        return user
    return role_checker
main.py — The API
from fastapi import Depends, FastAPI

from auth import get_current_user, require_role

app = FastAPI(title="Keycloak + FastAPI Demo")

@app.get("/public")
async def public_route():
    return {"message": "Anyone can see this."}

@app.get("/me")
async def read_me(user: dict = Depends(get_current_user)):
    return {
        "username": user.get("preferred_username"),
        "email": user.get("email"),
        "roles": user.get("realm_access", {}).get("roles", []),
    }

@app.get("/admin")
async def admin_only(user: dict = Depends(require_role("admin"))):
    return {"message": f"Welcome, admin {user.get('preferred_username')}!"}
Testing It
Get a token using the Resource Owner Password Credentials flow (great for testing, avoid in production):
curl -X POST "http://localhost:8080/realms/myapp/protocol/openid-connect/token" \
  -d "client_id=myapp-api" \
  -d "client_secret=your-client-secret" \
  -d "grant_type=password" \
  -d "username=testuser" \
  -d "password=testpass"
Then call your protected endpoint:
curl http://localhost:8000/me \
  -H "Authorization: Bearer <ACCESS_TOKEN>"
Integrating Keycloak with Golang
Now let’s do the same with Go using the standard net/http package plus the excellent coreos/go-oidc library — which handles JWKS fetching, key rotation, and signature verification for you.
Install Dependencies
go mod init keycloak-demo
go get github.com/coreos/go-oidc/v3/oidc
main.go — Full Working Example
package main

import (
    "context"
    "encoding/json"
    "log"
    "net/http"
    "strings"

    "github.com/coreos/go-oidc/v3/oidc"
)

const (
    keycloakURL = "http://localhost:8080/realms/myapp"
    clientID    = "myapp-api"
)

// Claims we care about from the Keycloak access token
type KeycloakClaims struct {
    PreferredUsername string `json:"preferred_username"`
    Email             string `json:"email"`
    RealmAccess       struct {
        Roles []string `json:"roles"`
    } `json:"realm_access"`
}

// contextKey avoids collisions in context values
type contextKey string

const claimsKey contextKey = "claims"

func main() {
    ctx := context.Background()

    // The provider fetches the OIDC discovery document and JWKS,
    // and handles key rotation automatically.
    provider, err := oidc.NewProvider(ctx, keycloakURL)
    if err != nil {
        log.Fatalf("failed to create OIDC provider: %v", err)
    }

    verifier := provider.Verifier(&oidc.Config{
        // Keycloak access tokens often use "account" as audience.
        // Set SkipClientIDCheck if you validate audience manually.
        ClientID: "account",
    })

    mux := http.NewServeMux()

    // Public route — no authentication
    mux.HandleFunc("GET /public", func(w http.ResponseWriter, r *http.Request) {
        writeJSON(w, http.StatusOK, map[string]string{
            "message": "Anyone can see this.",
        })
    })

    // Protected route — requires a valid token
    mux.Handle("GET /me", authMiddleware(verifier, http.HandlerFunc(meHandler)))

    // Admin route — requires the "admin" realm role
    mux.Handle("GET /admin",
        authMiddleware(verifier,
            requireRole("admin", http.HandlerFunc(adminHandler)),
        ),
    )

    log.Println("Server listening on :8000")
    log.Fatal(http.ListenAndServe(":8000", mux))
}

// authMiddleware validates the Bearer token and injects claims into context.
func authMiddleware(verifier *oidc.IDTokenVerifier, next http.Handler) http.Handler {
    return http.HandlerFunc(func(w http.ResponseWriter, r *http.Request) {
        authHeader := r.Header.Get("Authorization")
        if !strings.HasPrefix(authHeader, "Bearer ") {
            writeJSON(w, http.StatusUnauthorized, map[string]string{
                "error": "missing or malformed Authorization header",
            })
            return
        }

        rawToken := strings.TrimPrefix(authHeader, "Bearer ")

        // Verify signature, expiry, and issuer against Keycloak's JWKS
        token, err := verifier.Verify(r.Context(), rawToken)
        if err != nil {
            writeJSON(w, http.StatusUnauthorized, map[string]string{
                "error": "invalid token: " + err.Error(),
            })
            return
        }

        var claims KeycloakClaims
        if err := token.Claims(&claims); err != nil {
            writeJSON(w, http.StatusUnauthorized, map[string]string{
                "error": "failed to parse claims",
            })
            return
        }

        // Inject claims into the request context
        ctx := context.WithValue(r.Context(), claimsKey, claims)
        next.ServeHTTP(w, r.WithContext(ctx))
    })
}

// requireRole checks for a realm role in the already-validated claims.
func requireRole(role string, next http.Handler) http.Handler {
    return http.HandlerFunc(func(w http.ResponseWriter, r *http.Request) {
        claims, ok := r.Context().Value(claimsKey).(KeycloakClaims)
        if !ok {
            writeJSON(w, http.StatusInternalServerError, map[string]string{
                "error": "claims not found in context",
            })
            return
        }

        for _, r := range claims.RealmAccess.Roles {
            if r == role {
                next.ServeHTTP(w, r0(r, w)) // see note below
                return
            }
        }

        writeJSON(w, http.StatusForbidden, map[string]string{
            "error": "role '" + role + "' required",
        })
    })
}

func meHandler(w http.ResponseWriter, r *http.Request) {
    claims := r.Context().Value(claimsKey).(KeycloakClaims)
    writeJSON(w, http.StatusOK, map[string]any{
        "username": claims.PreferredUsername,
        "email":    claims.Email,
        "roles":    claims.RealmAccess.Roles,
    })
}

func adminHandler(w http.ResponseWriter, r *http.Request) {
    claims := r.Context().Value(claimsKey).(KeycloakClaims)
    writeJSON(w, http.StatusOK, map[string]string{
        "message": "Welcome, admin " + claims.PreferredUsername + "!",
    })
}

func writeJSON(w http.ResponseWriter, status int, v any) {
    w.Header().Set("Content-Type", "application/json")
    w.WriteHeader(status)
    _ = json.NewEncoder(w).Encode(v)
}
Correction on the snippet above — the requireRole loop shadows the *http.Request variable r. Here’s the clean, correct version:
func requireRole(role string, next http.Handler) http.Handler {
    return http.HandlerFunc(func(w http.ResponseWriter, req *http.Request) {
        claims, ok := req.Context().Value(claimsKey).(KeycloakClaims)
        if !ok {
            writeJSON(w, http.StatusInternalServerError, map[string]string{
                "error": "claims not found in context",
            })
            return
        }

        for _, userRole := range claims.RealmAccess.Roles {
            if userRole == role {
                next.ServeHTTP(w, req)
                return
            }
        }

        writeJSON(w, http.StatusForbidden, map[string]string{
            "error": "role '" + role + "' required",
        })
    })
}
💡 A note on pointers here: notice that
oidc.NewProviderreturns a `oidc.Provider— a **pointer** to a provider. We pass&oidc.Config{...}(the&operator takes the *address* of the struct literal) becauseprovider.Verifierexpects aoidc.Config. Thein the type declaration means “pointer to,” while&in an expression means “give me the address of.” This pattern — libraries accepting pointers so they can share one instance without copying — is everywhere in Go’snet/httpecosystem (e.g.,http.Request`).
Why go-oidc Instead of Manual JWT Parsing?
You could parse JWTs manually with golang-jwt/jwt, but go-oidc gives you for free:
- Automatic JWKS fetching and key rotation — Keycloak rotates signing keys;
go-oidcre-fetches keys when it encounters an unknownkid. - OIDC Discovery — issuer, endpoints, and algorithms are read from
.well-known/openid-configuration. - Issuer and expiry validation built in.
Testing the Go Service
# Get a token (same as before)
TOKEN=$(curl -s -X POST "http://localhost:8080/realms/myapp/protocol/openid-connect/token" \
  -d "client_id=myapp-api" \
  -d "client_secret=your-client-secret" \
  -d "grant_type=password" \
  -d "username=testuser" \
  -d "password=testpass" | jq -r .access_token)

# Call protected endpoints
curl http://localhost:8000/me -H "Authorization: Bearer $TOKEN"
curl http://localhost:8000/admin -H "Authorization: Bearer $TOKEN"
Role-Based Access Control (RBAC): FastAPI vs. Go Side-by-Side
Both implementations follow the exact same pattern — only the idioms differ:

The Keycloak token structure is identical in both cases — realm roles live in:
{
  "realm_access": {
    "roles": ["admin", "user", "offline_access"]
  },
  "resource_access": {
    "myapp-api": { "roles": ["client-specific-role"] }
  }
}
Use realm roles for organization-wide permissions and client roles (resource_access) for per-application permissions.
Best Practices for Production
Before you ship this, check these boxes:
- Never use
start-devin production. Usestartwith proper TLS (KC_HOSTNAME,KC_HTTPS_CERTIFICATE_FILE) or terminate TLS at a reverse proxy withKC_PROXY_HEADERS=xforwarded. - Avoid the password grant. The Resource Owner Password Credentials flow is deprecated in OAuth 2.1. Use Authorization Code Flow with PKCE for user-facing apps and Client Credentials for service-to-service calls.
- Keep access tokens short-lived (≤5≤5 minutes is a common baseline) and rely on refresh tokens.
- Handle key rotation. The naive JWKS cache in our FastAPI example never expires — in production, add a TTL and re-fetch on unknown
kid. (The Go example already handles this viago-oidc.) - Validate the audience (
aud) claim. Configure an audience mapper in Keycloak so tokens are explicitly issued for your API, and reject tokens meant for other clients. - Use a real database and backups. PostgreSQL (as in our Compose file) — never the default dev-file store.
- Enable health and metrics endpoints (
KC_HEALTH_ENABLED=true,KC_METRICS_ENABLED=true) for Kubernetes probes and Prometheus. - One realm per environment (dev/staging/prod), exported as JSON via
kc.sh exportfor reproducible, GitOps-friendly configuration.
Fore more articles and tutorials, visit:
메타데이터
- post_id
- 182d042c9fef
- slug
- keycloak-the-complete-guide-to-open-source-identity-and-access-management-with-fastapi-golang-182d042c9fef
- url
- https://medium.com/@mjmichael/keycloak-the-complete-guide-to-open-source-identity-and-access-management-with-fastapi-golang-182d042c9fef
- canonical_url
- https://medium.com/@mjmichael/keycloak-the-complete-guide-to-open-source-identity-and-access-management-with-fastapi-golang-182d042c9fef
- author_url
- https://medium.com/@mjmichael
- status
- ok
- fetched_at
- 2026-07-21 02:08:18