Test-Automation using Selenium: An introduction to the most popular Test Automation framework.
Test-automation has become a fundamental practice in modern software development. It enables improving the efficiency, quality, and…
Test-Automation using Selenium: An introduction to the most popular Test Automation framework.

Test-automation has become a fundamental practice in modern software development. It enables improving the efficiency, quality, and reliability of the testing process. One of the most widely used tools for test automation is undoubtedly Selenium, an open-source framework that allows developers to write automated tests for web applications. In this article, we will explore the basics of test automation with the use of Selenium, and I will also provide you an overview of how to use this powerful tool to automate tests in web applications.
What is Selenium?
Selenium is an open source tool for automated browser management, used as a testing framework. Selenium actually indicates a suite, consisting of several tools: Selenium IDE, Selenium Builder, Selenium Grid , Selenium WebDriver. Among the main advantages of using Selenium for test automation certainly we can mention the fact that it is a cross-platform tool, which can therefore run on Mac, Windows and Linux. It also provides the ability to write tests in several programming languages, including Java, C #, Ruby, Python, PHP and many more.
Selenium architecture:
The following is an explanation of the architecture of Selenium and its main components: Selenium IDE, Selenium WebDriver and Selenium Grid.
Selenium IDE (formerly known as Selenium Recorder) is a complete integrated development environment for testing: it allows you to create, record, and debug tests. It comes as a Chrome extension and Firefox add-on. Test creation can also be speeded up with Selenium Builder, an extension that translates user behavior into commands for structuring Selenium tests.
Selenium WebDriver (successor of Selenium Remote Control — Selenium RC), on the other hand, is the tool that simulates the behavior of a real user inside a browser: it is used to run tests locally or on remote machines inside supported browsers (all the main ones, such as Chrome, Firefox, Safari, Edge, Internet Explorer…).
Finally, Selenium Grid enhances WebDriver, allowing tests to run simultaneously on several machines, reducing the time needed to run tests on multiple browsers and operating systems.
Selenium IDE installation:
Here’s a step-by-step look at Selenium IDE installation using Google Chrome browser but remember that Selenium is a suite of web test automation tools and can also be used with another browser like Firefox.
Let’s start together the installation:
- Open your Google Chrome browser on your computer;
- Copy and paste this link on the browser search bar https://chrome.google.com/webstore/category/extensions ;
- You will land on the extensions page, now look for the search field and type “Selenium IDE.” as shown below:
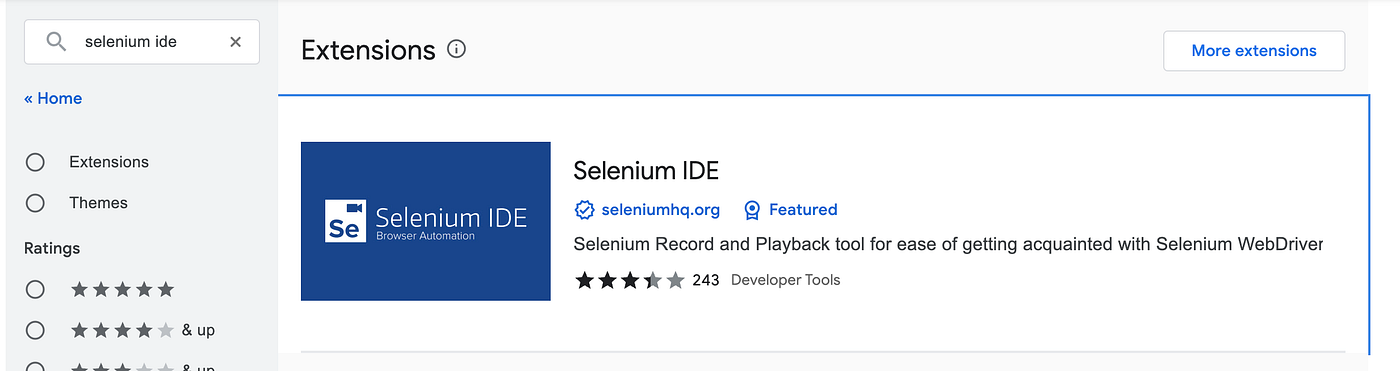
- Click on Selenium IDE result to open up the extension’s information page;
- Once you’re in the page tap on the “Add to Chrome” button, after that a confirmation message will be displayed, click then “Add Extension” to proceed with the installation;
- Once the installation is complete, if there were no previous extensions installed on your browser, you should observe an extension icon appearing in the Chrome toolbar:
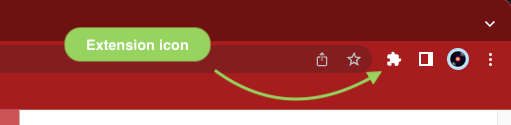
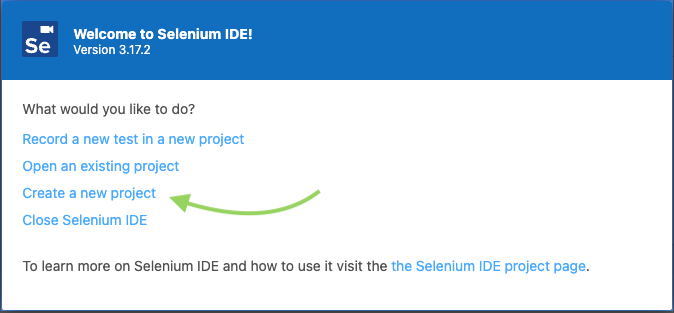
- You are now prepared to utilize Selenium on Chrome. To access the Selenium IDE, simply click on the extension icon. This will display the Selenium IDE extension. Once you click on it, a welcome window will appear, offering several options to choose from. Click on ‘Create a new project’ to begin setting up our first test:
Test creation:
Let’s say we need to verify the correct functioning of a login with a given username and password, in these 8️⃣ steps we will proceed with the setup of our first test:
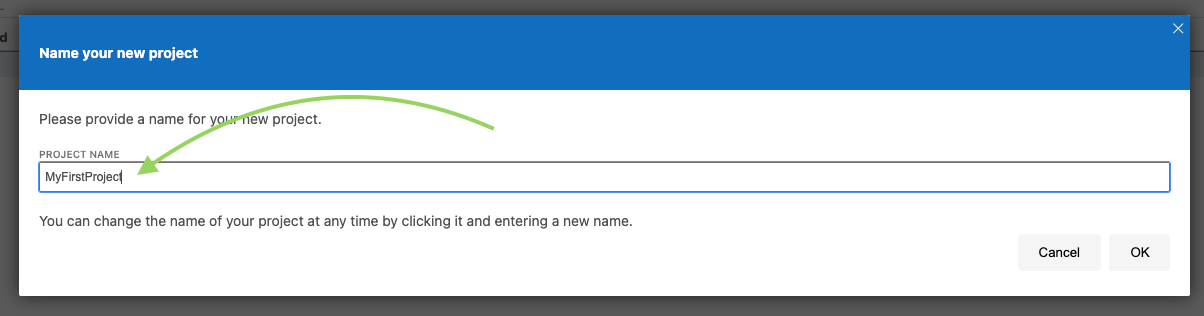
- ➡️ Step 1, name your project as MyFirstProject and press OK:
- ➡️ Step 2, rename the Untitled test that has been created by default pressing the vertical three-dot menu and opening the landing page, press “rename” and name your test as SuccessfulLogin:

- ➡️ Step 3, insert the following link https://the-internet.herokuapp.com/login in the field “Playback base URL” as shown in the picture below;
- ➡️ Step 4, press the recording red button “REC” on the right hand corner to open the desired page:

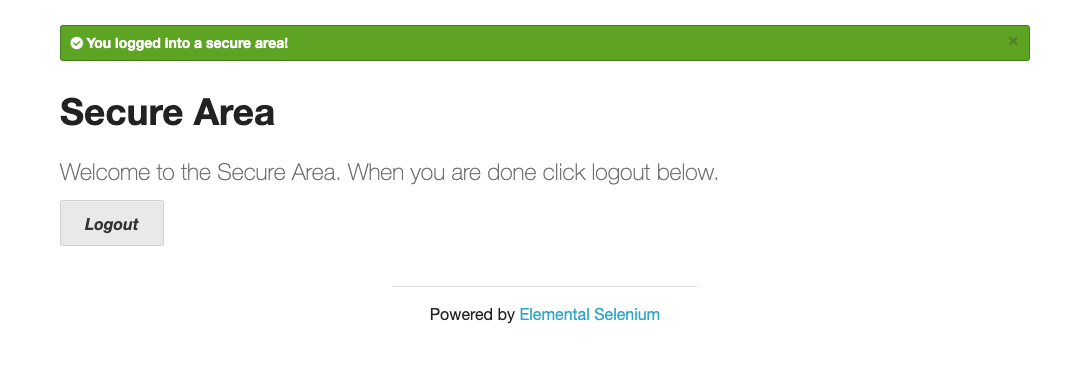
- ➡️ Step 5, at this point the browser will automatically open the login page, insert then the username and password reported in the page and press “Login” and you should access to the following page:
- ➡️ Step 6, click “Logout”;
- ➡️ Step 7, go to the Selenium IDE project page and stop recording.
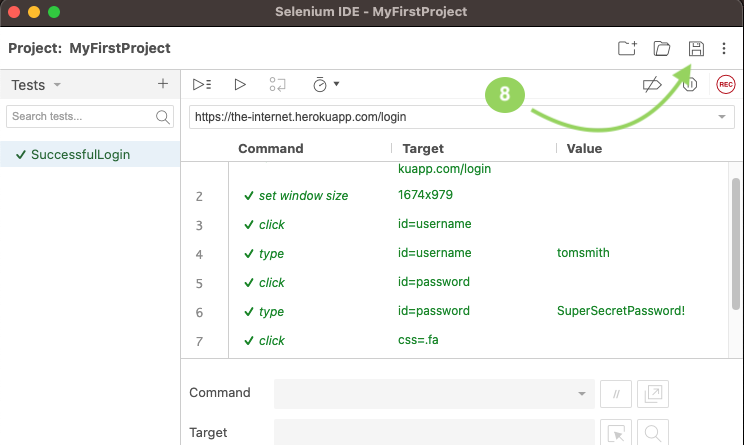
- ➡️ Step 8, finally save your project into a folder of your choice selecting the “Save project” icon or alternatively if you’re using a Mac just use the shortcut Command ⌘ + S:
- ✅ Great job! You just recorded and saved your first Test. 🥇
Let’s run our test
At this point, we have our test saved and we need to run it to reproduce the steps we previously recorded manually. We have the option to choose between 2 modalities, one using the Chrome Selenium IDE and the other one using selenium-side-runner from the command line. Let’s look at the 2 cases separately:
Option 1️⃣ :
Run the test using Chrome Selenium IDE:
- open the Chrome Selenium IDE from the chrome’s extension icon and this time select “Open an existing project” and through the directory, select the file MyFirstProject.side and click Open;
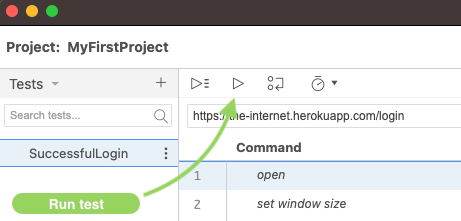
- select the “Run current test” button and the test will immediately start:
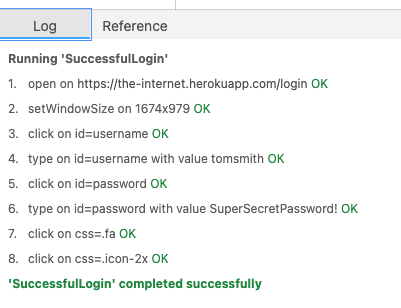
- If everything has gone correctly, you should see in the bottom log the printing of the individual steps performed by the test with all the details and the test result:
Option 2️⃣ :
Run the test using Selenium side runner:
There are a few prerequisites, following the selenium documentation that you need to perform the tests from command line, :
nodeversion8or10must be installed;npm(the NodeJS package manager) which typically gets installed withnode, must be installed;- Firefox browser;
Now open the terminal:
- install the selenium side runner by executing this command:
npm install -g selenium-side-runner- You need to install a driver for the browser you decide to use because Selenium communicates with each browser through a small binary application called a browser driver. In this case, if you choose to use Firefox, you can install geckodriver by executing the following command that will install it globally, allowing you to use it for Selenium automation:
npm install -g geckodriver- After installing the driver, you only need to launch the Selenium Side Runner along with the desired browser and provide the path to the MyFirstProject.side file that was previously created. This will initiate the immediate execution of our test:
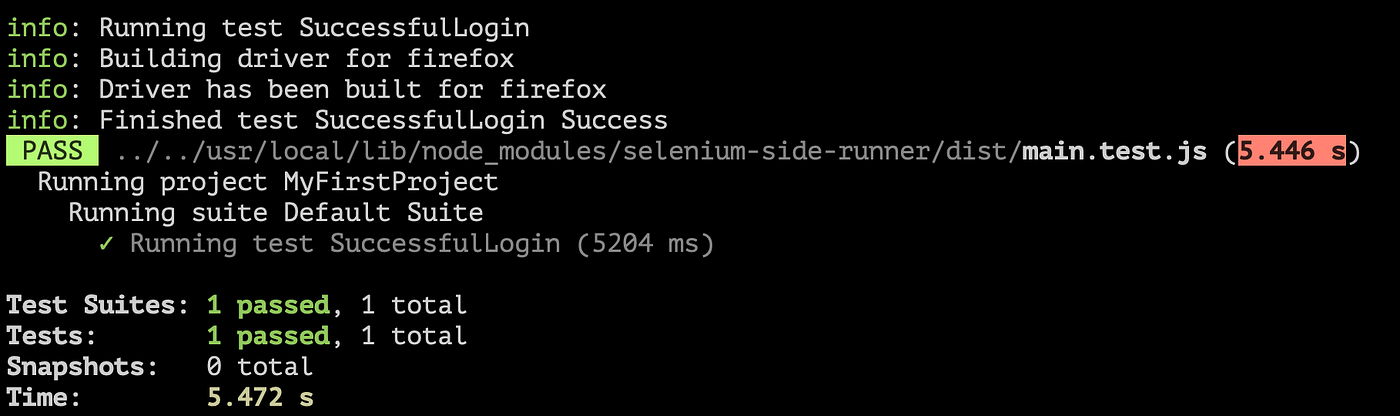
selenium-side-runner -c "browserName=firefox" /path/to/MyFirstProject.side- If the test has been executed, we will see the report printed on the terminal as shown in the example below:
I wrote this article following the official documentation of Selenium, which you can find at the following link. The documentation is detailed and accurate, covering all aspects from installation to usage.
Conclusions
In conclusion, test automation has become an essential practice for improving the efficiency and quality of software development. Throughout this article, we have explored the installation of Selenium IDE with Chrome as a powerful option for automating user interface tests (we also saw the installation of Firefox through the command line).
However, the topic of test automation is vast and rich with interesting facets that deserve further exploration. Therefore, I invite you to stay tuned to my channel, where you will find additional in-depth discussions on the subject. It is possible that in the future, I will publish a more detailed article that delves into advanced aspects of test automation, offering practical tips and solutions for common challenges you may encounter.
Don’t miss the opportunity to deepen your knowledge and stay updated on the latest trends in the field of test automation. Be sure to subscribe to my channel to be among the first to receive new content and not miss out on optimizing your testing activities.
Thank you for reading this article. Stay tuned and keep exploring the fascinating world of test automation!
Finally, I would like to thank my colleague Franceska for providing me with the lovely featured image and Davide for supporting me in writing this article.
메타데이터
- post_id
- 1bcff0577c8f
- slug
- test-automation-using-selenium-an-introduction-to-the-most-popular-test-automation-framework-1bcff0577c8f
- url
- https://insights.overapp.com/test-automation-using-selenium-an-introduction-to-the-most-popular-test-automation-framework-1bcff0577c8f
- canonical_url
- https://insights.overapp.com/test-automation-using-selenium-an-introduction-to-the-most-popular-test-automation-framework-1bcff0577c8f
- author_url
- https://medium.com/@agostino.careddu
- status
- ok
- fetched_at
- 2026-06-10 08:17:25






