[1989] Under the red light: demystifying the slow craft of darkroom film photography
[Long Read] Analogue film photography before Photoshop.
[1989] Under the red light: demystifying the slow craft of darkroom film photography
[Long Read] Analogue film photography before Photoshop.
By Jesse Karjalainen (Non-member? Join me on all your favourite social platforms: **YouTube | [TikTok](https://www.tiktok.com/@retrotechshow?source=user_about----------------------1aa8cfb4ab15----------------------) | [Substack](https://substack.com/@retrotechshow?source=user_about----------------------1aa8cfb4ab15----------------------) | [Bluesky](https://bsky.app/profile/retrotechshow.bsky.social?source=user_about----------------------1aa8cfb4ab15----------------------) | [Gumroad](https://jessebooks.gumroad.com/?source=user_about----------------------1aa8cfb4ab15----------------------)**.)
…
I don’t know if it was the worst school in Melbourne for a few years, but I went to what could generously be called an “experimental” one. Let’s just say, it wasn’t a school for the parents of lawyers and doctors. It was my local high school, which ironically was filled with some of the most expensive private schools in the city.
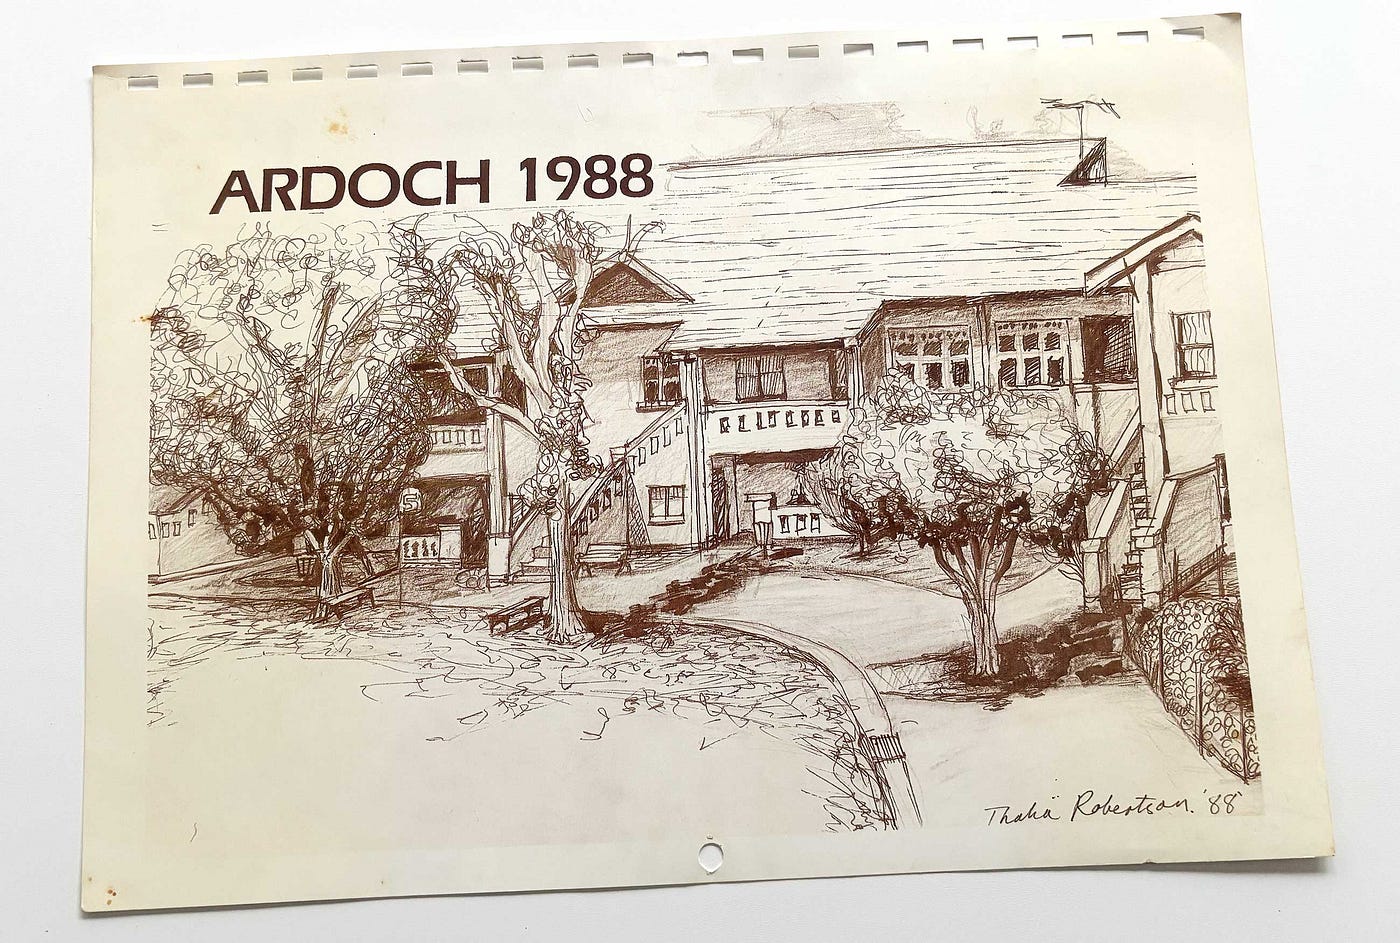
The Ardoch wall calendar from 1988. Image copyright Jesse Karjalainen.
That school was called Ardoch, set among a campus of Art Deco bungalows from the 1940s. On one level, it was a typically under-resourced school where the teachers did their best. At the same time, this school was known for being the last refuge for kids who had been expelled from every other school in the city.
The Ardoch High School logo. Image copyright Jesse Karjalainen.
We had all the usual subjects like maths, English, art and science. But we also had lots of ‘easy’ electives. The one I liked to brag about was Board Games.
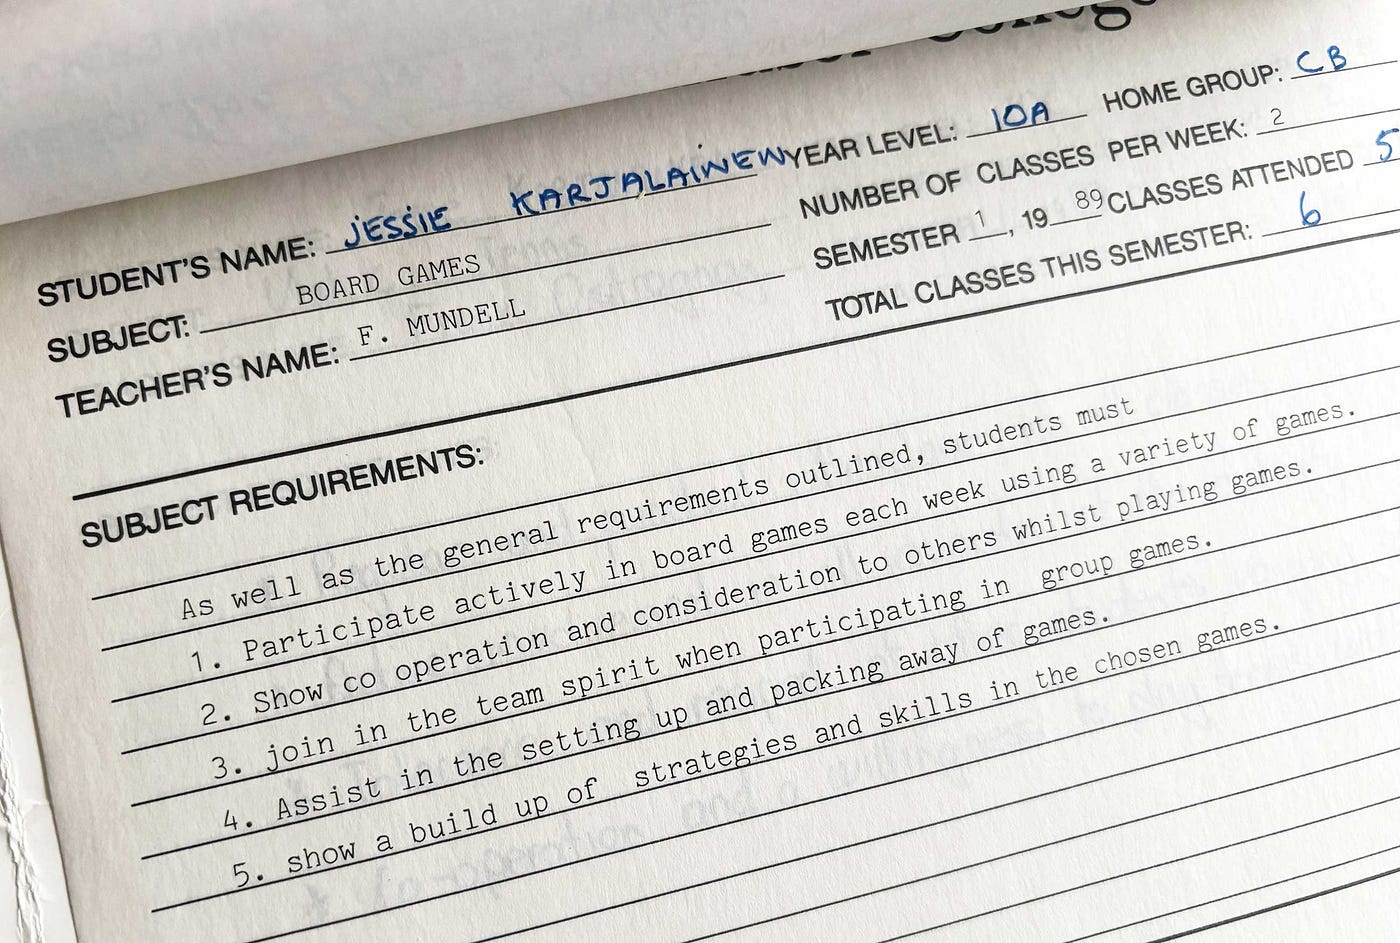
School report: Board Games, Year 10. Image copyright Jesse Karjalainen.
Yes, board games. I have my school transcript here. The subject requirements and learning objectives included: attend all classes; participate in all class activities; co-operate and work willingly with other class members; to learn new games; and enjoy board games. Amazingly, I reached an overall grade that year of ‘Satisfactory’.
In 1989, Year 10 for me, Ardoch merged with the nearby Windsor Technical School. We now had classes across two campuses.
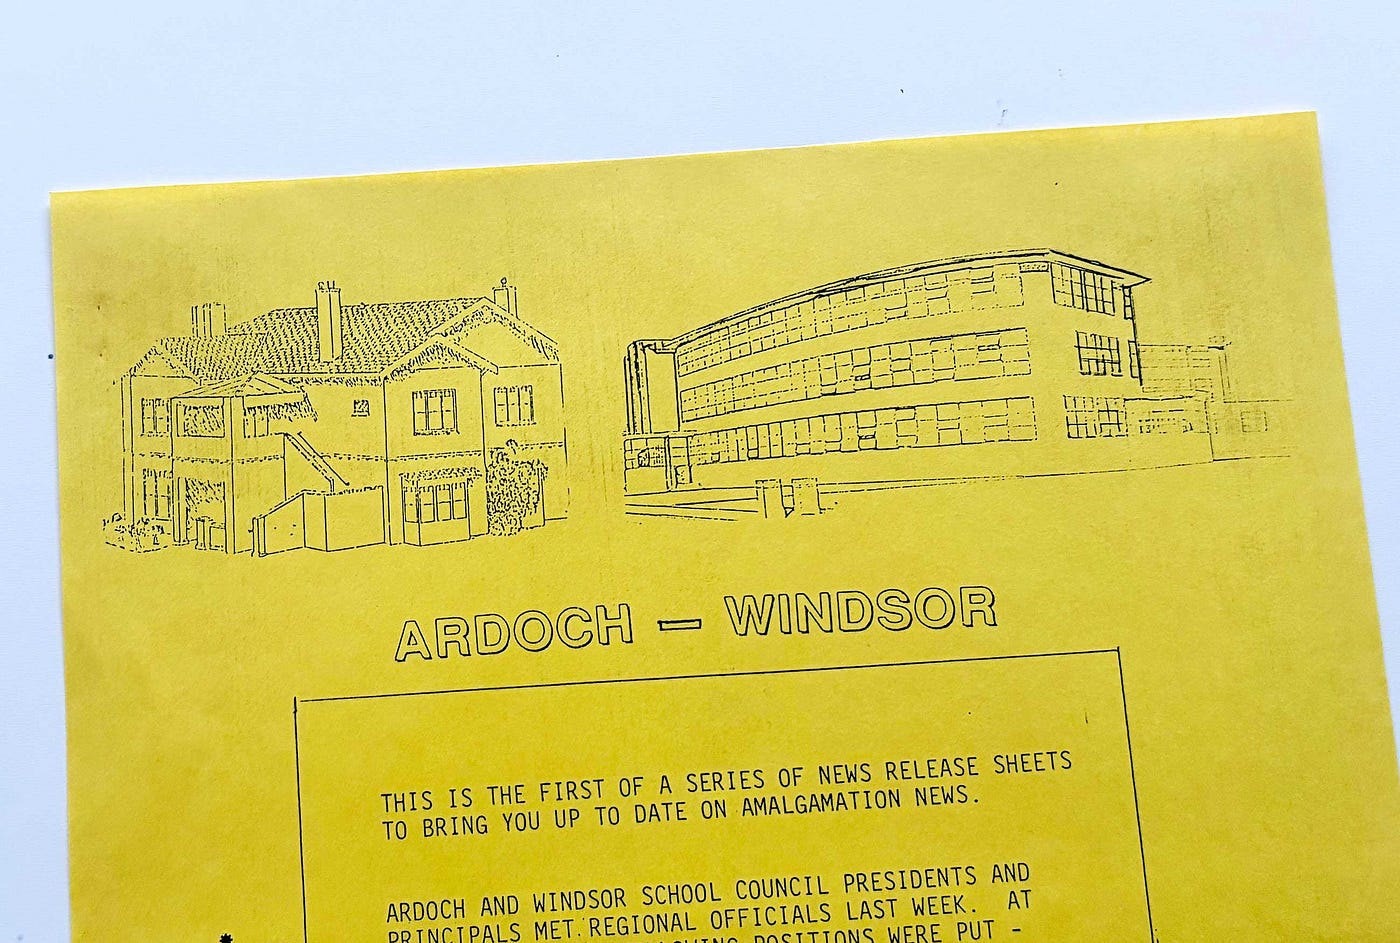
Ardoch High School and Windsor Technical School. Image copyright Jesse Karjalainen.
Suddenly, my electives included subjects like technical drafting, computer studies and photography. It was here, age 15, that I spent a joyous time in the photography darkroom. And it reignited my passion for photography.
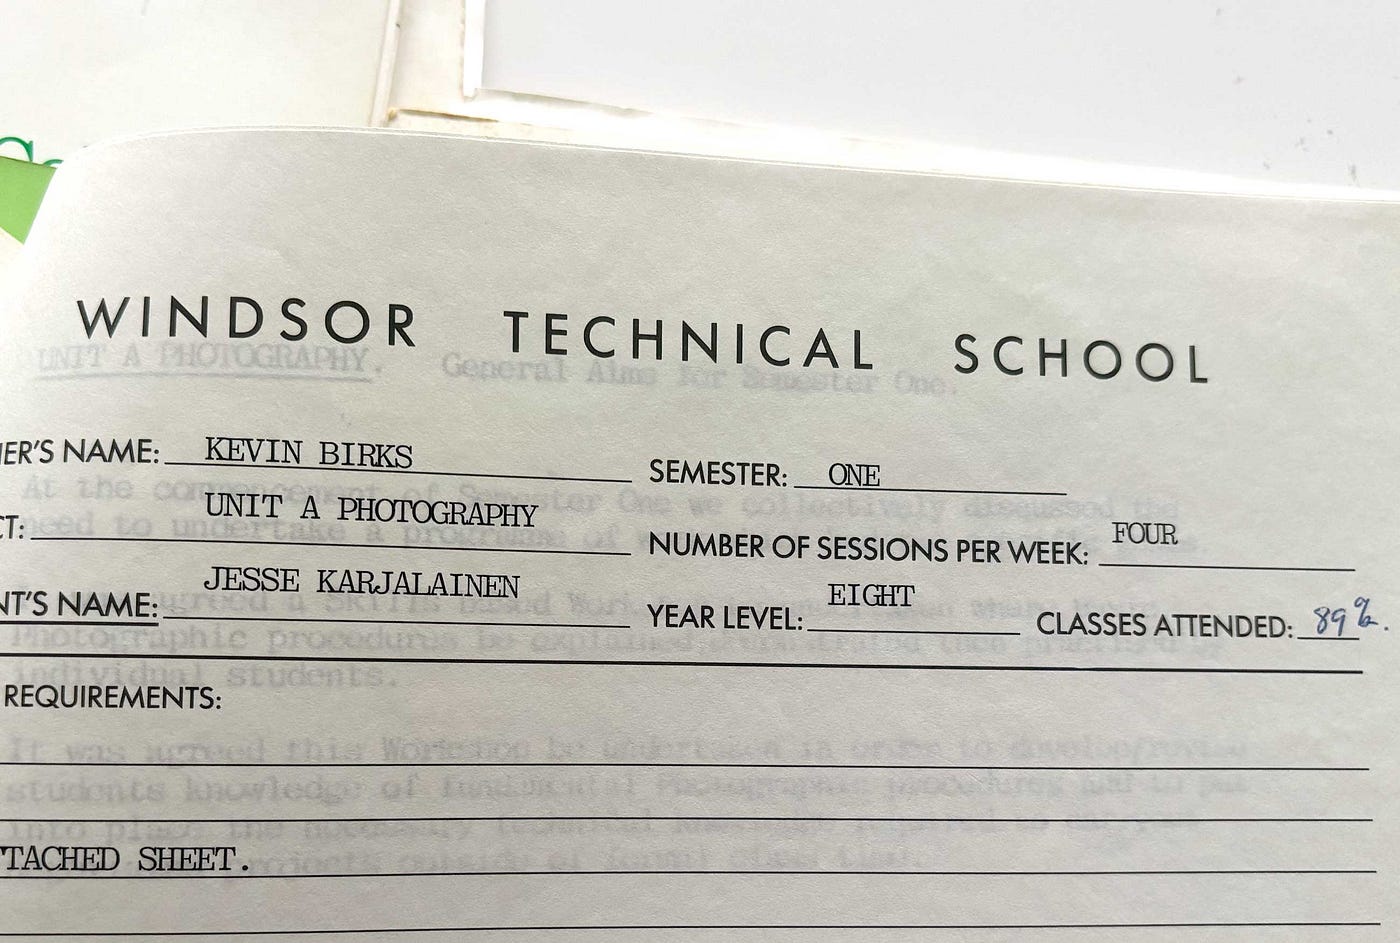
The Windsor Technical School letterhead. Image copyright Jesse Karjalainen.
There is a certain irony in younger Millennial and Gen Z readers being used to processing their photos in Lightroom, while in the analogue days, photographers did their processing in a Darkroom.
For those who are curious about how it all went down in the film days, I thought I would break it down according to the actual syllabus of Unit A Photography from Year 10 in 1989. It was set out by the excellent and encouraging teacher and photographer, Kevin Birks.
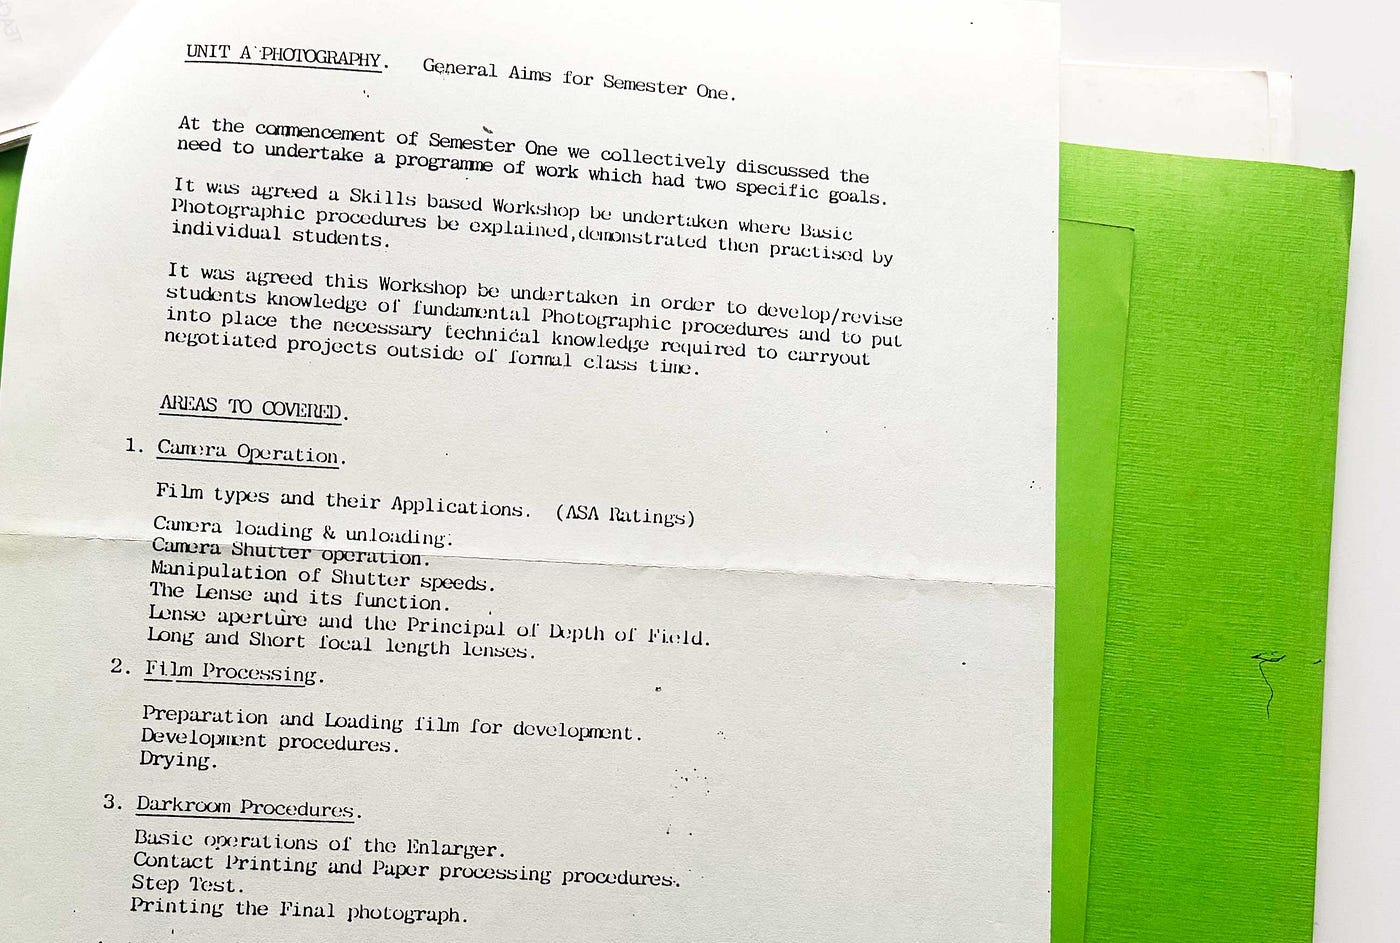
My old photography syllabus. Image copyright Jesse Karjalainen.
The steps included:
-
Camera Operation
-
Film Processing
-
Darkroom Procedures
Let’s take a look at how film processing and analogue prints were made back in the day.
Camera Operation
The first lesson of our photography class was to destroy the myth that you can only take good photos with an expensive camera. What matters is knowing the camera principles and how these work with the fundamentals of light.
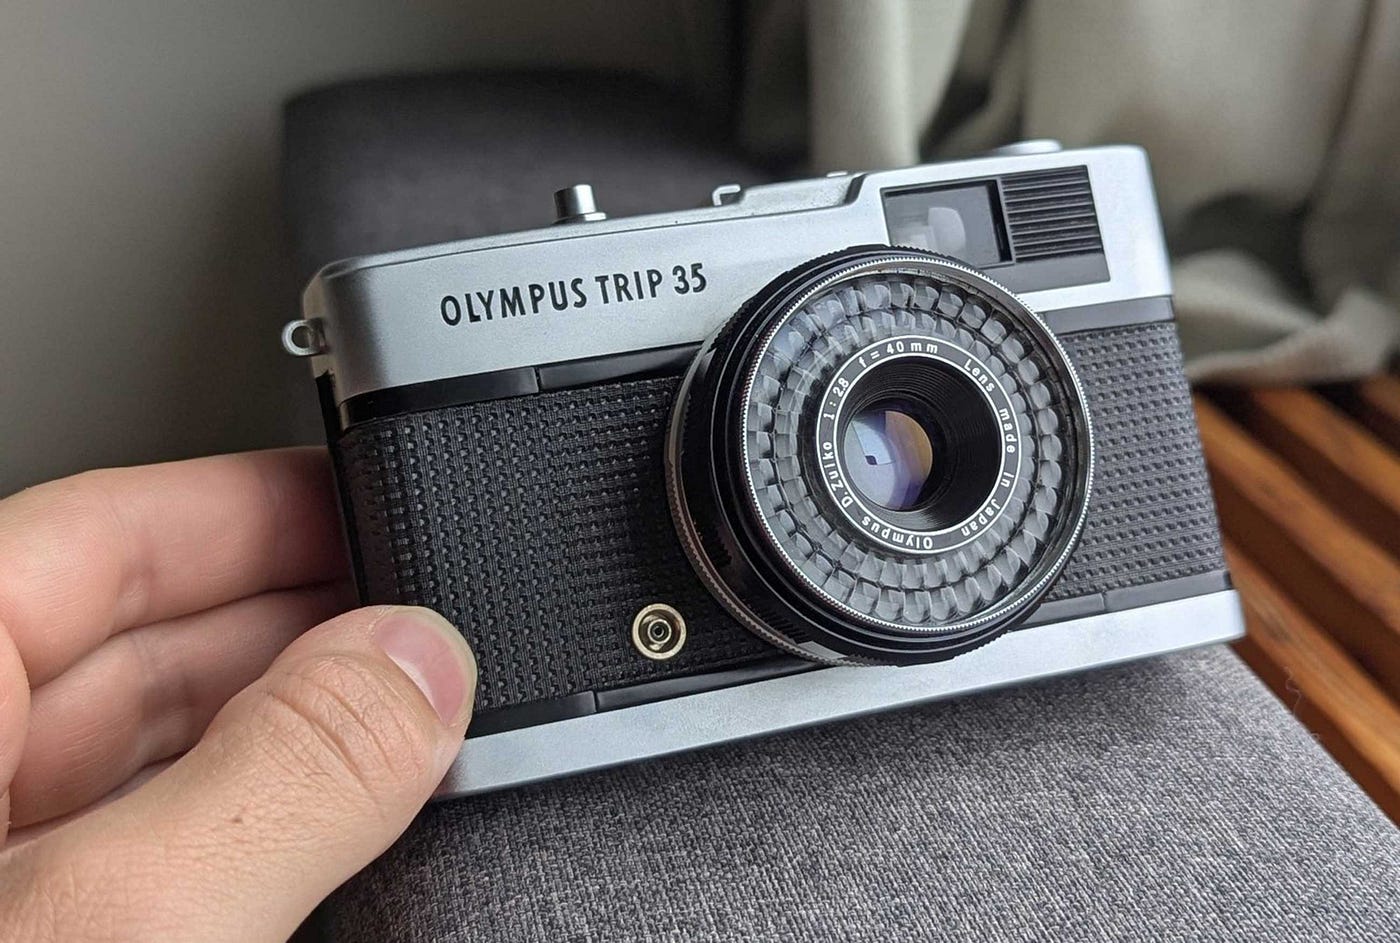
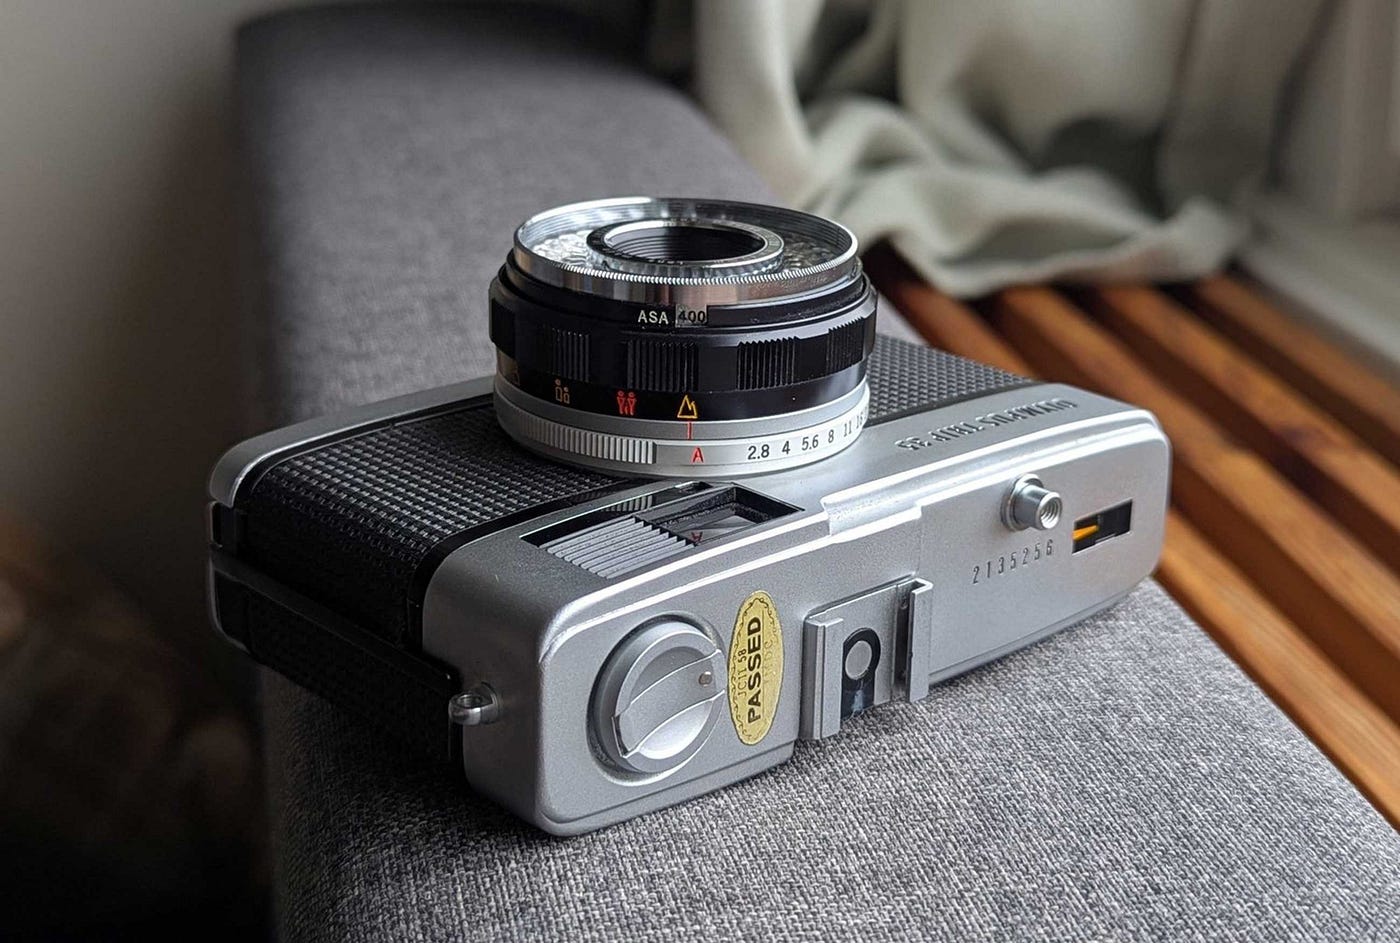
The Olympus Trip 35. Private image courtesy and copyright Gabriel de Blasio.
For this class, we were each given a roll of black and white Ilford film and a pocket camera. This was the ever-reliable Olympus Trip 35, which first came out in 1967 and stopped being made in 1984. This being 1989, we were using obsolete equipment from the start.
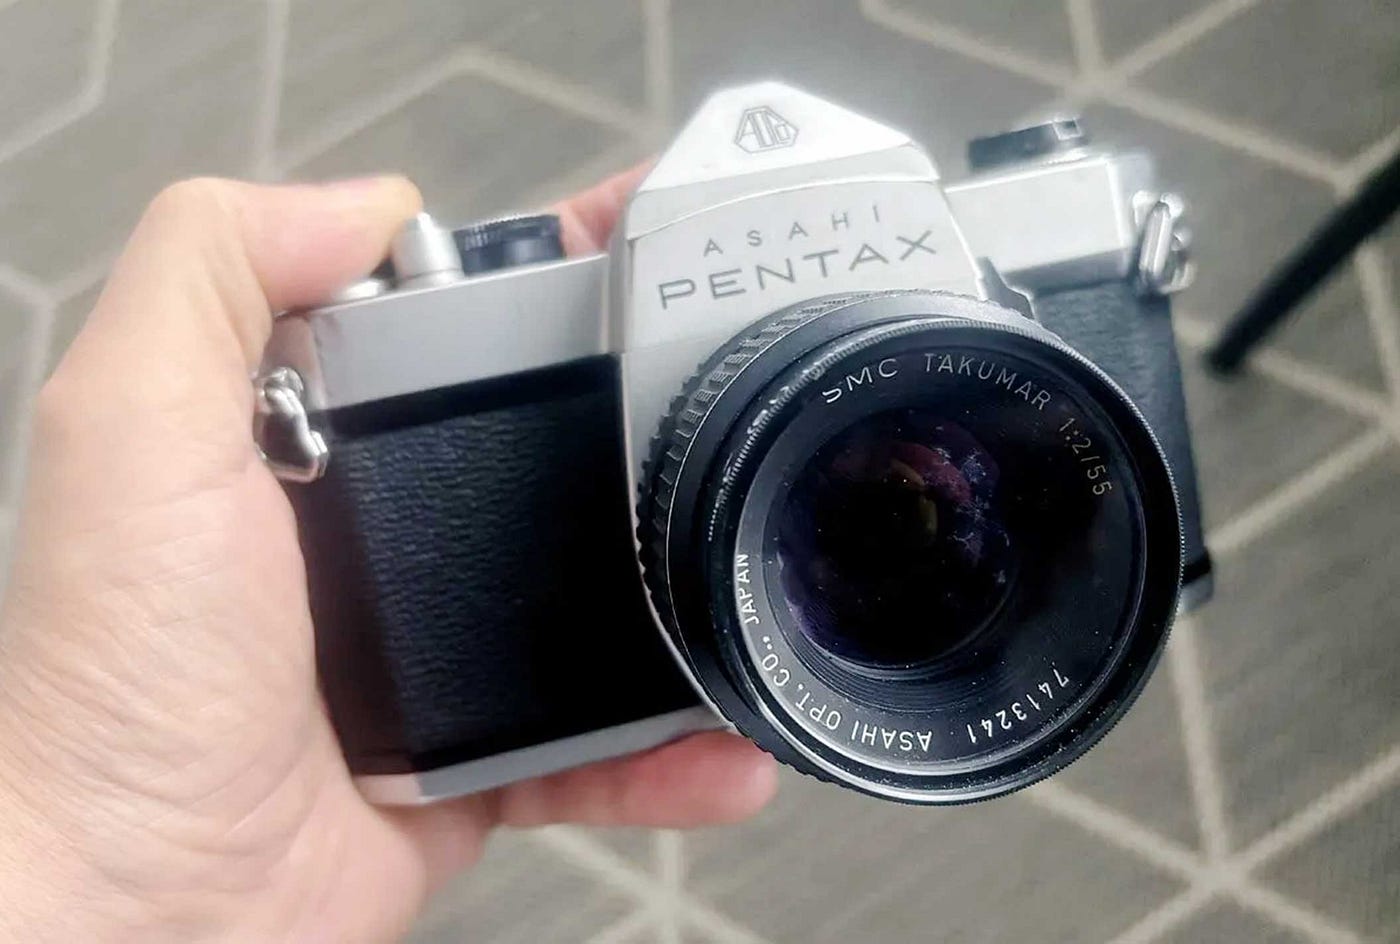
My Pentax SP1000 SLR film camera. Image copyright Jesse Karjalainen.
I remember scoffing at the Olympus Trip because I used my own Pentax SP1000 SLR to class. But looking at the Trip from a 2020’s perspective, it is actually a beautifully engineered camera.
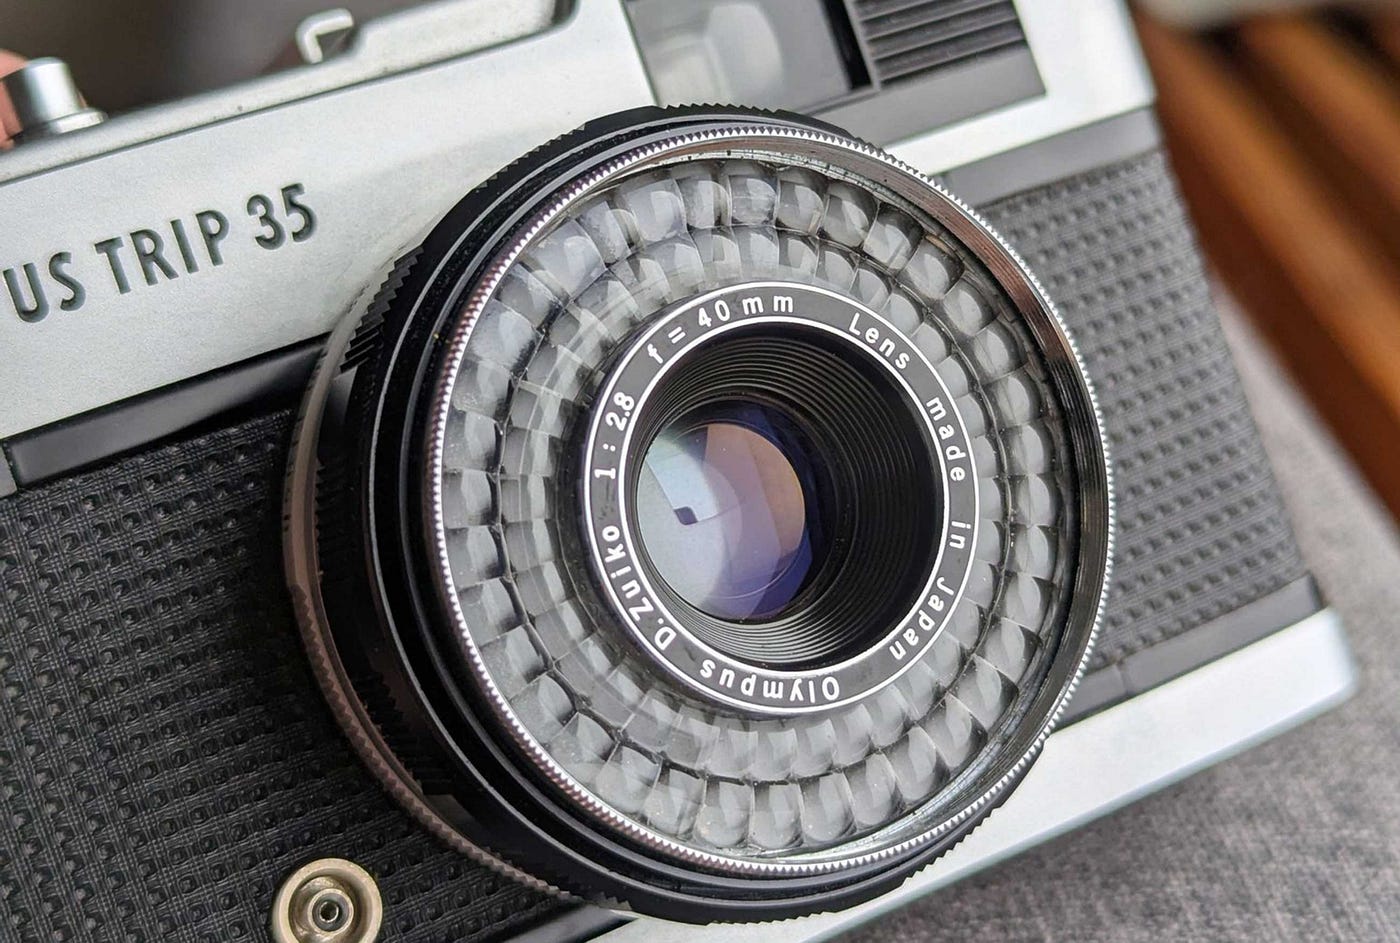
The Olympus Trip 35. Private image courtesy and copyright Gabriel de Blasio.
You’ll notice from pictures of it that it has a strange ring of glass beads around the lens. You won’t see this on any other camera because the Olympus Trip was the only solar-powered camera on the market.
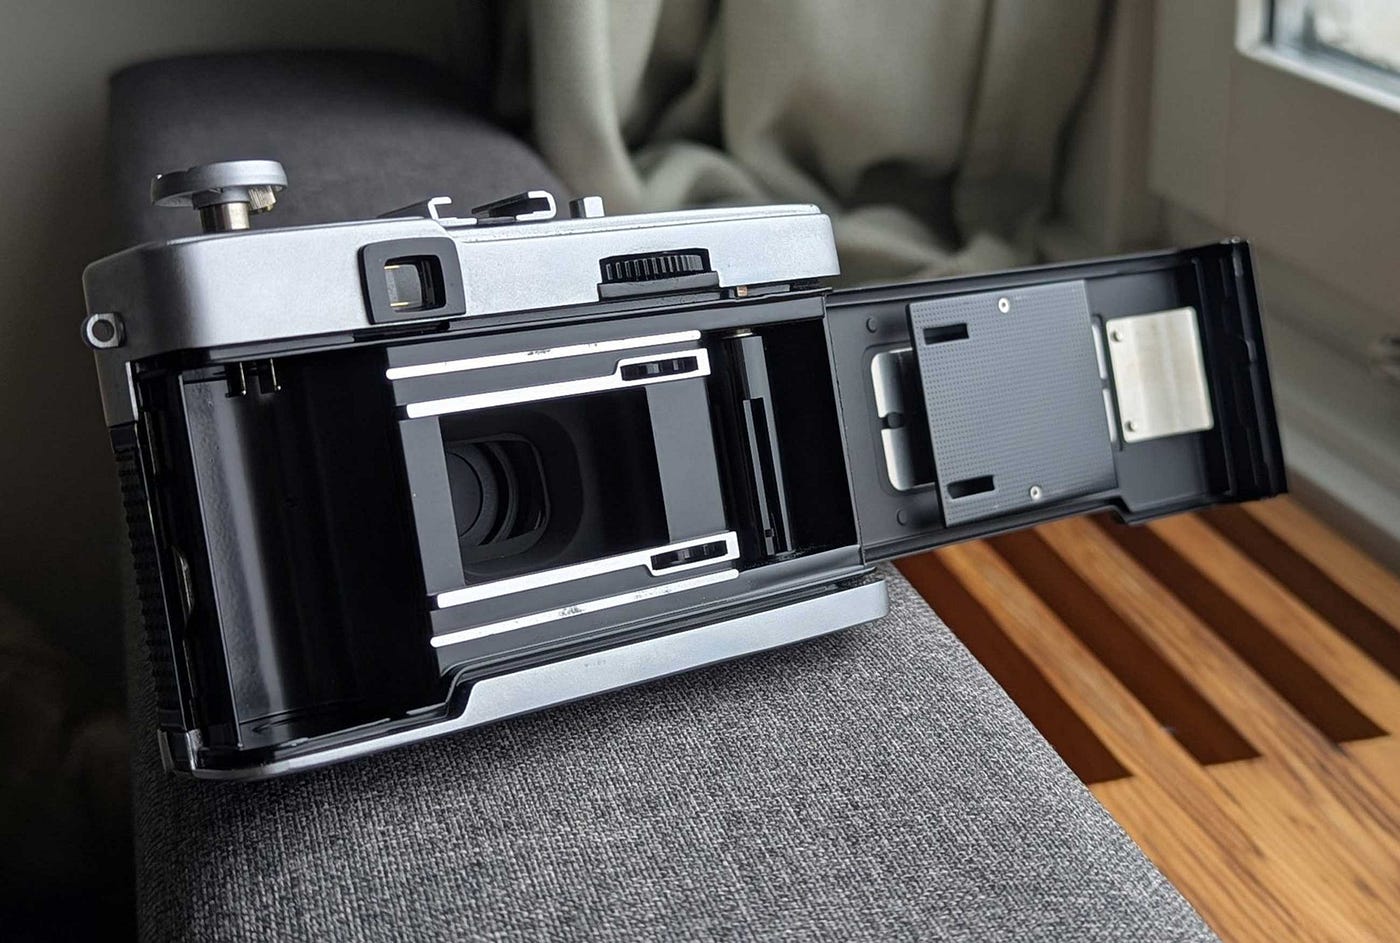
The Olympus Trip 35. Private image courtesy and copyright Gabriel de Blasio.
I won’t go too much into detail about camera operations except to say that both my camera and the school pocket camera used 35mm film. On the Trip, the shutter speed was manual, but the exposure metering was automatic, with no focus function. On my Pentax, everything was manual, so there were more things that could go wrong.
The real purpose of the class was to quickly move beyond film types, ASA ratings (a bit like ISO) and film grain to film processing and making prints in the darkroom. Therefore, the Olympus Trip quickly got everyone up to speed.
After we were unleashed onto the streets, we all came back with a used-up roll of black and white Ilford and Kodak film.
PART 1: Film Processing
The typical thing people did until the end of the 1990s was to take rolls of colour film to the pharmacy or photo-processing shop to magically turn them into a pack of prints. This was a highly complex and expensive thing to do at home.
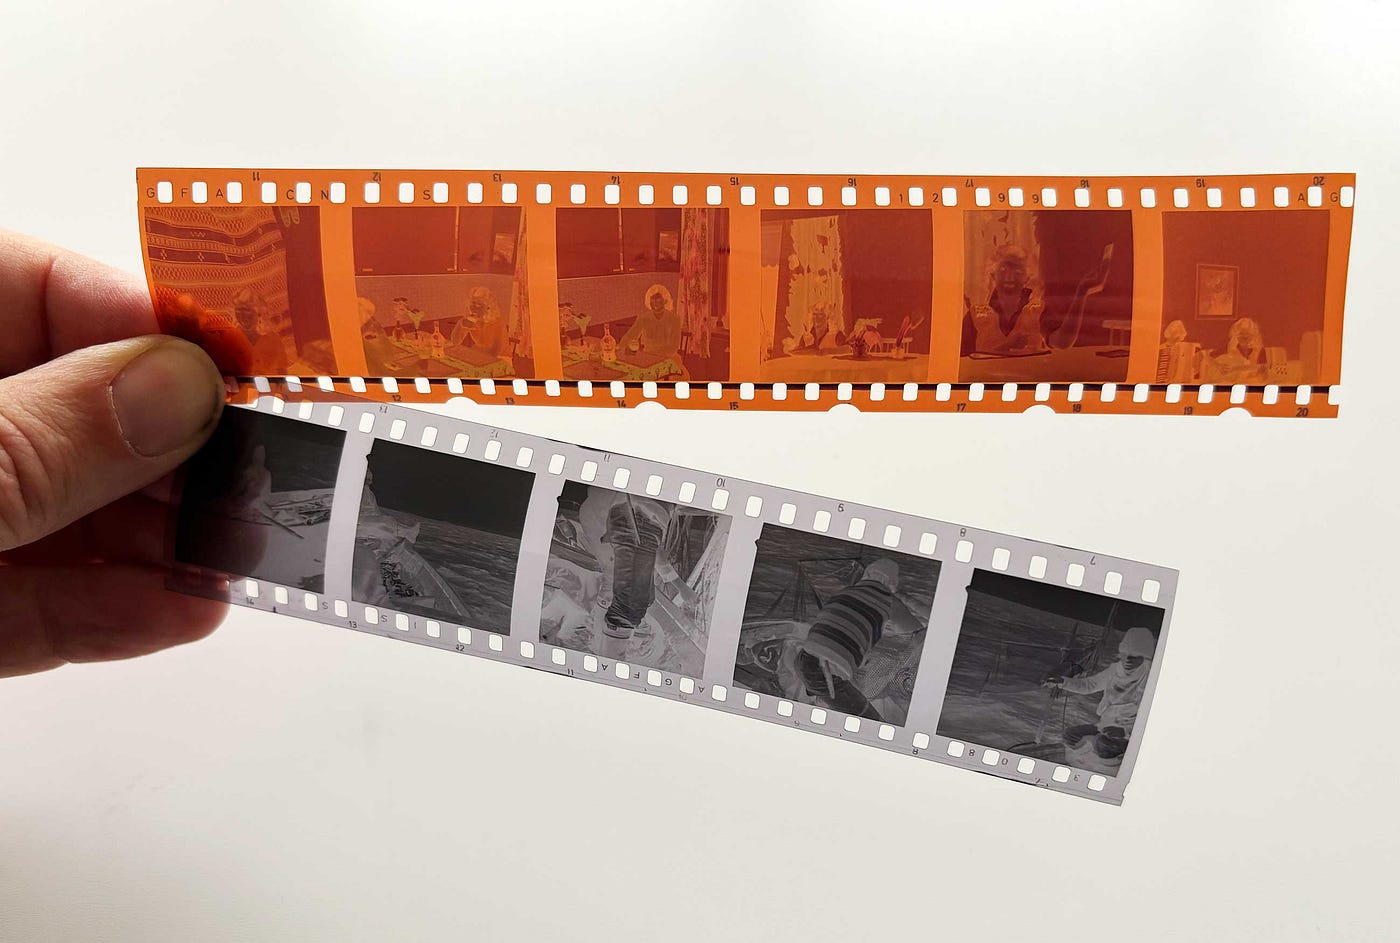
Colour (above) and black and white (below) negatives are different. Image copyright Jesse Karjalainen.
With black-and-white film, however, it was quite straightforward. There was a thriving industry catering to an army of hobbyists who processed their own materials at home. This made it all relatively affordable. A lot of photographers built darkrooms in their sheds, attics, broom cupboards and in the void underneath the stairs.
Our classroom, thankfully, had a purpose-built darkroom with dual entrances blocked by thick curtains. Inside was a gally with three so-called enlargers in a row along one side and a wet area along the other side for all the processing chemicals.
The first step in the whole film-processing process was to get the film out of the metal casing of the roll. This had to be done in complete darkness. (No red lights.) The options were: do it in the darkroom with the lights off; or use a special black-fabric “changing bag” or box that you reached into through special slots for your hands.
Inside that bag, you would have your film roll (one or more), a tool for popping open the film roll, a special film spool to put the film into and a so-called developing tank.
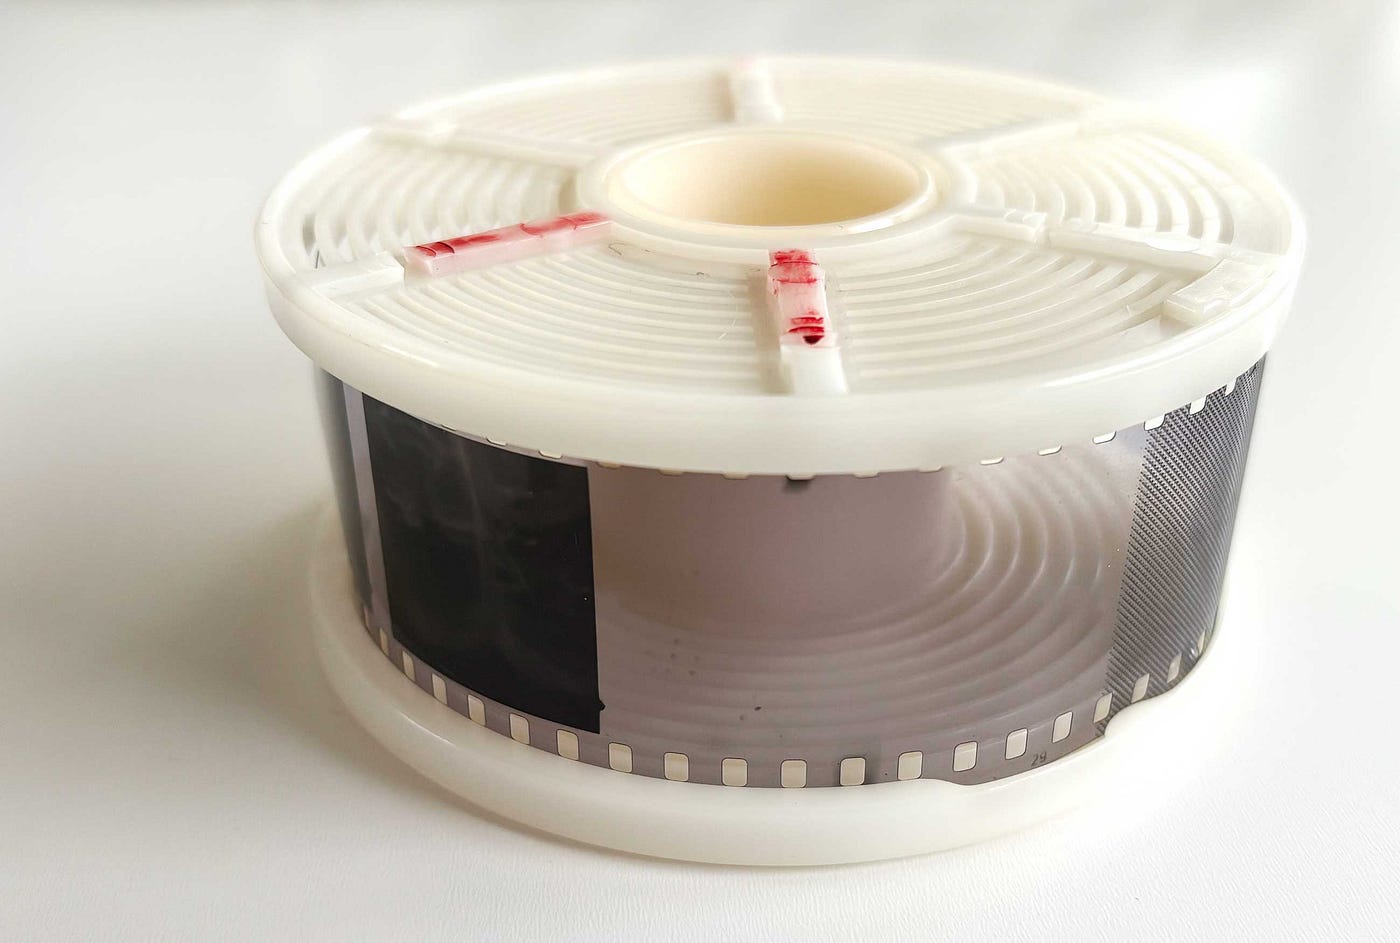
The film spool for film processing. Image copyright Jesse Karjalainen.
Whether in the bag or in the darkroom, you would pop open the film roll by feel alone. The film would be attached to the central spindle by a tape that you could tear. Next, the teacher taught us how to slide the film into the spool. Once it was in, there were small lugs (“teeth”) that caught the holes and you then twisted the two sides of the spool back and forth. This would feed the long film into the spiral grooves of the spool until the whole roll was secured inside.
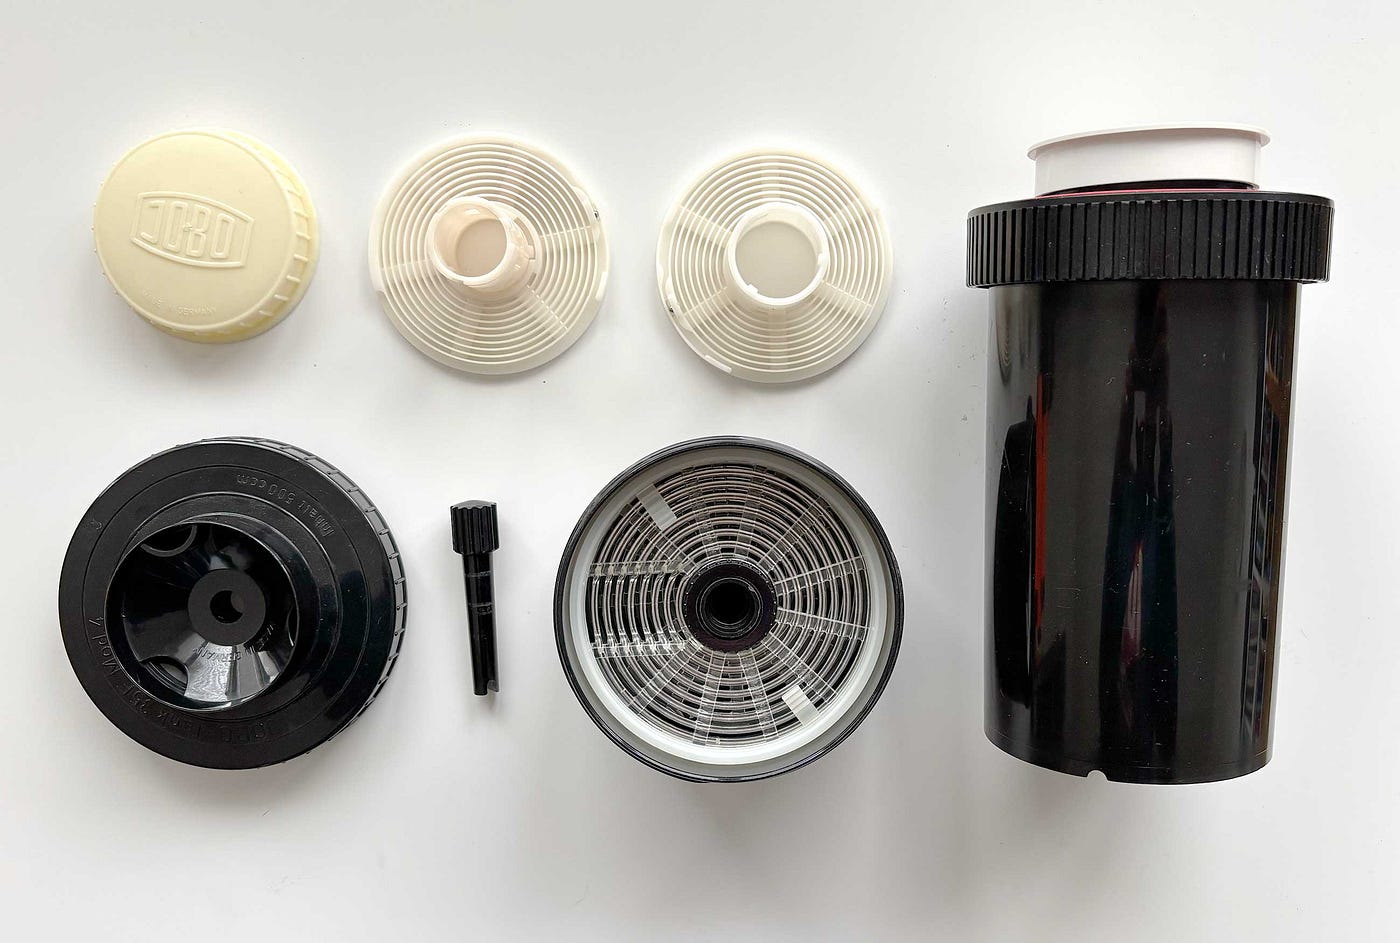
Film-processing tanks, large and small. Image copyright Jesse Karjalainen.
This was the trickiest part of film processing.
Once you had that done, you then put the spool inside the developing tank, secured the sealing ring and then put the lid on. Again, all of this was done by feel.
If you had several rolls of film and a larger developing tank, you would repeat the procedure. One film into one spool. With the lid of the developing tank fitted securely, you could now open the bag or step out of the darkroom. You were ready for the next step.
The tank was designed to be light-proof even with the cap removed. This was where you would pour in the processing chemicals.
Chemical realities
It can be hard for “digital natives” to understand just how much chemistry and physics applied when it came to analogue photography. To process black and white film, you needed five different chemicals.
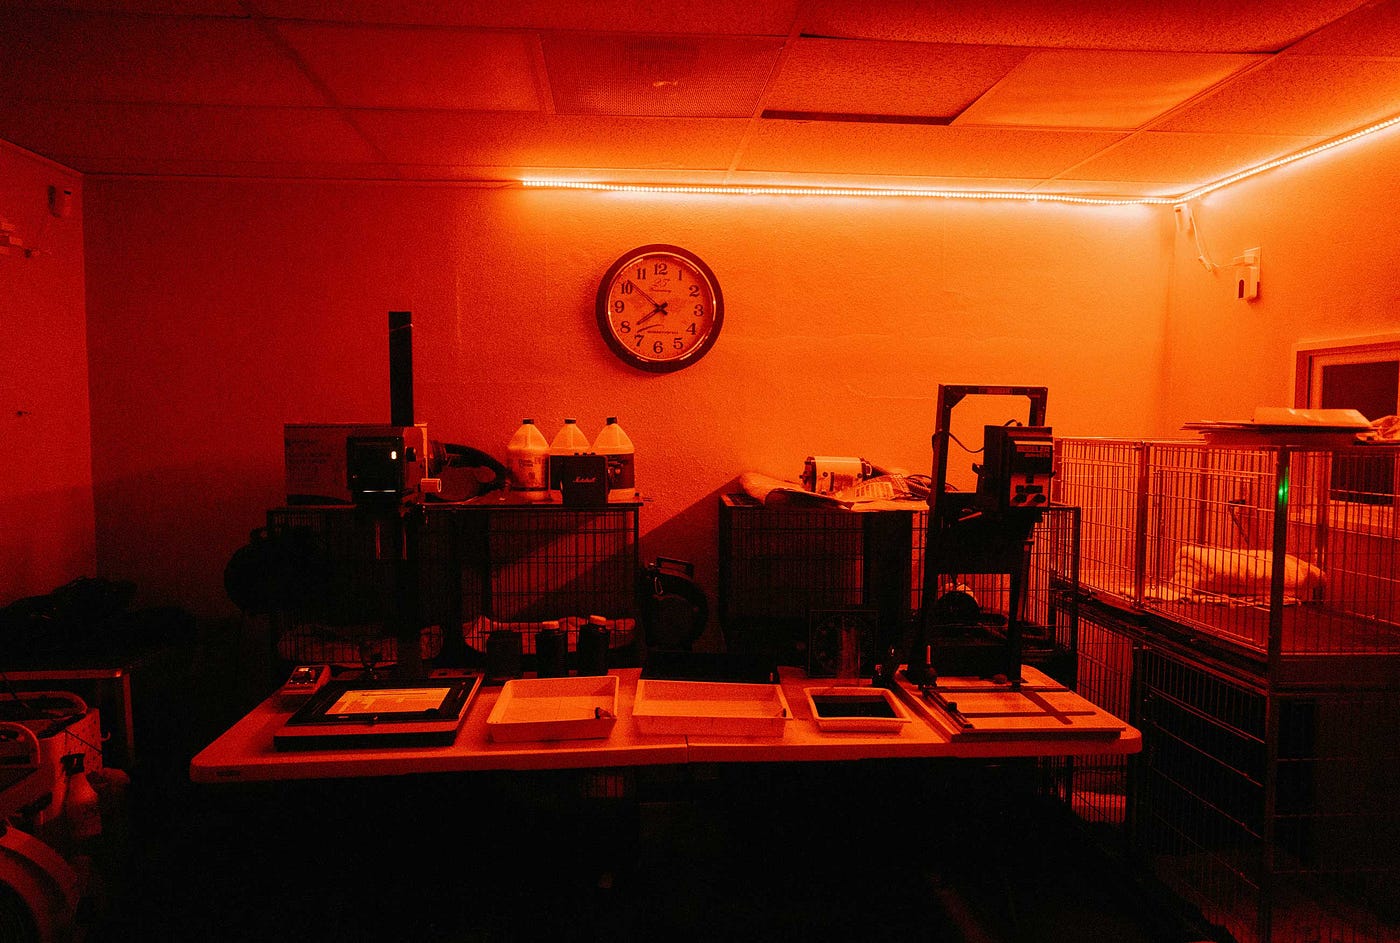
Image courtesy Francisco Gonzalez via Unsplash.
So, with your exposed film secured in the spool inside the developing tank, the first thing to was to check the temperature of your chemicals. You typically needed to keep it at around 20–24C/64–75F for optimal processing.
This was the thing about analogue photography. Even with a perfectly focused and perfectly exposed photo on the camera end, there were still endless variables to get right in the processing side of things.
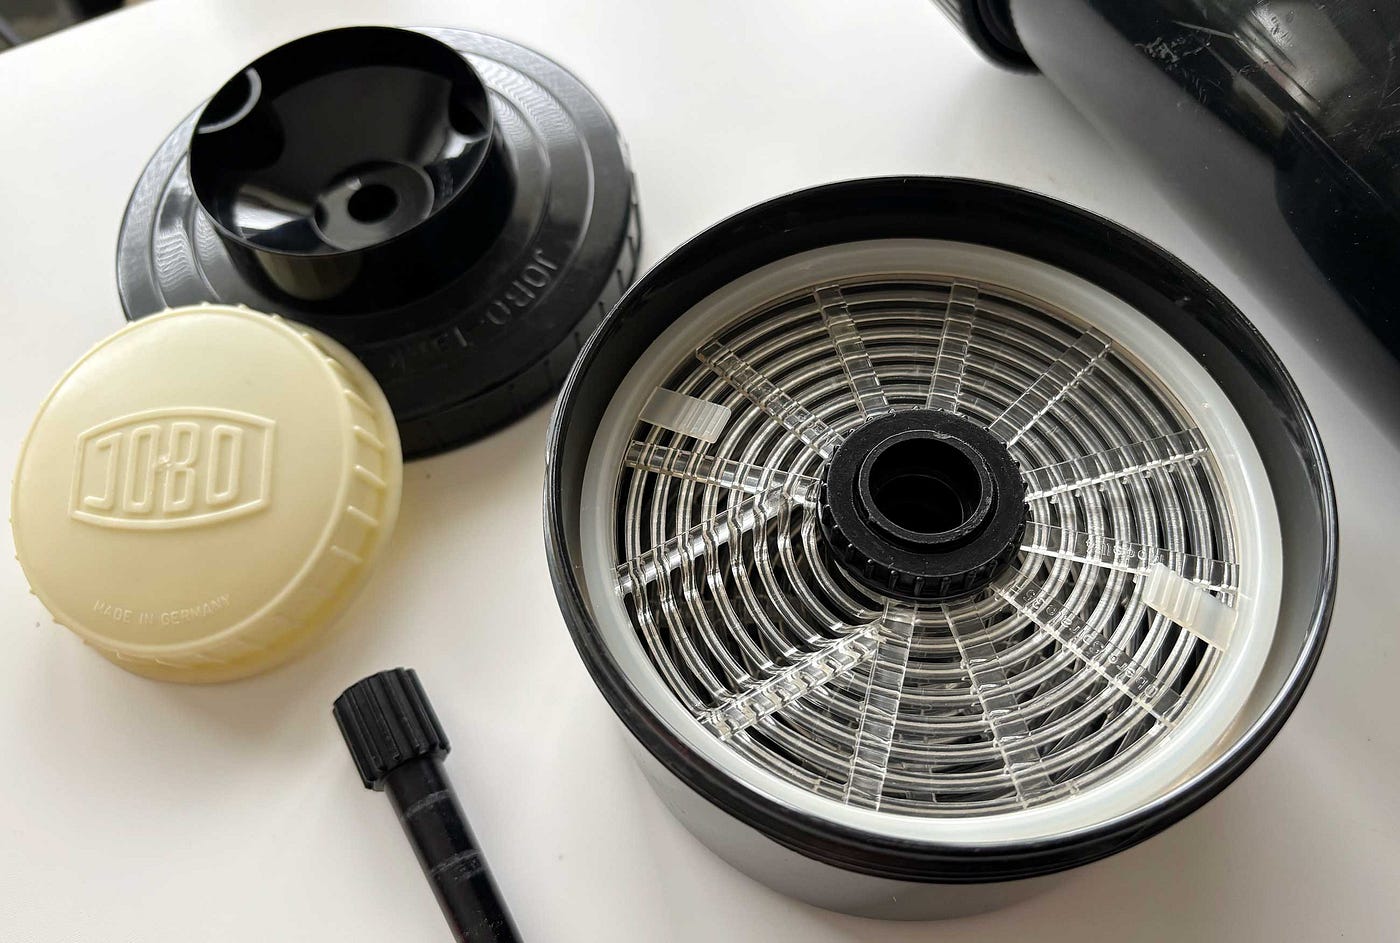
Inside the processing tank. Image copyright Jesse Karjalainen.
The steps for processing film were:
a) DEVELOPER
· Film developer — this is mixed with the emulsion on the photographic film and strips away the unexposed areas. The areas where light had hit the film through the camera lens remained. This left the clear/see-through parts of the film.
The first thing that could go wrong when pouring in the developer fluid was that it was, say, too cold, which might not fully develop that perfect exposure to its optimum potential. The second thing that could go wrong that you didn’t measure in enough developer liquid, which meant that you didn’t quite have enough fluid to fully develop your film.
After pouring in the developer, you put on the end cap to prevent spilling. Then you did a series of tipping the tank upside down using the axis of your wrist — like turning a key. You did this four times within the first 10 seconds. The next thing that could go wrong was when not all of the film began processing at the same time because air bubbles prevented the fluid from reaching the film emulsion. Therefore, you had to tap the tank hard against your workbench frequently to dislodge any stubborn air bubbles within the spool.
After the four minutes were up, you needed to remove the cap and pour out the developer solution. You could only use Developer Liquid once. This was the end of the first step of film processing. And there was still plenty that could go wrong.
b) STOP BATH
· Stop Bath — This chemical halts the work of the developer liquid. Without it, the developer could eventually “eat away” your image by destroying the emulsion.
The next step involved pouring in a diluted solution of Stop Bath. Being an analogue process, there were many variables at play. It was important to have the right temperature and dilution. That’s why we used beakers. Measure wrong and the solution wouldn’t work, causing over-development of your perfect exposure. Some Stop Bath solutions came with colour dyes that changed according to the level of dilution, which was a helpful indicator.
After several rounds of upside-down flips and air-bubble bumps, you poured out the liquid. It was generally okay to re-use with other spools during the same processing session, but otherwise it was a one-time use.
c) FIXER
· Fixer — This chemical is to “harden” or “fix” the state of the exposed emulsion that formed your image on the negative. This stopped the negatives from being affected by daylight.
The same procedures applied to the Fixer — right temperature, correct dilution, right amount of time and lots of sloshing it around the spool inside. This was another liquid that could only be used in the same processing session.
d) WASHER
· Washer — This is a soapy cleaning solution to properly wash your film so that no loose bits of floating emulsion stuck to your film.
Now you need to give your film a good wash. The Washer goes into the tank, you flip it around 5 times and pour it out. Then you repeat this step with fresh water and invert it 10 times before pouring it out again. Do this one last time and flip the tank 20 times before emptying it out.
e) WETTING AGENT
· Wetting Agent — This is a special liquid that lowers the surface tension of the film. This does three things: speeds up the drying process; works to prevent water spots from forming on the dried film; and repels dust from settling on the film as it dries.
The final step is to pour in Wetting Agent, which works like a laundry detergent. You fill the tank with clean water and add a given amount of agent (perhaps two capfuls) at the right temperature. Tipping the tank 5–6 times (with the cap on) is enough to coat the film with the wetting agent. Then you pour it out.
You are now done with the film processing. It is safe to open the processing tank and pull out the spool. The spool could be pulled apart into two sides by twisting the central spindle in opposite directions until you heard a click.
You retrieve the wet film, attach a film clip to one end and hang it up to dry. To remove the final Wetting Agent and water, you use the special squeegee by running it carefully down the film strip. Then allow to dry.
Once dry, you then hand-cut the film into the more familiar negative strips. Congratulations, you are now ready to start making your own prints in the darkroom.
Part 2: In the Darkroom
The minimum equipment you need to make your own prints in the darkroom includes:
· an enlarger, which is the projector that shines the image down onto your paper · a sink-like developing area for the wet chemicals involved in developing the paper prints · a red photo lamp to light the room · an assortment of trays, clips, beakers and pincers · an assortment of chemicals for print developing
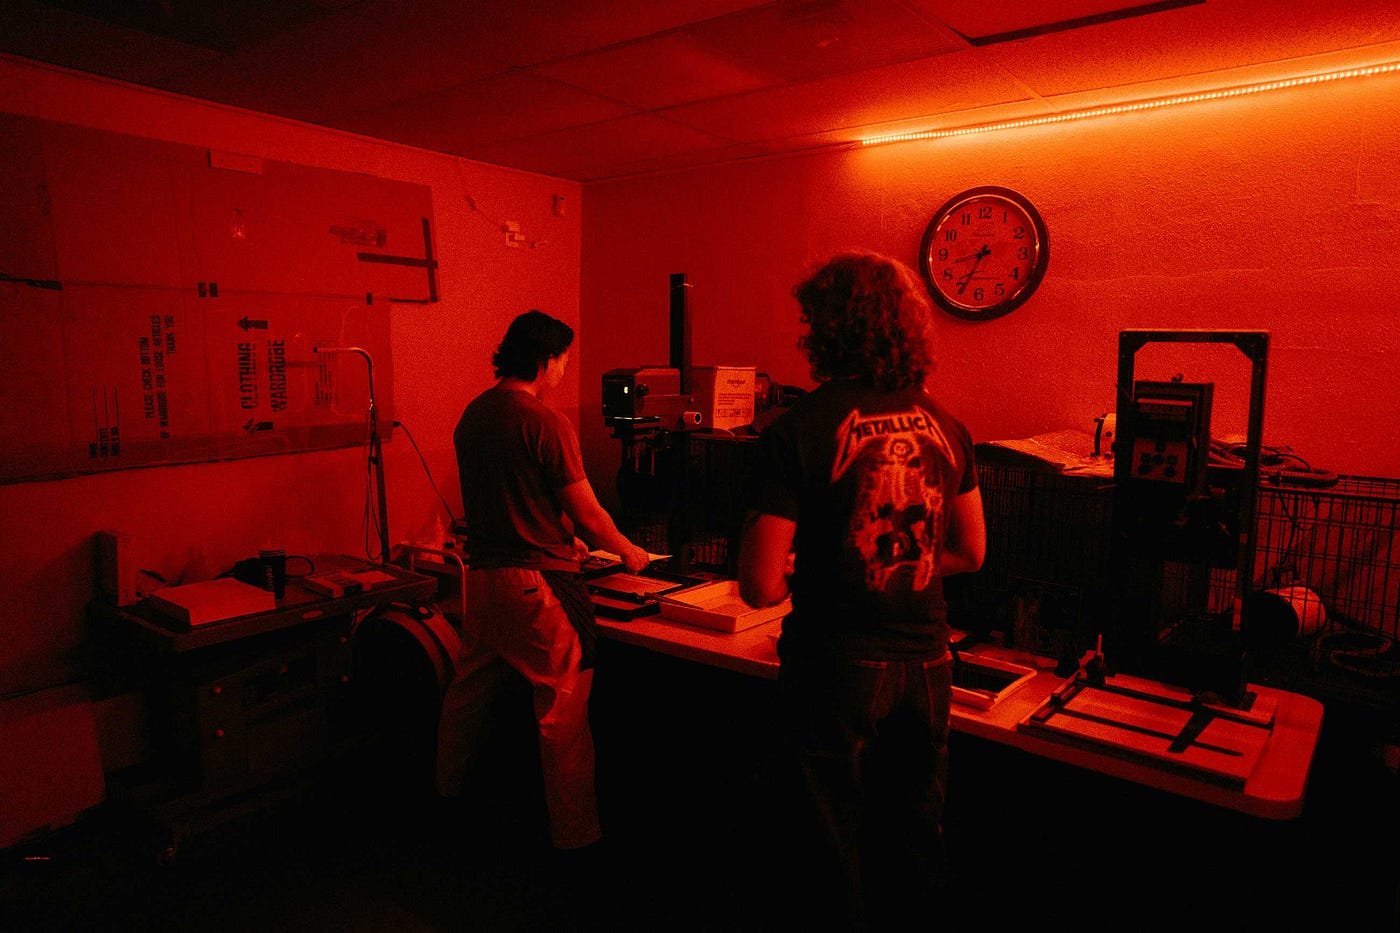
Image courtesy Francisco Gonzalez via Unsplash.
Before turning off the normal lights in the darkroom, you would check that the enlarger was working and that you had mixed up your chemicals ahead of time. You also needed to have a “clothesline” with pegs ready to hang up your finished prints as they dried.
Lastly, you needed to make sure you were stocked up on the paper stock of various grains and sizes according to your intended darkroom needs. My collection of old tech includes some packets of unused paper stock for turning into photo prints. The brand we used at my school was Ilford, but other brands existed, such as Agfa.
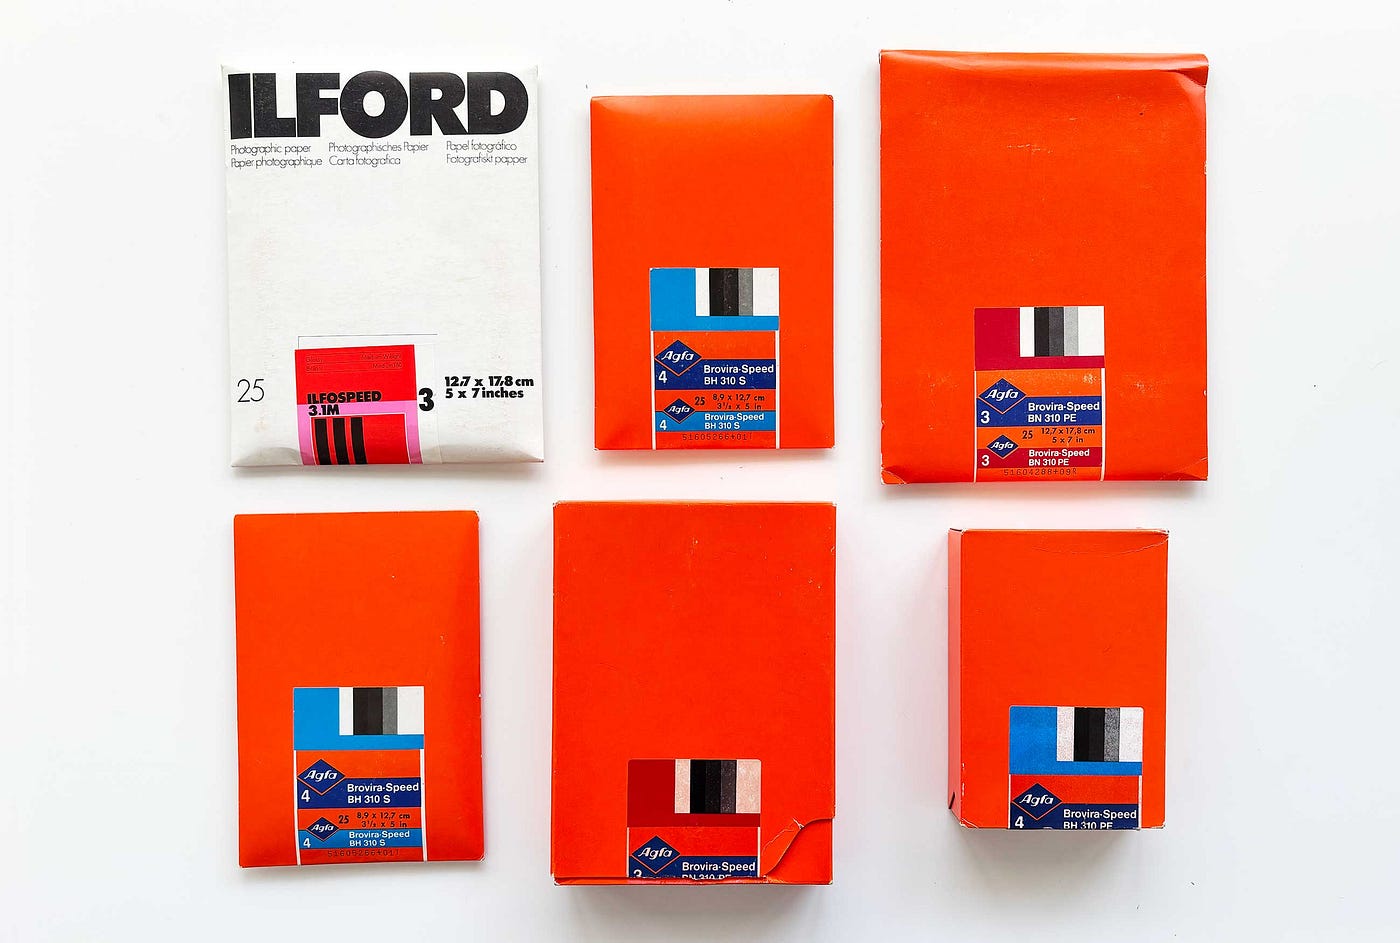
Different types of photographic paper stocks. Image copyright Jesse Karjalainen.
Inside each box is a plastic bag made of light-proof black plastic. If you were to open the box and bag in daylight, then the paper would instantly be ruined. You must only handle photo paper in the dark with a red light on.
Here is what the photographic paper looks like straight out of the packet (I opened this packet in the basement with the lights out, otherwise the whole pack would have been destroyed.)
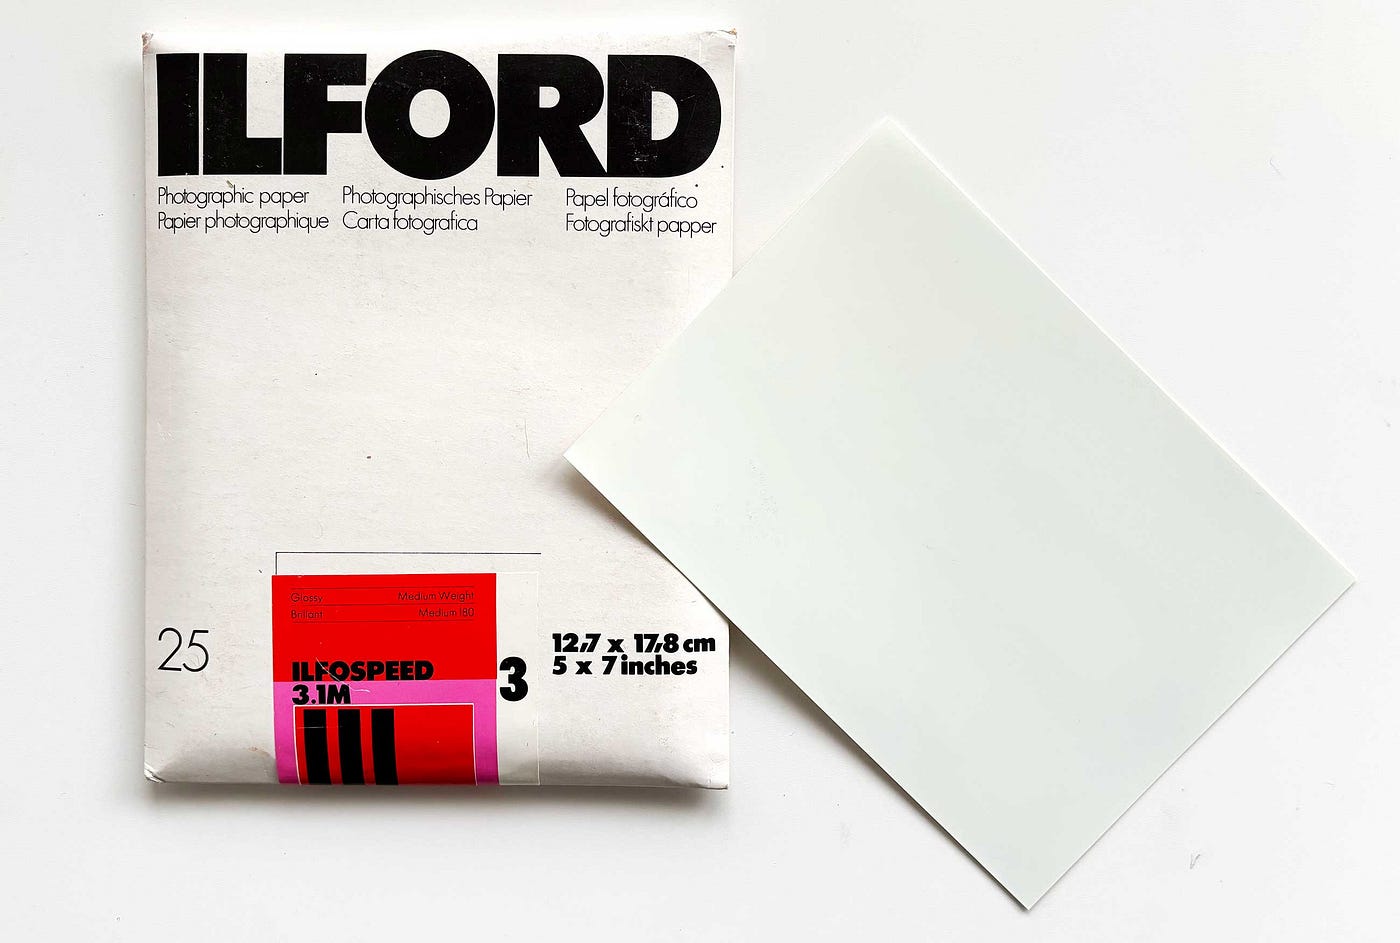
Ilford photographic paper. Image copyright Jesse Karjalainen.
Here it is after an hour of being in daylight. I added a spool on top to show what happens.
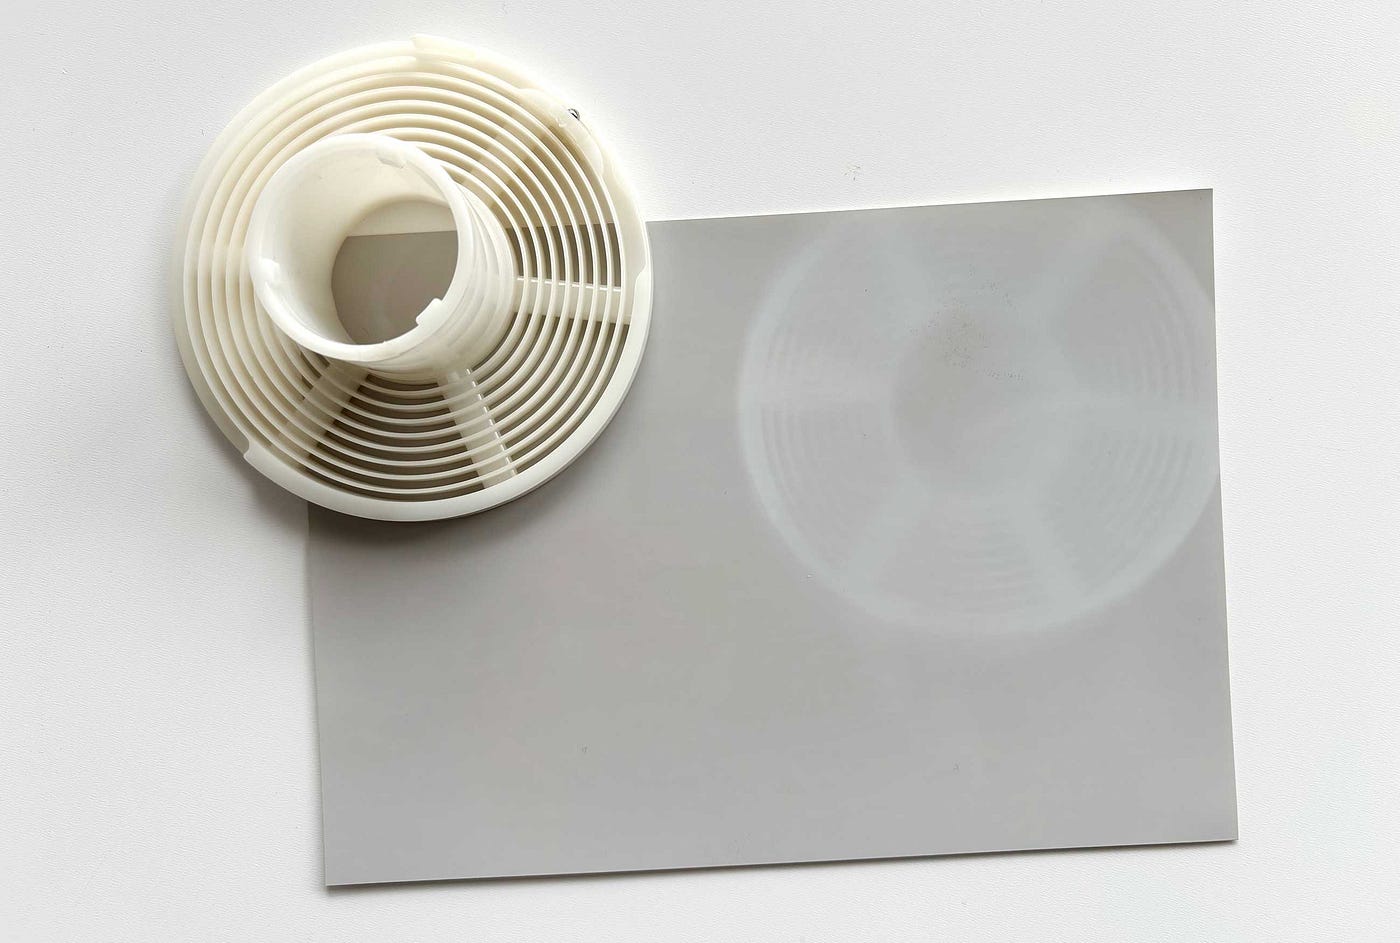
The photo paper after an hour of sunlight. Image copyright Jesse Karjalainen.
And here’s after three hours of lying out in the open.
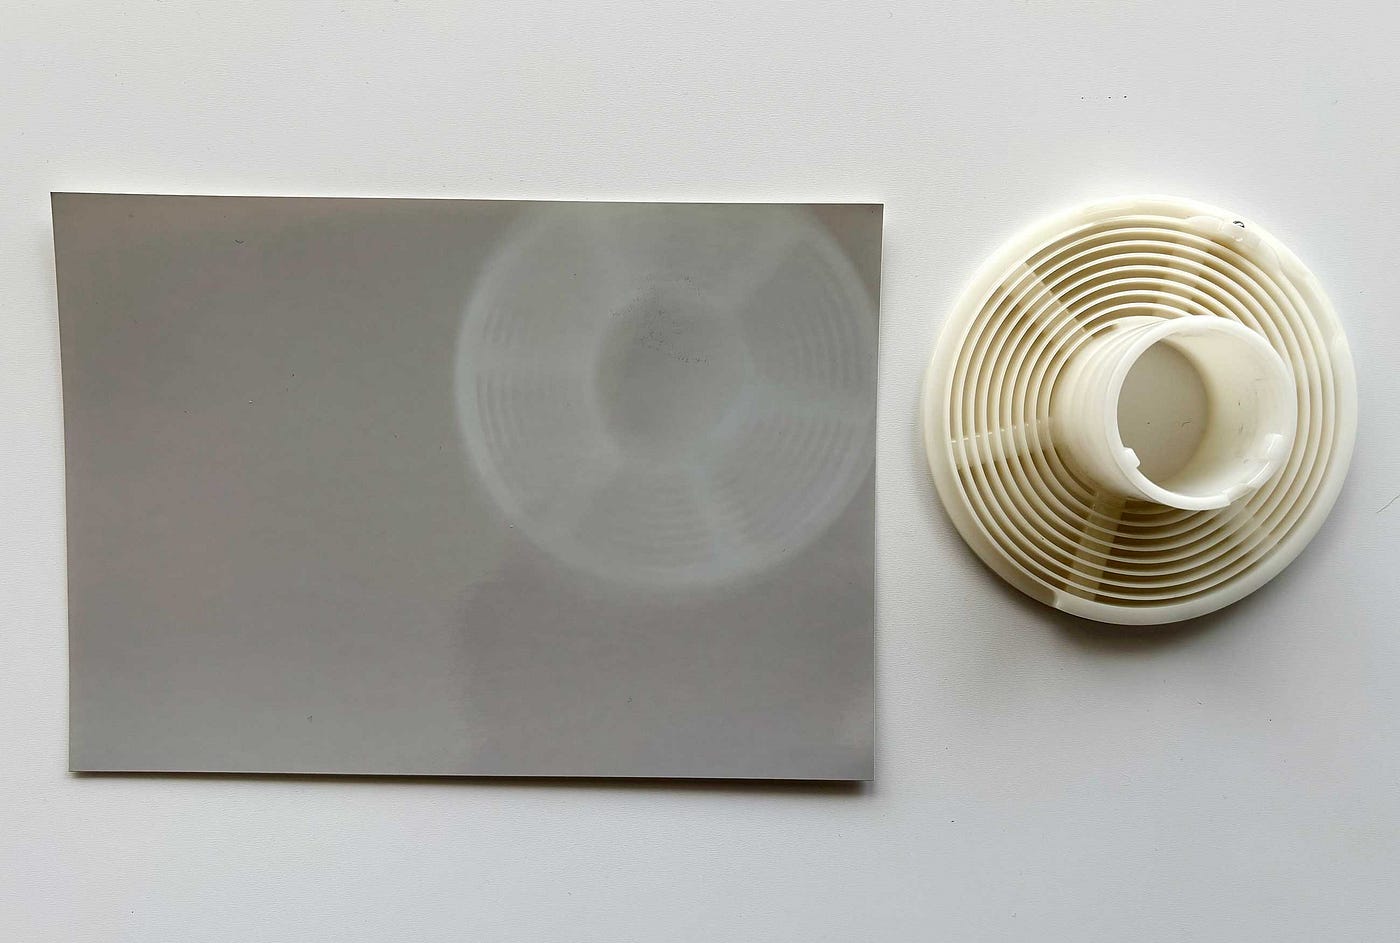
Three hours later. Image copyright Jesse Karjalainen.
This process of setting light on the reactive paper is roughly what happens when you shine your negative image on it via an enlarger. (The difference is that you “develop” it with chemicals, not what I have done with the paper above.)
With everything ready, you switched off the lights and put on the red darkroom light. Photographic paper was created in such a way that it was unaffected by the red wavelengths of light. Unlike the film processing part, you could work with exposing and developing prints without the photo paper being ruined. Switch on the ordinary light, however, and you would have to go and buy new stocks of expensive photo paper.
The Enlarger
The most important piece of equipment in the darkroom is the enlarger. This is essentially a downward-pointing projector on a vertical pole that you can move up and down.
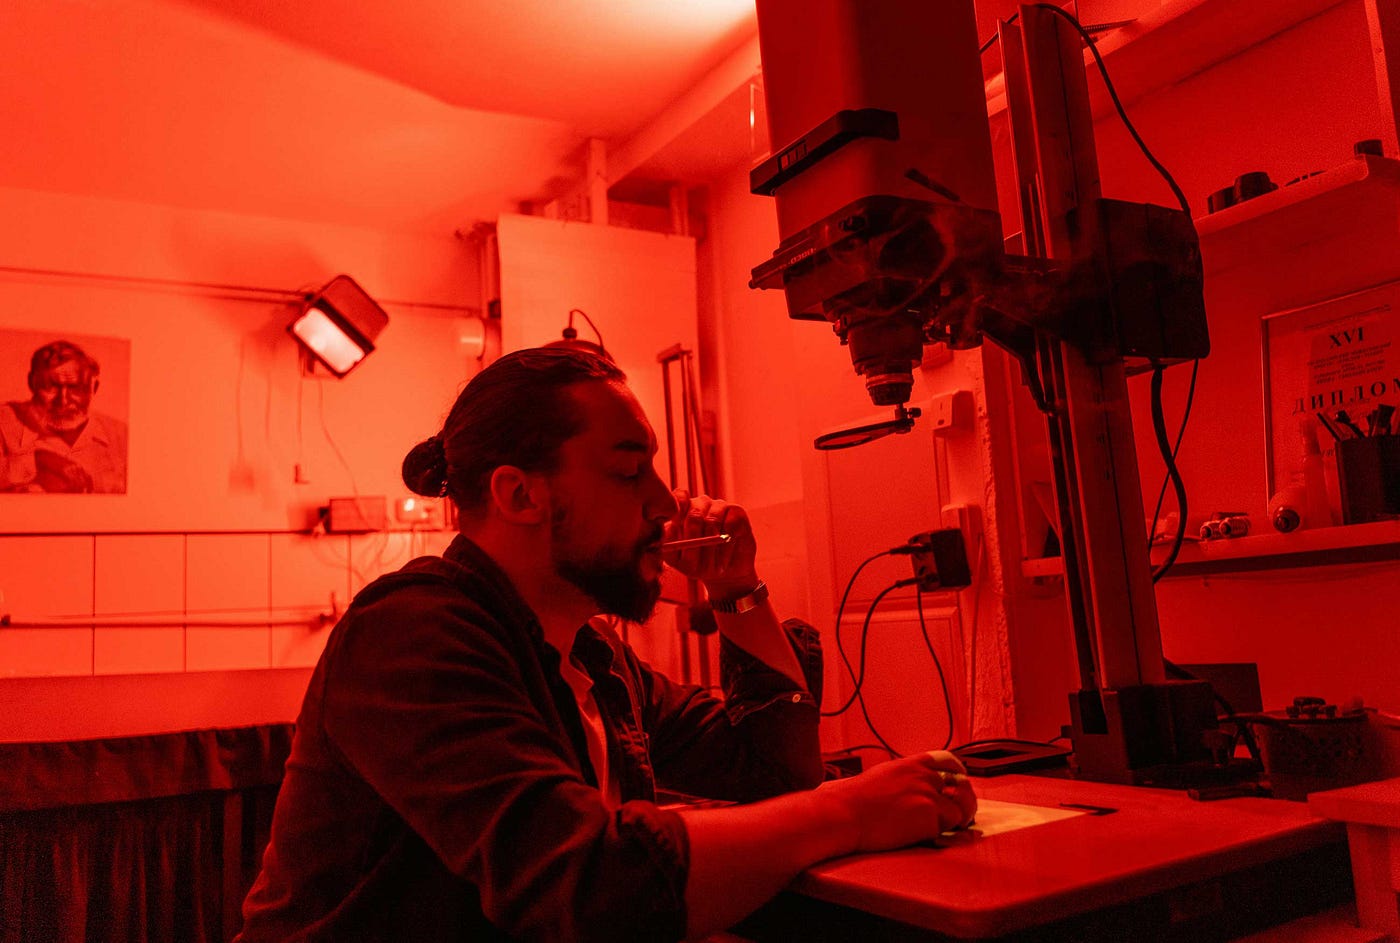
Image courtesy Tima Miroshnichenko via pexels.com.
Like any projector, the closer it is to the flat plane, the smaller the projected image. So, the higher up you have the enlarger, the larger the image from your negative grows. Here is a diagram.
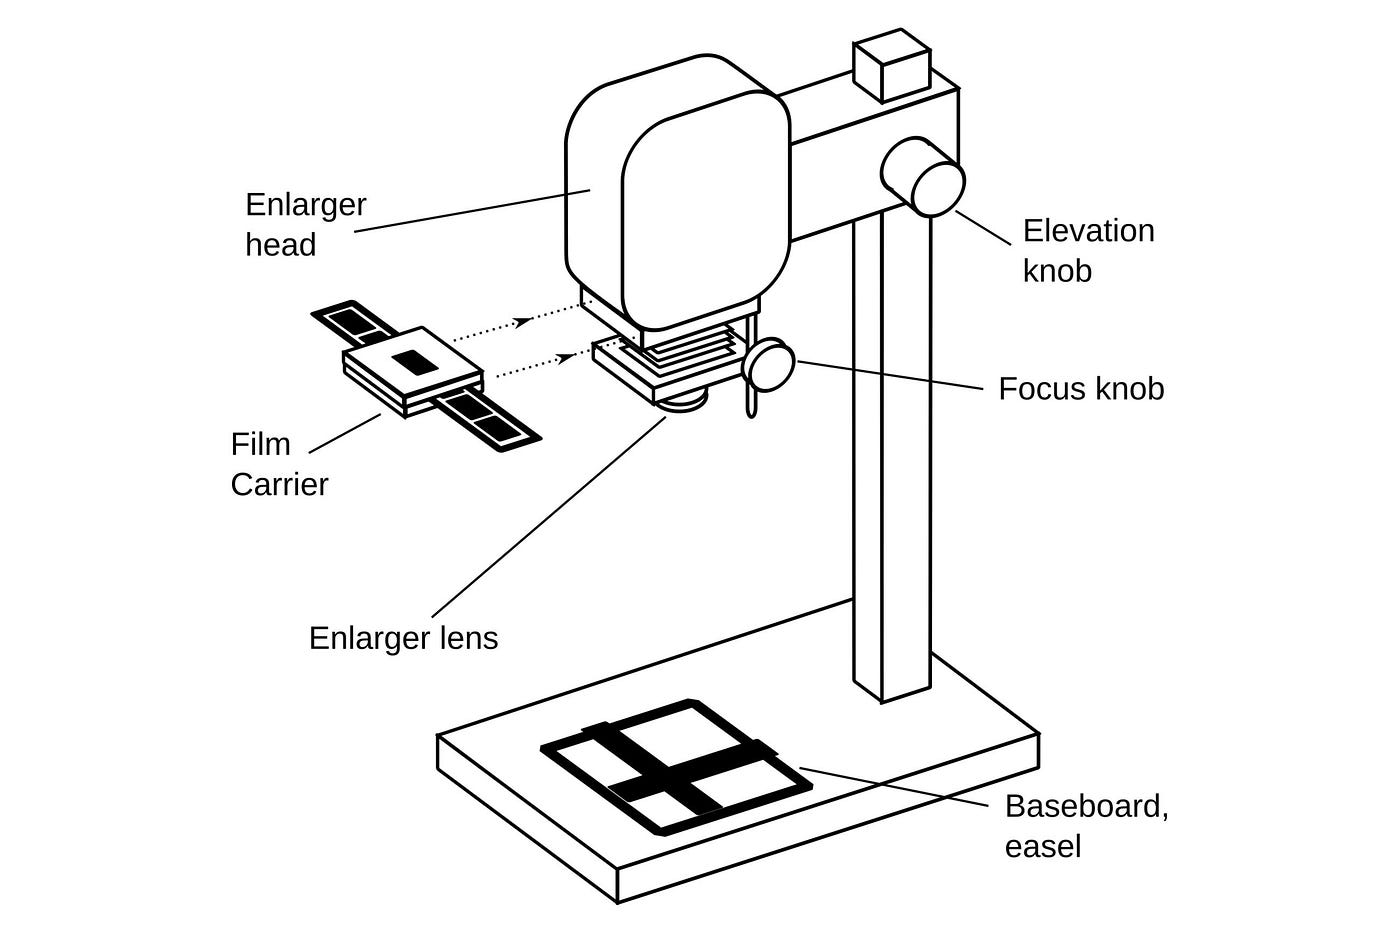
Image courtesy Wikipedia, under CC BY-SA 2.5.
High up, the enlarger blows up the image so that you can either make large prints on large paper or you can make small prints from a specific area of your image — essentially cropping the image.
I don’t have an enlarger myself, so I have modified this courtesy image by exaggerating a beam of light coming down onto the paper.
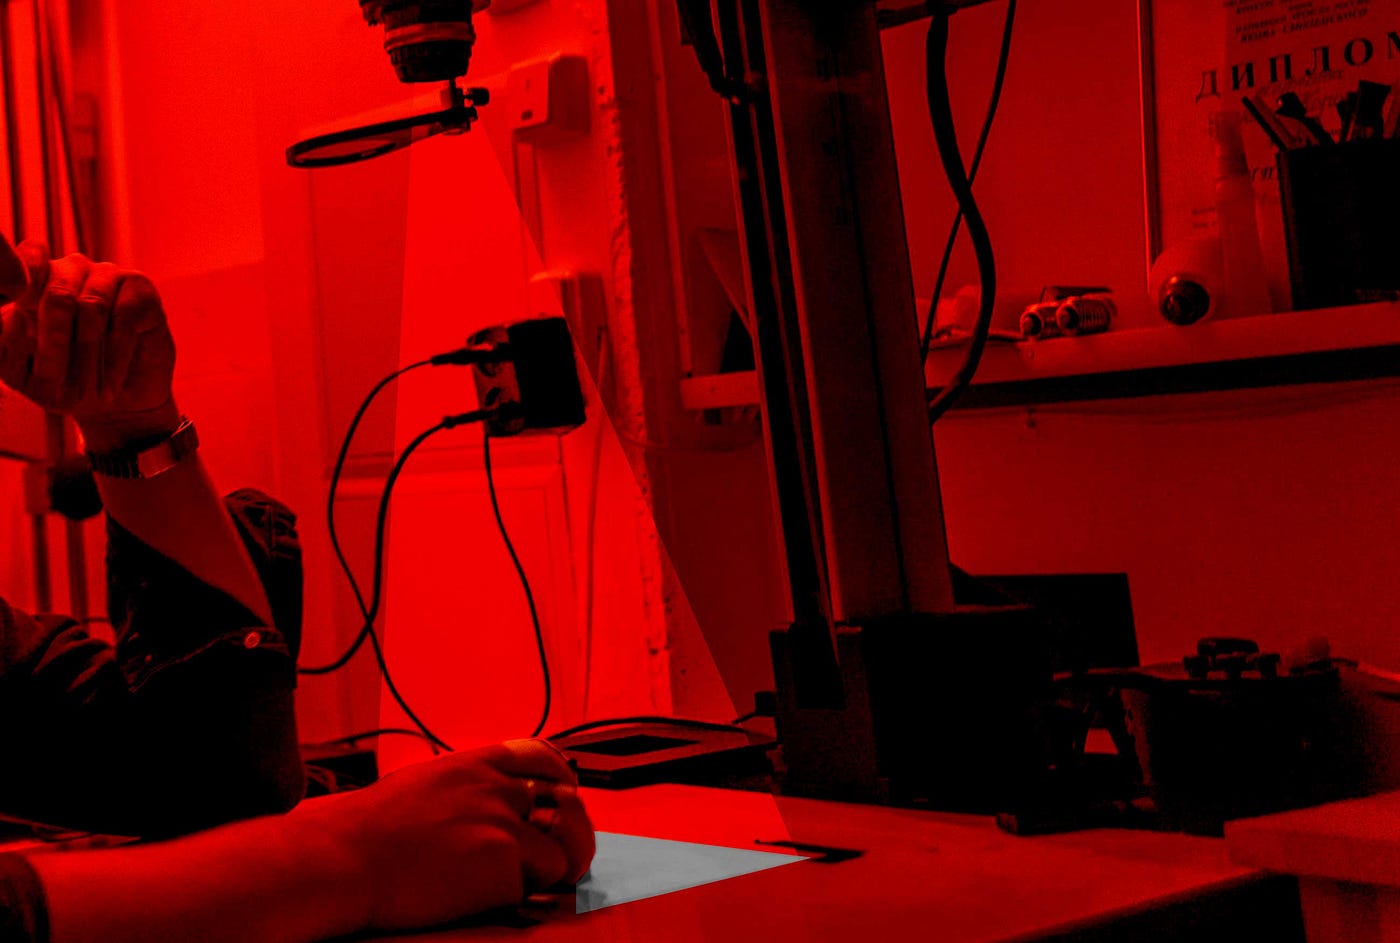
Image courtesy Tima Miroshnichenko via pexels.com, modified by author.
The light in the room is red (safe for the paper) and the light from the enlarger is white, which exposes the paper. And that is the process. Now to make some prints.
Part 3: Paper prints
With today’s digital photography, you take a photo and move it to your computer or tablet. You browse the thumbnails using something like Adobe Lightroom/Bridge. You pick one and open it in something like Photoshop. You make adjustments of various kinds and then you export the image to your printer of choice. Out comes the print.
The quick rundown of making analogue prints is that you take your negatives and first make a “contact sheet” (a page of thumbnails) after first making a “test strip”.
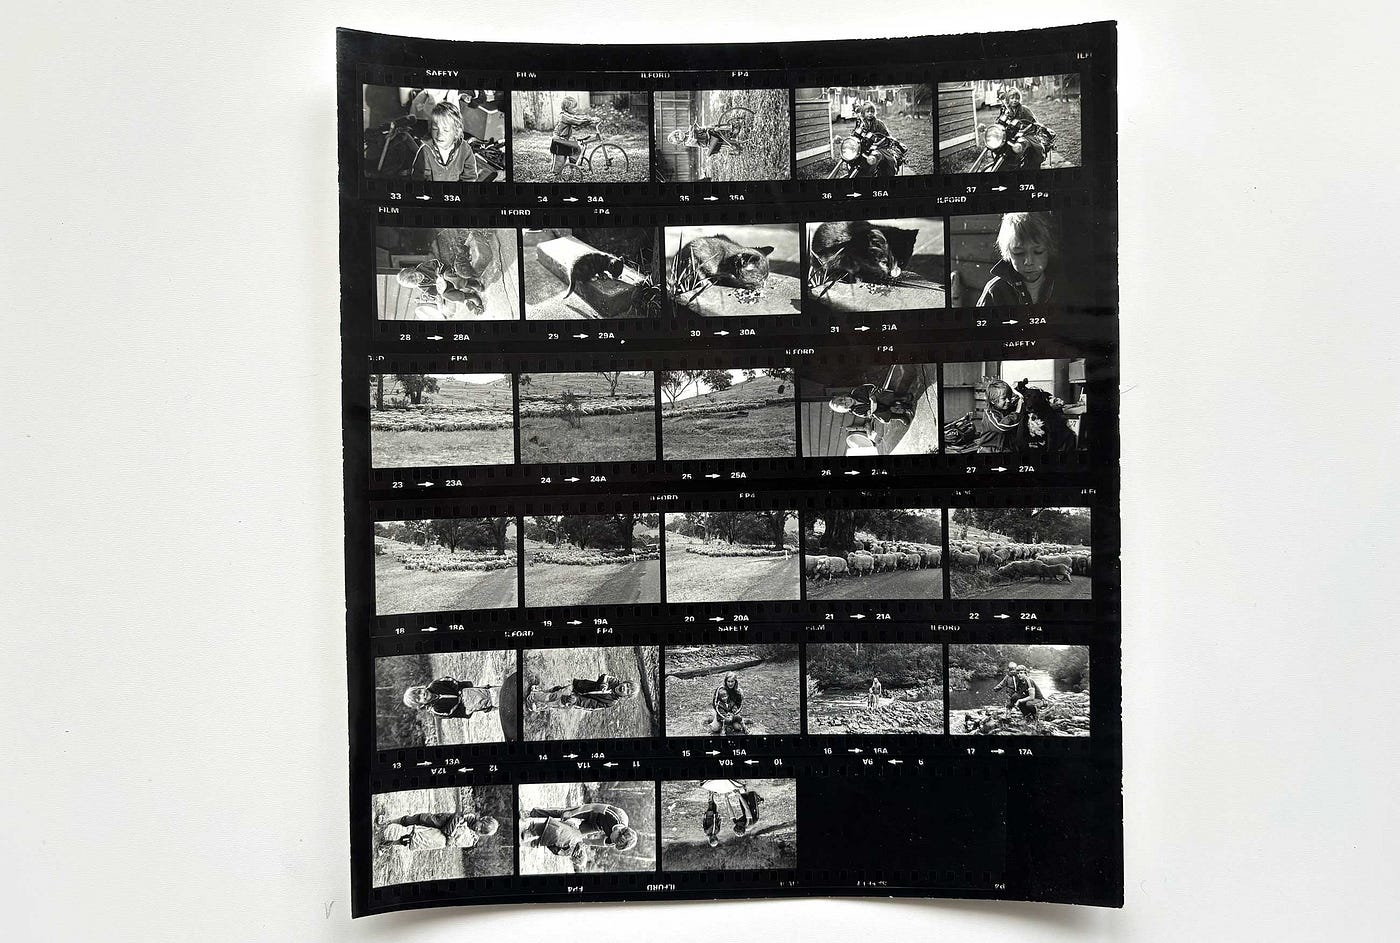
Contact sheet. Image copyright Jesse Karjalainen.
You check the contact sheet and choose which image to make a print of. Sometimes you’ll see contact sheets in movies and magazines with red pencil marks. You grab that negative and put it into the enlarger.
a) TEST STRIP
Whether you are making a contact sheet first or going straight to making a photo print, the first thing to do is make a test strip. This is because you won’t know how much time to set the exposure timer on the enlarger for.
Your negative will hopefully be perfectly exposed, but you now need to give the light-sensitive paper the right amount of light to create that perfect exposure. Being an analogue process, the enlarger has a set amount of light output, but (like all light) it weakens as the distance grows.
Having the enlarger way down low and beaming a small photo just centimetres from the paper will require less time/light than having the same negative projected up high to make a large print. That requires a longer time for the light to be beaming on the paper.
Therefore, to make a photo or contact sheet, you start by making so-called test strips. This involves cutting strips of light-sensitive photo paper and placing it under the area of the enlarger. What you are essentially doing is doing a test strip where you expose sections to light in multiple rounds to figure out what exposure time your image needs.
Starting at one end, you cover the paper strip (and negative) with a piece of card, leaving an area at one end uncovered. Then you set the enlarger for, say, 3 seconds of light, and expose the paper strip to three seconds of white light.
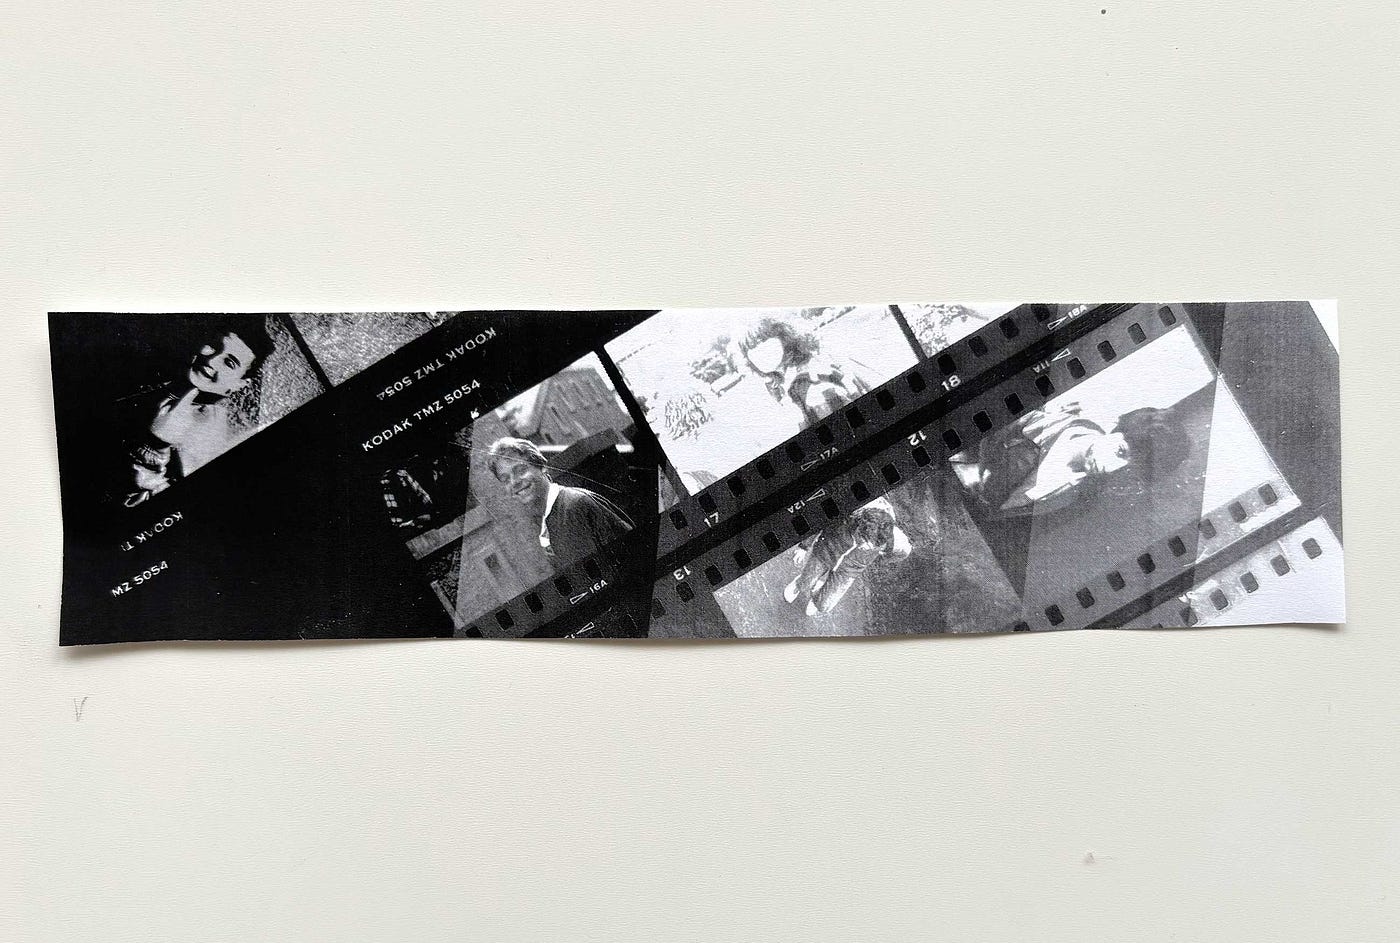
Test strip. Image copyright Jesse Karjalainen.
Remember, you are working in a room filled with red light. The projector will beam down white light. This is what the photo paper is designed to react to.
After the first burst, you move the card to the right a centimetre or so and do another 3-second burst. This means that the first area you exposed now has 6 seconds of exposure and the new area only 3 seconds.
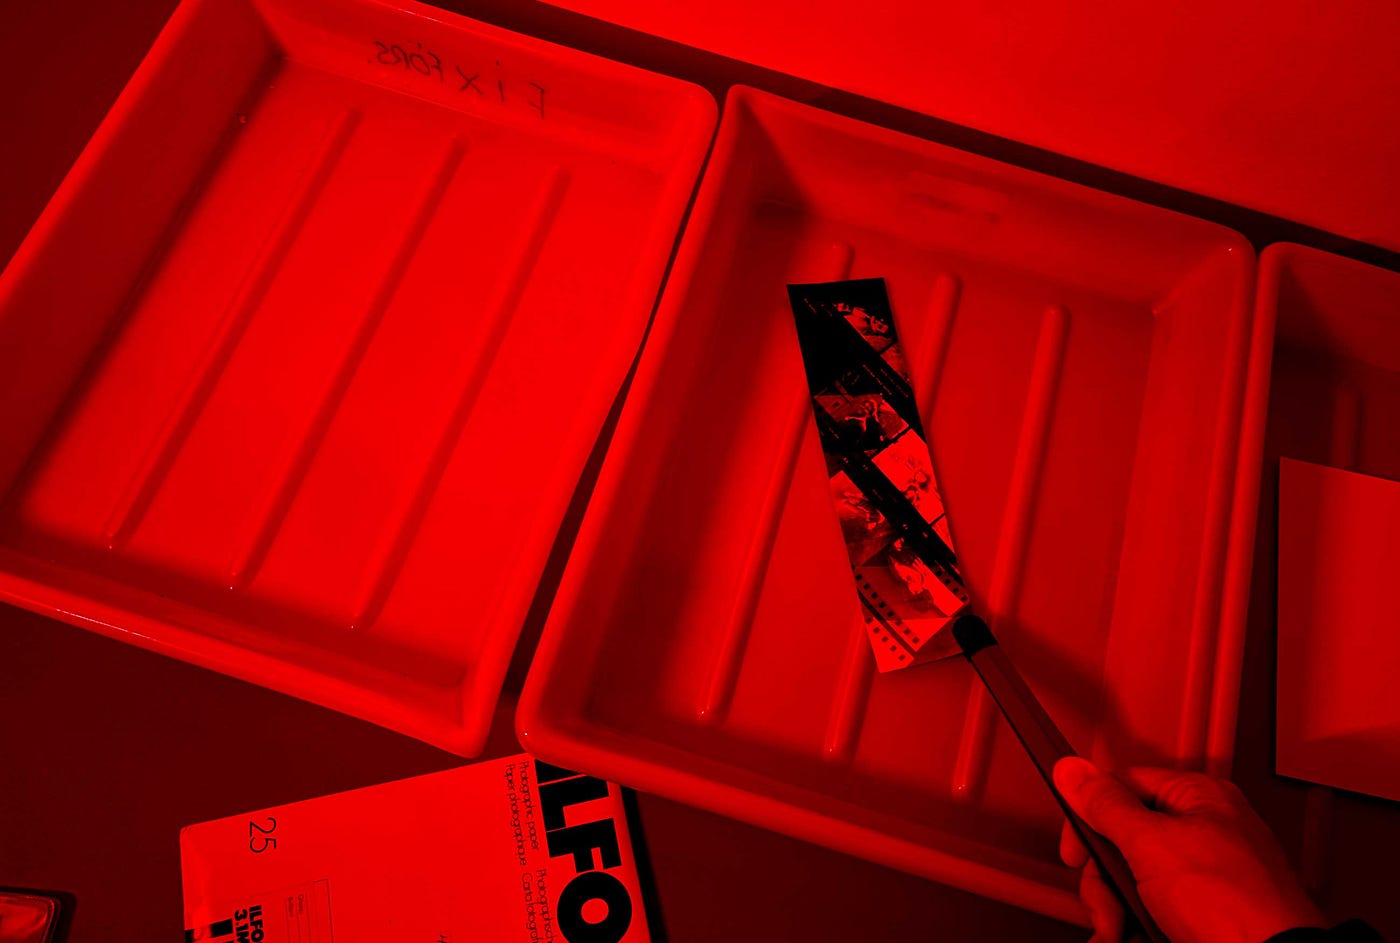
Fixing the test strip. Image copyright Jesse Karjalainen.
You then repeat along the whole strip until you have done the entire length. Once developed, the paper strip will have a series of panels going from dark to light. From this, you can see how many seconds (or minutes) of exposure/light beam are required to get a perfect exposure transferred onto the paper.
b) CONTACT SHEET
To make a contact sheet, you take your (dried) negatives and arrange them on a sheet of photographic paper. To make this, you place your negatives on the photo paper with a sheet of glass to keep them flat. You shine the light onto them from the enlarger and this creates a positive “copy” of your negatives — handy thumb prints of your images.
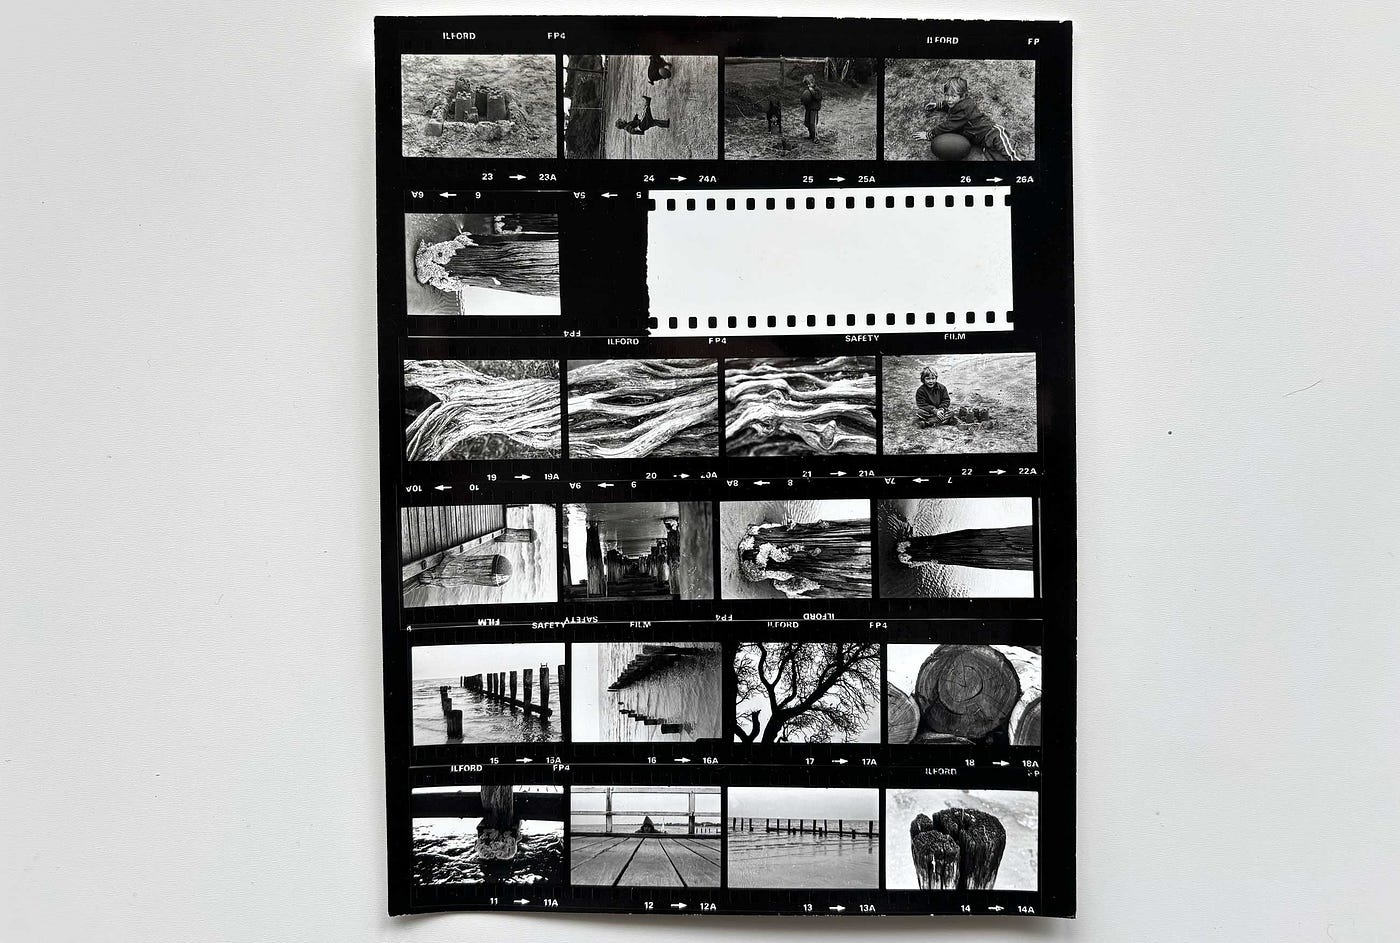
Contact sheet. Image copyright Jesse Karjalainen.
c) PHOTO PRINTS
If you skipped the contact sheet step, you now set yourself up by putting your negative into the enlarger and selecting your chosen image. Then you choose how big you want the print to be, which is usually determined by your choice of photo paper.
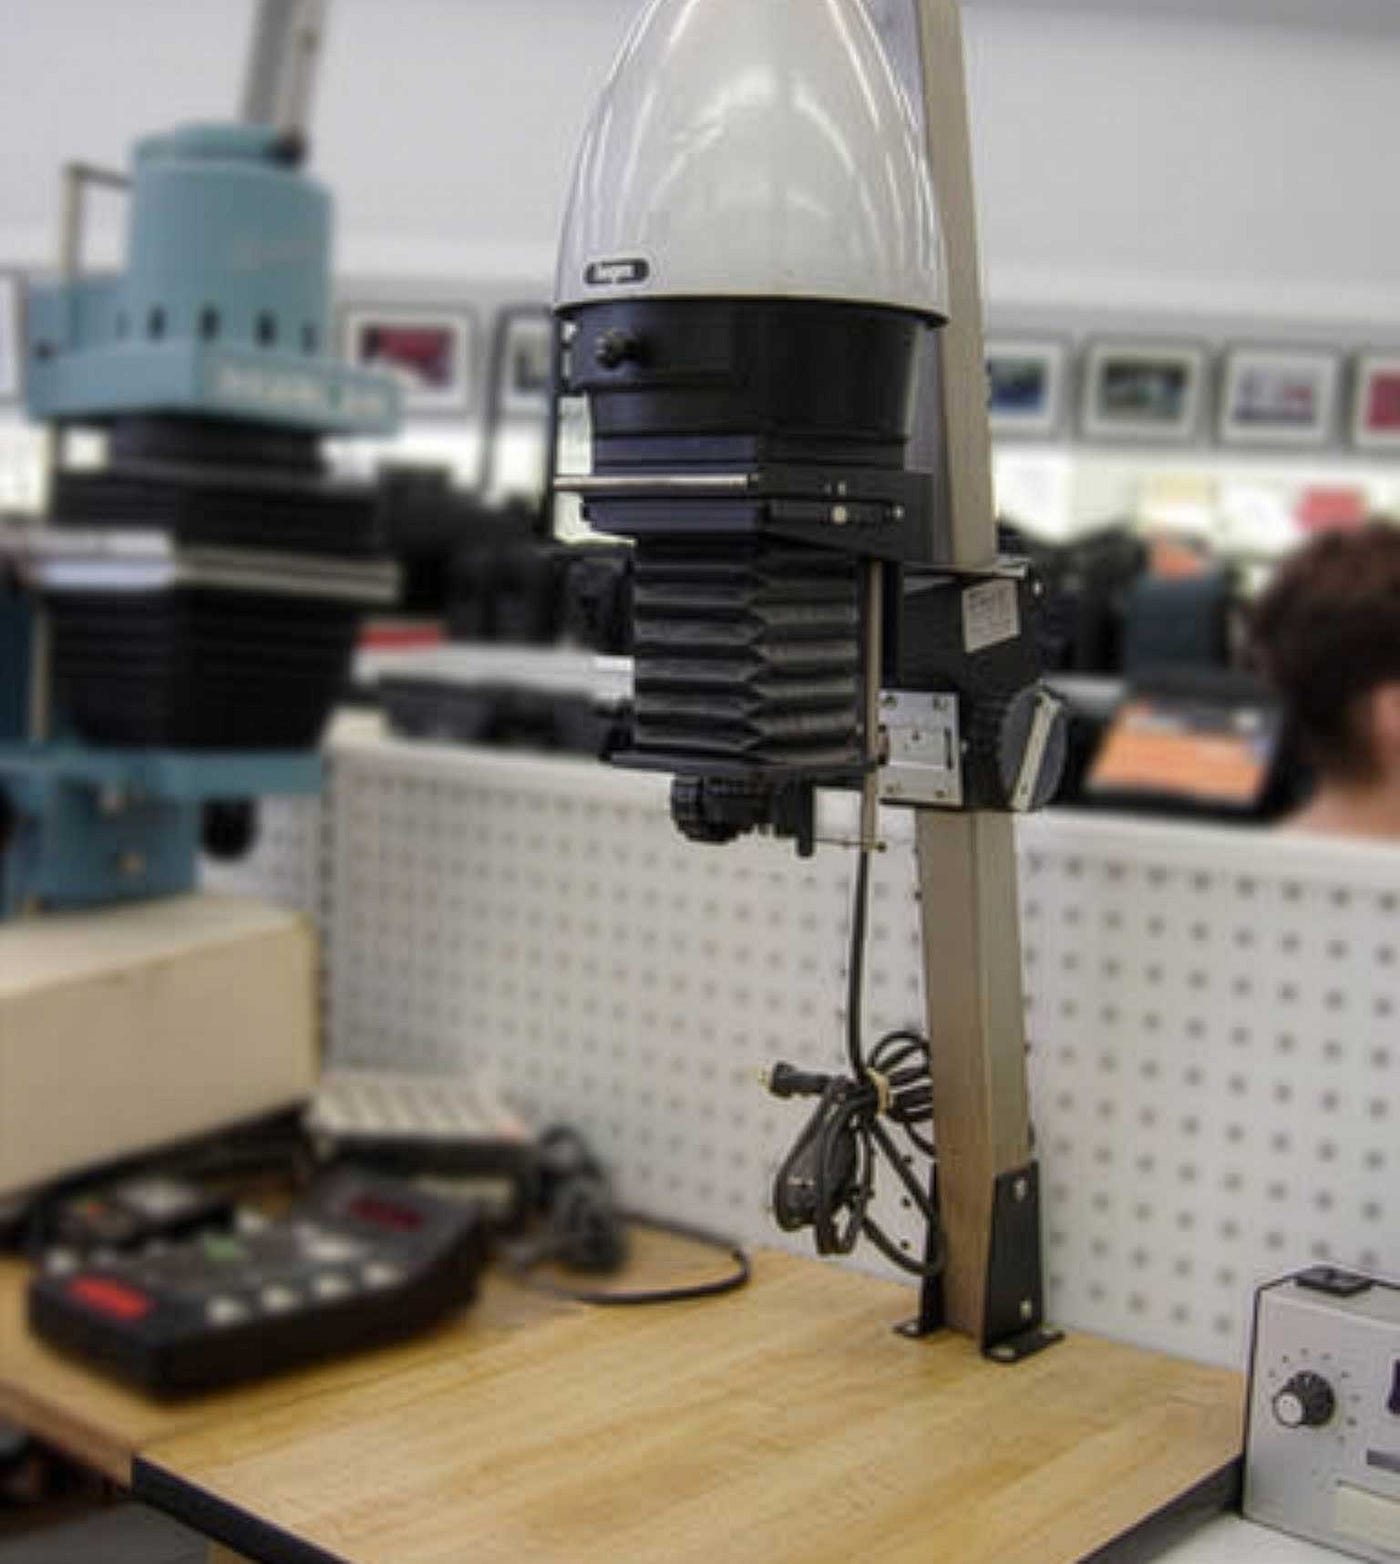
Image courtesy Leonard G via Wikipedia, under CC SA 1.0.
Then adjust the enlarger up or down to have the beamed image match your paper stock.
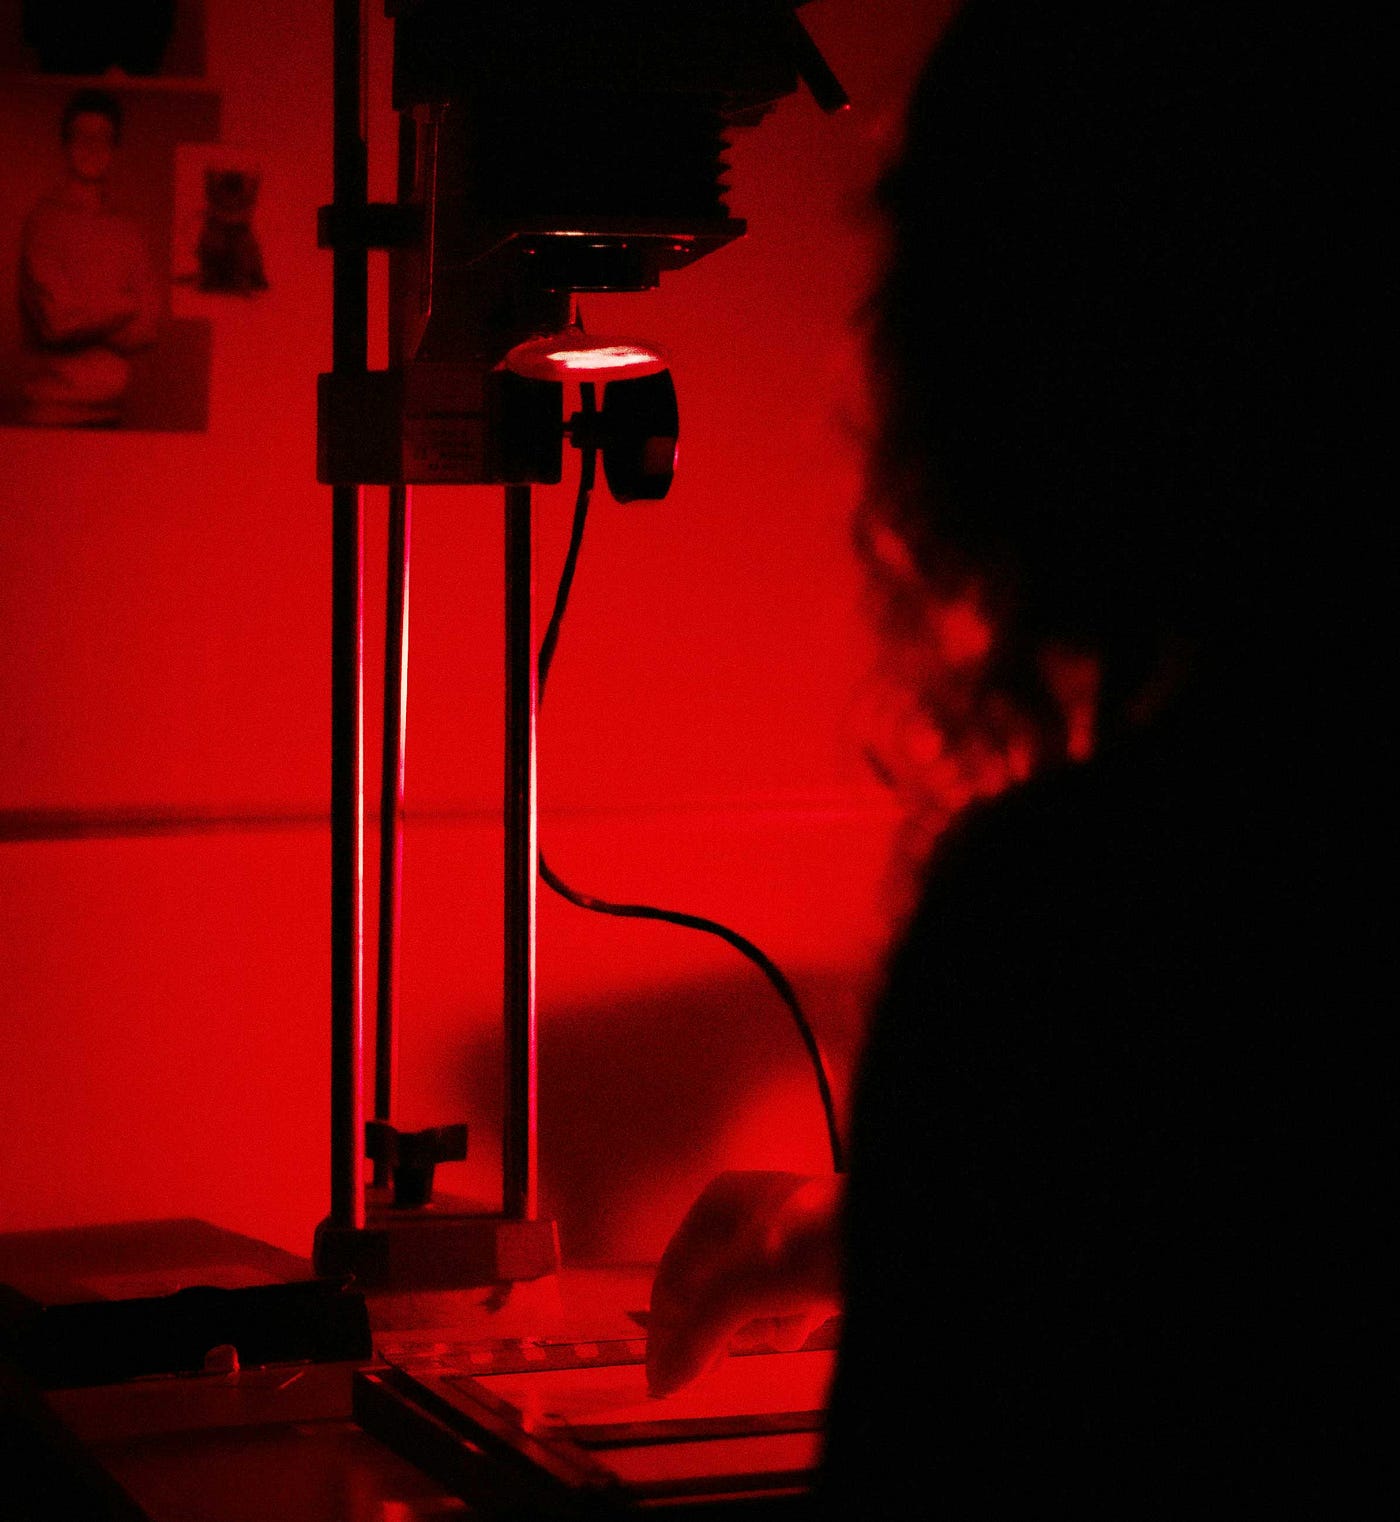
Image courtesy Daniel Leżuch via Unsplash.com.
Once you get the right size of image projection you want, you then adjust the focus to make sure you get a sharp image. Then you are ready for the paper. Turn off the enlarger and put your paper onto the photo-masking easel.
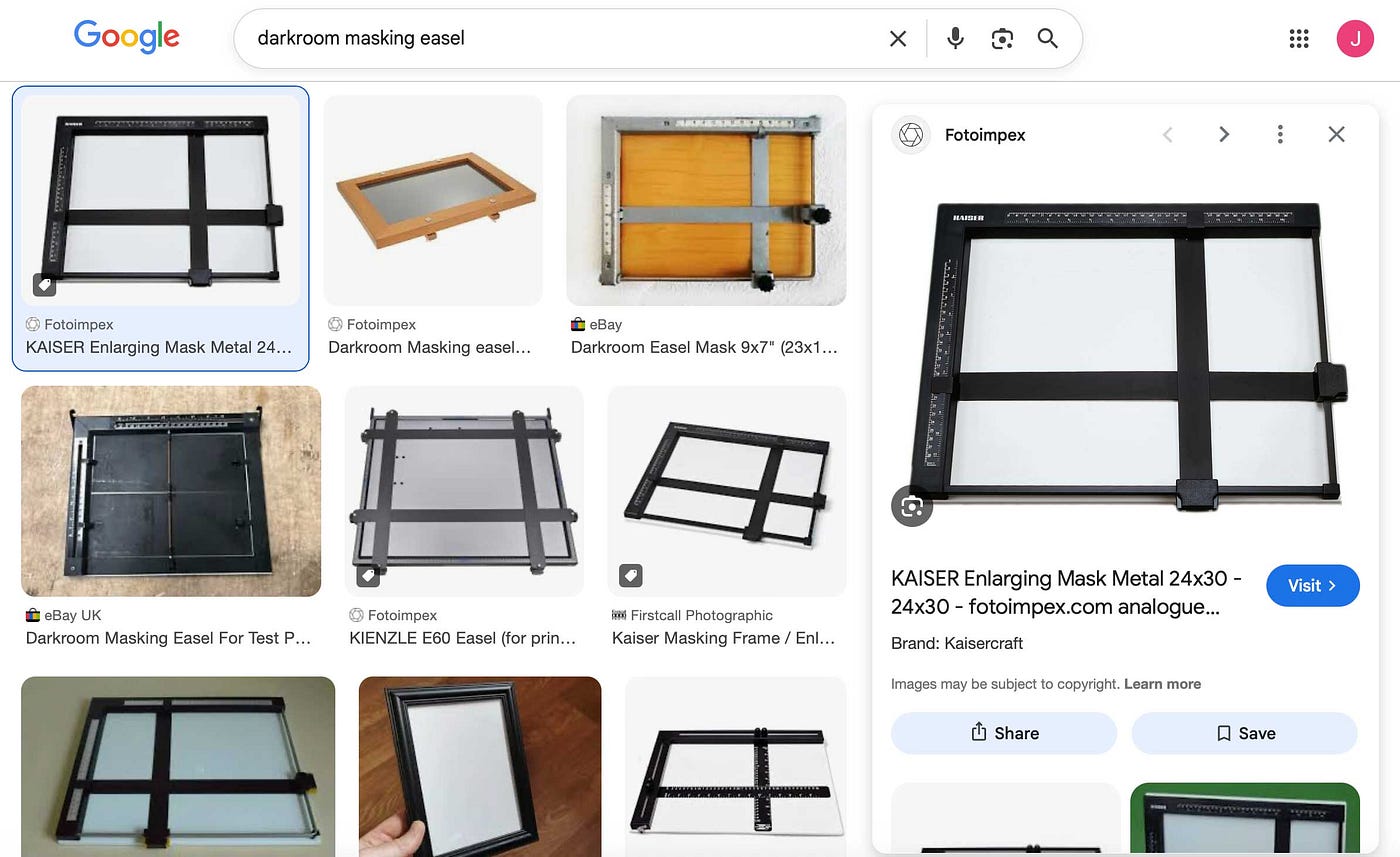
Image: screenshot of Google image search for photo easel, accessed in May 2026.
If you want white borders on your paper, mask the edges with the easel. Otherwise, go without if you want an edge-to-edge photo. Now, put on the enlarger according to the time required by the test strip. Make sure not to bump the paper.
Congratulations, you have now exposed your photo paper. Now it’s time for a series of chemical baths. Despite what you might think, the paper will still be white at this stage. That’s why you immerse it in the first bath of Developer.
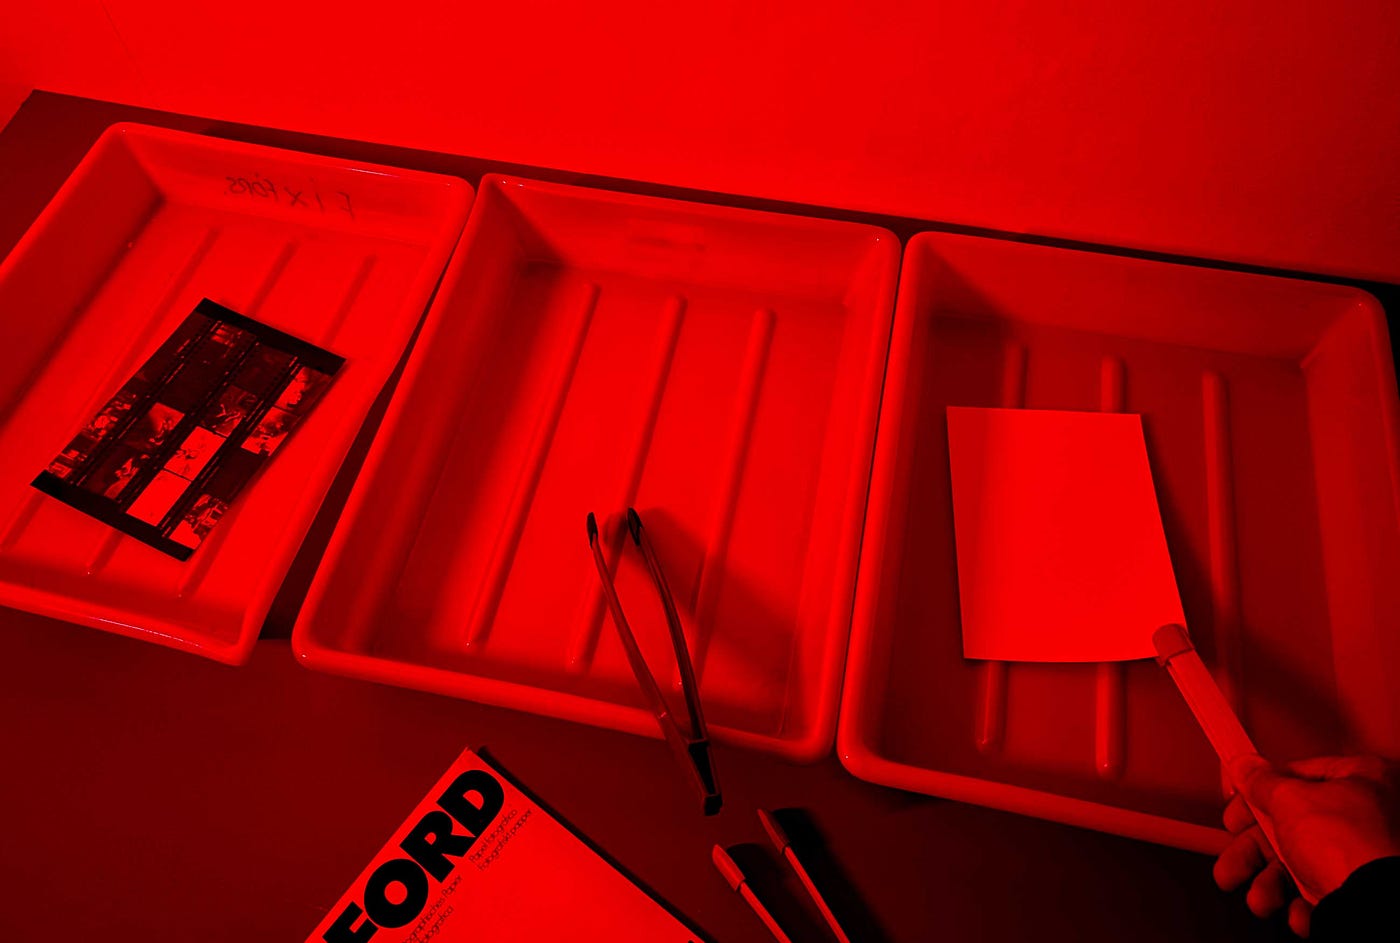
Image in developer. Image copyright Jesse Karjalainen.
Just like the film processing, the Developer fluid is what draws out the image in the emulsion, based on what did or didn’t get light shone on it. Use the tongs to move the paper around in the bath until the image appears.
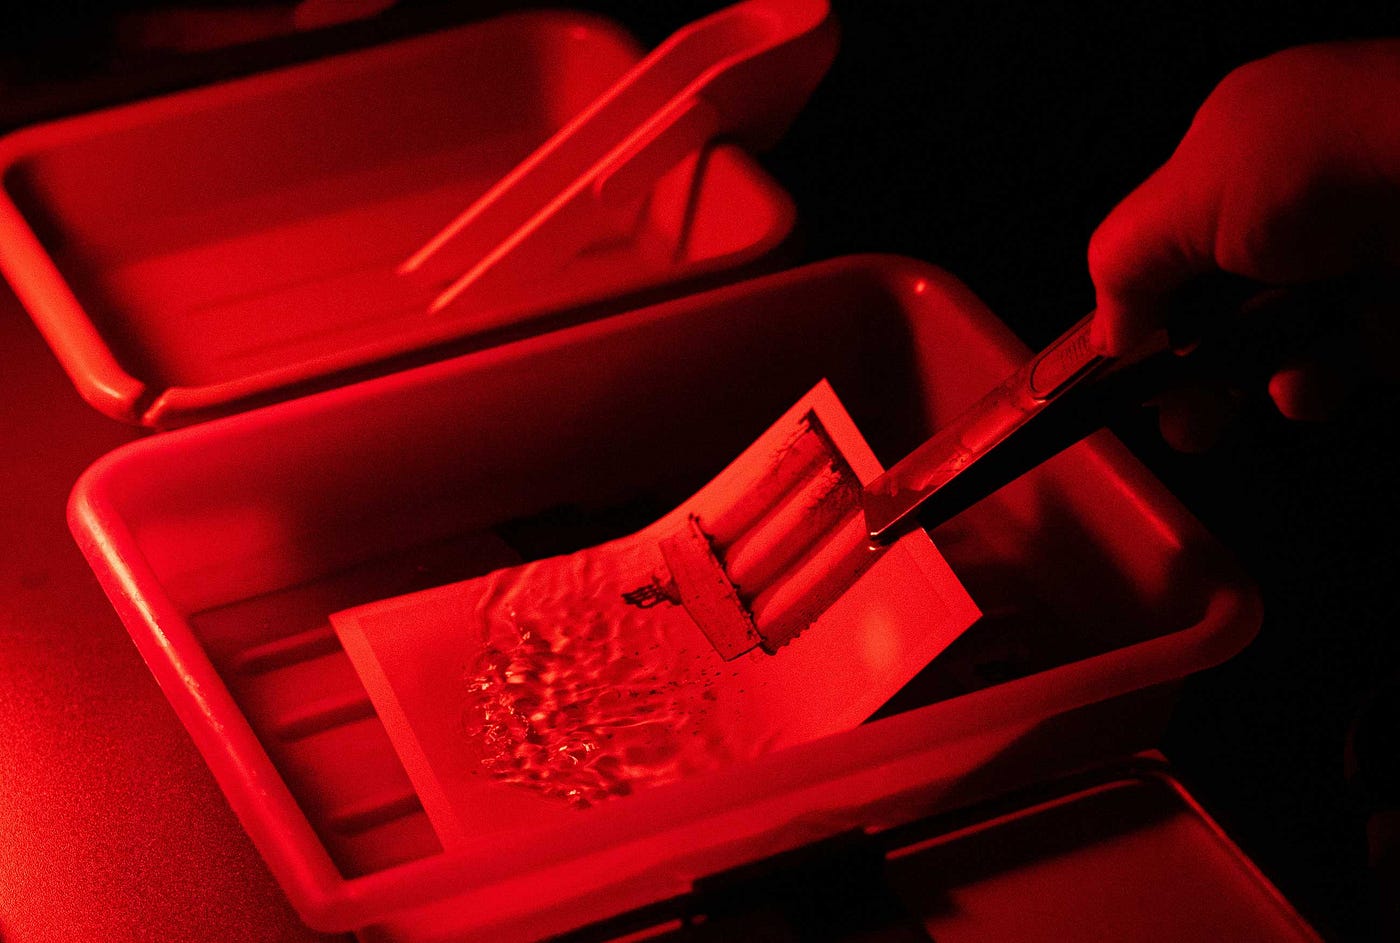
Photo by Daniel Leżuch on Unsplash
When the photo is fully developed, use the tongs to move it to the next tray, which also has Stop Bath solution in it. This instantly freezes any further development of the paper crystals and fixes the image in place.
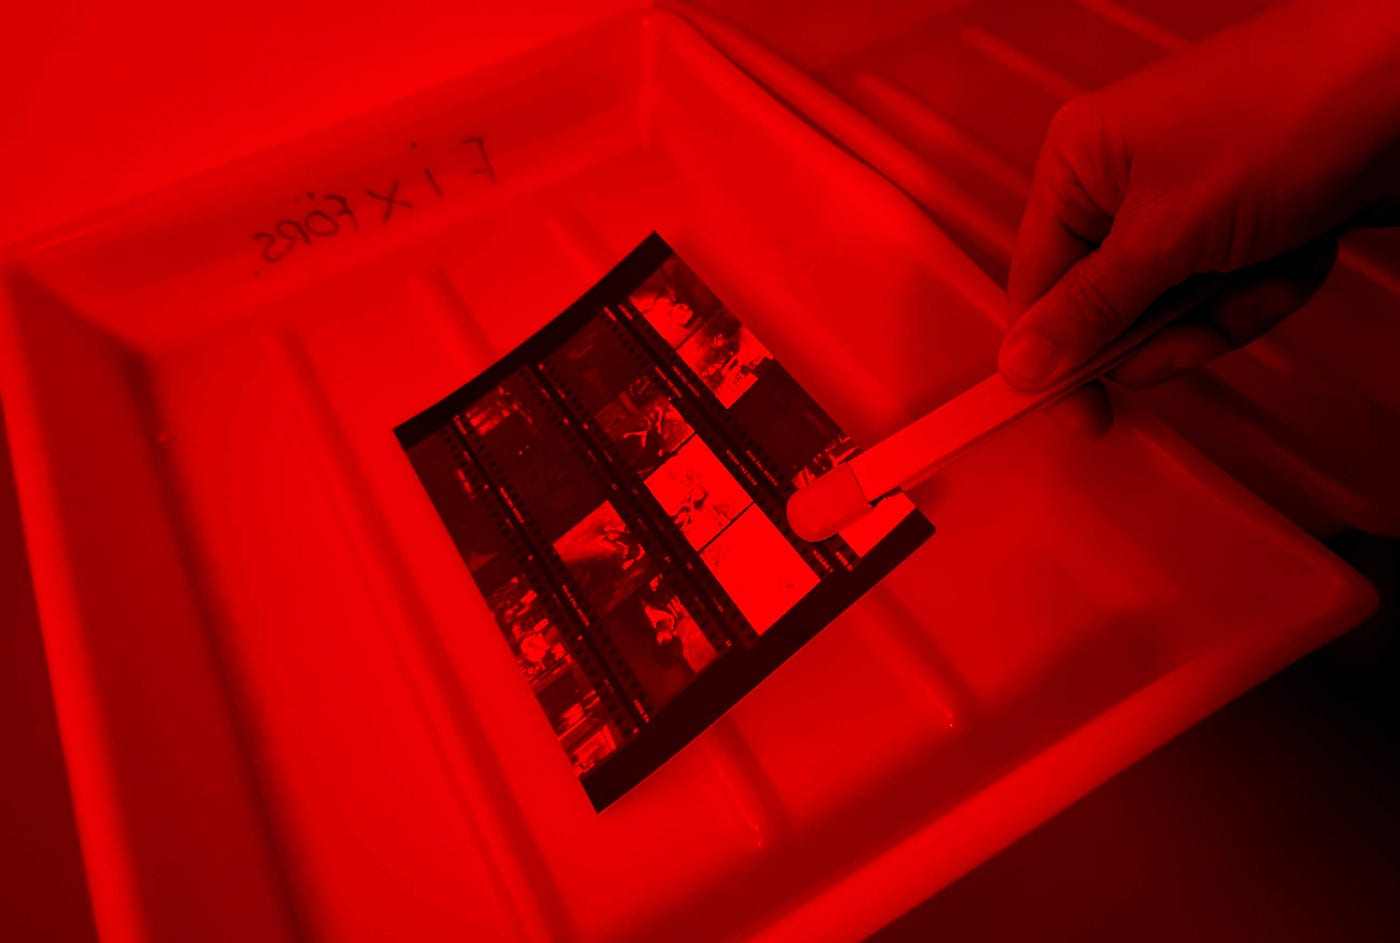
Stop Bath. Image copyright Jesse Karjalainen.
Lastly, you move the paper print into the third bath, this one with the Fixer fluid — just like in the film-processing stage. This does the work of making sure that the paper is no longer light-sensitive. The image is now “fixed”.
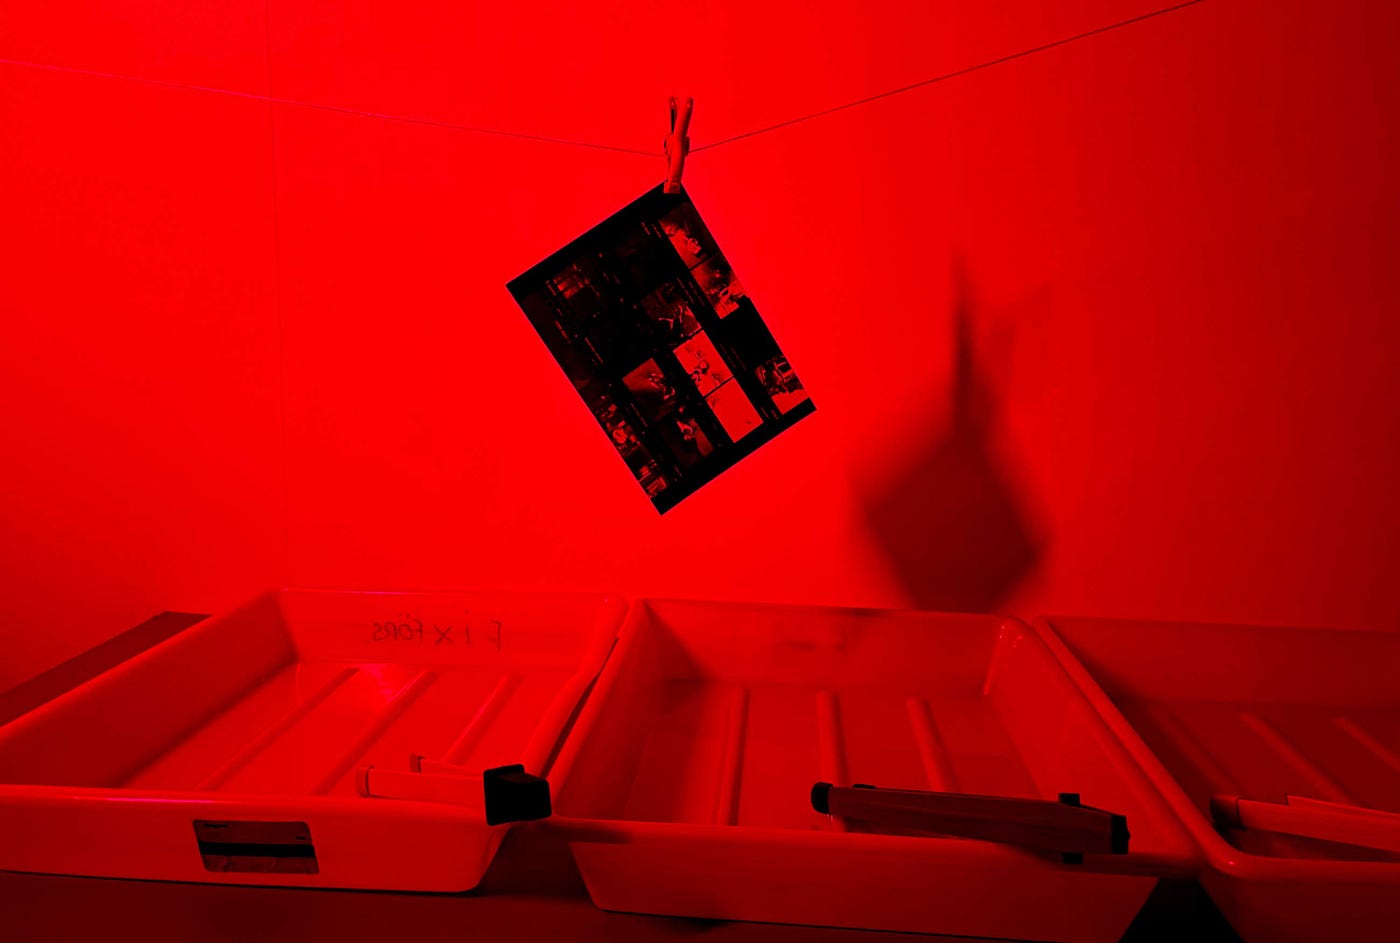
Hung out to dry. Image copyright Jesse Karjalainen.
All there is to do now is hang up the paper print and wait for it to dry. Or work on your next photo.
Fun times
I spent a whole year in that darkroom, making the most of the time I was allowed to be in there. For those of us who were doing photography, it became our teenage place to hang. During this time, we experimented with different styles of photography.
The good thing was that, as long as we didn’t abuse it, we could use the film and paper stocks of the school. So it was completely free.
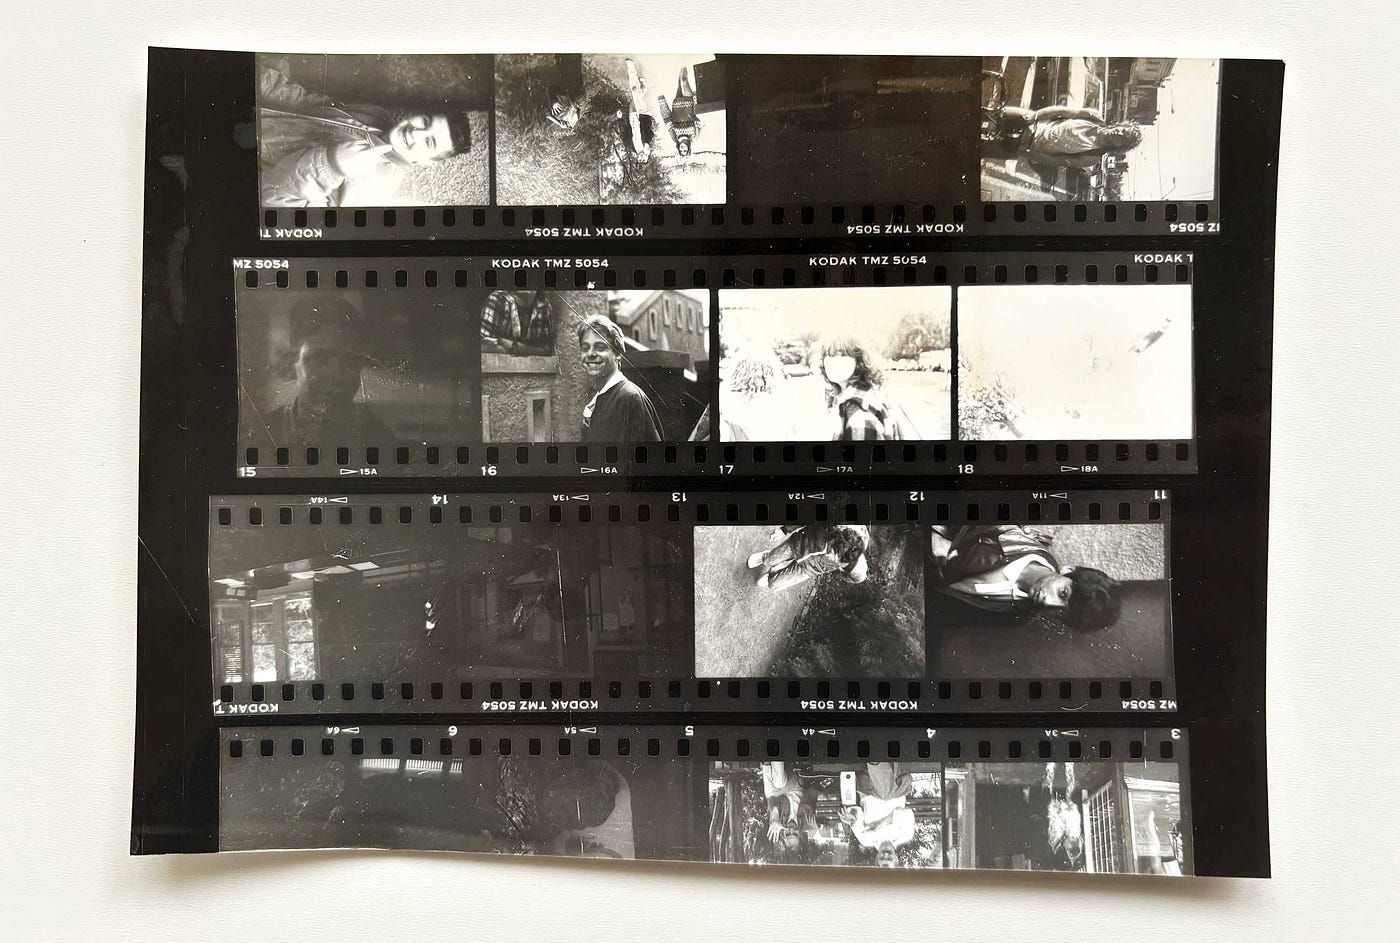
My contact sheet from 1989. Image copyright Jesse Karjalainen.
You can see here (above and below) how I went from a contact sheet to the final image of one of my classmates in Year 10 in 1989. All of it was done by hand in the school darkroom. I guess the school wasn’t so bad after all.
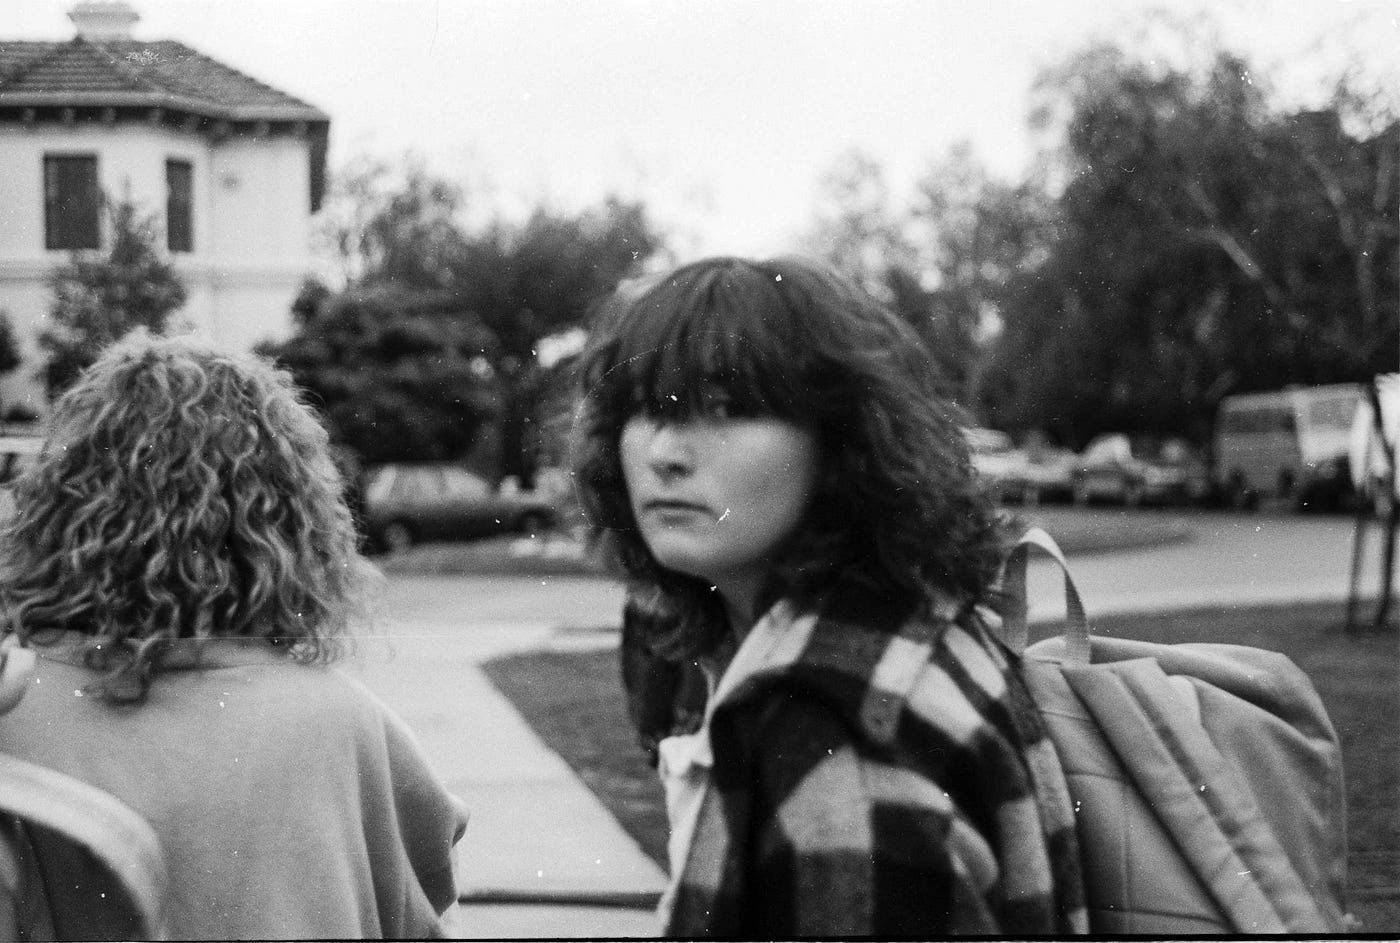
My photo of a classmate from 1989. Image copyright Jesse Karjalainen.
I must have produced a hundred or more images during those 12 months. We kept them all in a drawer in the photography classroom. Then, one weekend towards the end of the year, the room suffered a burst water pipe and all my prints got wet and essentially glued together into a lump of paper.
One batch of negatives and one contact sheet were salvageable, but the rest of my work was not.
As it turned out, I never did darkroom photography again. However, 15 years later, I took up digital photography and all of my old knowledge helped take me to new heights in the digital realm. Digital photography was soooooooo easy by comparison, though it required a whole new skillset to master. And then I moved into the photo studio and began the neverendingly tasking of mastering light. But that’s for a future article.
PS. This concludes 1989 and therefore the 1980s. A new, exciting decade of new technology awaits us.
See you next time.
Join me on all your favourite social platforms: **YouTube | [TikTok](https://www.tiktok.com/@retrotechshow?source=user_about----------------------1aa8cfb4ab15----------------------) | [Substack](https://substack.com/@retrotechshow?source=user_about----------------------1aa8cfb4ab15----------------------) | [Bluesky](https://bsky.app/profile/retrotechshow.bsky.social?source=user_about----------------------1aa8cfb4ab15----------------------) | [Gumroad](https://jessebooks.gumroad.com/?source=user_about----------------------1aa8cfb4ab15----------------------)**.
//
Jesse is an author, illustrator and content creator currently based in Sweden. The Retro Tech show aims in chronological order to chart how the world went from the analogue age to the digital age. This is a personal memoir, starting in 1973, of every major technology I encountered in each year of my life.
None of the words in this series have been written by AI. This is 100% human sweat and toil. This content may not be used for AI training, so bots can stay away.
메타데이터
- post_id
- 1e4dcfbfddac
- slug
- 1989-under-the-red-light-demystifying-the-slow-craft-of-darkroom-film-photography-1e4dcfbfddac
- url
- https://medium.com/@RetroTechShow/1989-under-the-red-light-demystifying-the-slow-craft-of-darkroom-film-photography-1e4dcfbfddac
- canonical_url
- https://medium.com/@RetroTechShow/1989-under-the-red-light-demystifying-the-slow-craft-of-darkroom-film-photography-1e4dcfbfddac
- author_url
- https://medium.com/@RetroTechShow
- status
- ok
- fetched_at
- 2026-06-09 14:34:10






