Getting Started with ESP32 in 2026: Complete Beginner Guide
Learn how to set up an ESP32 Development Board, install Arduino IDE, upload your first program, and start building IoT projects with…
Getting Started with ESP32 in 2026: Complete Beginner Guide
Learn how to set up an ESP32 Development Board, install Arduino IDE, upload your first program, and start building IoT projects with confidence.
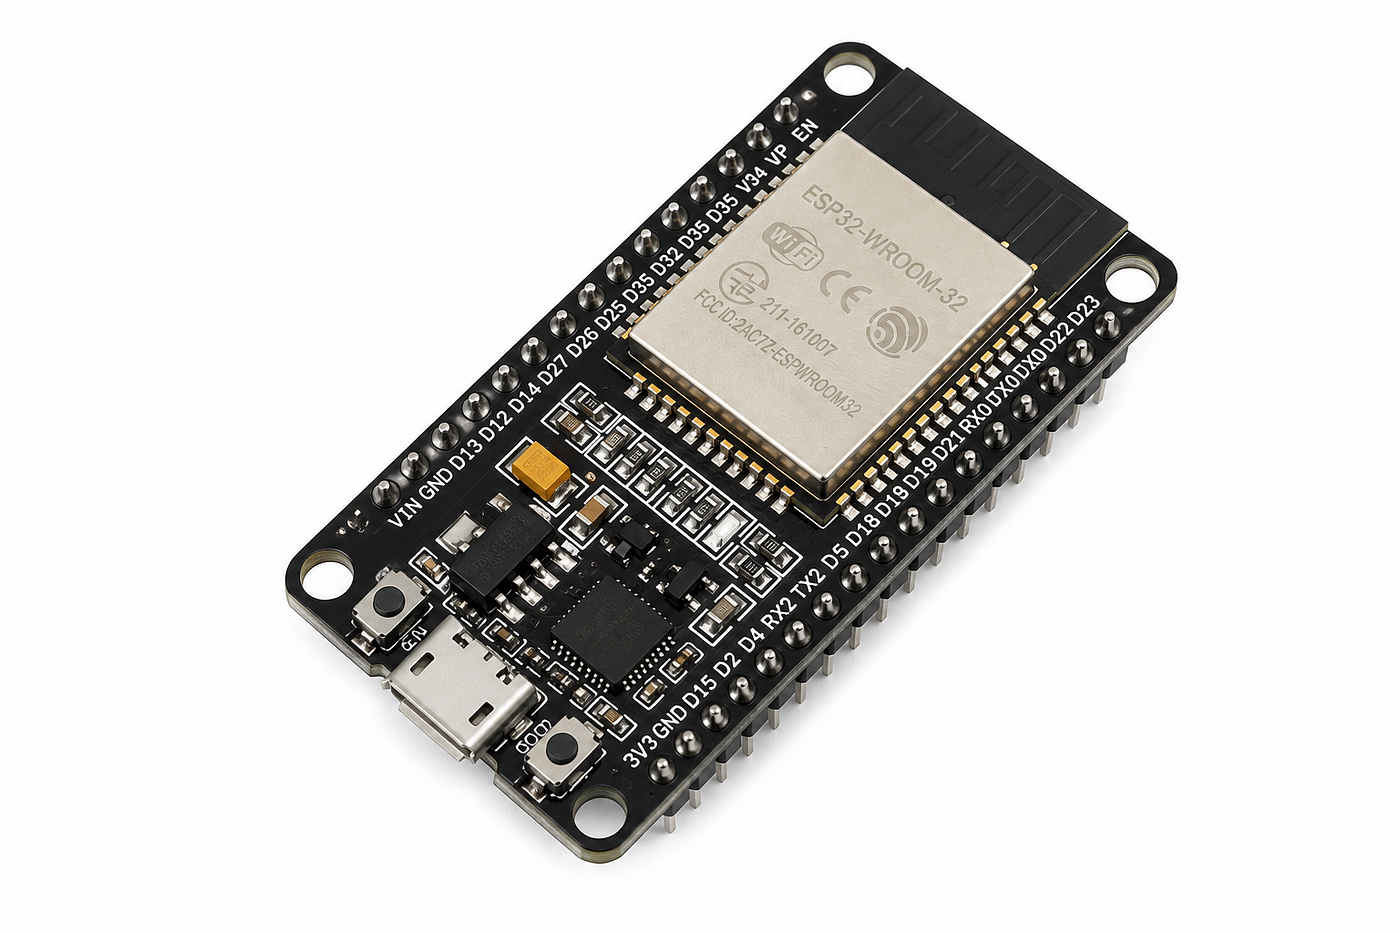
ESP32 Development Board — One of the most popular Wi-Fi and Bluetooth microcontrollers for IoT and embedded systems.
The ESP32 has become one of the most popular development boards for IoT, automation, robotics, smart home systems, and embedded electronics. With built-in Wi-Fi and Bluetooth, it provides an affordable and powerful platform for beginners as well as professional developers.
In this beginner-friendly guide, you’ll learn how to install the Arduino IDE, configure the ESP32 Board Package, upload your first program, and understand the basic workflow for developing ESP32 projects.
Whether you’re a student, hobbyist, engineer, or maker, this tutorial will help you start building ESP32-based projects with confidence.
Why Choose ESP32?
ESP32 offers significantly more features than traditional Arduino boards.
Key advantages include:
• Dual-core 32-bit processor
• Built-in Wi-Fi
• Built-in Bluetooth
• Multiple GPIO pins
• ADC and DAC support
• PWM outputs
• SPI, I2C and UART communication
• Low power operation
• Excellent community support
These features make the ESP32 ideal for IoT devices, automation systems, robotics, wireless sensors, and industrial monitoring.
What You’ll Need
- ESP32 Development Board
- USB Data Cable
- Arduino IDE
- Computer
- Internet Connection
Installing Arduino IDE
The Arduino IDE is one of the easiest development environments for programming the ESP32. It provides a simple interface for writing, compiling, and uploading code to your development board.
Steps:
-
Download the latest Arduino IDE from the official Arduino website.
-
Install the software by following the setup wizard.
-
Launch the Arduino IDE after installation.
-
Verify that the IDE opens correctly before installing ESP32 support.
Once the Arduino IDE is installed, you are ready to add ESP32 board support.
Installing ESP32 Board Package
Arduino IDE does not include ESP32 support by default. You need to install the official ESP32 Board Package provided by Espressif Systems.
Steps:
-
Open Arduino IDE.
-
Go to File → Preferences.
-
Add the ESP32 Board Manager URL.
-
Open Boards Manager.
-
Search for ESP32.
-
Install esp32 by Espressif Systems.
-
Restart the Arduino IDE after installation.
Your computer is now ready to program ESP32 development boards.
Programming Flow Diagram

Uploading Your First Program
After installing the ESP32 Board Package, it’s time to upload your first sketch.
The classic Blink example is the best way to verify that your ESP32 is working correctly.
Steps
-
Connect the ESP32 board using a USB data cable.
-
Select your ESP32 board from Tools → Board.
-
Select the correct COM Port.
-
Open the Blink example.
-
Click Upload.
-
Wait until “Done Uploading” appears.
If the upload completes successfully, your ESP32 is ready for more advanced IoT projects.
Common Problems
Even beginners sometimes face setup issues.
The most common problems include:
• USB driver not installed
• Wrong COM port selected
• Incorrect board selected
• Faulty USB charging cable
• Board Package not installed
Most of these issues can be solved within a few minutes by checking the board settings and USB connection.
What to Learn After ESP32 Basics
Once you have successfully uploaded your first program, you can start exploring more advanced ESP32 features.
Recommended learning path
- GPIO Input & Output
- PWM LED Control
- Analog Sensors
- Wi-Fi Connectivity
- Bluetooth Communication
- OLED Displays
- Web Server
- MQTT Protocol
- Home Automation
- IoT Cloud Platforms
Learning these topics will help you build professional embedded and IoT projects using ESP32.
Useful Resources
To continue learning and building projects with ESP32, explore the following resources:
• Chip.pk Knowledge Hub (Complete Tutorials)
• GitHub Repository (Sample Code & Documentation)
• Hackster Project (Project Walkthrough)
These resources provide additional examples, wiring diagrams, and project files to help you learn faster.
About Chip.pk
Chip.pk is one of Pakistan’s leading online electronics stores, providing genuine development boards, Arduino, ESP32, Raspberry Pi, sensors, robotics components, IoT modules, power supplies, LED lighting solutions, and engineering tools.
Our goal is to help students, hobbyists, engineers, educators, and industries build innovative electronic projects with reliable products and practical learning resources.
Start Building Today
The ESP32 is one of the best development boards for learning embedded systems and IoT. By following this guide, you’ve completed the first step toward building exciting electronics projects.
Continue experimenting, keep learning, and start creating your own smart devices with ESP32.
Chip.pk Article
Complete ESP32 Guide on Chip.pk
GitHub Repository
Hackster Project
메타데이터
- post_id
- 281eed9546fb
- slug
- getting-started-with-esp32-in-2026-complete-beginner-guide-281eed9546fb
- url
- https://medium.com/@chip.pk/getting-started-with-esp32-in-2026-complete-beginner-guide-281eed9546fb
- canonical_url
- https://medium.com/@chip.pk/getting-started-with-esp32-in-2026-complete-beginner-guide-281eed9546fb
- author_url
- https://medium.com/@chip.pk
- status
- ok
- fetched_at
- 2026-07-15 23:11:13