Orbs in Immersive Space: Leveraging On-Device Machine Learning In visionOS For Real-Time Hand…
The Apple Vision Pro has introduced developers to an entirely new paradigm of user interaction. As we step into this exciting frontier…
Orbs in Immersive Space: Leveraging On-Device Machine Learning In visionOS For Real-Time Hand Tracking
Source : Apple Media
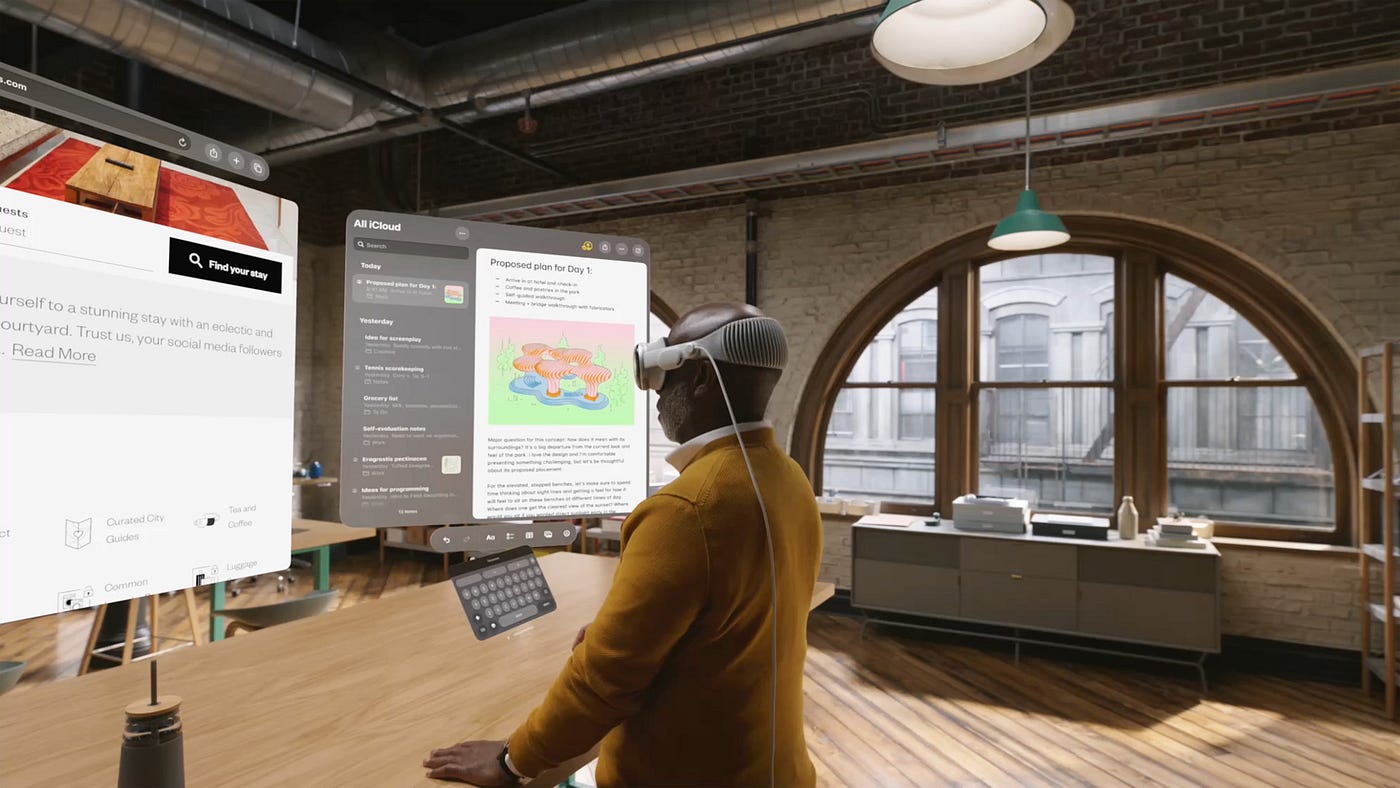
The Apple Vision Pro has introduced developers to an entirely new paradigm of user interaction. As we step into this exciting frontier, understanding how to blend physical gestures with digital content becomes crucial. In this tutorial, we’ll explore these concepts by building an engaging visionOS application that tracks hand movements and renders dynamic 3D spheres above the user’s palms.
What We’re Building
Our application, which we’ll call “Orbs”, demonstrates the seamless integration between physical movement and digital response in spatial computing. When users run the app and raise their palms, they’ll see beautiful metallic spheres materialize and hover above their hands, following their movements in real-time. While the concept is straightforward, the implementation teaches fundamental principles of visionOS development, from hand tracking to 3D rendering and spatial positioning.
Before we begin, ensure you have Xcode 15.2 or later installed and are familiar with iOS development using SwiftUI. While we’ll explain visionOS-specific concepts in detail, a basic understanding of Swift and SwiftUI will help you follow along more easily.
Project Setup
Let’s begin by creating our project in Xcode. Launch Xcode and create a new visionOS project using the “App” template. Name it “Orbs” and ensure you select “Mixed Reality” for the immersion style. This setting is crucial as it allows our app to blend virtual content with the user’s physical environment.

Xcode Project Setup
The architecture of our app revolves around several key components working in concert. The AppModel serves as our central coordinator, managing state and hand tracking. The HandGestureModel handles the intricacies of detecting and interpreting hand movements. The ImmersiveView manages our 3D content rendering, while the ContentView provides user instructions and interface elements.
The Main App
Once you’ve created your project, Xcode should’ve created a file named OrbsApp, using this file we’re setup the immersive space that will eventually render the 3D sphere and the main window. Replace the contents of the OrbsApp file with this :
import SwiftUI

/// Main app structure for the Orbs app
@main
struct OrbsApp: App {
    @StateObject private var appModel = AppModel()
    @Environment(\.openImmersiveSpace) var openImmersiveSpace

    var body: some Scene {
        // Window for instructions
        WindowGroup {
            ContentView()
                .environmentObject(appModel)
                .onAppear {
                    Task {
                        // Automatically open immersive space
                        await openImmersiveSpace(id: appModel.immersiveSpaceID)
                    }
                }
        }
        .windowStyle(.plain)
        .windowResizability(.contentSize)

        // Immersive space for orb visualization
        ImmersiveSpace(id: appModel.immersiveSpaceID) {
            ImmersiveView()
                .environment(appModel)
        }
        .immersionStyle(selection: .constant(.mixed), in: .mixed)
        .persistentSystemOverlays(.hidden)
    }
}
What we’ve done here is we’re invoking the immersive space when the app is launched, set the level of immersion for the immersive space and window properties.
User Interface and Instructions
While the 3D content forms the core of our experience, clear user guidance is essential. The ContentView provides this through a simple, elegant interface:
struct ContentView: View {
    var body: some View {
        VStack {
            Image(systemName: "hand.palm.facing.fill")
                .resizable()
                .frame(width: 200, height: 200)
                .padding(.all, 40)
                .foregroundStyle(.indigo)

            Text("Hold your hand open with your palm facing up")
                .font(.title)
                .multilineTextAlignment(.center)
                .padding(.all)
        }
    }
}
ContentView Preview
This view uses familiar SwiftUI components to create a clear, visually appealing instruction screen that helps users understand how to interact with the app.
Setting Up the App Model
At the heart of our application lies the AppModel, which coordinates between hand tracking and visual feedback. Create a new file called AppModel.swift and implement the following code:
@MainActor
@Observable
class AppModel: ObservableObject {
    let immersiveSpaceID = "ImmersiveSpace"
    var handGestureModel = HandGestureModel()
    var isHandTrackingAuthorized = false
    var leftLaserBeam: ModelEntity?
    var rightLaserBeam: ModelEntity?

    func requestHandTrackingAuthorization() async {
        let authorizationResult = await handGestureModel.session.requestAuthorization(for: [.handTracking])
        for (type, status) in authorizationResult {
            if type == .handTracking {
                isHandTrackingAuthorized = (status == .allowed)
                print("Hand tracking authorization status: \(status)")
            }
        }
    }
}
This model serves multiple crucial functions. It manages our immersive space identifier, maintains references to our hand tracking model, handles permission requests, and stores references to our 3D sphere entities. The @MainActor attribute ensures our model updates occur on the main thread, vital for UI consistency.
Implementing Hand Tracking
Hand tracking forms the foundation of our user interaction. Create HandGestureModel.swift to handle this functionality:
import ARKit
import RealityKit

/// Handles hand tracking and gesture detection using ARKit
@MainActor
class HandGestureModel: ObservableObject {
    /// ARKit session for hand tracking
    let session = ARKitSession()
    let handTracking = HandTrackingProvider()

    /// Current state of both hands being tracked
    @Published var latestHandAnchors: (leftHand: HandAnchor?, rightHand: HandAnchor?)

    init() {
        self.latestHandAnchors = (leftHand: nil, rightHand: nil)
    }

    /// Starts the hand tracking session
    func start() async {
        do {
            if HandTrackingProvider.isSupported {
                print("Starting hand tracking session...")
                try await session.run([handTracking])
                print("Hand tracking session started successfully")
            } else {
                print("Hand tracking not supported")
            }
        } catch {
            print("ARKitSession error:", error)
        }
    }

    /// Continuously monitors hand positions and updates the model
    func monitorHandUpdates() async {
        print("Starting hand updates monitoring")
        for await update in handTracking.anchorUpdates {
            guard update.anchor.isTracked else { continue }

            switch update.anchor.chirality {
            case .left:
                latestHandAnchors.leftHand = update.anchor
                if isHandRaised(update.anchor) {
                    print("Left hand raised")
                }
            case .right:
                latestHandAnchors.rightHand = update.anchor
                if isHandRaised(update.anchor) {
                    print("Right hand raised")
                }
            @unknown default:
                break
            }
        }
    }

    /// Determines if a hand is in the "raised palm" position
    func isHandRaised(_ handAnchor: HandAnchor) -> Bool {
        guard let skeleton = handAnchor.handSkeleton else { return false }

        // Check all fingers are extended
        let fingersToCheck: [HandSkeleton.JointName] = [
            .indexFingerTip,
            .middleFingerTip,
            .ringFingerTip,
            .littleFingerTip,
            .indexFingerTip,
            .thumbTip
        ]

        let wristJoint = skeleton.joint(.wrist)
        guard wristJoint.isTracked else { return false }

        // Get wrist position
        let wristTransform = matrix_multiply(
            handAnchor.originFromAnchorTransform,
            wristJoint.anchorFromJointTransform
        )
        let wristPosition = wristTransform.columns.3

        // Verify all fingers are extended
        for fingerTip in fingersToCheck {
            let tipJoint = skeleton.joint(fingerTip)
            guard tipJoint.isTracked else { return false }

            let tipTransform = matrix_multiply(
                handAnchor.originFromAnchorTransform,
                tipJoint.anchorFromJointTransform
            )
            let tipPosition = tipTransform.columns.3

            // Check finger is extended above wrist
            if tipPosition.y <= wristPosition.y {
                return false
            }
        }

        // Ensure hand is raised high enough
        return wristPosition.y > 0.3
    }
}
The HandGestureModel encapsulates all hand-tracking related functionality. It initializes and manages the ARKit session, continuously monitors hand positions, and determines when hands are in the correct position for sphere placement. The model uses async/await for smooth handling of the continuous stream of hand tracking updates.
In visionOS, ARKitSession and HandTrackingProvider form the core of hand-tracking. When you run the session with [handTracking], the system begins detecting hand poses and provides a continuous stream of HandAnchor objects for each tracked hand.
Each HandAnchor includes:
- A Chirality (
.leftor.right) that indicates which hand it belongs to. - Skeleton Data (
.handSkeleton) that contains positions and transforms for all the major joints in the hand. - A Transform (
originFromAnchorTransform) that locates the hand in the broader spatial world.
Our code in HandGestureModel leverages a Swift concurrency loop to capture new or updated hand anchors in real time. Inside that loop, you check anchor.isTracked to confirm the user’s hand is visible enough for ARKit to deliver meaningful joint data. The method isHandRaised(_:) then inspects key joints (like the wrist and finger tips) to decide if the user is holding their palm in an open and raised position. The coordinates come from applying transforms:
matrix_multiply(
  handAnchor.originFromAnchorTransform,
  joint.anchorFromJointTransform
)
This multiplication step translates the local joint transform into a world-space position, letting you compare the finger tips relative to the wrist on a consistent coordinate scale. If the user’s palm is high enough (e.g., wristPosition.y > 0.3), your code concludes they have a raised hand suitable to create orbs above them.
Because visionOS merges ARKit, RealityKit, and SwiftUI into a single environment, everything from request authorization (session.requestAuthorization) to skeleton joint queries remains synchronous and consistent, simplifying this once-complex pipeline.
Creating the Immersive Experience
The visual aspect of our app comes to life in the ImmersiveView. Create ImmersiveView.swift:
import SwiftUI
import RealityKit
import ARKit
import Combine

/// Main immersive view that handles the 3D orb visualization
struct ImmersiveView: View {
    @Environment(AppModel.self) private var appModel
    @State private var cancellables = Set<AnyCancellable>()
    @State private var rotationAngle: Float = 0.0
    @State private var pulseAngle: Float = 0.0

    /// Available material types for the orbs
    enum MaterialType: Int, CaseIterable {
        case iridescent = 0
        case metallic = 1

        static func random() -> MaterialType {
            return Int.random(in: 0...1) == 0 ? .iridescent : .metallic
        }
    }

    var body: some View {
        RealityView { content in
            print("Initial RealityView setup")

            // Create orbs with random materials
            let leftMaterial = MaterialType.random()
            let rightMaterial = MaterialType.random()

            print("Creating orbs with materials - Left: \(leftMaterial), Right: \(rightMaterial)")

            let leftSphere = createSphereEntity(name: "leftSphere", material: leftMaterial)
            let rightSphere = createSphereEntity(name: "rightSphere", material: rightMaterial)

            content.add(leftSphere)
            content.add(rightSphere)

            appModel.leftLaserBeam = leftSphere
            appModel.rightLaserBeam = rightSphere

            // Set up continuous update timer for hand tracking
            Timer.publish(every: 1.0 / 60.0, on: .main, in: .common)
                .autoconnect()
                .sink { _ in
                    // Update positions based on hands
                    if let leftHandAnchor = appModel.handGestureModel.latestHandAnchors.leftHand,
                       appModel.handGestureModel.isHandRaised(leftHandAnchor) {
                        appModel.leftLaserBeam?.isEnabled = true
                        updateSpherePosition(appModel.leftLaserBeam, with: leftHandAnchor)
                    } else {
                        appModel.leftLaserBeam?.isEnabled = false
                    }

                    if let rightHandAnchor = appModel.handGestureModel.latestHandAnchors.rightHand,
                       appModel.handGestureModel.isHandRaised(rightHandAnchor) {
                        appModel.rightLaserBeam?.isEnabled = true
                        updateSpherePosition(appModel.rightLaserBeam, with: rightHandAnchor)
                    } else {
                        appModel.rightLaserBeam?.isEnabled = false
                    }
                }
                .store(in: &cancellables)

        } update: { content in }
        .task {
            await appModel.requestHandTrackingAuthorization()
            if appModel.isHandTrackingAuthorized {
                await appModel.handGestureModel.start()
                await appModel.handGestureModel.monitorHandUpdates()
            }
        }
    }

    /// Creates a sphere entity with specified material
    private func createSphereEntity(name: String, material: MaterialType) -> ModelEntity {
        print("Creating sphere \(name) with material type: \(material)")

        let sphere = ModelEntity(
            mesh: .generateSphere(radius: 0.07),
            materials: [createMaterial(type: material)]
        )

        sphere.name = name
        sphere.isEnabled = false
        sphere.generateCollisionShapes(recursive: false)

        return sphere
    }

    /// Creates material based on specified type
    private func createMaterial(type: MaterialType) -> PhysicallyBasedMaterial {
        var material = PhysicallyBasedMaterial()

        switch type {
        case .iridescent:
            print("Creating iridescent material")
            material.baseColor = .init(tint: .magenta.withAlphaComponent(1.0))
            material.roughness = 0.5
            material.metallic = 0.4
        case .metallic:
            print("Creating metallic material")
            material.baseColor = .init(tint: .white.withAlphaComponent(1.0))
            material.roughness = 0.5
            material.metallic = 0.9
        }

        return material
    }

    /// Updates sphere position based on hand position
    private func updateSpherePosition(_ sphere: ModelEntity?, with handAnchor: HandAnchor) {
        guard let sphere = sphere,
              let skeleton = handAnchor.handSkeleton else { return }

        let palmJoint = skeleton.joint(.middleFingerMetacarpal)
        guard palmJoint.isTracked else { return }

        let handTransform = matrix_multiply(
            handAnchor.originFromAnchorTransform,
            palmJoint.anchorFromJointTransform
        )

        var transform = Transform(matrix: handTransform)
        transform.translation += SIMD3<Float>(0, 0.1, 0)

        sphere.transform = transform
    }
}
3D Sphere Tracked With Hand Gestures
The ImmersiveView combines SwiftUI’s declarative syntax with RealityKit’s 3D rendering capabilities. It creates our spheres, applies materials, and handles real-time position updates based on hand movements. The use of RealityKit’s PhysicallyBasedMaterial system allows us to create visually striking effects that respond naturally to the environment’s lighting.
- Sphere Creation: Each call to
ModelEntity(mesh: .generateSphere(radius: 0.07))constructs a small orb. You then apply aPhysicallyBasedMaterialwhose properties likeroughnessandmetallicdefine how the orb reflects or diffuses light in a physically plausible way. This harnesses the RealityKit shading model, which integrates with the user’s real or virtual environment lighting. - Position Updates: You set up a timer that fires at ~60 FPS, bridging SwiftUI with RealityKit. Each tick checks if
isHandRaisedreturnedtruefor the left or right hand. For a raised hand, the relevant sphere is enabled (.isEnabled = true) and repositioned. The transform is once again derived from the ARKit anchor transform, but you specifically target themiddleFingerMetacarpalor other joints to pick a stable point—just above the palm. A slight upward offset (transform.translation += SIMD3<Float>(0, 0.1, 0)) lifts the sphere above the user’s hand visually. - Scene Integration: When you place a
ModelEntityinRealityViewthroughcontent.add(...), RealityKit automatically integrates it with the user’s 3D environment. If you test in.fullimmersion style, the orbs appear in a fully enclosed environment; if you choose.mixed, they blend with the user’s actual surroundings.
Permissions

NSHandsTrackingUsageDescription In Info.plist
To finalize our app, add the NSHandsTrackingUsageDescription property in your Info.plist file with our reason for requesting permission to track the user’s hand movements.
Conclusion

Our Final App
Through building this app, we’ve explored several fundamental concepts in visionOS development: hand tracking with ARKit, 3D rendering with RealityKit, and the integration of spatial awareness into our applications. These foundations can be extended to create more complex interactions, from gesture-based controls to fully interactive spatial interfaces.
The combination of hand tracking and 3D rendering opens up exciting possibilities for spatial computing applications. Consider how you might extend this example to include different gestures, more complex 3D objects, or interactive elements that respond to specific hand movements.
Remember that the key to creating compelling spatial experiences lies in maintaining a natural, intuitive connection between physical actions and digital responses. As you develop your own applications, focus on creating interactions that feel natural and responsive while taking advantage of the unique capabilities of spatial computing.
메타데이터
- post_id
- 2b2b6b2a0843
- slug
- orbs-in-immersive-space-leveraging-on-device-machine-learning-in-visionos-for-real-time-hand-2b2b6b2a0843
- url
- https://itnext.io/orbs-in-immersive-space-leveraging-on-device-machine-learning-in-visionos-for-real-time-hand-2b2b6b2a0843
- canonical_url
- https://itnext.io/orbs-in-immersive-space-leveraging-on-device-machine-learning-in-visionos-for-real-time-hand-2b2b6b2a0843
- author_url
- https://medium.com/@prithivdev
- status
- ok
- fetched_at
- 2026-06-09 14:34:10