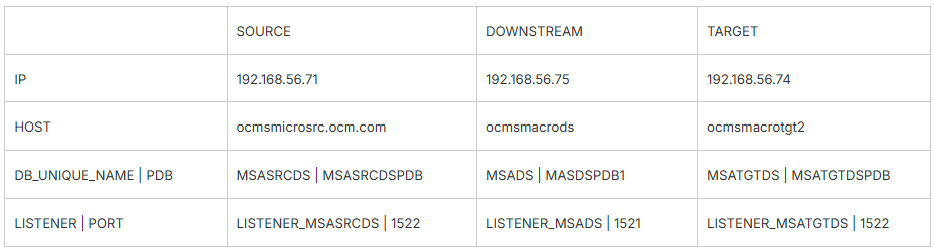
Configuring SCAN with dnsmasq
/etc/hosts file
Configuring SCAN with dnsmasq
/etc/hosts file
#PUBLIC
192.168.56.11 ocmracnode01.ocm.com ocmracnode01
192.168.56.12 ocmracnode02.ocm.com ocmracnode02

#PRIVATE
10.10.10.11 ocmracnode01-priv.ocm.com ocmracnode01-priv
10.10.10.12 ocmracnode02-priv.ocm.com ocmracnode02-priv

#VIP
###VIP does not require ethernet card. It is part of the public address and it must use the same subnet with Public IP. It is managed by Clusterware

192.168.56.14 ocmracnode01-vip.ocm.com ocmracnode01-vip
192.168.56.15 ocmracnode02-vip.ocm.com ocmracnode02-vip

#SCAN
192.168.56.101 OCM1-SCAN.ocm.com OCM1-SCAN
192.168.56.102 OCM1-SCAN.ocm.com OCM1-SCAN
192.168.56.103 OCM1-SCAN.ocm.com OCM1-SCAN- Check if dnsmasq is installed
[root@ocmracnode01 ~]# rpm -qa dnsmasq
dnsmasq-2.76-16.el7.x86_64
[root@ocmracnode01 ~]#

-- install dnsmasq
yum install dnsmasq
2. Configure it for auto-start on linux reboot
chkconfig dnsmasq on- Create /etc/racdns entry
SCAN IP’s must be the same subnet with public address
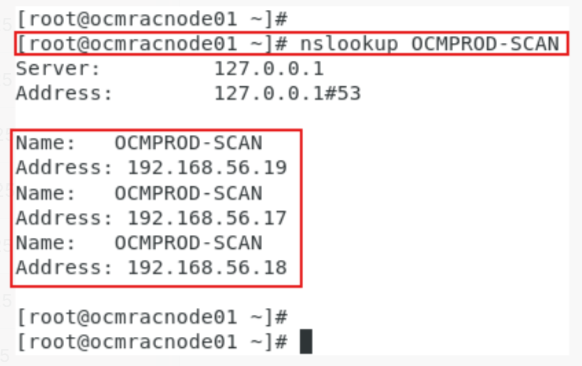
nslookup OCMPROD-SCAN it will resolve to 192.168.56.17/18/19
vi /etc/racdns
# SCAN
192.168.56.101 OCM1-SCAN.ocm.com OCM1-SCAN
192.168.56.102 OCM1-SCAN.ocm.com OCM1-SCAN
192.168.56.103 OCM1-SCAN.ocm.com OCM1-SCAN- Add /etc/racdns file path to /etc/dnsmasq.conf file
-- vi /etc/dnsmasq.conf
addn-hosts=/etc/racdns
local=/ocm.com/

-- status/stop/start/restart dnsmasq process
service dnsmasq status
service dnsmasq stop
service dnsmasq start
service dnsmasq restart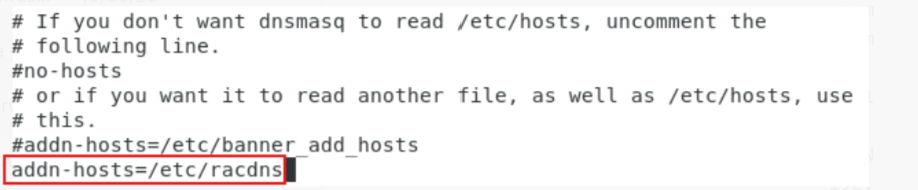
- dbsmasq runs on local host (127.0.0.1)
Add “nameserver 127.0.0.1” to /etc/resolve.conf
[root@ocmrac101 ~] cat /etc/resolv.conf
# Generated by NetworkManager
nameserver 127.0.0.1
search ocm.com
nameserver 192.168.56.1
nameserver 8.8.8.8
Make resolv.conf file read-only
chattr +i /etc/resolv.confyou can make it read-write by issuing the following command if needed:
chattr -i /etc/resolv.conf- Check Port Number 53 for DNS
netstat -tulpn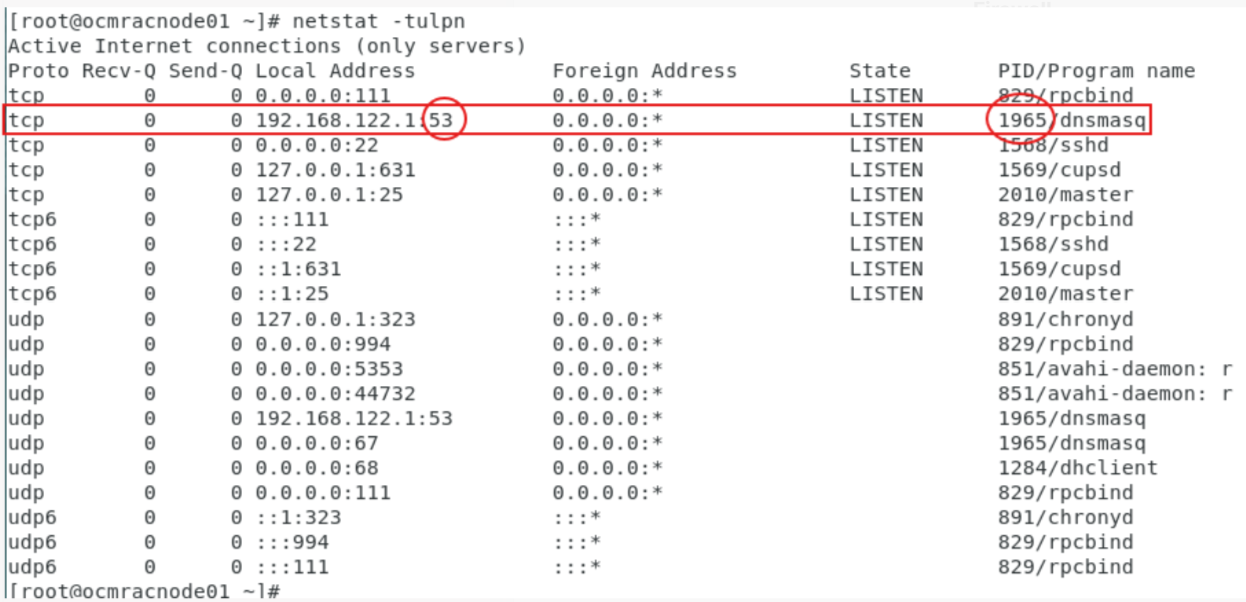
Port 53 process ID is 1965. Kill this process and check it again:
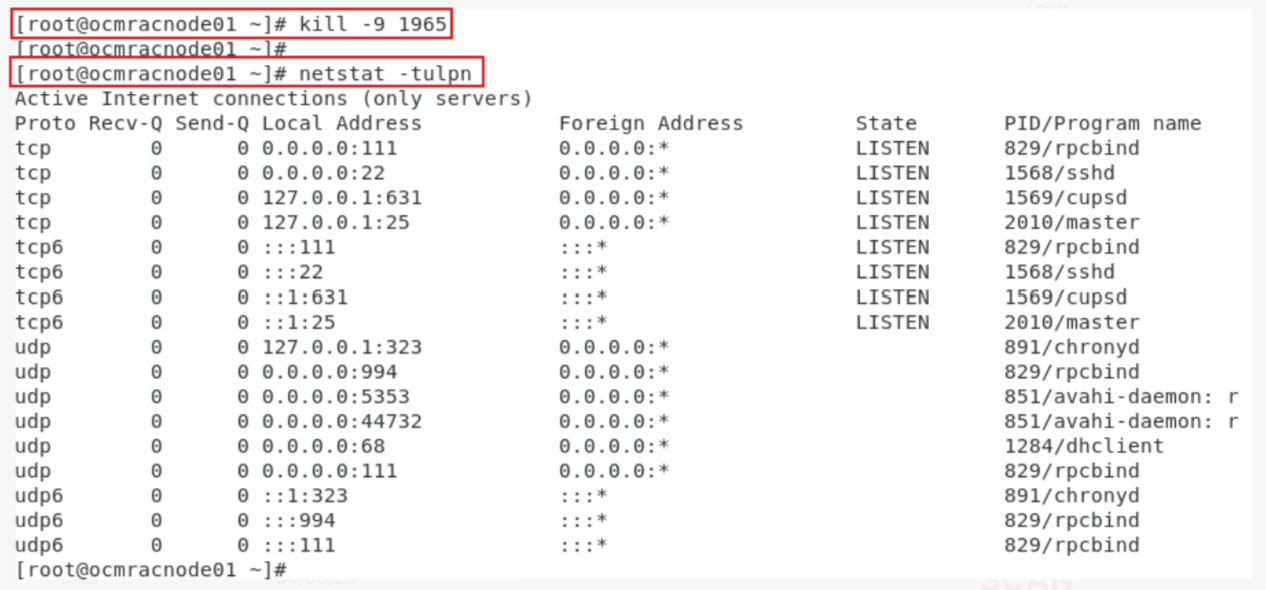
No 53 port processes anymore.
Issue the following command:
-- status/stop/start/restart dnsmasq process
service dnsmasq status
service dnsmasq stop
service dnsmasq start
service dnsmasq restart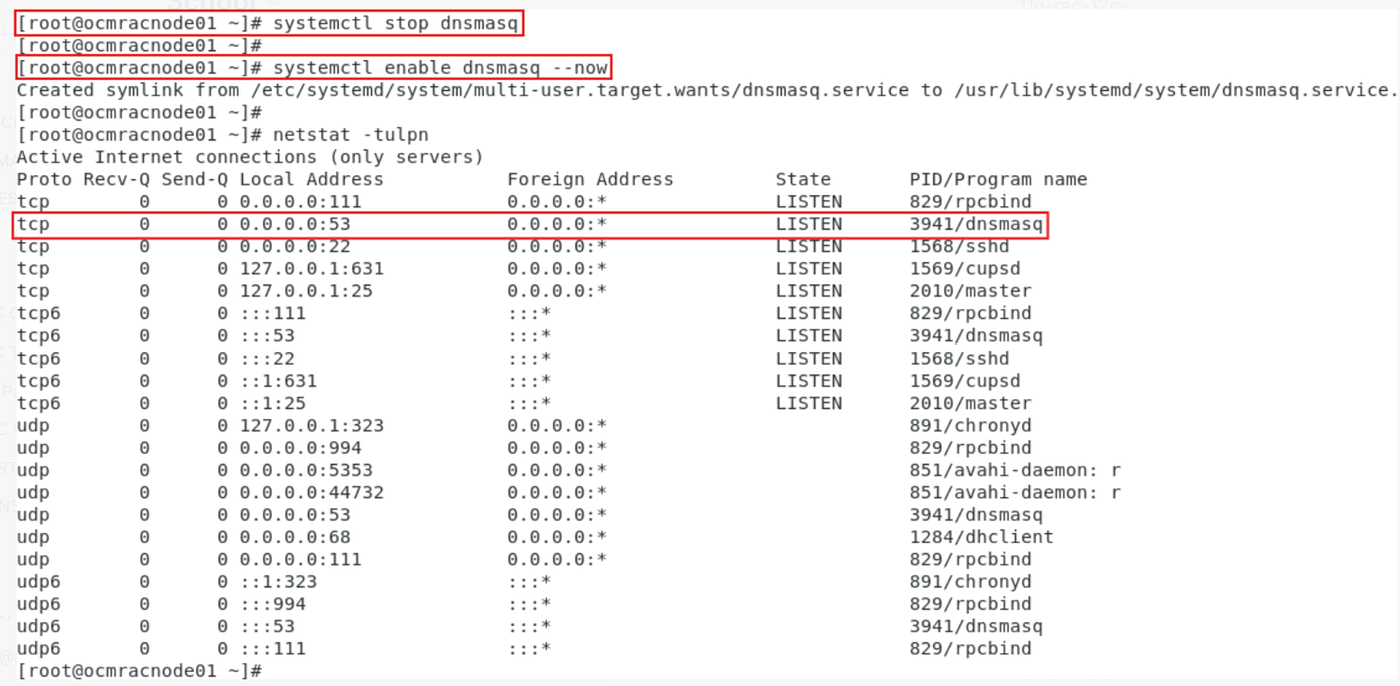
Now dnsmasq is back on port 53
- Check nslookup for SCAN
메타데이터
- post_id
- 2eeea22fe308
- slug
- configuring-scan-with-dnsmasq-2eeea22fe308
- url
- https://medium.com/@omernarman/configuring-scan-with-dnsmasq-2eeea22fe308
- canonical_url
- https://medium.com/@omernarman/configuring-scan-with-dnsmasq-2eeea22fe308
- author_url
- https://medium.com/@omernarman
- status
- ok
- fetched_at
- 2026-06-21 07:44:09