What is Desoldering?
When it comes to Electronics, things never go as planned.
What is Desoldering?
When it comes to Electronics, things never go as planned.
There are times where a circuit board malfunctions or soldering error occurs, and desoldering may be necessary.
Lot of questions can be on your mind, such as what desoldering is, why it’s vital, and how to actually do it. Let’s us break this down below!
So, Let’s understand what is Desoldering? Why is it important ?
Simply put, desoldering is a process of removing solder from a circuit board. Solder is a metal alloy with a low melting point, used to create permanent bond between two or more metal surfaces.
It is used to connect components like resistors, capacitors and microchips.
The reason why desoldering is important is because it is key to performing effective electronic repair. This means, desoldering the components without damaging the board or destroying the components themselves.
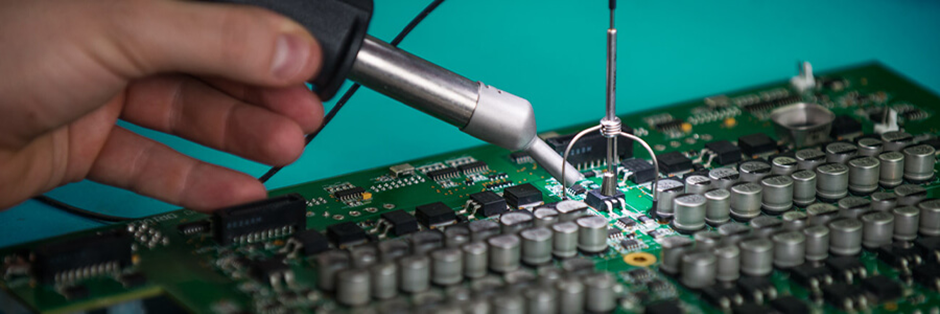
Common Desoldering methods
There are few different ways to desolder. Let’s talk about the most popular ones:
1. Desoldering Pump
Also known as solder sucker, this is the most common method used for desoldering. it looks a bit like a syringe.

Here’s how it works:
· Heat up the solder on the joint with a soldering iron.
· Once the solder begins to flow, you will then need to draw up the molten solder using the desoldering pump.
· The pump’s vacuum creates a suction force that pulls the melted solder out of the joint.
2. Desoldering Braid / Wick
A desoldering braid is another popular option. The braided copper wire is designed to soak up any excess solder when placed on the joint.
This is due to copper’s thermal abilities, meaning it retains heat. And as we know, molten solder will always flow towards the heat.

You use solder braid in the following way:
· Place the braided wick over the soldered joint
· Press the tip of your hot soldering iron onto the wick
· Due to the heat the solder will melt and travel into the wick, which will absorb and harden to it as the copper braid cools.
3. Desoldering Station
If you’re frequently doing desoldering work on complex boards, you may invest in desoldering station.
These stations include couple both a pump to draw up the solder, and a cartridge to heat up the required joint.
This allows for both quick and effective rework.

Desoldering stations can be costly but are worth it if you’re working with high-end electronics, repairing computers or dealing with advanced projects.
Here’s how to use a Desoldering Station:
· Turn on the Desoldering station and place the heated soldering tip on the soldered joint to melt it.
· Using the vacuum pump suck up the molten solder
· Remove the soldering iron and vacuum pump once the joint is clean
· Let it cool down before checking the cleaned joint.
4. Hot Air Rework station
The Hot Air Rework station is particularly used for delicate and detailed work.
They are adept at working with tiny chips that are hard to access with a regular soldering iron. By applying a hot stream of air, the solders becomes molten, and allowing the removal of the component without damaging the rest of the circuit board
These stations are more sophisticated instruments that require some experience to operate properly, but they’re essential for working with fine-pitch SMD components.
Here’s how to use a Hot Air Rework station :
· Set the station at a desired temperature and airflow.
· Position the hot air nozzle above the soldered joint
· Turn on the hot air stream to heat the solder
· Once melted, remove the solder and allow the board and component to cool down
Key Tips for successful Desoldering
Desoldering is not too technical, but it can be a little tricky if you’re doing it for the first time.
Here are some tips to help you get it right.
1. Using the Right Tool
Depending on your rework application, make sure you have the appropriate tool. For quick fixes, a desoldering pump or braid would be a good choice, but for detailed work, a hot air station or dedicated desoldering station would be better suited.
2. Don’t Overheat
It is important that you don’t overheat the components. Too much heat can damage the sensitive parts or even burn them. Be careful when your soldering iron is in contact with the joint. There are even shield accessories available, or other methods to help protect sensitive components.
3. Cleaning the Joints after Desoldering
Once the solders are removed, there might be some residual flux or solder left behind. You need to clean it up using Isopropyl alcohol and a small brush to ensure a clean, safe connection when you add new solder.
4. Practice makes perfect
It is said practice makes perfect. So, if you are new to desoldering don’t be scared of a few errors. It takes time to understand how to desolder and get your head around exactly the best way to tackle each rework task.
Conclusion
To be honest, desoldering can be a little complicated.
But it’s an essential skill for anyone involved in the repair, modification etc — knowing how to properly desolder is key to achieve the best results.
So, the next time you encounter a tough solder joint, remember that desoldering is more than just removing solder — it’s about giving your electronics another chance to shine.
Happy desoldering!
메타데이터
- post_id
- 2f20a2b37f05
- slug
- what-is-desoldering-2f20a2b37f05
- url
- https://medium.com/@akhan_4147/what-is-desoldering-2f20a2b37f05
- canonical_url
- https://medium.com/@akhan_4147/what-is-desoldering-2f20a2b37f05
- author_url
- https://medium.com/@akhan_4147
- status
- ok
- fetched_at
- 2026-08-06 02:33:23