Complete KivyMD WhatsApp UI Tutorial: Building Mobile Apps with Python
Introduction
Complete KivyMD WhatsApp UI Tutorial: Building Mobile Apps with Python
Introduction
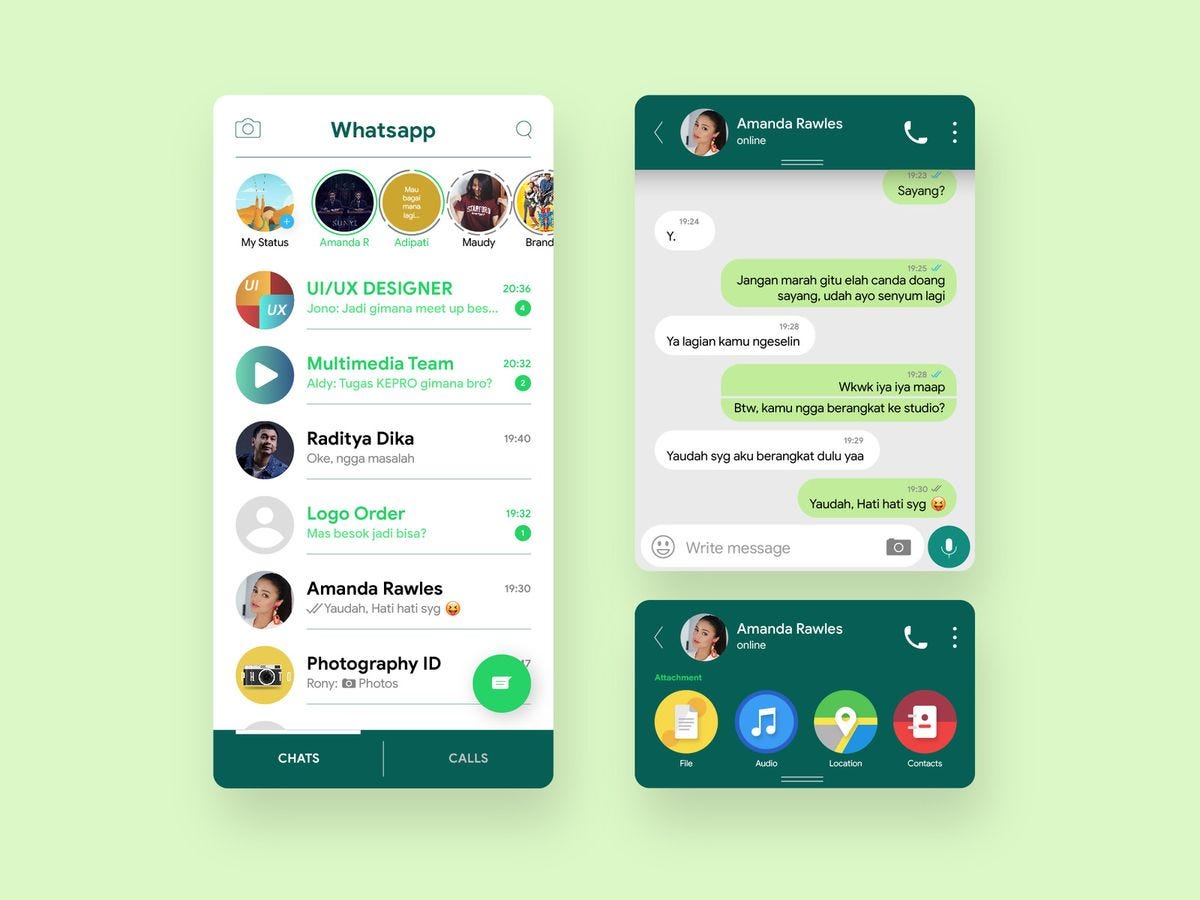
KivyMD is a powerful extension of the Kivy framework that brings Material Design components to Python mobile app development. While there’s a scarcity of comprehensive KivyMD tutorials online, this guide will take you through building a complete WhatsApp UI redesign, providing you with the knowledge to create stunning mobile applications.
This tutorial assumes you have basic knowledge of Python programming and some familiarity with the Kivy framework. We’ll start from the ground up and build a fully functional WhatsApp-style interface.
What You’ll Learn
- Setting up a KivyMD application structure
- Implementing Material Design theming
- Creating responsive mobile UI layouts
- Working with KivyMD widgets and components
- Building a complete chat interface
- Customizing colors and themes
Prerequisites
Before we begin, ensure you have the following installed:
Required Software
- Python 3.7 or higher
- pip (Python package installer)
- A code editor (VS Code, PyCharm, or similar)
Installation
Install the required packages:
# Install KivyMD (this will also install Kivy)
pip install kivymd
# For better development experience, also install:
pip install kivy[base] kivymd[dev]Verify Installation
Create a test file to verify everything is working:
# test_installation.py
try:
    import kivy
    import kivymd
    print("✓ Kivy and KivyMD installed successfully!")
    print(f"Kivy version: {kivy.__version__}")
    print(f"KivyMD version: {kivymd.__version__}")
except ImportError as e:
    print(f"Installation error: {e}")
Understanding KivyMD vs Kivy
KivyMD extends Kivy with Material Design components, offering:
- Material Design Widgets: Buttons, cards, navigation drawers, etc.
- Theming System: Consistent color schemes and typography
- Responsive Design: Automatic adaptation to different screen sizes
- Modern UI Components: Following Google’s Material Design guidelines
Building the Basic Application Structure
Step 1: Create the Main Application File
Create a new file called main.py:
# main.py
import kivy
from kivymd.app import MDApp
from kivymd.uix.label import MDLabel
from kivy.core.window import Window

# Set window size for mobile simulation
Window.size = (320, 600)

class WhatsAppClone(MDApp):
    """
    Main application class for WhatsApp UI clone
    Inherits from MDApp to get Material Design functionality
    """

    def build(self):
        """
        Initializes the application and returns the root widget
        This method is called once when the app starts
        """
        # Set up the app theme
        self.setup_theme()

        # Set window title
        self.title = "WhatsApp"

        # Return the root widget (for now, just a simple label)
        return MDLabel(
            text="WhatsApp UI Clone",
            halign="center",
            theme_text_color="Primary"
        )

    def setup_theme(self):
        """
        Configure the app's theme colors and style
        """
        # Set theme style (Dark or Light)
        self.theme_cls.theme_style = "Dark"

        # Set primary color palette
        self.theme_cls.primary_palette = "Teal"

        # Set accent color palette (for highlights and accents)
        self.theme_cls.accent_palette = "Teal"

        # Set accent hue for lighter teal color
        self.theme_cls.accent_hue = "400"

# Run the application
if __name__ == "__main__":
    WhatsAppClone().run()
Understanding the Code Structure
Let’s break down each component:
Import Statements
import kivy                    # Core Kivy framework
from kivymd.app import MDApp   # Material Design app class
from kivymd.uix.label import MDLabel  # Material Design label widget
from kivy.core.window import Window   # Window management
Window Configuration
Window.size = (320, 600) # Set window size (width, height) in pixelsThis simulates a mobile device screen size for development purposes.
App Class Definition
class WhatsAppClone(MDApp):We inherit from MDApp instead of Kivy's App to get Material Design functionality.
The build() Method
The build() method is crucial - it:
- Runs once when the app starts
- Sets up the theme
- Configures the window title
- Returns the root widget of the application
Understanding KivyMD Theming System
Available Color Palettes
KivyMD provides predefined color palettes based on Material Design:
# Available color palettes
PALETTES = [
    'Red', 'Pink', 'Purple', 'DeepPurple', 'Indigo', 'Blue',
    'LightBlue', 'Cyan', 'Teal', 'Green', 'LightGreen', 'Lime',
    'Yellow', 'Amber', 'Orange', 'DeepOrange', 'Brown', 'Gray', 'BlueGray'
]
Hue Values
Each palette has multiple hue variations:
# Available hue values
HUES = ['50', '100', '200', '300', '400', '500', '600', '700', '800', '900', 'A100', 'A200', 'A400', 'A700']
Theme Configuration Explained
def setup_theme(self):
    # Theme style: "Light" or "Dark"
    self.theme_cls.theme_style = "Dark"

    # Primary palette: Main app color
    self.theme_cls.primary_palette = "Teal"

    # Accent palette: Secondary color for highlights
    self.theme_cls.accent_palette = "Teal"

    # Accent hue: Lighter variation of the accent color
    self.theme_cls.accent_hue = "400"
Building a Complete WhatsApp Interface
Now let’s create a more complete WhatsApp-style interface:
# complete_whatsapp_ui.py
import kivy
from kivymd.app import MDApp
from kivymd.uix.boxlayout import MDBoxLayout
from kivymd.uix.toolbar import MDTopAppBar
from kivymd.uix.list import MDList, OneLineListItem, TwoLineListItem, ThreeLineListItem
from kivymd.uix.list import OneLineIconListItem, TwoLineIconListItem
from kivymd.uix.scrollview import MDScrollView
from kivymd.uix.textfield import MDTextField
from kivymd.uix.button import MDIconButton, MDFloatingActionButton
from kivymd.uix.card import MDCard
from kivymd.uix.label import MDLabel
from kivymd.uix.screen import MDScreen
from kivymd.uix.screenmanager import MDScreenManager
from kivymd.uix.bottomnavigation import MDBottomNavigation, MDBottomNavigationItem
from kivymd.uix.tab import MDTabs, MDTabsBase
from kivymd.uix.floatlayout import MDFloatLayout
from kivymd.icon_definitions import md_icons
from kivy.core.window import Window
from kivy.metrics import dp

# Set window size for mobile simulation
Window.size = (320, 600)

class ChatListItem(TwoLineIconListItem):
    """Custom list item for chat conversations"""

    def __init__(self, contact_name, last_message, time, avatar_icon="account", **kwargs):
        super().__init__(**kwargs)
        self.text = contact_name
        self.secondary_text = last_message
        self.tertiary_text = time

        # Add avatar icon
        self.add_widget(
            MDIconButton(
                icon=avatar_icon,
                theme_icon_color="Custom",
                icon_color=self.theme_cls.primary_color,
                pos_hint={"center_y": 0.5},
                on_release=self.open_chat
            )
        )

    def open_chat(self, instance):
        """Handle chat opening"""
        print(f"Opening chat with {self.text}")

class ChatsTab(MDFloatLayout):
    """Tab containing chat conversations"""

    def __init__(self, **kwargs):
        super().__init__(**kwargs)
        self.create_chat_list()

    def create_chat_list(self):
        """Create the list of chat conversations"""

        # Create scroll view for chat list
        scroll = MDScrollView()
        chat_list = MDList()

        # Sample chat data
        chats = [
            ("John Doe", "Hey, how are you doing?", "2:30 PM", "account"),
            ("Jane Smith", "See you tomorrow!", "1:45 PM", "account-circle"),
            ("Family Group", "Mom: Don't forget dinner", "12:30 PM", "account-group"),
            ("Work Team", "Meeting at 3 PM", "11:15 AM", "briefcase"),
            ("Sarah Wilson", "Thanks for the help!", "10:20 AM", "account-heart"),
            ("Mike Johnson", "Call me when you're free", "Yesterday", "phone"),
            ("Study Group", "Assignment due tomorrow", "Yesterday", "school"),
            ("Alex Brown", "Great job on the project!", "Monday", "thumb-up"),
        ]

        # Add chat items to the list
        for contact, message, time, icon in chats:
            chat_item = ChatListItem(
                contact_name=contact,
                last_message=message,
                time=time,
                avatar_icon=icon
            )
            chat_list.add_widget(chat_item)

        scroll.add_widget(chat_list)
        self.add_widget(scroll)

        # Add floating action button for new chat
        fab = MDFloatingActionButton(
            icon="message-plus",
            pos_hint={"center_x": 0.85, "center_y": 0.15},
            on_release=self.new_chat
        )
        self.add_widget(fab)

    def new_chat(self, instance):
        """Handle new chat creation"""
        print("Creating new chat")

class StatusTab(MDFloatLayout):
    """Tab for status updates"""

    def __init__(self, **kwargs):
        super().__init__(**kwargs)
        self.create_status_list()

    def create_status_list(self):
        """Create the list of status updates"""

        scroll = MDScrollView()
        status_list = MDList()

        # Add "My Status" item
        my_status = TwoLineIconListItem(
            text="My Status",
            secondary_text="Tap to add status update",
            on_release=self.add_status
        )
        my_status.add_widget(
            MDIconButton(
                icon="plus-circle",
                theme_icon_color="Custom",
                icon_color=self.theme_cls.primary_color,
                pos_hint={"center_y": 0.5}
            )
        )
        status_list.add_widget(my_status)

        # Add divider
        status_list.add_widget(MDLabel(text="Recent updates", size_hint_y=None, height=dp(40)))

        # Sample status updates
        statuses = [
            ("Alice Cooper", "25 minutes ago", "camera"),
            ("Bob Wilson", "1 hour ago", "video"),
            ("Carol Johnson", "3 hours ago", "camera"),
            ("David Smith", "5 hours ago", "video"),
        ]

        for name, time, icon in statuses:
            status_item = TwoLineIconListItem(
                text=name,
                secondary_text=time,
                on_release=lambda x, name=name: self.view_status(name)
            )
            status_item.add_widget(
                MDIconButton(
                    icon=icon,
                    theme_icon_color="Custom",
                    icon_color=self.theme_cls.accent_color,
                    pos_hint={"center_y": 0.5}
                )
            )
            status_list.add_widget(status_item)

        scroll.add_widget(status_list)
        self.add_widget(scroll)

    def add_status(self, instance):
        """Handle status addition"""
        print("Adding new status")

    def view_status(self, name):
        """Handle status viewing"""
        print(f"Viewing status from {name}")

class CallsTab(MDFloatLayout):
    """Tab for call history"""

    def __init__(self, **kwargs):
        super().__init__(**kwargs)
        self.create_call_list()

    def create_call_list(self):
        """Create the list of call history"""

        scroll = MDScrollView()
        call_list = MDList()

        # Sample call data
        calls = [
            ("John Doe", "Today, 2:30 PM", "call-made", "green"),
            ("Jane Smith", "Today, 1:45 PM", "call-received", "green"),
            ("Mike Johnson", "Yesterday, 8:20 PM", "call-made", "green"),
            ("Sarah Wilson", "Yesterday, 3:15 PM", "call-missed", "red"),
            ("Work Team", "Monday, 10:30 AM", "video", "blue"),
            ("Mom", "Sunday, 7:45 PM", "call-received", "green"),
        ]

        for name, time, call_type, color in calls:
            call_item = TwoLineIconListItem(
                text=name,
                secondary_text=time,
                on_release=lambda x, name=name: self.make_call(name)
            )
            call_item.add_widget(
                MDIconButton(
                    icon=call_type,
                    theme_icon_color="Custom",
                    icon_color=color,
                    pos_hint={"center_y": 0.5}
                )
            )
            call_list.add_widget(call_item)

        scroll.add_widget(call_list)
        self.add_widget(scroll)

    def make_call(self, name):
        """Handle call initiation"""
        print(f"Calling {name}")

class MainScreen(MDScreen):
    """Main screen with tabs"""

    def __init__(self, **kwargs):
        super().__init__(**kwargs)
        self.create_interface()

    def create_interface(self):
        """Create the main interface with toolbar and tabs"""

        # Main layout
        main_layout = MDBoxLayout(orientation="vertical")

        # Top toolbar
        toolbar = MDTopAppBar(
            title="WhatsApp",
            md_bg_color=self.theme_cls.primary_color,
            specific_text_color="white",
            right_action_items=[
                ["magnify", lambda x: self.search()],
                ["dots-vertical", lambda x: self.show_menu()],
            ]
        )

        # Tabs
        tabs = MDTabs(
            tab_hint_x=True,
            tab_hint_y=True,
            background_color=self.theme_cls.primary_color,
            indicator_color=self.theme_cls.accent_color,
            text_color_active="white",
            text_color_normal="white"
        )

        # Add tabs
        chats_tab = MDBottomNavigationItem(
            name="chats",
            text="CHATS",
            icon="message-text"
        )
        chats_tab.add_widget(ChatsTab())

        status_tab = MDBottomNavigationItem(
            name="status",
            text="STATUS",
            icon="circle-slice-8"
        )
        status_tab.add_widget(StatusTab())

        calls_tab = MDBottomNavigationItem(
            name="calls",
            text="CALLS",
            icon="phone"
        )
        calls_tab.add_widget(CallsTab())

        tabs.add_widget(chats_tab)
        tabs.add_widget(status_tab)
        tabs.add_widget(calls_tab)

        # Add components to main layout
        main_layout.add_widget(toolbar)
        main_layout.add_widget(tabs)

        self.add_widget(main_layout)

    def search(self):
        """Handle search functionality"""
        print("Search activated")

    def show_menu(self):
        """Handle menu display"""
        print("Menu opened")

class WhatsAppClone(MDApp):
    """Main application class"""

    def build(self):
        """Build the application"""

        # Set up theme
        self.setup_theme()

        # Set window title
        self.title = "WhatsApp"

        # Create screen manager
        screen_manager = MDScreenManager()

        # Add main screen
        main_screen = MainScreen(name="main")
        screen_manager.add_widget(main_screen)

        return screen_manager

    def setup_theme(self):
        """Configure the app theme"""

        # Set theme style
        self.theme_cls.theme_style = "Dark"

        # Set primary color (main app color)
        self.theme_cls.primary_palette = "Teal"

        # Set accent color (for highlights)
        self.theme_cls.accent_palette = "Teal"
        self.theme_cls.accent_hue = "400"

        # Additional theme customizations
        self.theme_cls.material_style = "M3"  # Material Design 3

# Run the application
if __name__ == "__main__":
    WhatsAppClone().run()
Key Features Explained
1. Custom List Items
class ChatListItem(TwoLineIconListItem):We create custom list items that inherit from KivyMD’s TwoLineIconListItem, allowing us to display contact names, last messages, and avatars.
2. Tabbed Interface
tabs = MDTabs(
    tab_hint_x=True,
    tab_hint_y=True,
    background_color=self.theme_cls.primary_color,
    indicator_color=self.theme_cls.accent_color,
)
The tabs provide navigation between Chats, Status, and Calls sections.
3. Floating Action Button
fab = MDFloatingActionButton(
    icon="message-plus",
    pos_hint={"center_x": 0.85, "center_y": 0.15},
    on_release=self.new_chat
)
Material Design floating action button for primary actions.
4. Responsive Layout
The layout automatically adapts to different screen sizes using KivyMD’s responsive design principles.
Advanced Customization
Custom Color Scheme
def setup_custom_theme(self):
    """Set up a custom color scheme"""

    # Use custom colors
    self.theme_cls.primary_palette = "Green"
    self.theme_cls.primary_hue = "700"  # WhatsApp's actual green

    self.theme_cls.accent_palette = "LightGreen"
    self.theme_cls.accent_hue = "400"

    # Set custom background colors
    self.theme_cls.bg_dark = "#0D1117"
    self.theme_cls.bg_light = "#FFFFFF"
Adding Icons and Images
# Add custom avatars
avatar = MDIconButton(
    icon="account-circle",
    theme_icon_color="Custom",
    icon_color=self.theme_cls.primary_color,
    icon_size="40dp"
)
Animation and Transitions
from kivy.animation import Animationdef animate_fab(self, instance):
"""Animate floating action button"""
anim = Animation(size=(dp(60), dp(60)), duration=0.2)
anim.start(instance)Testing and Debugging
Running the Application
python main.pyCommon Issues and Solutions
- Import Errors: Ensure KivyMD is properly installed
- Window Size: Adjust
Window.sizefor different screen sizes - Theme Issues: Check palette names and hue values
- Layout Problems: Use
MDBoxLayoutandMDFloatLayoutappropriately
Development Tips
- Use MDScreen: For complex layouts, use
MDScreencontainers - Theme Consistency: Stick to Material Design principles
- Testing: Test on different screen sizes and orientations
- Performance: Use
MDListfor long lists of items
Next Steps
- Add Navigation: Implement screen navigation between chats
- Database Integration: Store chat messages and contacts
- Real-time Updates: Add WebSocket support for live messaging
- Media Support: Add image and video message support
- Notifications: Implement push notifications
- Deployment: Package for Android/iOS using Buildozer
Conclusion
This tutorial has provided you with a comprehensive foundation for building mobile applications with KivyMD. You’ve learned how to:
- Set up a KivyMD application with proper theming
- Create responsive layouts using Material Design components
- Implement tabbed navigation and custom list items
- Handle user interactions and events
- Customize the appearance with themes and colors
The WhatsApp UI clone demonstrates the power and flexibility of KivyMD for creating professional mobile applications. With this foundation, you can extend the app with additional features like real messaging, user authentication, and media sharing.
Remember that building great mobile apps is an iterative process. Start with a solid foundation like this tutorial provides, then gradually add features and improvements based on user feedback and requirements.
메타데이터
- post_id
- 2f6b8c60cae7
- slug
- complete-kivymd-whatsapp-ui-tutorial-2f6b8c60cae7
- url
- https://medium.com/@haddiebakrie/complete-kivymd-whatsapp-ui-tutorial-2f6b8c60cae7
- canonical_url
- https://medium.com/@haddiebakrie/complete-kivymd-whatsapp-ui-tutorial-2f6b8c60cae7
- author_url
- https://medium.com/@haddiebakrie
- status
- ok
- fetched_at
- 2026-07-19 00:45:20