Nmap Post Port Scans | JR PT Room
Recently I completed my nmap post port scans room from jr pt module. and as the name suggests this room focuses on the post scans. This…
Nmap Post Port Scans | JR PT Room
Recently I completed my nmap post port scans room from jr pt module. and as the name suggests this room focuses on the post scans. This room introduces us with some new keywords that are used very commonly and are very important to use starting with
Service Detection:
Once Nmap discovers open ports, you can probe each port to identify the service running on it. Further investigation of open ports is essential, as the pentester can use this information to determine whether the service has known vulnerabilities.
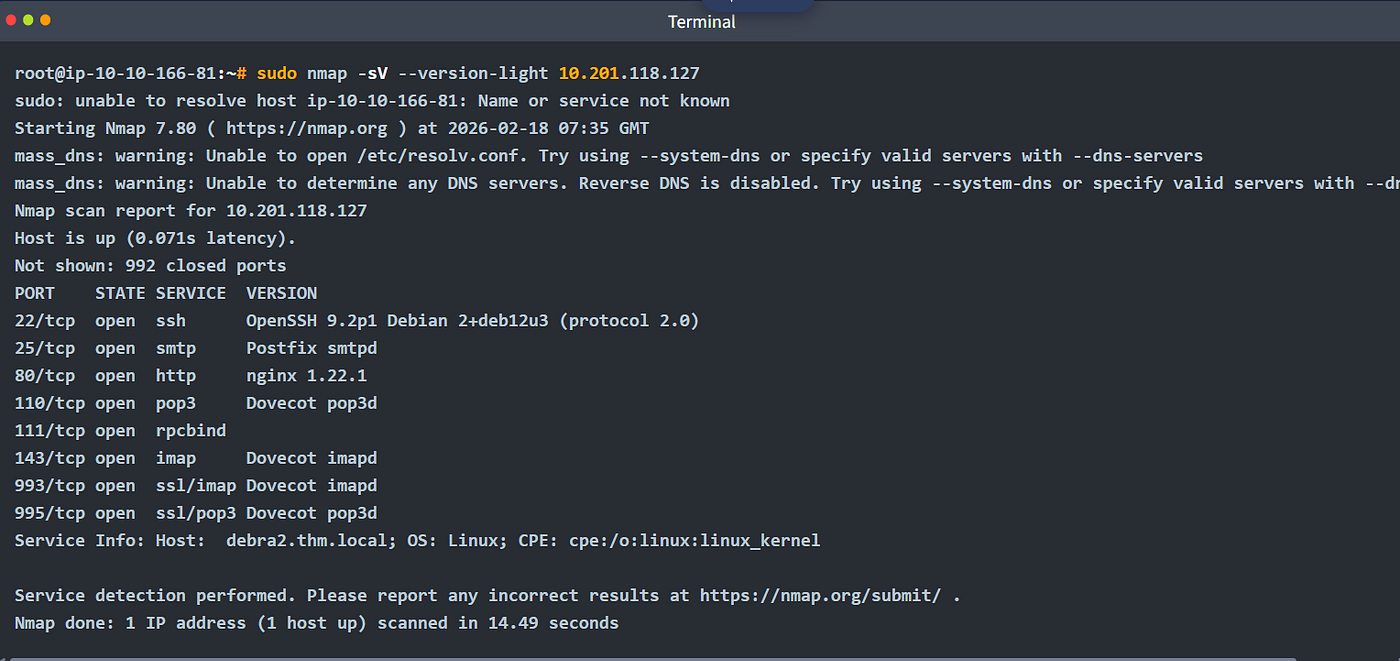
Adding -sV to your Nmap command will collect and determine service and version information for the open ports. You can control the intensity with --version-intensity LEVEL where the level ranges from 0(the lightest) to 9(the most complete). -sV --version-light has an intensity of 2, while -sV --version-all has an intensity of 9.
It is important to note that using -sV will force Nmap to proceed with the TCP 3-way handshake and establish the connection. The connection establishment is necessary because Nmap cannot discover the version without establishing a connection fully and communicating with the listening service. In other words, a stealth SYN scan -sS is not possible when the -sV option is chosen.
Answers:
1:What is the detected version for port 143? = Dovecot imapd
2:Which service did not have a version detected with --version-light? = rpcbind
OS Detection:
Nmap can detect the Operating System (OS) of a target based on its behaviour and any telltale signs in its network responses. OS detection can be enabled using -O; this is an uppercase O as in OS. In this example, we will run nmap -sS -O MACHINE_IP on the AttackBox.
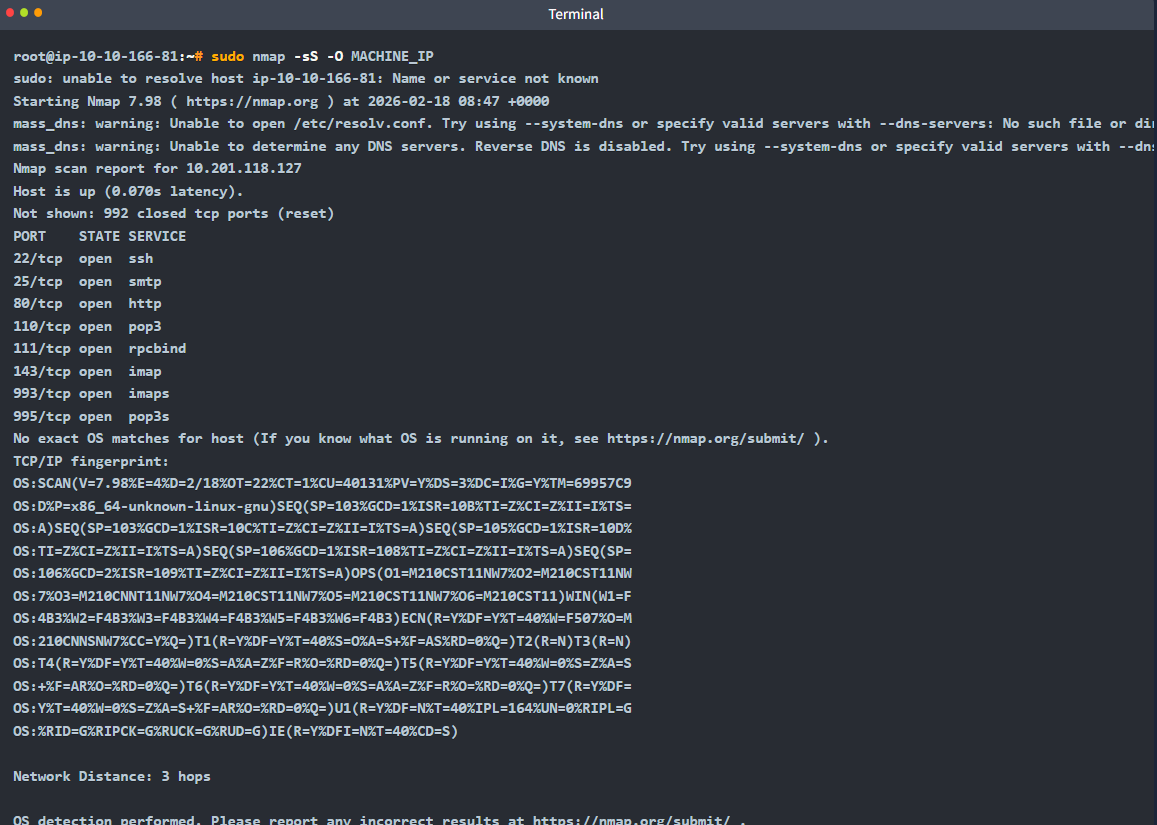
In this case, Nmap was unable to determine an exact operating system match for the target host. Although OS detection was performed successfully, the collected TCP/IP fingerprint did not closely match any known signatures in Nmap’s database. As a result, Nmap returned the message “No exact OS matches for host.”
Despite the lack of a precise match, the fingerprint data still provides useful clues. For example, TTL (Time to Live) refers to a value in each network packet that decrements as it passes through routers. Linux systems typically respond with a TTL of 64, while Windows systems commonly use 128. TCP sequence behaviour refers to how a system generates and increments TCP sequence numbers, which vary between operating systems and kernel versions. Service responses, such as the banners and protocol quirks observed on open ports, also differ between OS families. Together, these signals strongly indicate that the target is running a 64-bit Linux operating system.
Traceroute:
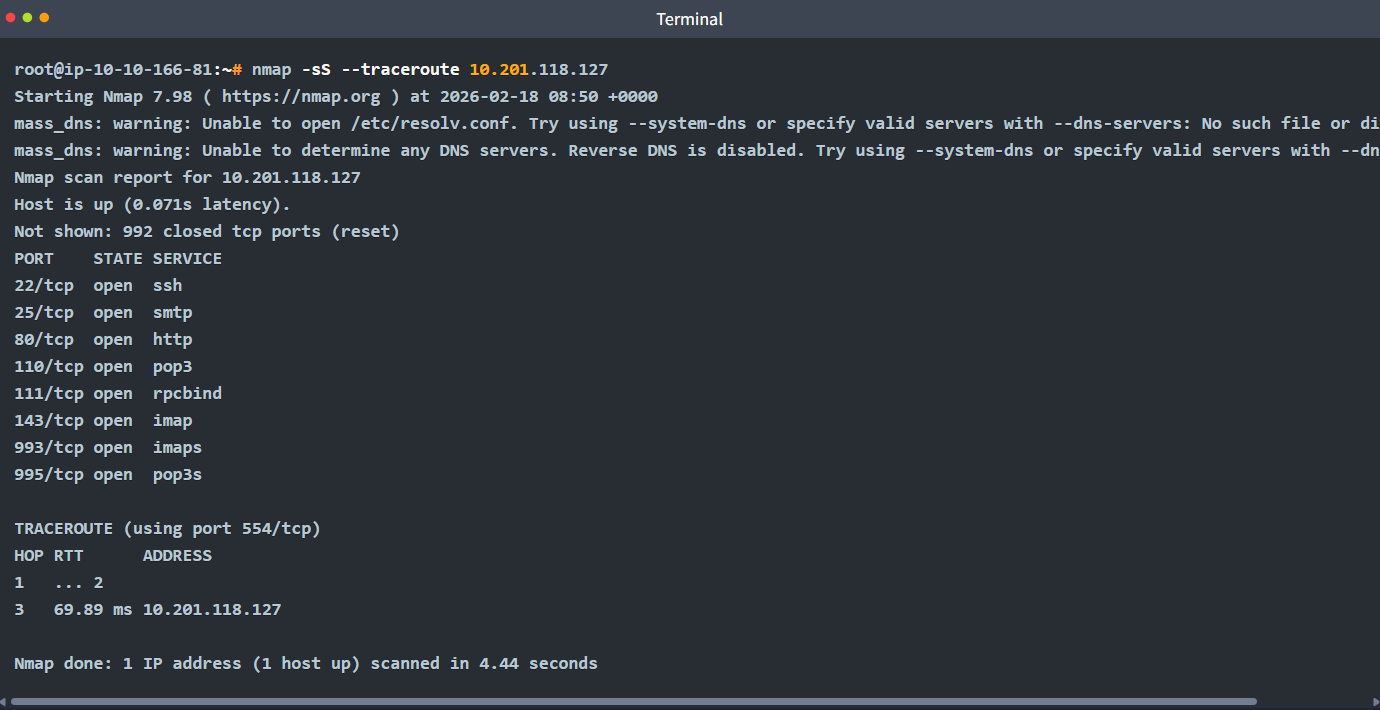
If you want Nmap to find the routers between you and the target, just add --traceroute. In the following example, Nmap appended a traceroute to its scan results. Note that Nmap’s traceroute works slightly differently from the traceroute command found on Linux and macOS or tracert found on MS Windows. Standard traceroute starts with a packet with a low TTL (Time to Live) and increases it until it reaches the target. Nmap’s traceroute starts with a packet with a high TTL and keeps decrementing it.
Nmap Scripts:
Nmap default installation can easily contain close to 600 scripts. Take a look at your Nmap installation folder. On the AttackBox, navigate to the directory at /usr/share/nmap/scripts, and you will notice that there are hundreds of scripts conveniently named starting with the protocol they target.
You can specify to use any or a group of these installed scripts; moreover, you can install other users’ scripts and use them for your scans. Let’s begin with the default scripts. You can choose to run the scripts in the default category using --script=default or simply adding -sC. In addition to default(opens in new tab), categories include auth, broadcast, brute, default, discovery, dos, exploit, external, fuzzer, intrusive, malware, safe, version, and vuln. A brief description is shown in the following table.
Answers:
1:Knowing that Nmap scripts are saved in /usr/share/nmap/scripts on the AttackBox. What does the script http-robots.txt check for? = disallowed entries
2:Can you figure out the name for the script that checks for the remote code execution vulnerability MS15–034 (CVE-2015–1635)? = http-vuln-cve2015–1635
3:On the AttackBox, run Nmap with the default scripts -sC against MACHINE_IP. You will notice that a page is hosted on port 80. What is the http-title value? = Welcome to nginx on Debian!
4:Based on its description, the script ssh2-enum-algos “reports the number of algorithms (for encryption, compression, etc.) that the target SSH2 server offers.” What is the name of the server host key algorithm that relies on SHA2-512 and is supported by MACHINE_IP? = rsa-sha2–512
Whenever you run a Nmap scan, it is only reasonable to save the results in a file. Selecting and adopting a good naming convention for your filenames is also crucial.
Normal:
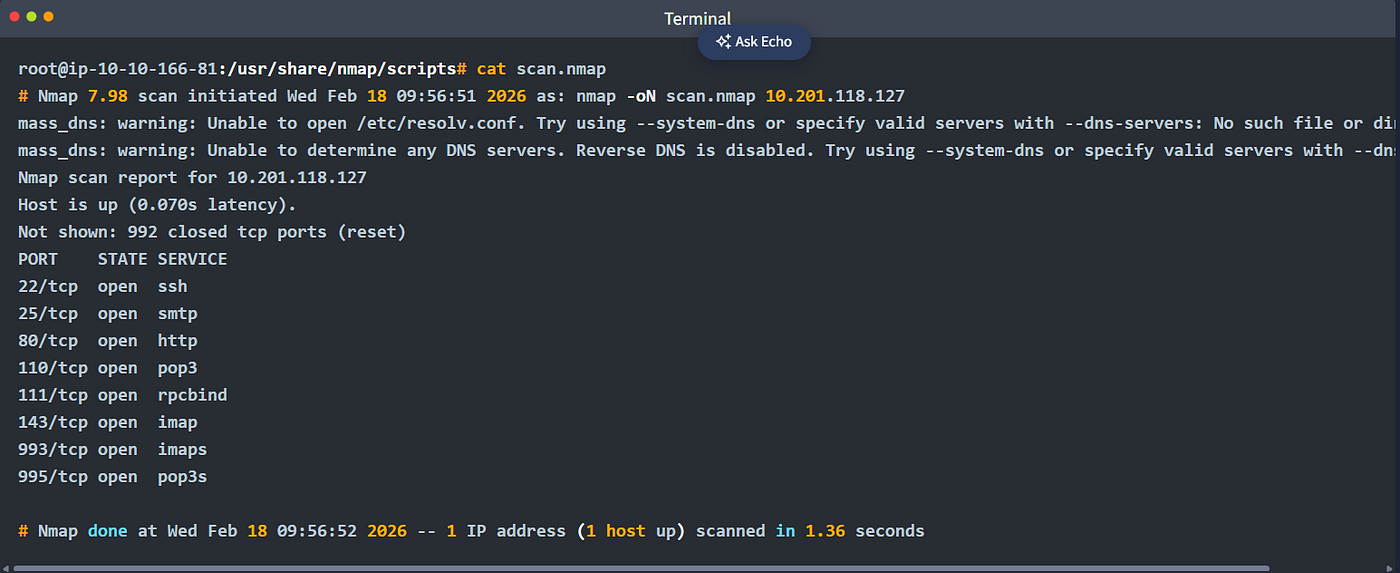
As the name implies, the normal format is similar to the output you get on the screen when scanning a target. You can save your scan in normal format by using -oN FILENAME; N stands for normal. In the AB, first enter the command nmap -oN scan.nmap MACHINE_IP and then issue the following command:
Grepable:
The grepable format has its name from the command grep; grep stands for Global Regular Expression Printer. In simple terms, it makes filtering the scan output for specific keywords or terms efficient. You can save the scan result in a grepable format using -oG FILENAME. The scan output, displayed above in normal format, is shown in the console below using grepable format. The normal output is 21 lines; however, the grepable output is only 4 lines. The main reason is that Nmap wants to make each line meaningful and complete when the user applies grep. As a result, the lines in the grepable output are so long that they are not convenient to read compared to the normal output. A sample response is shown below:

XML:
The third format is XML. You can save the scan results in XML format using -oX FILENAME. The XML format would be most convenient for processing the output in other programs. Conveniently enough, you can save the scan output in all three formats using -oA FILENAME to combine -oN, -oG, and -oX for normal, grepable, and XML.
Answers:
1:What parameter is used to save the output in a greppable format? Write with a dash (-). = -oG
2:Is it possible to save Nmap output in XML format (yea/nay)? = yea
메타데이터
- post_id
- 2f6bb94cd640
- slug
- nmap-post-port-scans-jr-pt-room-2f6bb94cd640
- url
- https://medium.com/@muhammad.anas.rah/nmap-post-port-scans-jr-pt-room-2f6bb94cd640
- canonical_url
- https://medium.com/@muhammad.anas.rah/nmap-post-port-scans-jr-pt-room-2f6bb94cd640
- author_url
- https://medium.com/@muhammad.anas.rah
- status
- ok
- fetched_at
- 2026-08-15 06:47:53

