Setting Up Mountpoint S3 CSI with IRSA on EKS: A Step-by-Step Guide
Introduction
Setting Up Mountpoint S3 CSI with IRSA on EKS: A Step-by-Step Guide
Introduction
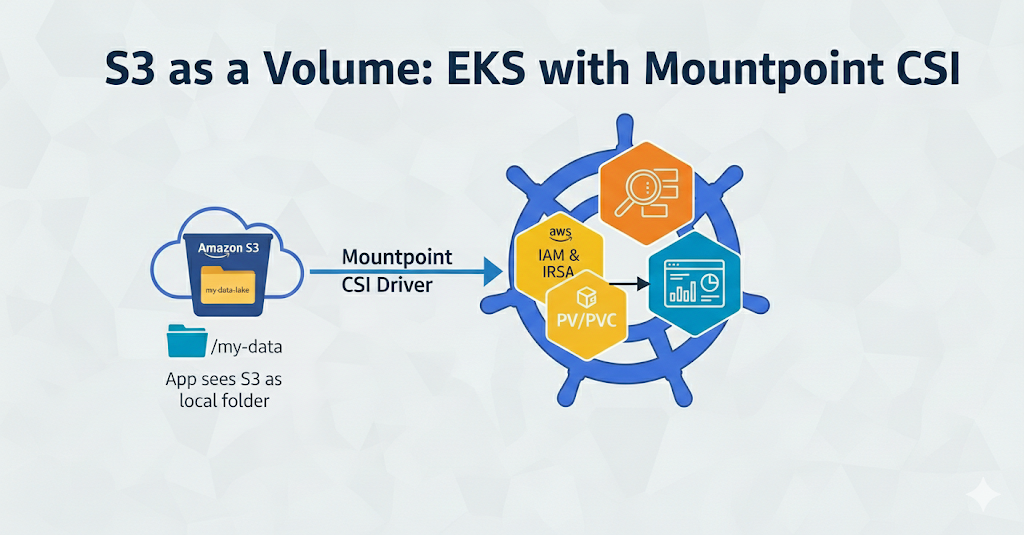
In the world of cloud-native applications, efficiently managing data storage is crucial. Amazon EKS (Elastic Kubernetes Service) provides a robust platform for running Kubernetes workloads, and integrating Amazon S3 (Simple Storage Service) can enhance data accessibility. This guide walks you through setting up the Mountpoint for Amazon S3 CSI (Container Storage Interface) driver with IAM Roles for Service Accounts (IRSA) on EKS. We’ll use static provisioning to mount an S3 bucket into a Kubernetes pod, allowing seamless access to S3 objects as a filesystem.
This setup is ideal for scenarios where you need to read and write data to S3 directly from your applications without managing complex authentication. We’ll cover enabling OIDC and IRSA, installing the CSI driver, creating IAM roles, and deploying a simple Kubernetes application.
Note: This guide assumes you have an EKS cluster running and basic familiarity with AWS CLI and Kubernetes. All commands are executed in a Bash environment.
Prerequisites
- An EKS cluster in the
us-west-2region. - AWS CLI configured with appropriate permissions.
kubectlinstalled and configured to access your cluster.- An S3 bucket in
us-west-2(we'll create one if needed).
Step 1: Enable OIDC and IRSA for the EKS Cluster
IRSA allows Kubernetes service accounts to assume IAM roles securely. This requires an OIDC provider associated with your EKS cluster.
Step 1.1: Describe the Cluster and Get the OIDC Issuer
Run the following commands to retrieve the OIDC issuer details:
CLUSTER_NAME=medium
REGION=us-west-2
OIDC_ISSUER=$(aws eks describe-cluster \
--name $CLUSTER_NAME \
--region $REGION \
--query "cluster.identity.oidc.issuer" \
--output text)
echo "OIDC_ISSUER=$OIDC_ISSUER"
OIDC_ID=$(echo "$OIDC_ISSUER" | cut -d'/' -f5)
ACCOUNT_ID=$(aws sts get-caller-identity --query Account --output text)
echo "OIDC_ID=$OIDC_ID"
echo "ACCOUNT_ID=$ACCOUNT_ID"
Step 1.2: Check or Create the IAM OIDC Provider
Check if the OIDC provider exists:
aws iam list-open-id-connect-providers \
--query "OpenIDConnectProviderList[].Arn" \
--output text | grep "$OIDC_ID" || echo "OIDC provider not found"
If not found, create it:
aws iam create-open-id-connect-provider \
--url "$OIDC_ISSUER" \
--client-id-list "sts.amazonaws.com" \
--thumbprint-list "9e99a48a9960b14926bb7f3b02e22da0afd10df6"
Verify:
aws iam list-open-id-connect-providers \
--query "OpenIDConnectProviderList[].Arn" \
--output text | grep "$OIDC_ID"
Step 2: Create IAM Role and Policy for the CSI Driver (Driver‑Level IRSA) (optional; not required for this example, but recommended for some production patterns)
The Mountpoint S3 CSI driver itself can run with a dedicated IAM role. This role is used by the driver’s controller/daemonset in the kube-system namespace, independent of your application pods.
Step 2.1: Create the CSI Driver S3 Access Policy
Create a file AmazonS3CSIDriverPolicy.json:
{
  "Version": "2012-10-17",
  "Statement": [
    {
      "Sid": "MountpointListBuckets",
      "Effect": "Allow",
      "Action": [
        "s3:ListAllMyBuckets"
      ],
      "Resource": "*"
    },
    {
      "Sid": "MountpointBucketAccess",
      "Effect": "Allow",
      "Action": [
        "s3:ListBucket",
        "s3:GetBucketLocation"
      ],
      "Resource": "arn:aws:s3:::<BUCKET_NAME>"
    },
    {
      "Sid": "MountpointObjectAccess",
      "Effect": "Allow",
      "Action": [
        "s3:GetObject",
        "s3:PutObject",
        "s3:DeleteObject",
        "s3:AbortMultipartUpload",
        "s3:ListMultipartUploadParts"
      ],
      "Resource": "arn:aws:s3:::<BUCKET_NAME>/*"
    }
  ]
}
This example scopes the driver to a single bucket; you can widen or tighten it as needed.
Create the policy:
aws iam create-policy \
  --policy-name AmazonS3CSIDriverPolicy \
  --policy-document file://AmazonS3CSIDriverPolicy.json
Step 2.2: Create the CSI Driver Trust Policy and Role
Create a trust policy file aws-s3-csi-driver-trust-policy.json:
{
  "Version": "2012-10-17",
  "Statement": [
    {
      "Effect": "Allow",
      "Principal": {
        "Federated": "arn:aws:iam::<ACCOUNT_ID>:oidc-provider/oidc.eks.<REGION>.amazonaws.com/id/<OIDC_ID>"
      },
      "Action": "sts:AssumeRoleWithWebIdentity",
      "Condition": {
        "StringEquals": {
          "oidc.eks.<REGION>.amazonaws.com/id/<OIDC_ID>:sub": "system:serviceaccount:kube-system:s3-csi-driver-sa",
          "oidc.eks.<REGION>.amazonaws.com/id/<OIDC_ID>:aud": "sts.amazonaws.com"
        }
      }
    }
  ]
}
Create the role:
aws iam create-role \
  --role-name AmazonEKS_S3_CSI_DriverRole \
  --assume-role-policy-document file://aws-s3-csi-driver-trust-policy.json
Attach the policy:
aws iam attach-role-policy \
  --role-name AmazonEKS_S3_CSI_DriverRole \
  --policy-arn arn:aws:iam::<ACCOUNT_ID>:policy/AmazonS3CSIDriverPolicy
Step 3: Install the Mountpoint for Amazon S3 CSI Driver
The CSI driver enables Kubernetes to mount S3 buckets as volumes.
Step 3.1: Create the EKS Add-On
Install the driver as an EKS-managed add-on:
aws eks create-addon \
--cluster-name $CLUSTER_NAME \
--addon-name aws-mountpoint-s3-csi-driver \
--region $REGION
Step 3.2: Verify the Add-On and Pods
Check the status:
aws eks describe-addon \
--cluster-name $CLUSTER_NAME \
--addon-name aws-mountpoint-s3-csi-driver \
--region $REGION \
--query "addon.status"
kubectl get pods -n kube-system -l app.kubernetes.io/name=aws-mountpoint-s3-csi-driver
Step 4: Create the S3 Bucket
Create an S3 bucket in the same region as your cluster.
aws s3api create-bucket \
--bucket medium\
--region us-west-2 \
--create-bucket-configuration LocationConstraint=us-west-2
Optionally, add a sample file:
aws s3 cp /etc/hosts s3://z1-cloud/test/hosts.txtStep 5: Create IAM Role and Policy for IRSA
Define a policy for S3 access and a role that the service account can assume.
Step 5.1: Create the S3 Access Policy
Create a file k8-s3-mount.json:
{
  "Version": "2012-10-17",
  "Statement": [
    {
      "Effect": "Allow",
      "Action": [
        "s3:ListBucket",
        "s3:GetBucketLocation"
      ],
      "Resource": "arn:aws:s3:::medium"
    },
    {
      "Effect": "Allow",
      "Action": [
        "s3:GetObject",
        "s3:PutObject",
        "s3:DeleteObject",
        "s3:AbortMultipartUpload",
        "s3:ListMultipartUploadParts"
      ],
      "Resource": "arn:aws:s3:::medium/*"
    }
  ]
}
Create the policy:
aws iam create-policy \
--policy-name k8-s3-mount \
--policy-document file://k8-s3-mount.json
Step 5.2: Create the Trust Policy and Role
Create a trust policy file shared-trust-fixed.json (replace <OIDC_ID> with your actual OIDC ID):
{
  "Version": "2012-10-17",
  "Statement": [
    {
      "Effect": "Allow",
      "Principal": {
        "Federated": "arn:aws:iam::<ACCOUNT_ID>:oidc-provider/oidc.eks.us-west-2.amazonaws.com/id/<OIDC_ID>"
      },
      "Action": "sts:AssumeRoleWithWebIdentity",
      "Condition": {
        "StringEquals": {
          "oidc.eks.us-west-2.amazonaws.com/id/<OIDC_ID>:sub": "system:serviceaccount:s3:s3-mount-sa",
          "oidc.eks.us-west-2.amazonaws.com/id/<OIDC_ID>:aud": "sts.amazonaws.com"
        }
      }
    }
  ]
}
Create the role:
aws iam create-role \
--role-name SharedS3MountRole \
--assume-role-policy-document file://shared-trust-fixed.json
Attach the policy:
aws iam attach-role-policy \
--role-name SharedS3MountRole \
--policy-arn arn:aws:iam::<ACCOUNT_ID>:policy/k8-s3-mount
Verify:
aws iam get-role \
--role-name SharedS3MountRole \
--query 'Role.AssumeRolePolicyDocument' \
--output json
Step 6: Create the Kubernetes ServiceAccount
Create a service account annotated with the IAM role ARN.
File: s3-mount-sa.yaml
apiVersion: v1
kind: ServiceAccount
metadata:
  name: s3-mount-sa
  namespace: s3
  annotations:
    eks.amazonaws.com/role-arn: arn:aws:iam::<ACCOUNT_ID>:role/SharedS3MountRole
Apply it:
kubectl apply -f s3-mount-sa.yaml
kubectl describe sa s3-mount-sa -n s3 | grep -A2 Annotations
Step 7: Create S3 PV and PVC for Static Provisioning
For static provisioning, define a PersistentVolume (PV) and PersistentVolumeClaim (PVC).
Step 7.1: PersistentVolume
File: s3-persistentvolume.yaml
apiVersion: v1
kind: PersistentVolume
metadata:
  name: s3-pv
spec:
  accessModes:
    - ReadWriteMany
  capacity:
    storage: 10Gi  # Required by K8s, ignored by S3
  volumeMode: Filesystem
  storageClassName: ""  # Static provisioning
  persistentVolumeReclaimPolicy: Retain
  claimRef:  # 1:1 binding to PVC
    namespace: s3
    name: s3-pvc
  mountOptions:
    - region us-west-2  # S3 bucket region
  csi:
    driver: s3.csi.aws.com
    volumeHandle: s3-volume  # Unique string
    volumeAttributes:
      bucketName: medium
      authenticationSource: pod  # Use pod IRSA
      stsRegion: us-west-2  # STS region
Step 7.2: PersistentVolumeClaim
File: s3-persistentvolumeclaim.yaml
apiVersion: v1
kind: PersistentVolumeClaim
metadata:
  name: s3-pvc
  namespace: s3
spec:
  accessModes:
    - ReadWriteMany
  storageClassName: ""  # Must be "" for static PV
  volumeName: s3-pv
  resources:
    requests:
      storage: 10Gi  # K8s requirement, ignored by S3
Apply them:
kubectl apply -f s3-persistentvolume.yaml
kubectl apply -f s3-persistentvolumeclaim.yaml
Step 8: Deploy the Application
Instead of using Helm, we’ll create a simple Kubernetes Deployment. This assumes you have a container image ready (e.g., from ECR).
File: app-deployment.yaml
apiVersion: apps/v1
kind: Deployment
metadata:
  name: sample
  namespace: s3
spec:
  replicas: 1
  selector:
    matchLabels:
      app: sample
  template:
    metadata:
      labels:
        app: sample
    spec:
      serviceAccountName: s3-mount-sa  # IRSA SA
      containers:
      - name: sample
        image: <ACCOUNT_ID>.dkr.ecr.us-east-1.amazonaws.com/sample:v1
        imagePullPolicy: Always
        volumeMounts:
        - name: s3-volume
          mountPath: /s3-data
        env:
        - name: test2
          value: "1"
        - name: test2
          value: "2"
      volumes:
      - name: s3-volume
        persistentVolumeClaim:
          claimName: s3-pvc
Apply the deployment:
kubectl apply -f app-deployment.yamlStep 9: Validate the Setup
Step 9.1: Check PV and PVC
kubectl get pv | grep s3
kubectl get pvc -n s3 | grep s3
Ensure they are “Bound”.
Step 9.2: Confirm IRSA Environment Variables
kubectl exec -it deploy/sample -n s3 -- env | egrep 'AWS_REGION|AWS_ROLE_ARN|AWS_WEB_IDENTITY'You should see the role ARN and token file.
Step 9.3: Verify the Mount
kubectl exec -it deploy/sample -n s3 -- mount | grep s3-data
kubectl exec -it deploy/sample -n s3 -- ls /s3-data
The mount should show as mountpoint-s3 and list S3 objects.
Key Precautions and Learnings
- Ensure OIDC trust conditions use fully qualified keys (e.g.,
oidc.eks.us-west-2.amazonaws.com/id/<ID>:sub) to avoid authentication errors. - Align regions: The bucket, cluster, and
mountOptionsmust match to prevent "Wrong region" issues. - Mountpoint S3 CSI supports only static provisioning; dynamic provisioning isn’t available yet.
- Use
authenticationSource: podfor pod-level IRSA, ensuring the driver uses the application's credentials. - For multi-namespace setups, consider separate roles for better security.
This setup provides a secure, efficient way to integrate S3 with EKS workloads. If you encounter issues, check AWS documentation or community forums for updates. Happy deploying!
Key Concepts in Setting Up Mountpoint S3 CSI with IRSA on EKS
This section provides context and explanations for the core components used in the guide. Understanding these terms will help you grasp why each step is necessary and how they work together to securely mount an S3 bucket into a Kubernetes pod on EKS.
IAM Roles for Service Accounts (IRSA)
- Purpose: IRSA is an AWS feature that allows Kubernetes service accounts (SAs) to assume IAM roles securely, without needing to store long-term AWS credentials (like access keys) in pods. This enhances security by using short-lived, automatically rotated tokens via OpenID Connect (OIDC).
- How It Works in This Setup: Instead of hardcoding AWS credentials in your application pod, the pod uses a service account annotated with an IAM role ARN. The CSI driver and your app can then access S3 using this role’s permissions, reducing the risk of credential leaks.
- Benefits: Eliminates the need for IAM users or instance profiles; integrates seamlessly with Kubernetes RBAC. It’s essential for cloud-native apps running on EKS to follow the principle of least privilege.
- Common Pitfalls: Ensure the OIDC provider is set up correctly, as misconfigurations lead to “No signing credentials available” errors.
Trust Policy
- Purpose: A trust policy is a JSON document attached to an IAM role that defines who (or what) can assume the role. In IRSA, it specifies that a Kubernetes service account from your EKS cluster can assume the role via OIDC federation.
- How It Works in This Setup: The trust policy includes conditions like the OIDC issuer URL, the service account’s namespace and name (e.g.,
system:serviceaccount:s3:s3-mount-sa), and the audience (sts.amazonaws.com). This allows AWS STS (Security Token Service) to issue temporary credentials when the pod requests them. - Key Elements: It uses
Federatedprincipals (pointing to the OIDC provider) andStringEqualsconditions to match the pod's identity. Without this, the role can't be assumed, breaking IRSA. - Why It’s Critical: It bridges Kubernetes identities to AWS IAM, enabling secure, pod-level access to S3 without cluster-wide permissions.
IAM Role
- Purpose: An IAM role is a set of permissions that can be assumed by trusted entities (like users, services, or in this case, Kubernetes pods). It defines what actions the entity can perform on AWS resources.
- How It Works in This Setup: The
SharedS3MountRolerole is attached to a policy (e.g.,k8-s3-mount) that grants S3 permissions (list, get, put, delete objects in the bucket). The pod assumes this role via IRSA to access S3. - Benefits: Roles are temporary and scoped; they avoid permanent credentials. In EKS, this role is assumed per pod, allowing fine-grained access control.
- Creation Steps Recap: Create the role with the trust policy, then attach the S3 access policy. Verify with
aws iam get-role.
OIDC Provider
- Purpose: An IAM OIDC provider enables federation between AWS IAM and external identity providers (like EKS’s OIDC issuer). It allows AWS to trust tokens issued by Kubernetes.
- How It Works in This Setup: EKS generates an OIDC issuer URL per cluster. You create an IAM OIDC provider mapped to this URL, which IRSA uses to validate and exchange Kubernetes tokens for AWS credentials.
- Key Details: The provider includes a thumbprint for SSL validation and client ID (
sts.amazonaws.com). If it doesn't exist, create it once per cluster. - Why Needed: Without it, IRSA can’t function, as there’s no way to verify the pod’s identity against AWS.
CSI Driver (Mountpoint for Amazon S3 CSI Driver)
- Purpose: The Container Storage Interface (CSI) is a standard for exposing storage systems to Kubernetes. The Mountpoint S3 CSI driver specifically allows mounting S3 buckets as POSIX-compliant filesystems in pods, making S3 objects appear as local files.
- How It Works in This Setup: Installed as an EKS add-on, it runs as pods in the
kube-systemnamespace. It handles mounting the S3 bucket via FUSE (Filesystem in Userspace), using the pod's IRSA credentials for authentication. The driver translates file operations (read/write) into S3 API calls. - Key Features: Supports read/write access, but only static provisioning (manual PV/PVC creation). It’s optimized for high-throughput, low-latency access to S3.
- Benefits: No need to download/upload files manually; integrates S3 seamlessly into Kubernetes workloads. Note: It’s AWS-managed and specific to EKS/S3.
- Limitations: Doesn’t support dynamic provisioning yet; requires the bucket to be in the same region as the cluster.
PersistentVolume (PV) and PersistentVolumeClaim (PVC)
- Purpose: In Kubernetes, PVs represent physical storage resources, while PVCs are requests for storage by users. They abstract storage provisioning, allowing pods to mount volumes without knowing the underlying details.
- How It Works in This Setup: We use static provisioning — a pre-defined PV (bound to the S3 bucket via the CSI driver) is claimed by a PVC. The PVC is then mounted into the pod at
/z1-ml-data, exposing S3 as a filesystem. - Key Elements: The PV specifies the CSI driver (
s3.csi.aws.com), bucket name, and authentication source (podfor IRSA). The PVC references the PV by name, ensuring a 1:1 binding. - Why Static?: Mountpoint S3 CSI doesn’t support dynamic provisioning (automatic PV creation), so you must create them manually.
- Benefits: Decouples storage from applications; allows reuse across pods. In this case, it enables S3 access without copying data locally.
Static Provisioning
- Purpose: Unlike dynamic provisioning (where Kubernetes auto-creates PVs based on StorageClasses), static provisioning requires manual PV creation. It’s used here because the Mountpoint S3 CSI driver doesn’t yet support dynamic modes.
- How It Works in This Setup: You define the PV with a
claimRefto bind it directly to a specific PVC. ThestorageClassNameis set to""to indicate static binding. - Benefits: Full control over storage configuration; suitable for unique resources like S3 buckets.
- Drawbacks: More manual steps compared to dynamic provisioning in other CSI drivers (e.g., EBS).
The driver‑level IAM role is an IAM role that the Mountpoint S3 CSI driver’s own Kubernetes service account assumes, giving the driver a shared set of S3 permissions it can use across the cluster. You typically use this role when you want a single, central set of credentials for all S3 volumes, when you don’t need per‑pod isolation, or when you rely on driver‑level authentication instead of authenticationSource: pod. In this article’s example we use pod‑level IRSA, so the mount works without a dedicated driver role, but in larger or multi‑tenant clusters it’s a good practice to configure this role to cleanly separate the driver’s baseline S3 access from each application’s own IAM permissions.
메타데이터
- post_id
- 345f6c1965ae
- slug
- setting-up-mountpoint-s3-csi-with-irsa-on-eks-a-step-by-step-guide-345f6c1965ae
- url
- https://medium.com/@azeezz/setting-up-mountpoint-s3-csi-with-irsa-on-eks-a-step-by-step-guide-345f6c1965ae
- canonical_url
- https://medium.com/@azeezz/setting-up-mountpoint-s3-csi-with-irsa-on-eks-a-step-by-step-guide-345f6c1965ae
- author_url
- https://medium.com/@azeezz
- status
- ok
- fetched_at
- 2026-06-09 15:37:30




