From Hours to Seconds: Automating Power BI Metadata in Fabric
In a 4-minute read, learn how to centralize your Power BI semantic model metadata in one file and auto-populate every description in…
From Hours to Seconds: Automating Power BI Metadata in Fabric
In a 4-minute read, learn how to centralize your Power BI semantic model metadata in one file and auto-populate every description in seconds using a Fabric notebook.
The Background
In the era of AI, data agents are changing how we work with Power BI — letting people ask questions in plain language instead of digging through reports.
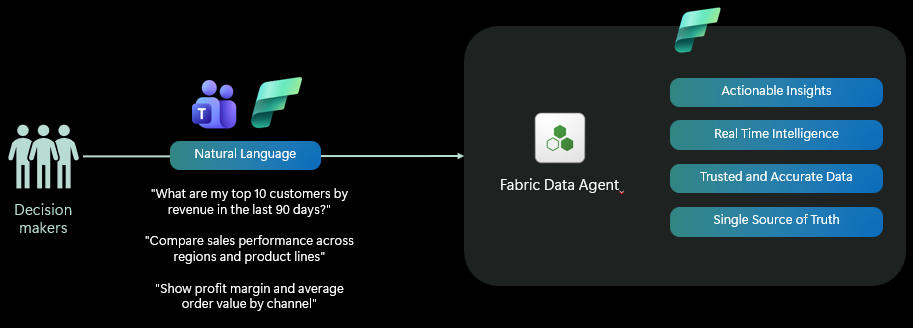
But here’s the catch: an agent is only as good as the business context built into your semantic model.
The Problem
Before your agent can answer questions about your data, you first need to onboard it to that context. It has to understand what each table holds and what each column actually means.
That context lives in your Power BI semantic model’s descriptions. And when your model has 50+ tables and 100+ columns, filling all of those in by hand is slow, repetitive work.
When I build models for my clients, this one step alone used to take me hours. So let me show you a faster way.
The Solution
Populate every table and column description automatically in minutes — using a PySpark notebook in Microsoft Fabric.
You maintain your business definitions in one simple CSV, and the notebook pushes them straight into your semantic model
Before you start
You need these things:
- A data dictionary (CSV) — this is the single source of truth for all your descriptions. It needs three columns:
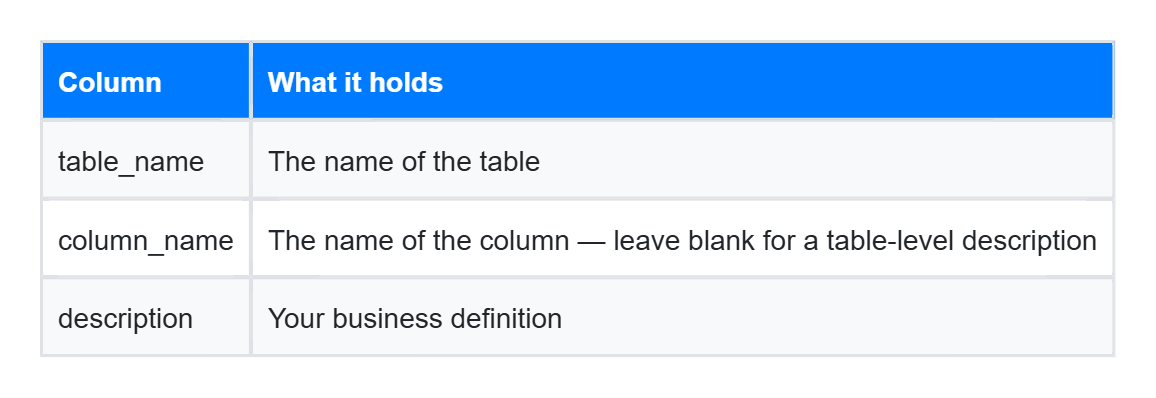

Sample CSV file
Tip: Store this CSV in your Lakehouse / Files so the notebook can read it directly.
-
A Fabric workspace containing your raw data.
-
A semantic model already created and published in that workspace.
Implementation
- Install the library
%pip install semantic-link-labs- Step 2 — Run the script
Update the three variables at the top (DATASET, WORKSPACE, DESC_FILE) to match your environment, then run:
import pandas as pd
from sempy_labs.tom import connect_semantic_model
DATASET = "semantic_model" # as it appears in the workspace
WORKSPACE = "my_workspace"
DESC_FILE = "Files/landing_zone/04-gold-data-dictionary.csv" # lakehouse path, or use abfss://…
# - - load the external file (CSV here; use pd.read_excel for .xlsx) - -
meta = pd.read_csv(f"/lakehouse/default/{DESC_FILE}")
meta["column_name"] = meta["column_name"].fillna("").astype(str).str.strip()
meta["table_name"] = meta["table_name"].astype(str).str.strip()
meta["description"] = meta["description"].fillna("").astype(str)
# index for quick lookup
tbl_desc = {r.table_name: r.description
for r in meta.itertuples() if r.column_name == "" and r.description}
col_desc = {(r.table_name, r.column_name): r.description
for r in meta.itertuples() if r.column_name and r.description}
applied, missing = 0, []
with connect_semantic_model(dataset=DATASET, workspace=WORKSPACE, readonly=False) as tom:
for t in tom.model.Tables:
# table-level description
if t.Name in tbl_desc:
t.Description = tbl_desc[t.Name]
applied += 1
# column-level descriptions
for c in t.Columns:
key = (t.Name, c.Name)
if key in col_desc:
c.Description = col_desc[key]
applied += 1
# report anything in the file that didn't match a real object
model_tables = {t.Name for t in tom.model.Tables}
model_cols = {(t.Name, c.Name) for t in tom.model.Tables for c in t.Columns}
missing = [k for k in tbl_desc if k not in model_tables]
missing += [k for k in col_desc if k not in model_cols]
print(f"Applied {applied} descriptions.")
if missing:
print("No matching object for:", missing)
# Changes are committed automatically when the `with` block exits
Output
What the script does, in plain terms:
- Reads your CSV and cleans it up.
- Builds two lookups — one for table descriptions, one for column descriptions.
- Connects to your semantic model and writes each description onto the matching object.
- Flags any dictionary entry that didn’t match a real table or column, so you can catch typos.
The Result
The notebook populates your entire model in one pass. In my case, it applied 118 descriptions in about 30 seconds
Replacing what used to be hours of manual work.
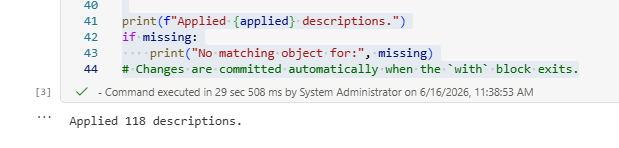
Sample Output from my semantic model: Table Name
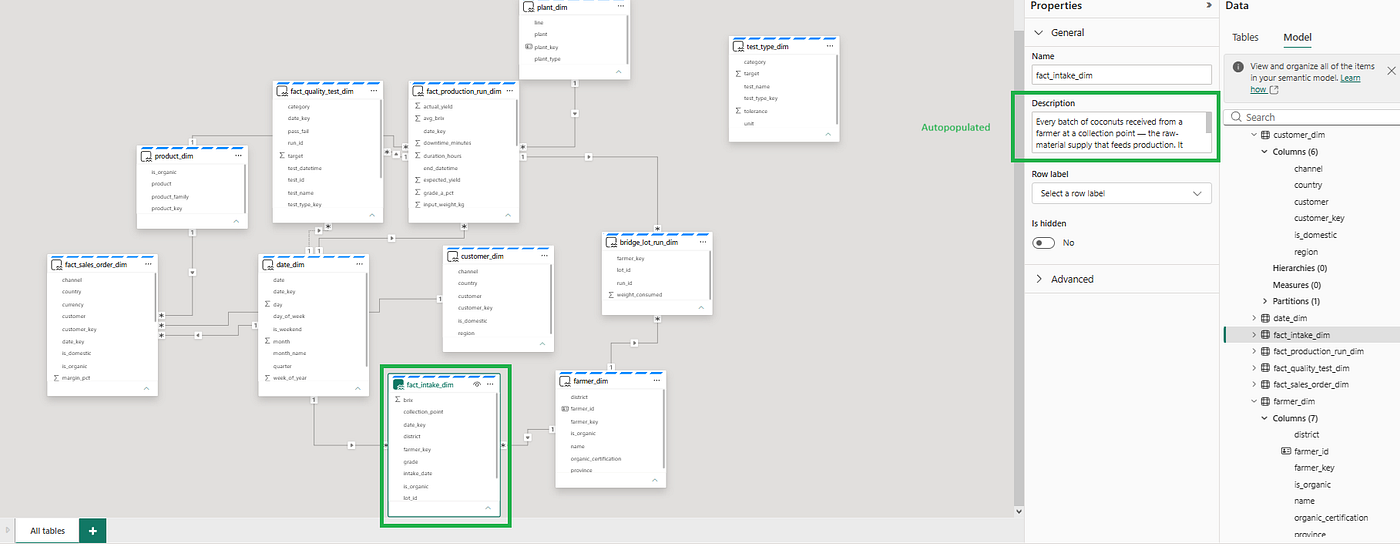
Sample Output from my semantic model: Column Name
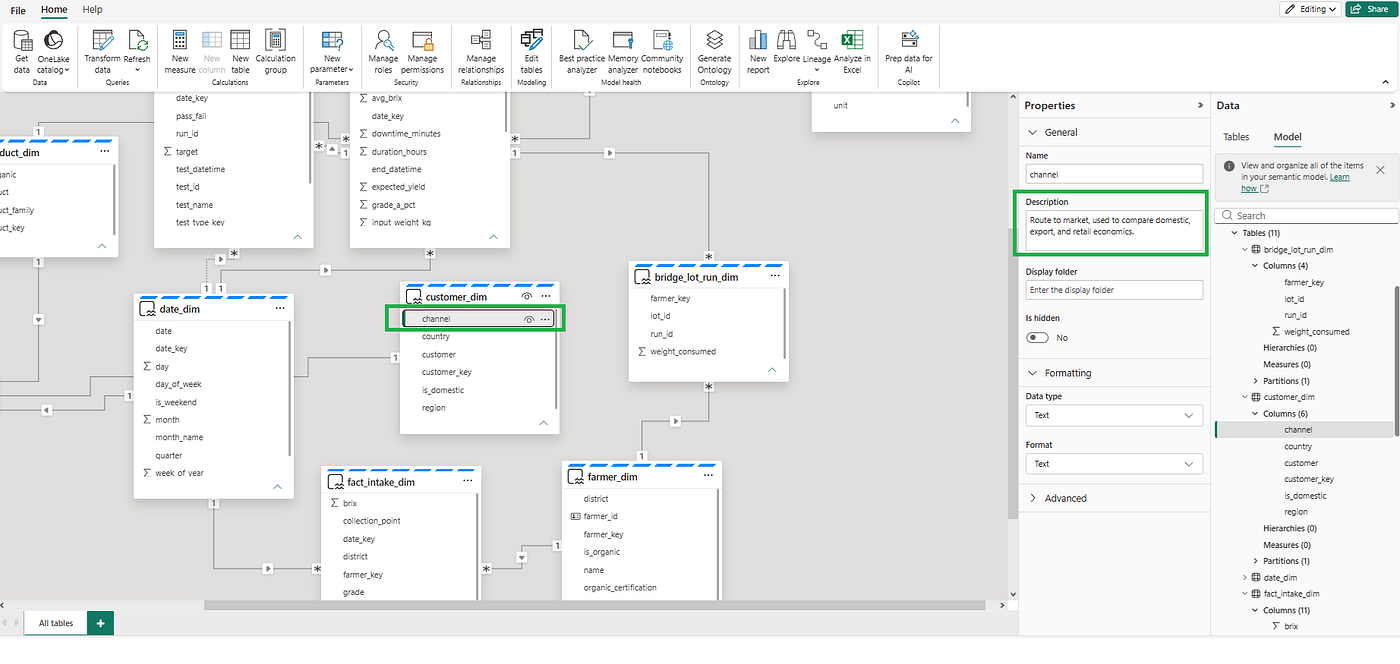
And that’s it. What used to take me hours now runs in the time it takes to grab a coffee. Your descriptions stay version-controlled in one CSV, your semantic model stays documented, and your AI agents get the context they need to answer real business questions.
If you found this helpful, give it a clap 👏 and follow along — I share practical Fabric and Power BI workflows like this regularly. Got a question or a use case of your own? Drop it in the comments — I’d love to hear how you’re using it.
About Me!
Hi, I’m Therese — a Solution Engineer for Data Platforms at Microsoft, sharing real-world tips from the projects I build.
메타데이터
- post_id
- 35010ea8f7b2
- slug
- from-hours-to-seconds-automating-power-bi-metadata-in-fabric-35010ea8f7b2
- url
- https://medium.com/@77mssario/from-hours-to-seconds-automating-power-bi-metadata-in-fabric-35010ea8f7b2
- canonical_url
- https://medium.com/@77mssario/from-hours-to-seconds-automating-power-bi-metadata-in-fabric-35010ea8f7b2
- author_url
- https://medium.com/@77mssario
- status
- ok
- fetched_at
- 2026-07-07 05:31:20



