Displaying Data in Frontend and Deploying to Cloud
VS Code, GitHub, & Render is all you need.
Displaying Data in Frontend and Deploying to Cloud
VS Code, GitHub, & Render is all you need.
Deployment is a vital process for any software that wants to show some data to a user from the backend to the frontend. No deployment, no access, no user, no money, and hence, no more Cappuccino.
Today, we’ll learn how to fetch data from your backend to frontend using one HTML file. Then we’ll host everything on someone else’s computer, AKA the cloud. We have to configure many things back and forth in the process; learning them is the goal of this tutorial.
Frontend Boilerplate
Following the previous article regarding backend development with .NET, we want to display the contents fetched via API to a browser so users can easily interact with our application.
Create an HTML file and generate the usual boilerplate. I also added a bit of styling.
<!DOCTYPE html>
<html lang="en">
<head>
    <meta charset="UTF-8">
    <meta name="viewport" content="width=device-width, initial-scale=1.0">
    <title>CMS</title>
    <link rel="stylesheet"href="<https://cdn.jsdelivr.net/npm/@picocss/pico@2/css/pico.min.css>">
    <style>
    div {
        padding: 16px;
        margin: 16px; }
    </style>
</head>

<body>
    <h1>Welcome to Coffee Management System!</h1>
</body>
</html>
Now, think for a moment: how is the data being received from the backend, and how can we capture and display it to the frontend?
We’re receiving the data in JSON from the backend. Once we convert the JSON into an usable format, we can display it in HTML.
So, let’s create a dropdown where users can choose their item of choice. The following code is creating a dropdown; selecting an item will display its name, price, quantity, and size.
<div class="container">
<h1>Welcome to Coffee Management System!</h1>

<select id="name">
 <option value=""></option>
 <option value="Cappuccino">Cappuccino</option>
 <option value="Latte">Latte</option>
 <option value="Mocha">Mocha</option>
 <option value="Americano">Americano</option>
 <option value="Macchiato">Macchiato</option>
 <option value="Frappuccino">Frappuccino</option>
 <option value="Espresso">Espresso</option>
</select>

<button onclick="getOrder()">Get Order</button>
<p id="order"></p>
</div>
Backend Adjustment
For the backend, we have to make a slight adjustment to Program.cs first.
Right now it’s returning values using a primary key. We want to search by string, so we’ll use the FirstOrDefaultAsync() method instead in the GET endpoint.
// Retrieve one coffee
app.MapGet("/coffee/{name}", async (string name, CoffeeDb db) =>
    await db.Coffees.FirstOrDefaultAsync(c => c.Name == name)
        is Coffee coffee
            ? Results.Ok(coffee)
            : Results.NotFound());
Also, add this snippet to change the CORS policy so our frontend can actually access the backend. Right now, this code will allow access from any domain. This is a security issue, but we’ll fix it later.
builder.Services.AddCors();
var app = builder.Build();
app.UseCors(policy => policy.AllowAnyOrigin().AllowAnyMethod().AllowAnyHeader());
Now, the content our endpoints give is in text format. We have to convert them to an actual JSON object using JavaScript.
Write the following code before the ending HTML tag:
<script type="text/javascript">
    function getOrder() {
        const name = document.getElementById('name').value;

if(name === '') {
  document.getElementById('order').innerHTML = "<br>Please select all option.";
  return;
 }
 fetch(`http://localhost:5000/coffee/${name}`)

  .then(response => response.json())
  .then(data => {
   let coffees = '';
   coffees += '<br>' + data.name + '<br>' + data.size + '<br>' + data.quantity + '<br>' + data.price + '<br>'
   document.getElementById('order').innerHTML = coffees;
  });
 }
</script>
Basically, this takes a value from the dropdown by user selection, then retrieves and displays that specific item from the database in HTML format.
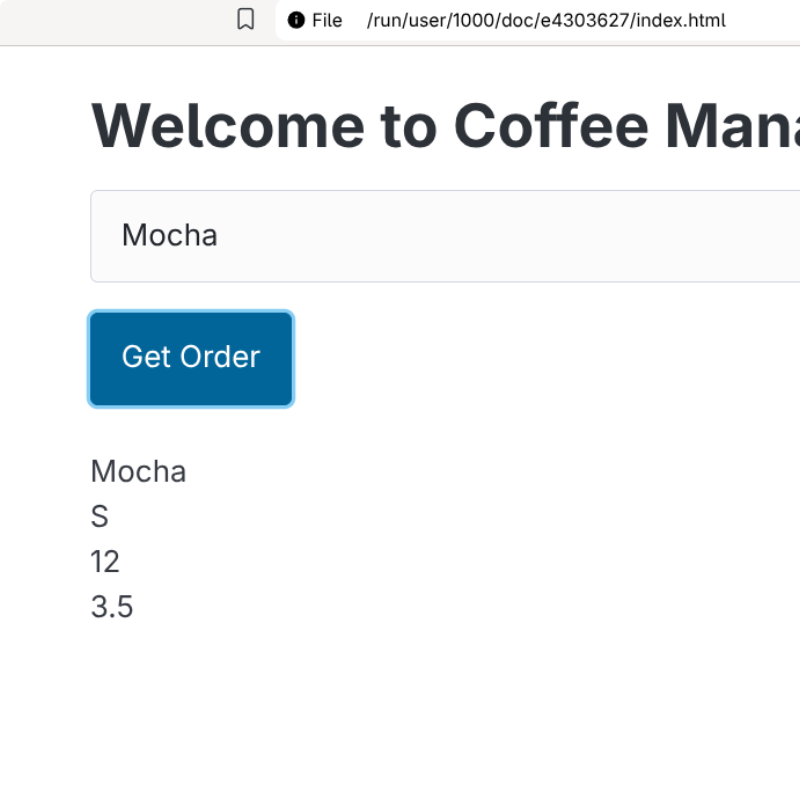
When you run the project, then open the HTML file in the browser and select a coffee, you should see its details below. Perfect!
Troubleshooting
- If it’s not showing anything, make sure you’re actually returning any data in the Program.cs. Swagger should point it out.
- JSON objects are in lowercase; ensure you also write the keys in lowercase (e.g., data.name, not data.Name).
- Configure the CORS snippet properly so the frontend can actually access resources from the backend.
A Quick Git Lesson
Our application is ready to push to production!
Granted, it’s not the fanciest coffee app in town. But hey, at least we got it working. Stop complaining, lol.
We can polish it later. Right now, the target is to understand how things work so we can do them better the next time.
Anyway.
Git protects you from a disaster, prevents others from causing the disaster, and rolls back to a safe state when an actual disaster happens. It’s a wonderful creation of humanity!
And GitHub is a software company that uses the Git version control system to host developers’ code in the cloud.
Alright. Create a new repository in GitHub. From here, you can either manually upload the code or push via terminal. They actually outline how to upload your code from your PC the first time you create a repo.
BTW, you also have to install GitHub first.
Atlassian has a wonderful guide about Git and its usages. Read it here.
The official Git docs are also very helpful. Read it here.
Git setup
As a first-time Git user, setting up the username and email is adequate for now.
$ git config --global user.name "John Doe"
$ git config --global user.email johndoe@example.com
Now, you can either clone the empty repo or connect an existing codebase and push it to that repo. Since we already have the project on our PC, we’ll upload it to the repo.
From the VS Code terminal, type:
git init
git remote add origin <https://github.com/><username>/<project-name>.git
This would put the project under Git version control and connect it to the GitHub repo. Now run the following command; it’s only needed for the first time:
git add .
git commit -m "Initial commit"
git branch -M main
git push -u origin main
Go to your GitHub repo from the browser; you should see the changes there. Awesome!
From next time, when you’re ready to push any changes, just type these 3 commands:
git add . # stages all changes (prepares them for commit)
git commit -m "what changed & why" # makes the changes permanent
git push # uploads commits to GitHub (the cloud)
It’s always a good idea to create a separate branch to make changes in the codebase. Use the following command for branching:
git switch -c new-branch # creates new branch
git switch new-branch # enters the branch
git status # lists all branches
git pull origin main # refreshes main first before merging
git merge new-branch # switches and merge to main
git push origin main # pushes the main branch
This many Git lessons should be enough to survive the majority of your programming projects.
Render Setup
There exist many IaaS and PaaS platforms, but you need to make sure they support . NET. I found Render’s pricing and code support decent, so I chose it. Plus, it abstracts away the setup complexities so you can focus on deployment.
Create an account on render.com. Then create a new project. Add a new web service, and connect your GitHub repo. Select “Free” as the instance type; everything else is fine. Lastly, click “Deploy Web Service.”
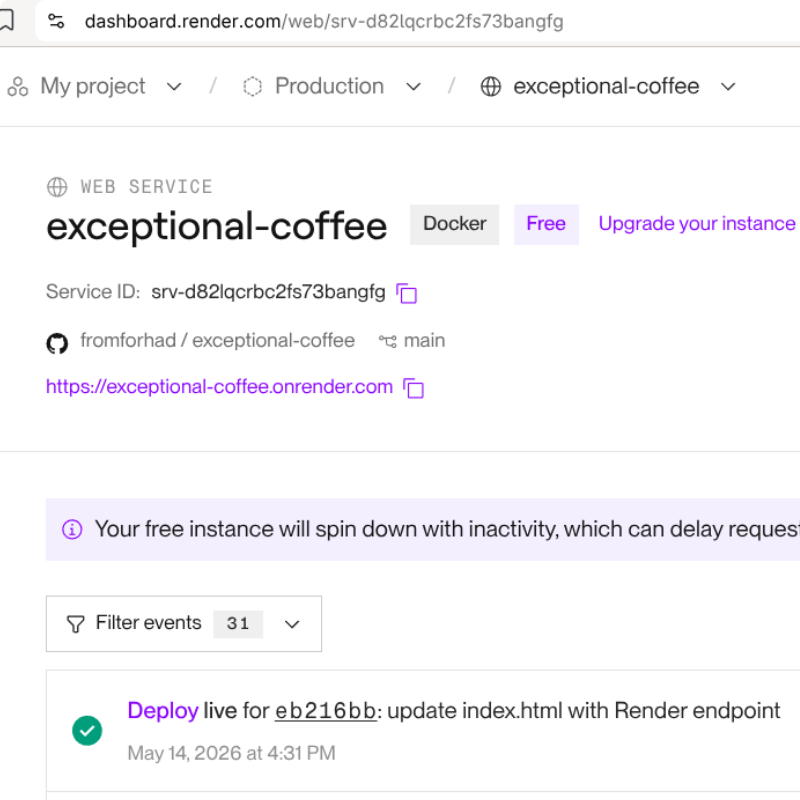
Now a few issues arise.
The first one is, Render has no way to know it’s a .NET app [1]. How do we run our project then?
We use Docker!
Docker is basically a lighter version of a virtual machine that spins up an OS with only the necessary components to build your specific application. It containerizes the project so it can run consistently across various platforms. Another useful invention, you must admit!
Type the following code in the terminal:
dotnet publish -c ReleaseIt sets up necessary steps to make our application ready for cloud deployment. This will generate a .dll file, which will be needed for Docker.
Add a file named Dockerfile (without any extension) at the top of your project folder and paste the following code:
FROM mcr.microsoft.com/dotnet/sdk:8.0 AS build
WORKDIR /app

COPY . .
RUN dotnet restore
RUN dotnet publish -c Release -o out

FROM mcr.microsoft.com/dotnet/aspnet:8.0
WORKDIR /app
d
COPY --from=build /app/out .
ENTRYPOINT ["dotnet", "<project-name>.dll"]
To know more about Dockerfiles, read here.
[1] Actually, Render does have the capability to auto-detect project type. However, using Docker is still a smart choice so you won’t have to worry about configuration again when moving platforms.
The second issue is that Render supports up to .NET 8. But our application was running version 10. We have to downgrade all the packages.
Run this command first:
dotnet remove package Microsoft.AspNetCore.Diagnostics.EntityFrameworkCore
dotnet remove package Microsoft.EntityFrameworkCore.Design
dotnet remove package Microsoft.EntityFrameworkCore.Sqlite
dotnet remove package NSwag.AspNetCore
dotnet remove package Swashbuckle.AspNetCore
Then run this; they target .NET 8:
dotnet add package Microsoft.AspNetCore.Diagnostics.EntityFrameworkCore --version 8.0.26
dotnet add package Microsoft.EntityFrameworkCore.Design --version 8.0.26
dotnet add package Microsoft.EntityFrameworkCore.Sqlite --version 8.0.26
dotnet add package NSwag.AspNetCore --version 14.7.0
dotnet add package Swashbuckle.AspNetCore --version 8.0.0
Save changes and push to GitHub. Since our repo is connected to Render, it’ll auto pick the changes and build the project again.
And hopefully, it should run this time. You’ll see a successful build message in the Events section.
Render would give you a unique URL. In our case, if you type /coffee at the end of this URL (e.g., yoursite.onrender.com/coffee), you’d see all the coffees listed from the database. Awesome!
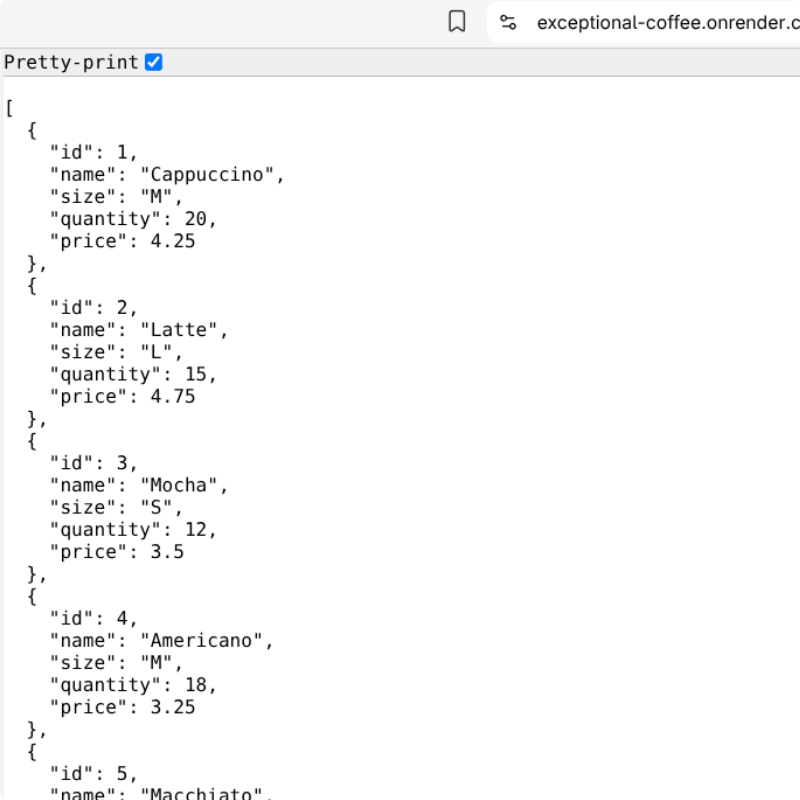
Note: Free instances will shut down after some inactivity. But once a request is made, it comes online again within a minute. Keep that in mind.
Troubleshooting:
- If it’s broken, it’s possible that the Dockerfile wasn’t configured properly. Make sure it resides at the root directory of your project.
- Ensure you pointed to the right .dll file (same as the project name) in the Dockerfile after running the dotnet publish command.
- Ensure all the packages are supported by .NET 8.
- When you downgrade, make sure to also change the TargetFramework tag to “net8.0” in the csproj file.
- Remove the custom localhost link from the Run() method in Program. cs.
Frontend HTML
Before uploading the frontend, we have one tiny adjustment to make. So far we were serving from localhost. But we have the endpoints from Render now. Go to index.html, update localhost with the Render’s URL in JavaScript, and push to GitHub.
Now that everything is up and running, all you have to do is create a static site from the Render dashboard. Connect the same GitHub repo again and point to the directory where your index.html is in “Publish Directory.”
Since our HTML file is in the root directory for now, put the root directory here (./).
Note: I know this is not the best practice to put both frontend and backend at the same place. For learning’s sake, I’m skipping the industry standard practices at this moment.
Render will give you a URL, accessing which should display the contents from index.html. Selecting an option and clicking the submit button should give you the contents from the backend. Yay!
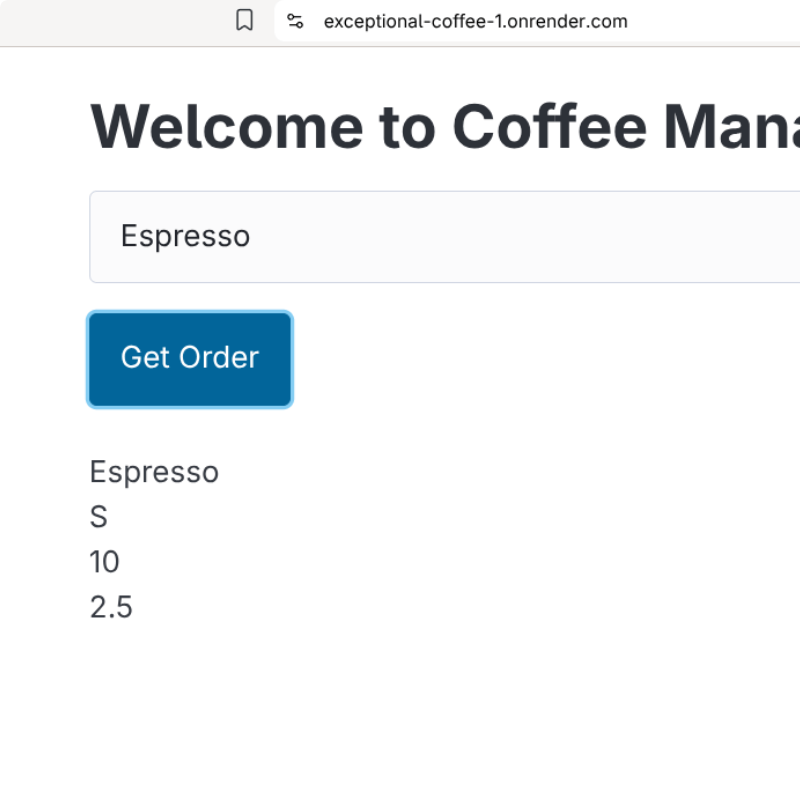
Congrats on building your first full-stack application using .NET! Yes, it’s not the next dazzling todo app, but it’s still something, yah?
Many things are still left untouched, such as the ability to let users order or adjust their cart. Maybe we’ll look into that some other day.
Cheers.
Note: This post is a personal reference while learning backend development. Some information may be inaccurate or incomplete. Please research it yourself as well.
메타데이터
- post_id
- 39fe2b53b356
- slug
- displaying-data-in-frontend-and-deploying-to-cloud-39fe2b53b356
- url
- https://medium.com/@fromforhad/displaying-data-in-frontend-and-deploying-to-cloud-39fe2b53b356
- canonical_url
- https://medium.com/@fromforhad/displaying-data-in-frontend-and-deploying-to-cloud-39fe2b53b356
- author_url
- https://medium.com/@fromforhad
- status
- ok
- fetched_at
- 2026-06-09 15:37:30


