Deploying WSO2 Identity Server on Red Hat OpenShift Using Helm: A Comprehensive Guide to…
In this guide, I walk through my journey of deploying WSO2 Identity Server on Red Hat OpenShift running on Azure. Starting from a clean…
Deploying WSO2 Identity Server on Red Hat OpenShift Using Helm: A Comprehensive Guide to Enterprise-Grade Kubernetes Deployments
In this guide, I walk through my journey of deploying WSO2 Identity Server on Red Hat OpenShift running on Azure. Starting from a clean environment, I cover building a custom Docker image, provisioning and configuring MySQL, customizing Helm deployments, and overcoming the challenges encountered along the way to achieve a production-ready identity and access management (IAM) platform.
The Security Context Constraint (SCC) Challenge
By default, OpenShift’s restricted-v2 SCC enforces the execution of containers using an arbitrary, randomly assigned User ID (UID) generated at the namespace level. It completely ignores any USER directives defined inside a standard Dockerfile.
The official WSO2 Identity Server image relies on a fixed UID (802). When OpenShift forces a random UID on execution, the container process loses read and write access to critical execution paths inside its own file system, resulting in immediate Permission denied runtime panics.
Resolution Strategy
To achieve native OpenShift compatibility without weakening cluster security:
- Refactor the Container Image Layer: Alter file system permissions to inherit root group membership (
GID 0). In the Linux security model, directories that are group-writable byGID 0allow any random UID injected by OpenShift to successfully read and write to those directories. - Apply Targeted RBAC Escalation: Grant the specific service account targeted deployment rights via the cluster administrator profile.
Phase 1: Environment Provisioning & Infrastructure Setup
1. Azure Virtual Machine Provisioning
Deploy an Ubuntu 22.04 LTS instance on Microsoft Azure tailored to accommodate both the OpenShift control plane and the memory-intensive JVM workloads of WSO2 IS.
- Instance Type:
Standard_D8s_v3(8 vCPUs, 32GB RAM) - Storage Disk: Minimum 256GB Premium SSD (Crucial: Standard 32GB/64GB disks will immediately trigger disk-pressure eviction states once the OpenShift internal registry and WSO2 base layers compile).
2. Network Security Group (NSG) Configuration
Expose the following inbound ports on your Azure network perimeter:
22/TCP– Secure Shell (SSH) management.443/TCP– OpenShift Web Console and API routing over HTTPS.9443/TCP– WSO2 Identity Server HTTPS Servlet interface.
3. Core Binary & Utility Installation
Execute the following commands to install dependencies, the Helm package manager, the OpenShift CLI client, and OpenShift Local:
# Docker
sudo apt install -y docker.io && sudo systemctl enable --now docker
sudo usermod -aG docker $USER && newgrp docker

# Tools
sudo apt install -y curl wget git unzip tar mysql-client virtiofsd tmux

# Helm
curl https://raw.githubusercontent.com/helm/helm/main/scripts/get-helm-3 | bash
# OpenShift CLI
wget https://mirror.openshift.com/pub/openshift-v4/x86_64/clients/ocp/4.14.20/openshift-client-linux-4.14.20.tar.gz
tar -xzf openshift-client-linux-4.14.20.tar.gz
sudo mv oc kubectl /usr/local/bin/ && sudo chmod +x /usr/local/bin/oc
# CRC
wget https://developers.redhat.com/content-gateway/rest/mirror/pub/openshift-v4/clients/crc/latest/crc-linux-amd64.tar.xz
tar xvf crc-linux-amd64.tar.xz && mkdir -p ~/local/bin
mv crc-linux-*-amd64/crc ~/local/bin/
echo 'export PATH=$HOME/local/bin:$PATH' >> ~/.bashrc && source ~/.bashrcPhase 2: OpenShift Local (CRC) Initialization
Prior to cluster initialization, append your user profile to the virtualization group (libvirt) and explicitly scale up resource allocations.
The default disk allocation for an OpenShift Local instance is 32GB. This allocation will immediately fail under enterprise workloads. Combining the core Red Hat operators with a 1GB compressed WSO2 IS distribution results in severe disk pressure, triggering the immediate status:
Pod evicted — low ephemeral storage. You must scale the virtual disk to 100GB before cluster creation.
scp ~/Downloads/pull-secret azureuser@<VM_IP>:~/pull-secret# Append profile to virtualization layer
sudo usermod -aG libvirt $USER && newgrp libvirt
# Set production-capable cluster parameters
crc config set cpus 6
crc config set memory 20480
crc config set disk-size 100
crc config set consent-telemetry yes
# Stage virtualization environments
crc setupObtain your Red Hat platform pull secret from Red Hat OpenShift Hybrid Cloud Console and stage it locally to bootstrap the environment.
# Bootstrap cluster virtualization layer (Averages 10-20 minutes execution time)
crc start --pull-secret-file ~/pull-secret
Upon successful cluster convergence, record the generated administrative parameters outputted to your terminal shell:
Started the OpenShift cluster.
The server is accessible via web console at:
  https://console-openshift-console.apps-crc.testing

Log in as administrator:
  Username: kubeadmin
  Password: XXXXX-XXXXX-XXXXX-XXXXX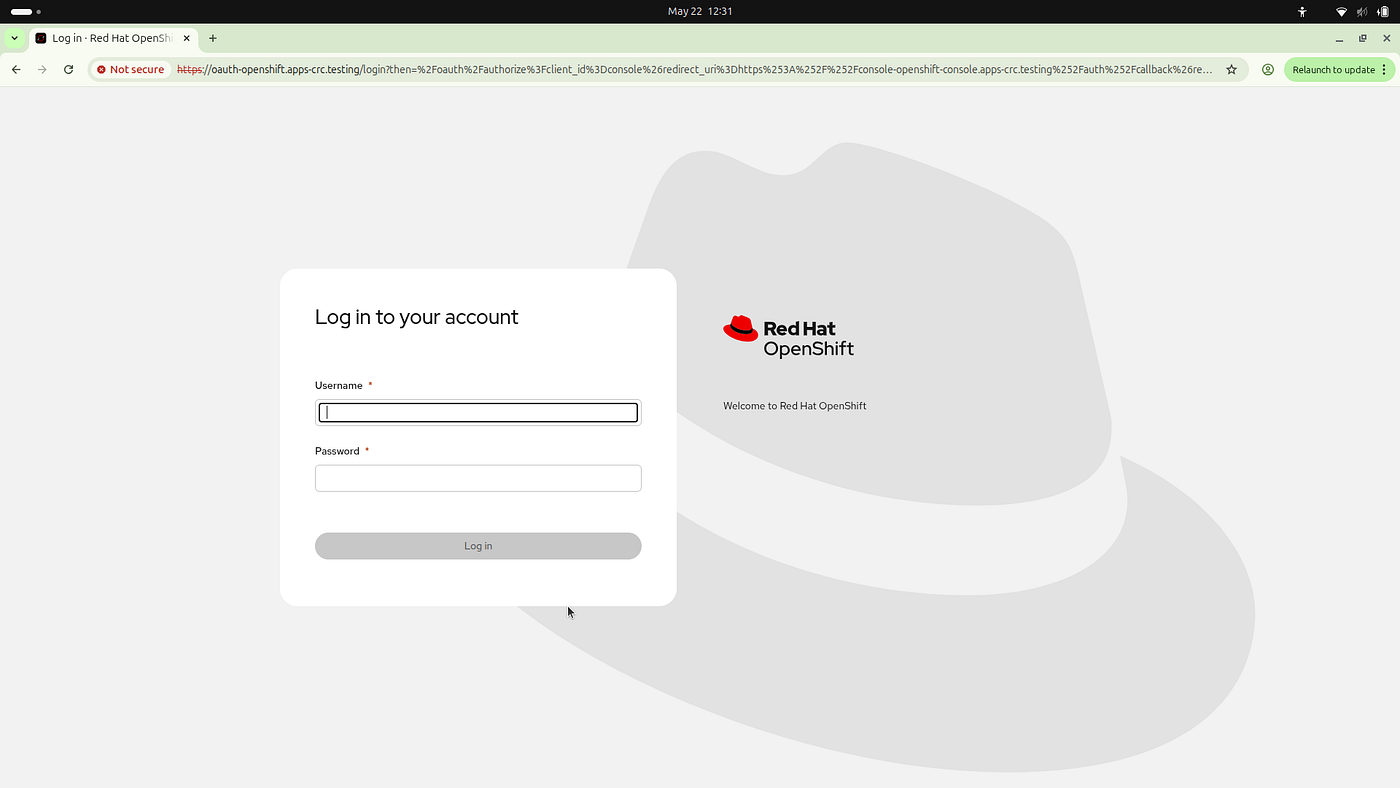
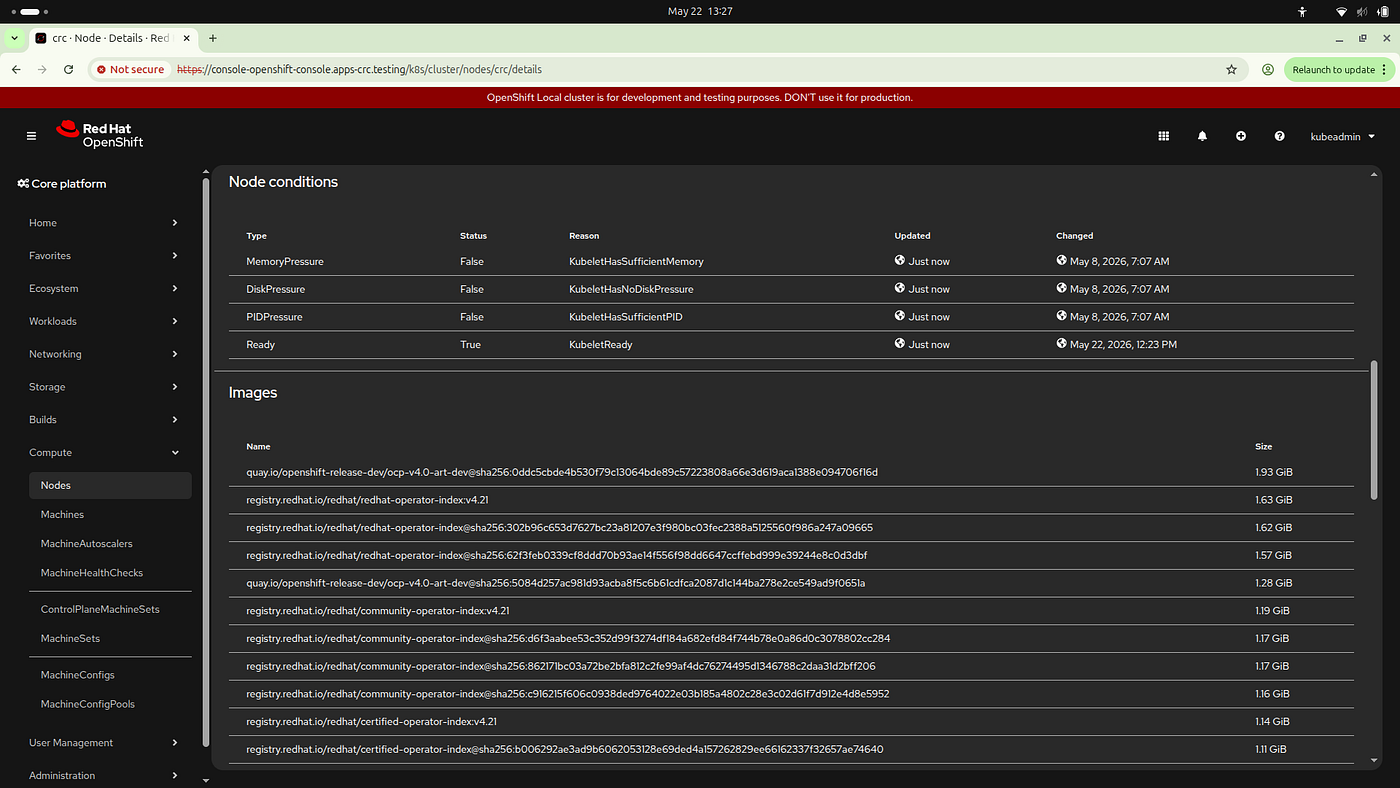
Validating node conditions and system operator images inside the OpenShift console.
Phase 3: Custom Docker Image Engineering
To bypass the restricted-v2 runtime permission conflicts, author a custom Dockerfile targeting the root group layer (GID 0) while appending required cloud database drivers.
1. Build the Production-Ready Dockerfile
Create a Dockerfile compiling the WSO2 IS image with the MySQL Connector/J driver and OpenShift directory authorization patches:
FROM wso2/wso2is:7.3.0

# Define structural root group variables for OpenShift compatibility
ARG USER_GROUP=root
ARG USER_GROUP_ID=0

USER root

# Inject required external dependency wrappers
# (MySQL Connector/J and dnsjava for reliable k8s membership resolving)
RUN wget -O ${WSO2_SERVER_HOME}/repository/components/dropins/mysql-connector-j-8.2.0.jar https://repo1.maven.org/maven2/com/mysql/mysql-connector-j/8.2.0/mysql-connector-j-8.2.0.jar && \
    wget -O ${WSO2_SERVER_HOME}/repository/components/dropins/dnsjava-3.6.1.jar https://repo1.maven.org/maven2/dnsjava/dnsjava/3.6.1/dnsjava-3.6.1.jar

# Enforce Group Write Permissions across the WSO2 Server context tree
RUN chown -R wso2carbon:root ${WSO2_SERVER_HOME} && \
    chmod -R g+rwX ${WSO2_SERVER_HOME}

USER wso2carbon
2. Compile and Publish the Image Assets
docker build -t <your-dockerhub-namespace>/wso2is-openshift:7.3.0 .
docker push <your-dockerhub-namespace>/wso2is-openshift:7.3.0
Phase 4: Highly Granular MySQL Database Layer Configuration
1. Creating the Project Namespace
Before launching any workloads, create a dedicated logical isolation zone for the infrastructure. Navigate to Administration -> Namespaces to see how OpenShift manages system spaces alongside user-defined targets.
export NAMESPACE="wso2-openshift"
oc create ns $NAMESPACE
oc project $NAMESPACE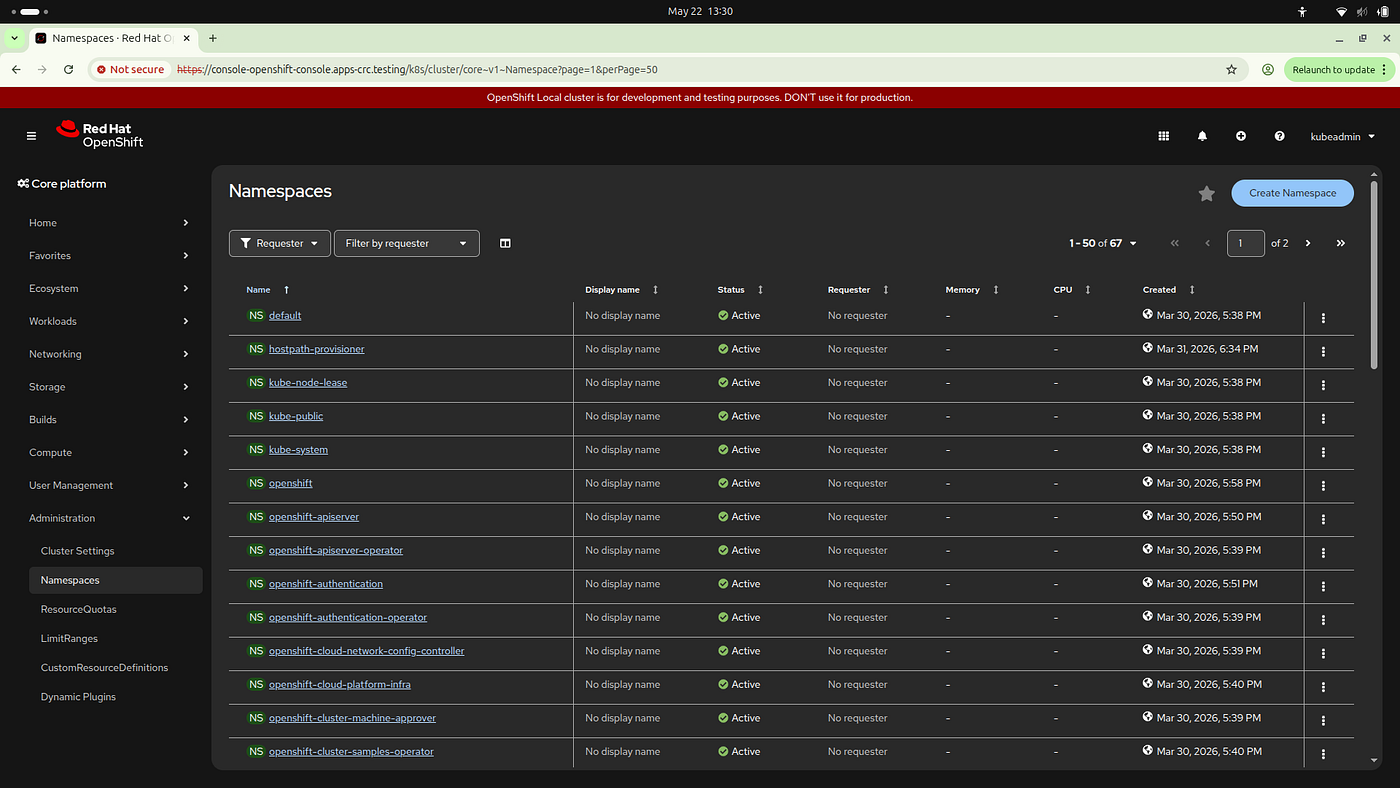
Viewing the cluster namespace hierarchy within the administrative control panel.
2. Provision the Database Instance
Deploy an ephemeral MySQL database instance utilizing native platform templates.
oc new-app --template=mysql-ephemeral \
  -p MYSQL_USER=user \
  -p MYSQL_PASSWORD=pass \
  -p MYSQL_DATABASE=mydb \
  -p MYSQL_ROOT_PASSWORD=rootpass \
  -n $NAMESPACE
Monitor the control plane via oc get pods -n $NAMESPACE until the database replica reaches 1/1 Running state.
3. Isolate and Provision Component Databases
Establish a port-forwarding channel to execute standard administrative schema configurations locally:
# Initialize background port-forwarding tunnel
MYSQL_POD=$(oc get pods -n $NAMESPACE -l name=mysql --no-headers -o custom-columns=":metadata.name")
oc port-forward $MYSQL_POD 3306:3306 -n $NAMESPACE &

# Segment databases according to WSO2 architectural separation definitions
mysql -h 127.0.0.1 -P 3306 -u root -p'rootpass' -e "CREATE DATABASE WSO2IDENTITY_DB;"
mysql -h 127.0.0.1 -P 3306 -u root -p'rootpass' -e "CREATE DATABASE WSO2SHARED_DB;"
mysql -h 127.0.0.1 -P 3306 -u root -p'rootpass' -e "CREATE DATABASE WSO2CONSENT_DB;"
mysql -h 127.0.0.1 -P 3306 -u root -p'rootpass' -e "CREATE DATABASE WSO2USER_DB;"
4. Extract and Mount Component DDL Schemas
Stage the precise structural standard query language components by pulling down the distribution pack:
wget https://github.com/wso2/product-is/releases/download/v7.3.0/wso2is-7.3.0.zip
unzip wso2is-7.3.0.zip
Applying database scripts incorrectly across repositories will result in terminal app crashes, generating structural errors like
Table 'WSO2USER_DB.UM_DOMAIN' doesn't exist. Follow this matrix exactly:
WSO2IDENTITY_DB → Stores identity-related artifacts (IDN_*) including OAuth, OpenID Connect, authentication, and federation configurations.
WSO2CONSENT_DB -> Stores consent and privacy artifacts (CM_*) used for consent management and compliance.
WSO2SHARED_DB -> Stores shared registry artifacts (REG_*) used across the platform.
WSO2USER_DB -> Stores user management artifacts (UM_*) including users, roles, permissions, and claims.
Execute the schema installation while systematically forcing innodb_strict_mode=OFF. This handles index sizing constraint differences introduced natively within MySQL 8.x variations without dropping execution threads.
mysql -h 127.0.0.1 -P 3306 -u root -p'rootpass' --init-command="SET SESSION innodb_strict_mode=OFF;" WSO2IDENTITY_DB < ~/wso2is-7.3.0/dbscripts/identity/mysql.sql
mysql -h 127.0.0.1 -P 3306 -u root -p'rootpass' --init-command="SET SESSION innodb_strict_mode=OFF;" WSO2CONSENT_DB < ~/wso2is-7.3.0/dbscripts/consent/mysql.sql
mysql -h 127.0.0.1 -P 3306 -u root -p'rootpass' --init-command="SET SESSION innodb_strict_mode=OFF;" WSO2SHARED_DB < ~/wso2is-7.3.0/dbscripts/mysql.sql
mysql -h 127.0.0.1 -P 3306 -u root -p'rootpass' --init-command="SET SESSION innodb_strict_mode=OFF;" WSO2USER_DB < ~/wso2is-7.3.0/dbscripts/mysql.sql
Phase 5: WSO2 Identity Server Helm Deployment
1. Acquire Chart Sources & Escalate RBAC Authorization
Clone the official deployment profiles and append security context permission exemptions explicitly to the target service account:
git clone https://github.com/wso2/kubernetes-is.git
cd kubernetes-is

# Elevate service account privileges to allow compliance with targeted runtime overrides
oc adm policy add-scc-to-user anyuid -z wso2-identity-server -n wso2-openshift
2. Orchestrate the Helm Orchestration Command
Deploy the chart using highly structured --set overrides.
💡 Engineering Best Practices: Helm Argument Escape Syntax
- URL Parameter Quoting: String variables containing colons (
jdbc:mysql://...) must be encapsulated within a double-quoted configuration key context string (--set "key=value") to ensure the parser correctly evaluates the token.- Strict Chart Referencing: Avoid using the current directory execution token (
.). Declare explicit, absolute storage strings (~/kubernetes-is) to avoid standard Helm path parsing exceptions.
export RELEASE_NAME="wso2"

helm install $RELEASE_NAME ~/kubernetes-is -f ~/kubernetes-is/values.yaml -n wso2-openshift \
  --set deployment.securityContext.enableRunAsUser=false \
  --set deployment.securityContext.enableRunAsGroup=false \
  --set deployment.securityContext.seccompProfile.enabled=false \
  --set deployment.apparmor.enabled=false \
  --set deployment.image.registry="" \
  --set deployment.image.repository="wso2is-openshift" \
  --set deployment.image.tag="7.3.0" \
  --set deployment.replicas=1 \
  --set deployment.resources.requests.cpu="500m" \
  --set deployment.resources.requests.memory="1Gi" \
  --set deployment.resources.limits.cpu="1500m" \
  --set deployment.resources.limits.memory="3Gi" \
  --set deployment.startupProbe.failureThreshold=60 \
  --set deploymentToml.database.identity.type=mysql \
  --set "deploymentToml.database.identity.url=jdbc:mysql://mysql:3306/WSO2IDENTITY_DB" \
  --set deploymentToml.database.identity.username=root \
  --set deploymentToml.database.identity.password=rootpass \
  --set deploymentToml.database.identity.driver=com.mysql.cj.jdbc.Driver \
  --set deploymentToml.database.shared.type=mysql \
  --set "deploymentToml.database.shared.url=jdbc:mysql://mysql:3306/WSO2SHARED_DB" \
  --set deploymentToml.database.shared.username=root \
  --set deploymentToml.database.shared.password=rootpass \
  --set deploymentToml.database.shared.driver=com.mysql.cj.jdbc.Driver \
  --set deploymentToml.database.consent.type=mysql \
  --set "deploymentToml.database.consent.url=jdbc:mysql://mysql:3306/WSO2CONSENT_DB" \
  --set deploymentToml.database.consent.username=root \
  --set deploymentToml.database.consent.password=rootpass \
  --set deploymentToml.database.consent.driver=com.mysql.cj.jdbc.Driver \
  --set deploymentToml.database.user.type=mysql \
  --set "deploymentToml.database.user.url=jdbc:mysql://mysql:3306/WSO2USER_DB" \
  --set deploymentToml.database.user.username=root \
  --set deploymentToml.database.user.password=rootpass \
  --set deploymentToml.database.user.driver=com.mysql.cj.jdbc.Driver
Validate internal startup loops via standard logging hooks:
oc logs -f deployment/wso2-identity-server -n wso2-openshift | grep -E "INFO|ERROR|started"
# Expected terminal validation confirmation: "WSO2 Carbon started in X sec"
Phase 6: Operational Analysis, Event Logs, & Troubleshooting
During deployment rollout, tracking platform components is crucial to diagnosing transient network spikes or configuration hiccups.
1. Monitoring Internal Routing Spikes
Under the Compute -> Nodes -> crc -> Events view, you can track connectivity health updates. For instance, temporary connection issues during operator reconciliation are logged transparently before self-healing loops take over:
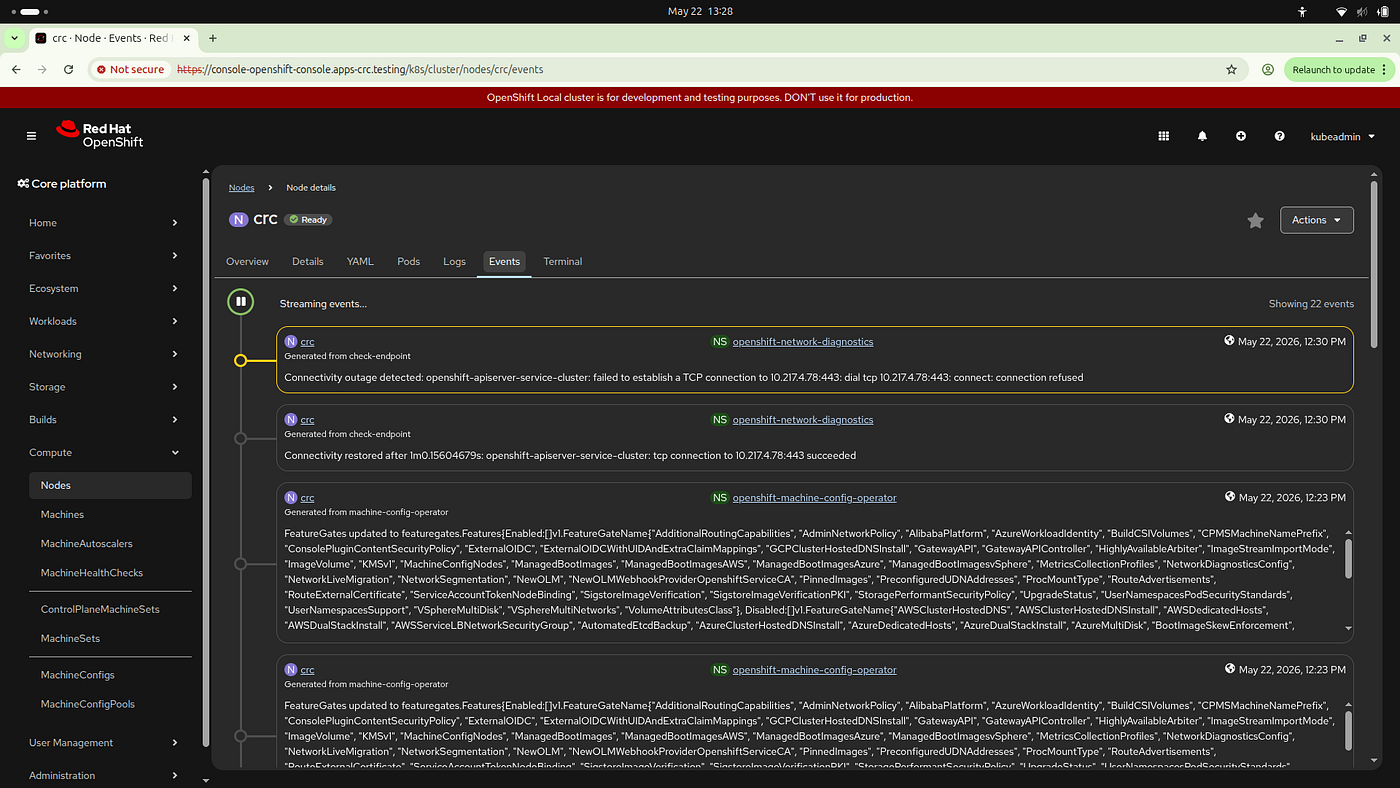
Figure 3: Monitoring runtime cluster API server connection events and self-healing loops.
2. Investigating Pod Prober Delays
If your pods fail health checks or experience startup delays, checking the system runtime journal logs under Compute -> Nodes -> crc -> Logs provides absolute visibility. You can spot the precise timestamps where startup probes are executed or flagged:
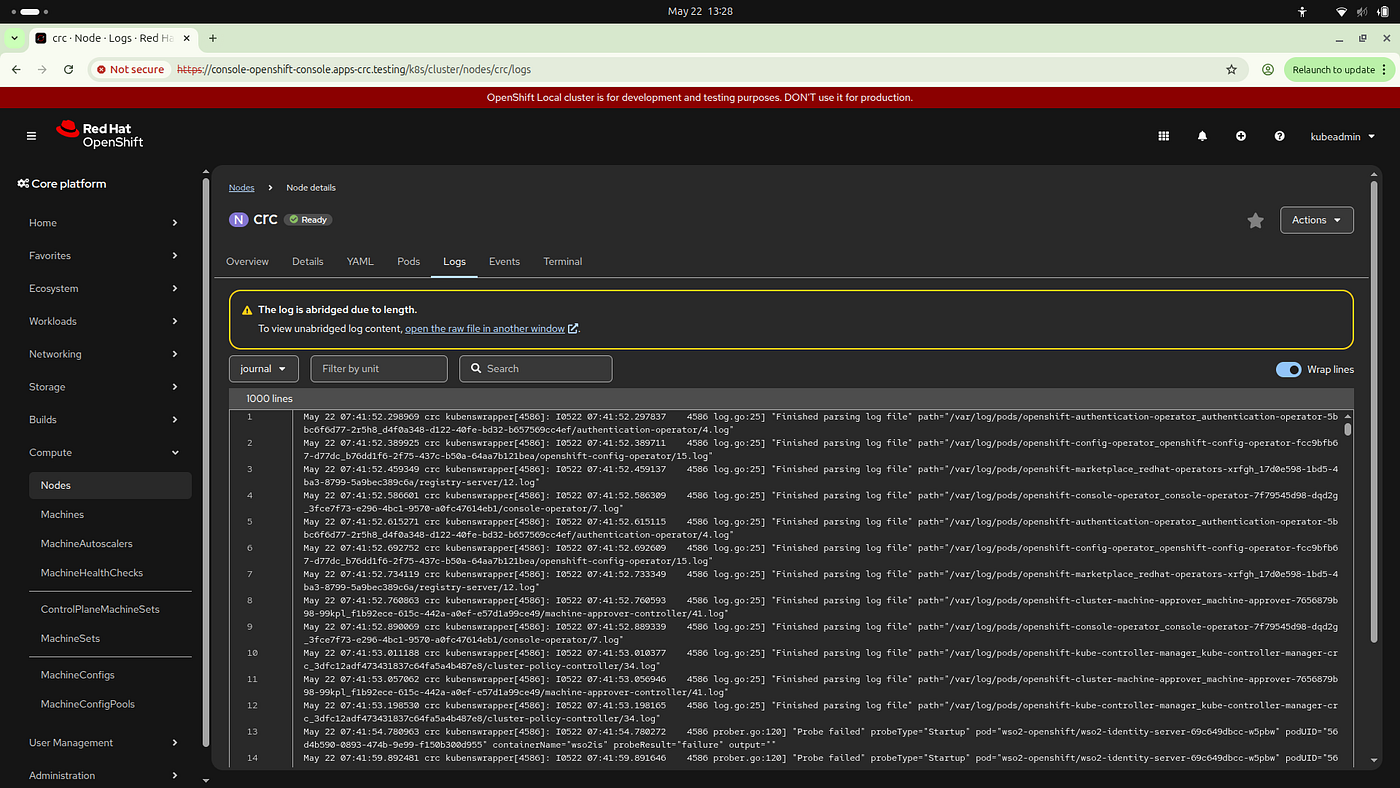
Figure 4: Inspecting system prober journal logs to track container health check statistics.
3. Scaling Replicas and Pod Allocation
Once the resource parameters settle, check Workloads -> Pods inside the wso2-openshift project namespace. You will see your database pods running alongside the identity server instances:
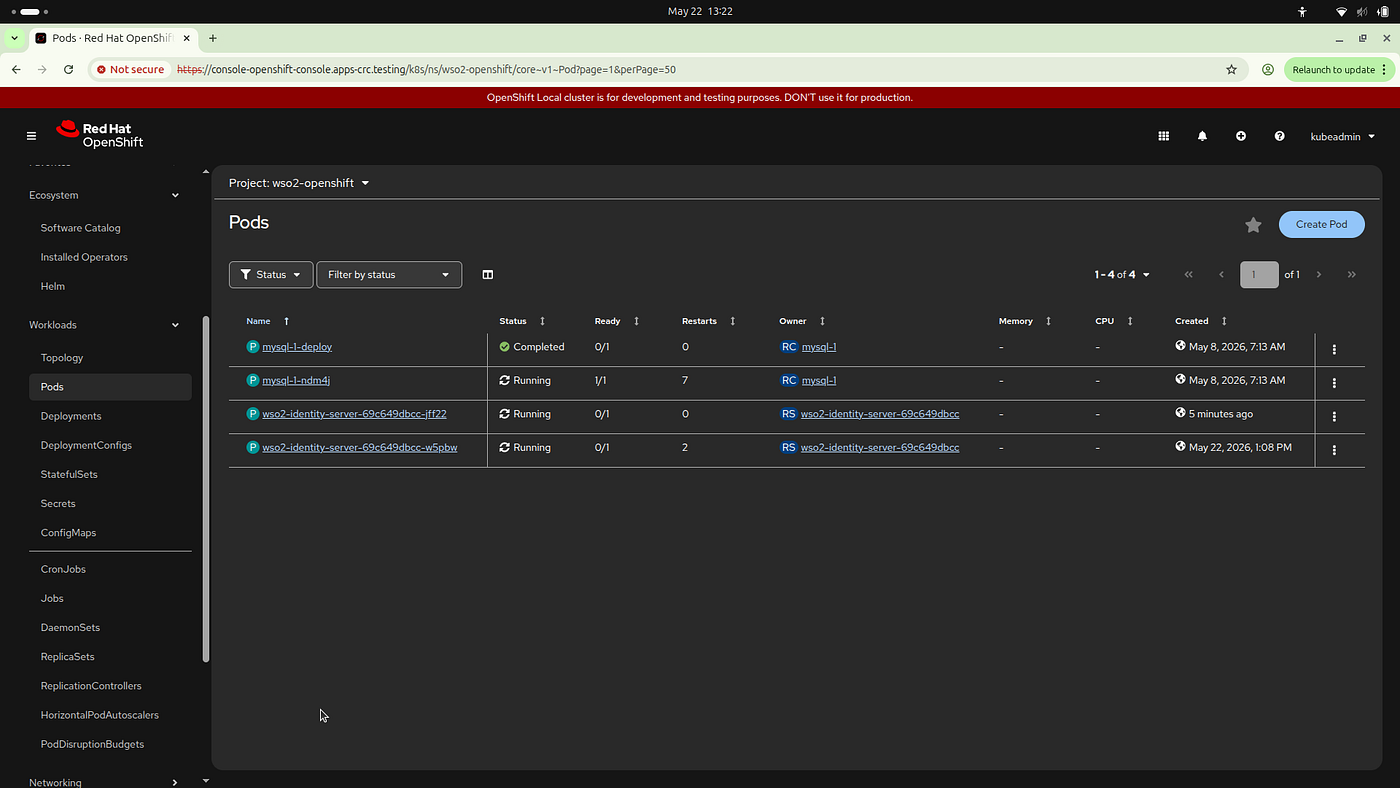
Figure 5: Inspecting pod execution states, readiness metrics, and restart counts within the namespace.
When you increase your deployments or scale up to multiple replicas, OpenShift handles the rolling update strategy seamlessly. You can view this orchestration under Workloads -> Deployments:
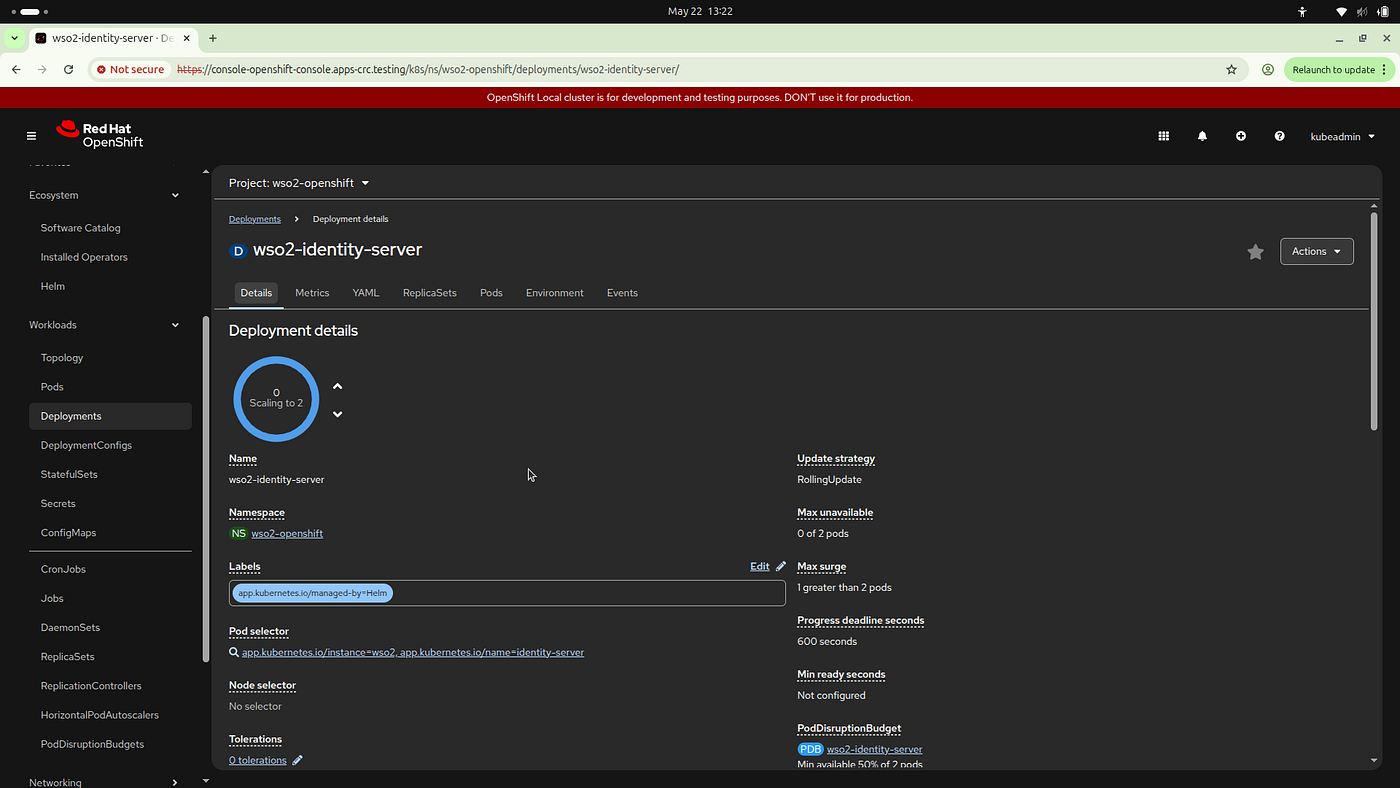
Figure 6: Scaling replicas and monitoring rollout progress within the deployment panel.
Phase 7: Service Mesh Networking & Ingress Routing
1. Verifying Internal Cluster Services
The Helm chart provisions core abstractions mapping internal cluster IP records to ports 3306 (MySQL) and 9443 (WSO2 Identity Server). You can verify these components under Networking -> Services:
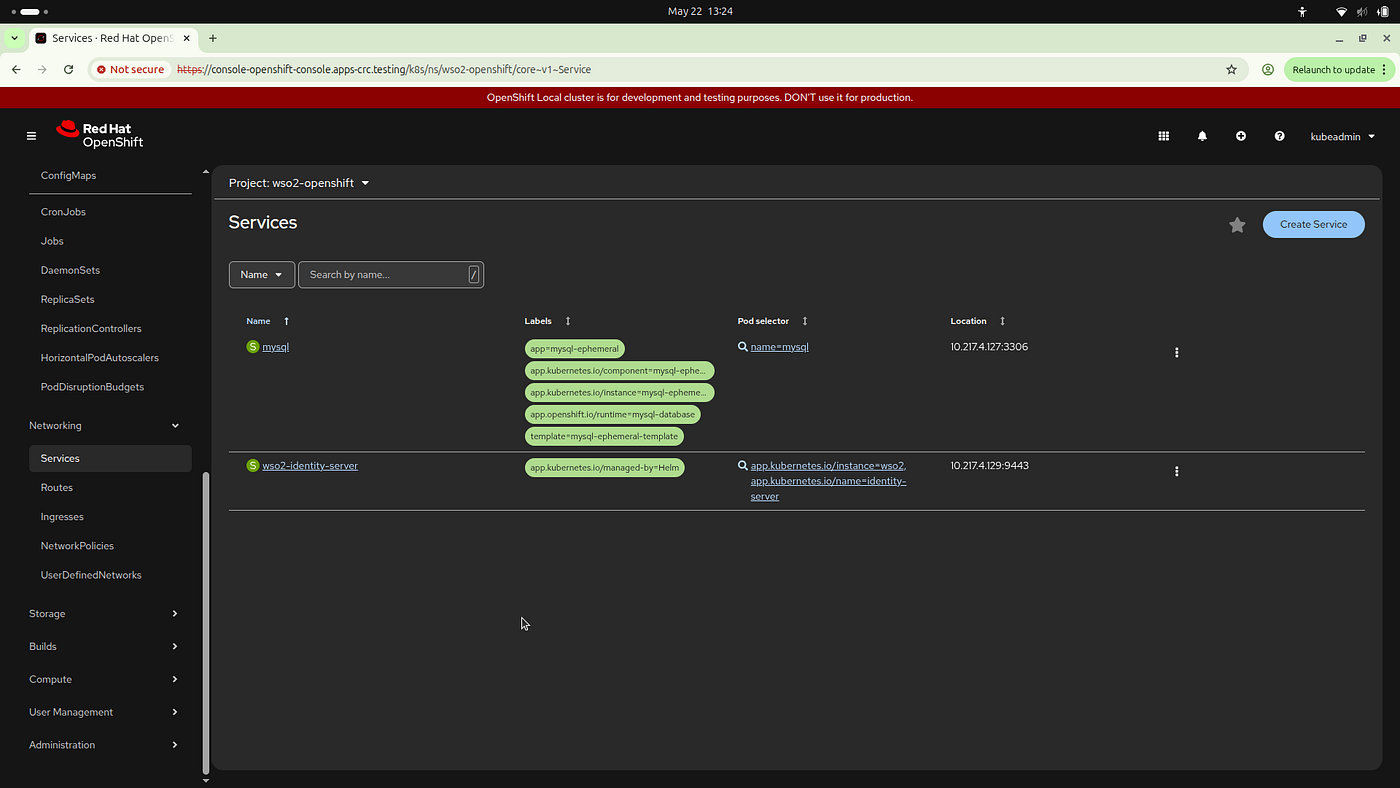
Figure 7: High-level overview of the internal networking services layer within the namespace.
2. Generating the OpenShift Route
Generate an edge router network passthrough configuration to expose port 9443 outside the cluster:
oc create route passthrough wso2is-ssl \
  --service=wso2-identity-server \
  --port=9443 \
  --hostname=wso2is.apps-crc.testing \
  -n wso2-openshift
You can view the exposed hostname details and mapping status under Networking -> Routes:
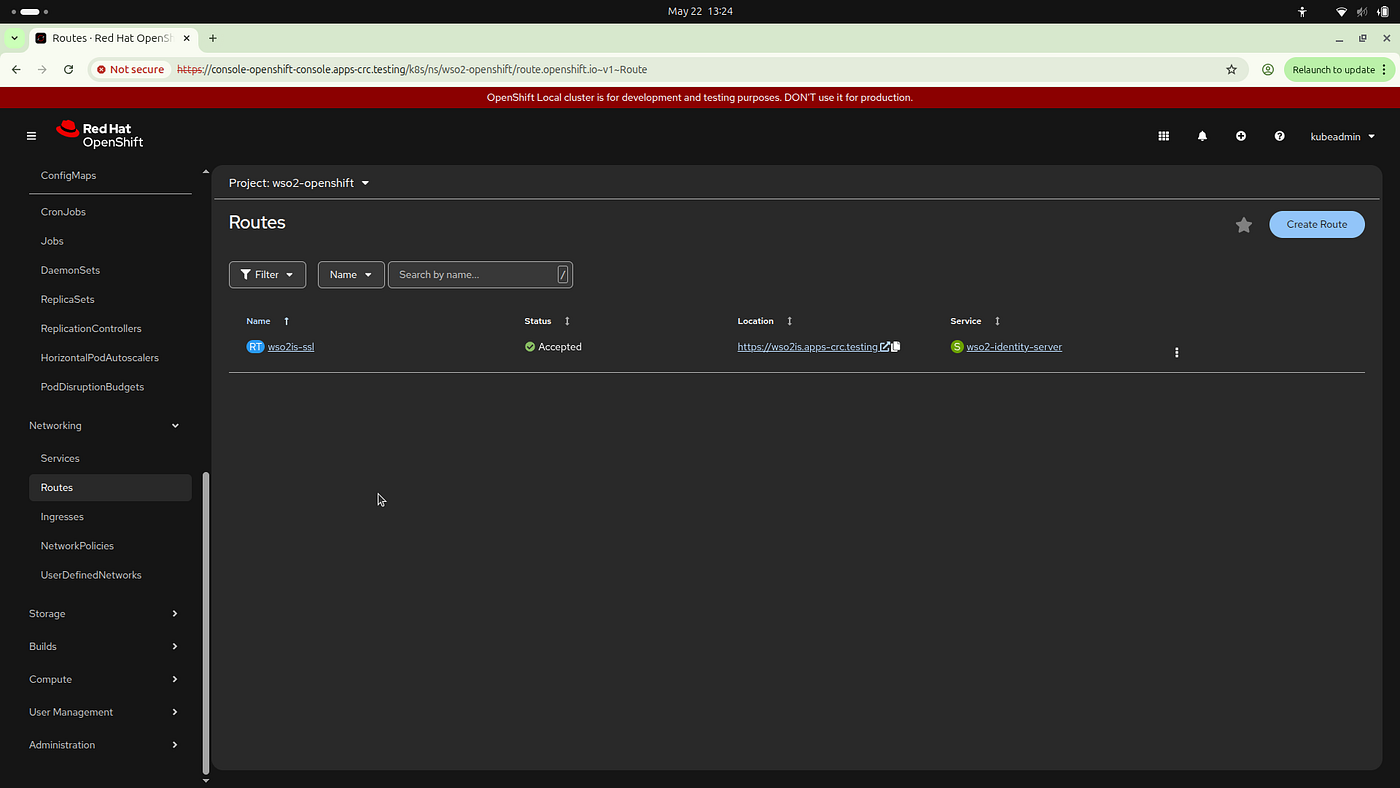
Figure 8: Reviewing the active ingress routes and passthrough configurations.
Clicking on the route link gives you a granular view of the rule configuration, including labels, target port settings, and TLS endpoint settings:
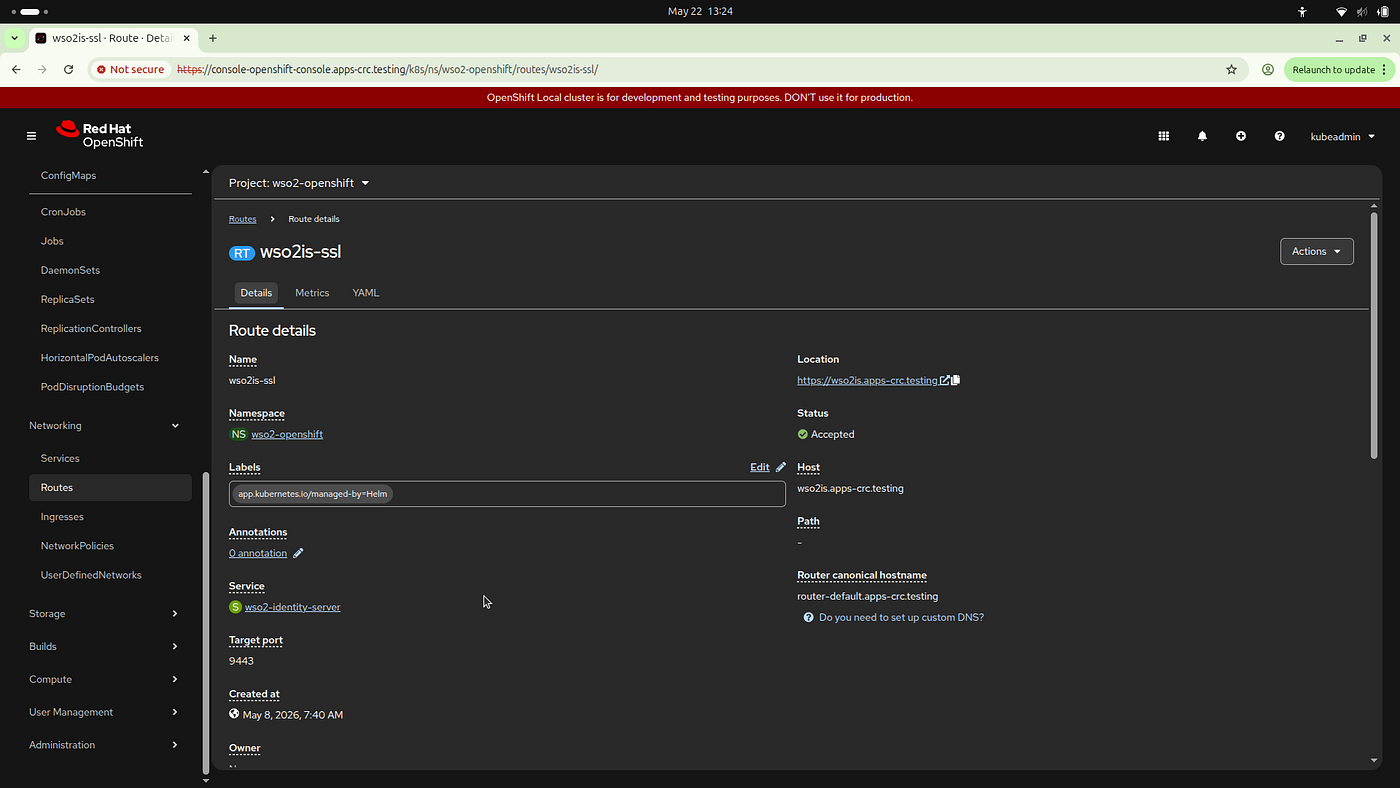
Figure 9: In-depth details of the wso2is-ssl passthrough route configuration.
3. Checking Ingress Rules
To map external traffic patterns to the platform smoothly, check Networking -> Ingresses to ensure your rule targets are correctly bound to the appropriate hostname strings:
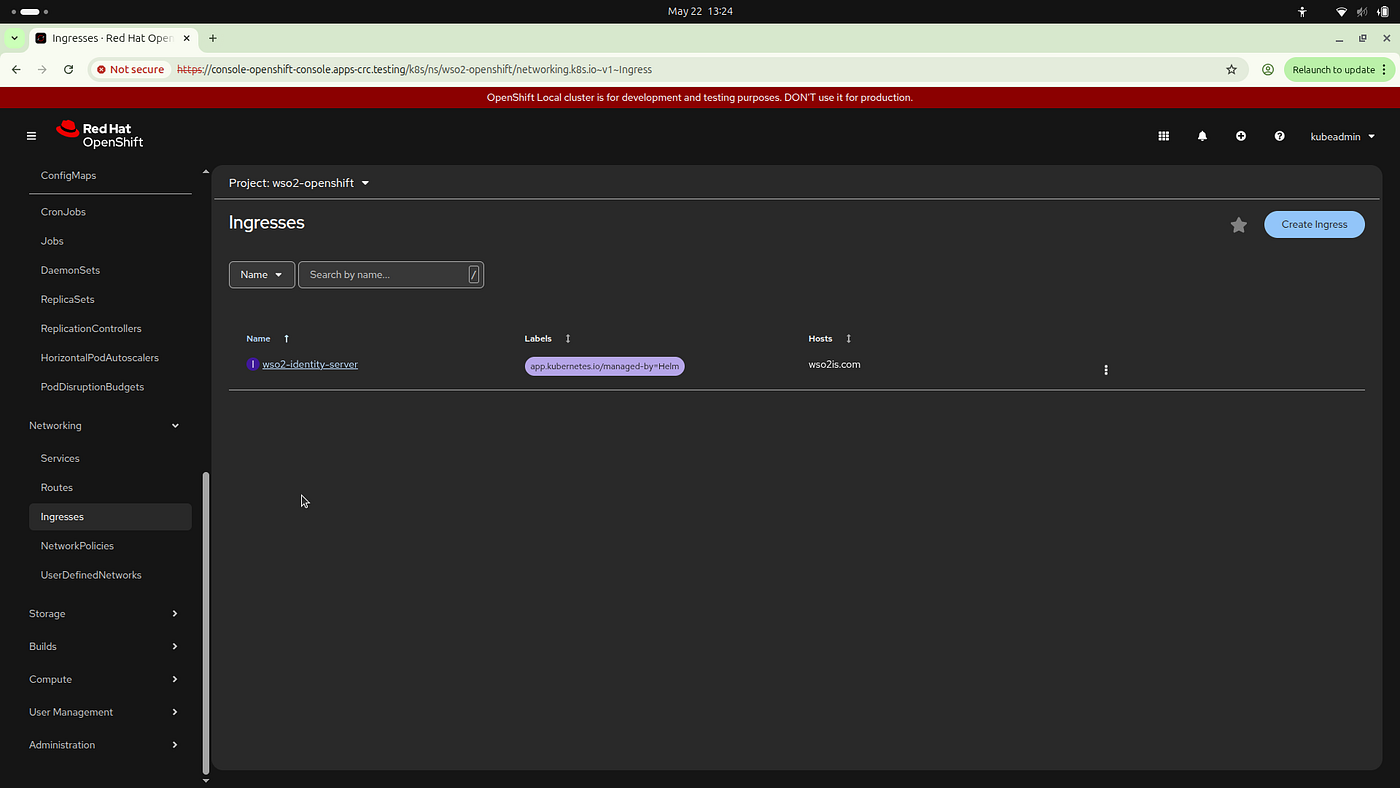
Figure 10: Mapping system ingress rules onto specific application host headers.
2. High Availability Scaling and Proactive Tuning
When scaling up deployment configurations to support multiple replica architectures across production systems, you must address resource bottlenecks:
- The CPU Allocation Constraint: By default, the WSO2 IS Helm chart configures explicit reservations of
2 CPUsper pod. A standard OpenShift Local instance allocates 6 CPUs total, with platform system operator pods burning roughly3 CPUs. Consequently, scaling up replicas will freeze deployment updates into permanentPendingcycles. You must drop explicit request sizes dynamically using configuration updates:
helm upgrade wso2 ~/kubernetes-is --reuse-values --set deployment.resources.requests.cpu="500m"The Startup Probe Window Expansion: When multiple replicas run simultaneously within a single development system context, runtime I/O scaling challenges can delay service readiness. This triggers health-check failures and restarts with the log error: Container wso2is failed startup probe, will be restarted. Expand the checking cycles limits using the parameters below:
helm upgrade wso2 ~/kubernetes-is --reuse-values --set deployment.startupProbe.failureThhis configuration change extends the validation time frame to 5 minutes ($60 \text{ cycles} \times 5\text{s}$), providing a safe window for the JVM instances to settle.
Phase 8: Edge Connectivity & Multi-Channel Access Methods
Because OpenShift Local leverages internal hypervisor network abstractions (vsock), its internal interface addresses (127.0.0.1) are not directly queryable across public VM endpoints. Resolving this issue requires precise SSH tunneling and permanent network mapping.
1. Implement Persistent Foreground Network Mapping Using tmux
To prevent local proxy terminations when SSH terminal shell instances hang up or exit, manage network mappings using decoupled multiplexer virtual sheets.
# Initialize an insulated background multiplexer panel workspace
tmux new -s persistent-routing

# Execute non-terminating port proxies inside the multiplexer matrix
oc port-forward service/wso2-identity-server 9443:9443 -n wso2-openshift --address 0.0.0.0

# Detach securely from the execution session by entering: Ctrl+B then D
To pull the operational logs back up into focus later, run tmux attach -t persistent-routing.
2. Establish Secure Remote API Management Access Paths
To access the OpenShift web administration dashboard from an external client workstation, build an encapsulated loopback SSH tunnel connection:
# Execute this command sequence directly from your local desktop terminal environment
sudo ssh -i ~/Downloads/azure-infrastructure-key.pem \
  -L 443:127.0.0.1:443 \
  -L 6443:127.0.0.1:6443 \
  azureuser@<YOUR_AZURE_VM_PUBLIC_IP> -N
3. Client Workstation DNS Routing Configuration
Map local translation hosts to forward lookups across endpoints cleanly. Update your workstation administrative routing configuration (/etc/hosts on UNIX architectures or C:\Windows\System32\drivers\etc\hosts on Windows):
# Cluster Management Loopback Interceptors
127.0.0.1   console-openshift-console.apps-crc.testing
127.0.0.1   oauth-openshift.apps-crc.testing
127.0.0.1   downloads-openshift-console.apps-crc.testing
127.0.0.1   api.crc.testing

# Public Application Workspace Interceptors
<YOUR_AZURE_VM_PUBLIC_IP>   wso2is.apps-crc.testing
<YOUR_AZURE_VM_PUBLIC_IP>   wso2is.com
⚠️ Critical Resolution Warning: DNS Pollution
Ensure you remove duplicate entries for
wso2is.comfrom previous sandbox tests. If duplicate hosts entries exist, modern web browsers default to the oldest records in the host matrix, generating an immediateERR_CONNECTION_REFUSEDerror.
Verification & Interface Sign-On
Once network translation paths are updated, use your browser to verify management endpoints:
- OpenShift Administration Management Web Console:
https://console-openshift-console.apps-crc.testing(Sign-in usingkubeadmincredentials). - WSO2 Identity Platform Management Control Console:
https://wso2is.apps-crc.testing:9443/console(Sign-in using default credentials:admin/admin).
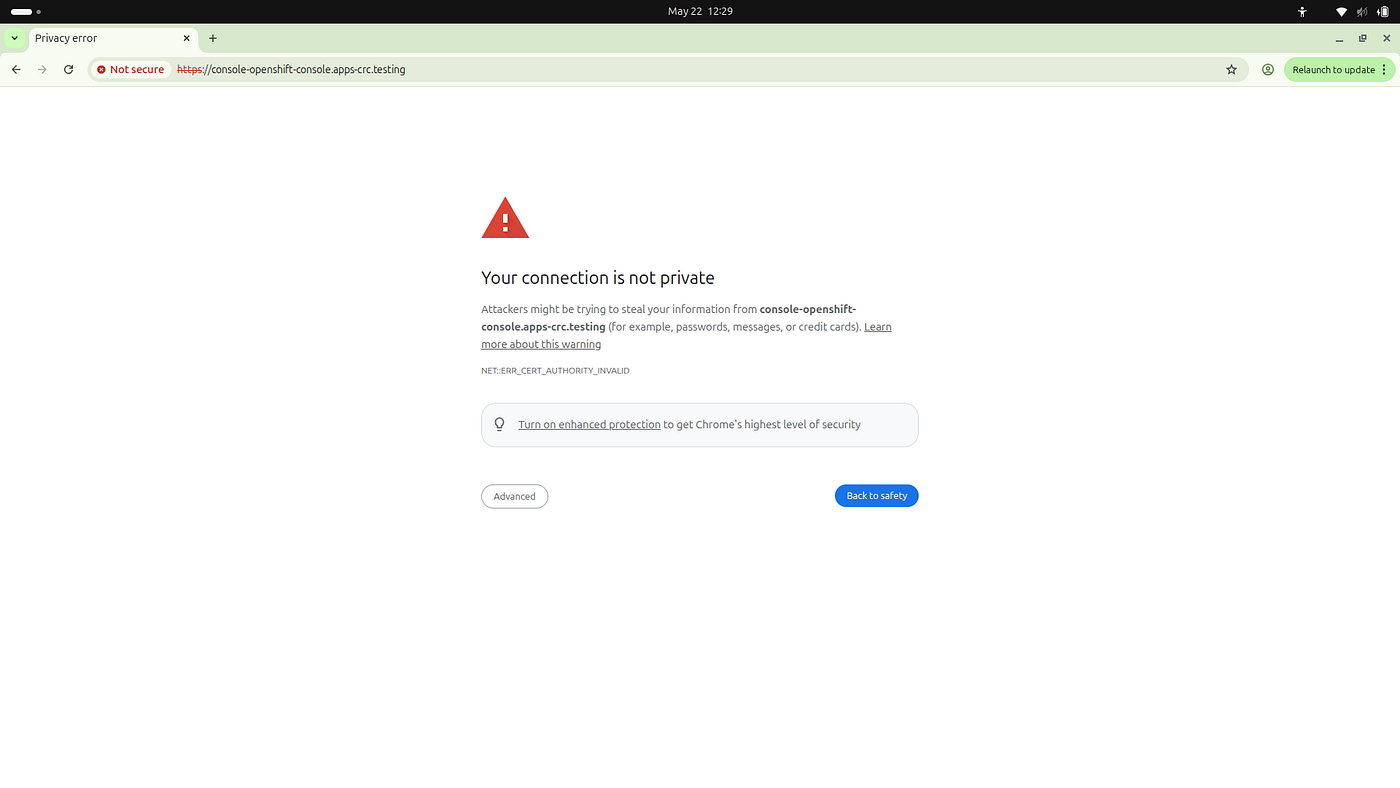
Because these local integration topologies utilize standard self-signed certificate signatures, modern security layers will display a connection warning page. Bypass this safely:
- Google Chrome / Microsoft Edge: Click anywhere on the warning page background layer and type the sequence:
thisisunsafe- Mozilla Firefox: Click Advanced $\rightarrow$ Accept the Risk and Continue.
Conclusion
Deploying WSO2 Identity Server on Red Hat OpenShift successfully bridges the gap between enterprise-grade identity management and cloud-native resilience. While the initial setup requires navigating strict Security Context Constraints, precise database schema mapping, and environment tuning, the result is a highly secure, scalable, and production-ready IAM platform. By adopting these architectural patterns such as root-group compliance and isolated database volumes organizations can confidently run critical identity infrastructure on enterprise Kubernetes with minimal operational friction.
메타데이터
- post_id
- 3c5742a14eae
- slug
- deploying-wso2-identity-server-on-red-hat-openshift-using-helm-a-comprehensive-guide-to-3c5742a14eae
- url
- https://medium.com/@ravindrandharshan/deploying-wso2-identity-server-on-red-hat-openshift-using-helm-a-comprehensive-guide-to-3c5742a14eae
- canonical_url
- https://medium.com/@ravindrandharshan/deploying-wso2-identity-server-on-red-hat-openshift-using-helm-a-comprehensive-guide-to-3c5742a14eae
- author_url
- https://medium.com/@ravindrandharshan
- status
- ok
- fetched_at
- 2026-06-09 15:37:30