How I Diagnose a Seagate Drive That Won’t Show on Mac
The first thing I do when a Seagate Backup Plus disappears from a Mac is not try to fix it.
How I Diagnose a Seagate Drive That Won’t Show on Mac
The first thing I do when a **Seagate Backup Plus disappears from a Mac is not** try to fix it.
I try to understand what kind of problem I’m looking at.
That one pause can be the difference between changing a Finder setting and making a damaged drive harder to recover.
I start by asking where the drive still appears
This guide is for Mac users whose Seagate Backup Plus, Backup Plus Slim, Portable, Ultra Touch, or One Touch drive is not showing up where they expect it.
The problem I’m solving is simple:
How do I find the safest next step before I risk the files on the drive?
When I troubleshoot this kind of issue, I always start with the same question:
Can macOS see the drive anywhere?
That usually puts the problem into one of three buckets.
If the drive is missing only from Finder, I treat it as a display issue first.
If the drive appears in Disk Utility but is greyed out, I treat it as a mounting or file-system issue.
If the drive does not appear in Finder or Disk Utility, I stop assuming this is a software problem and check the cable, port, power, adapter, or the drive itself.
This order matters because each situation has a different risk level.
A hidden drive does not need recovery software.
A greyed-out drive may need careful repair.
A drive that no computer can detect should not be forced through repeated software fixes.
When Finder is the only problem, I keep it simple
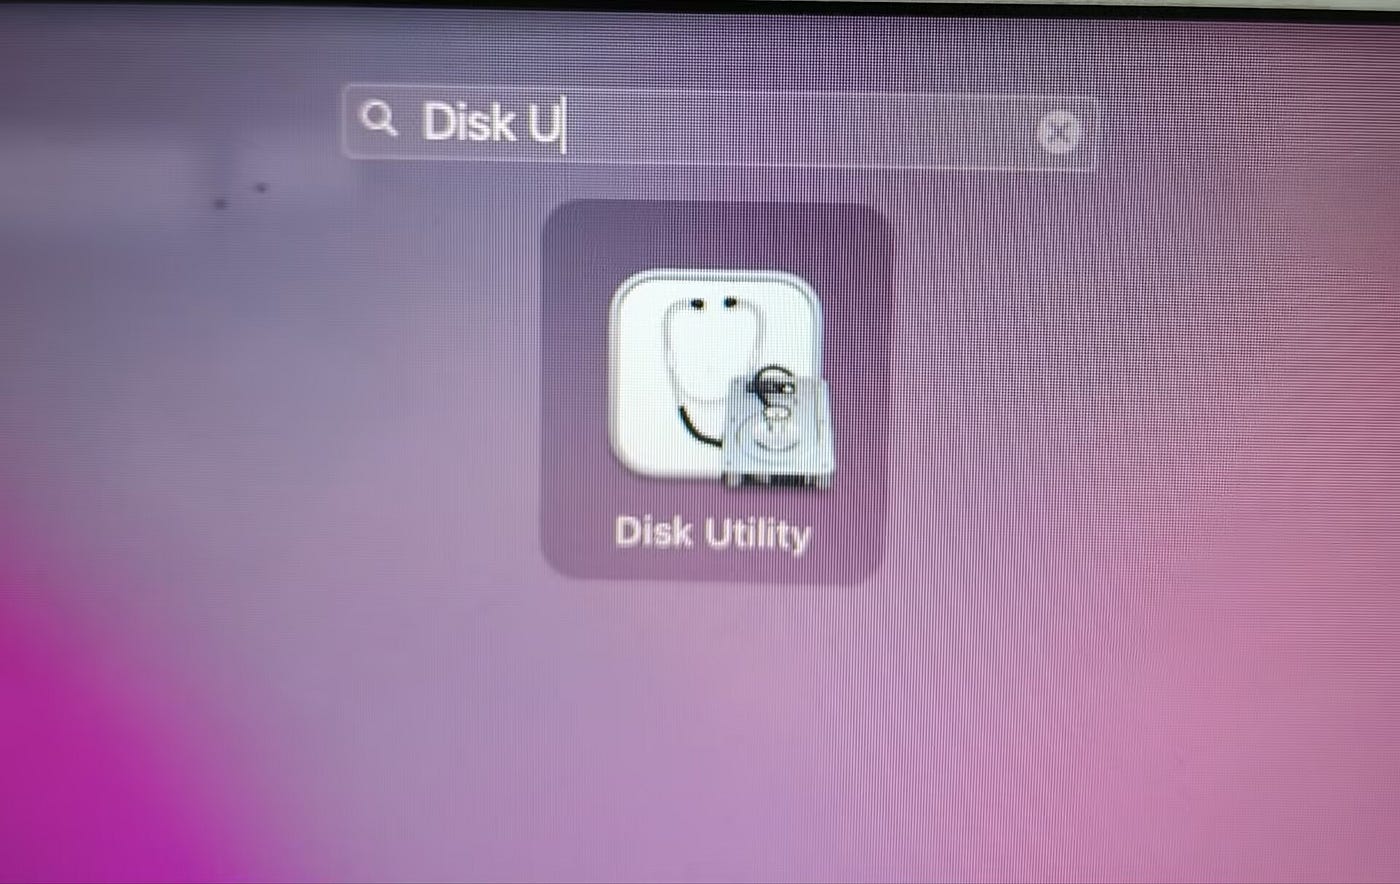
If Disk Utility can see the Seagate drive but Finder cannot, I do not run First Aid right away.
I check Finder settings first.
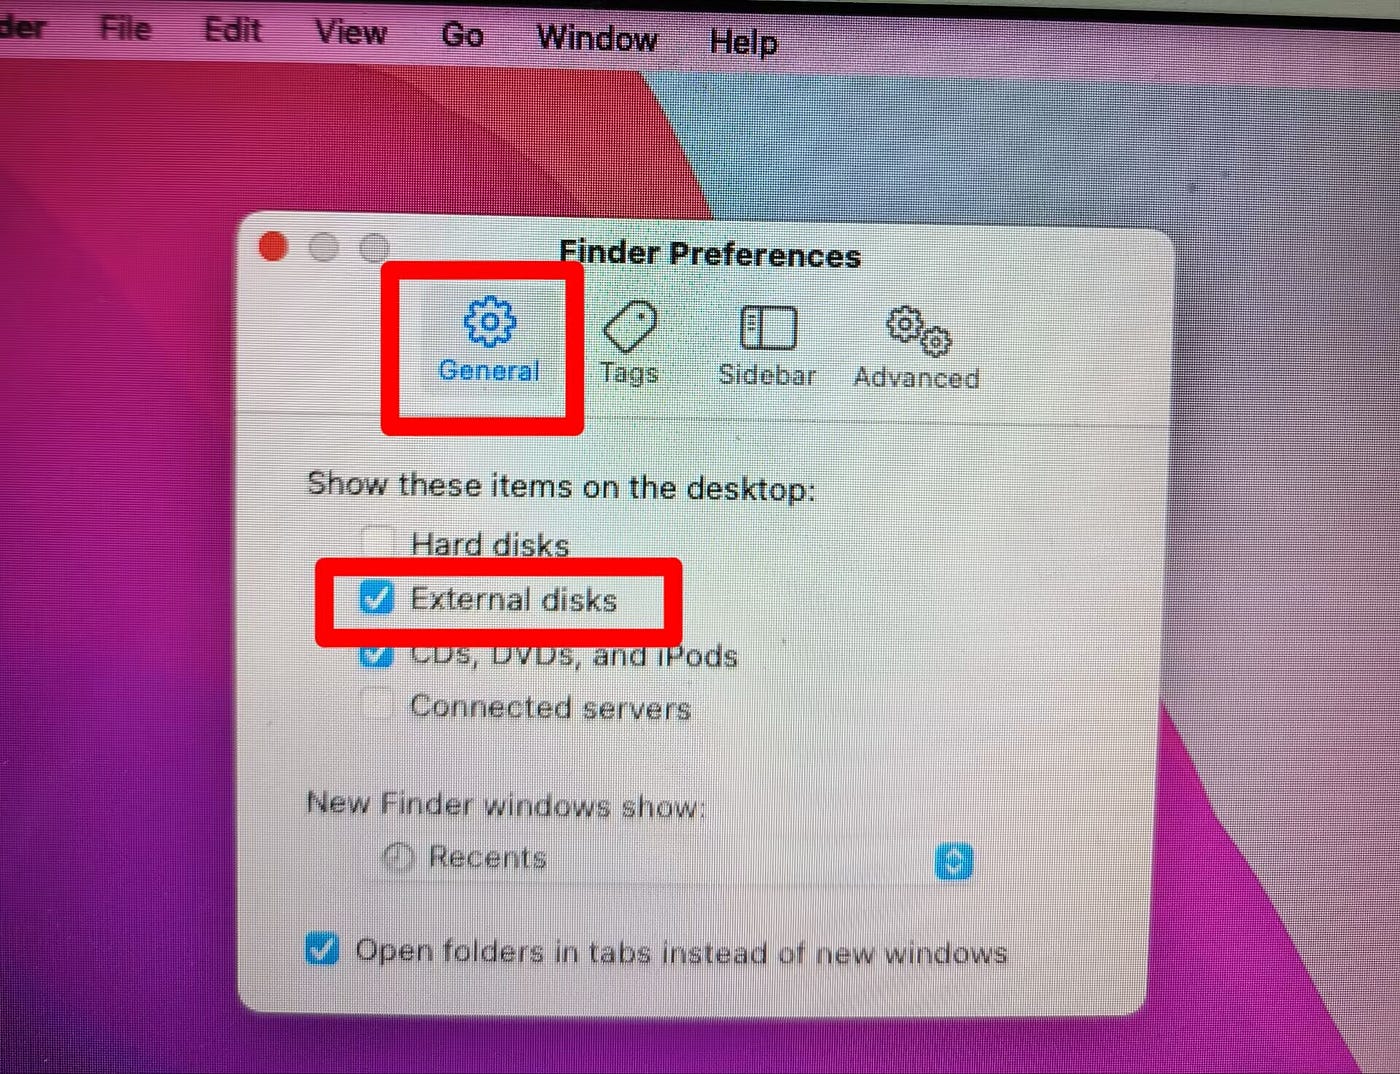
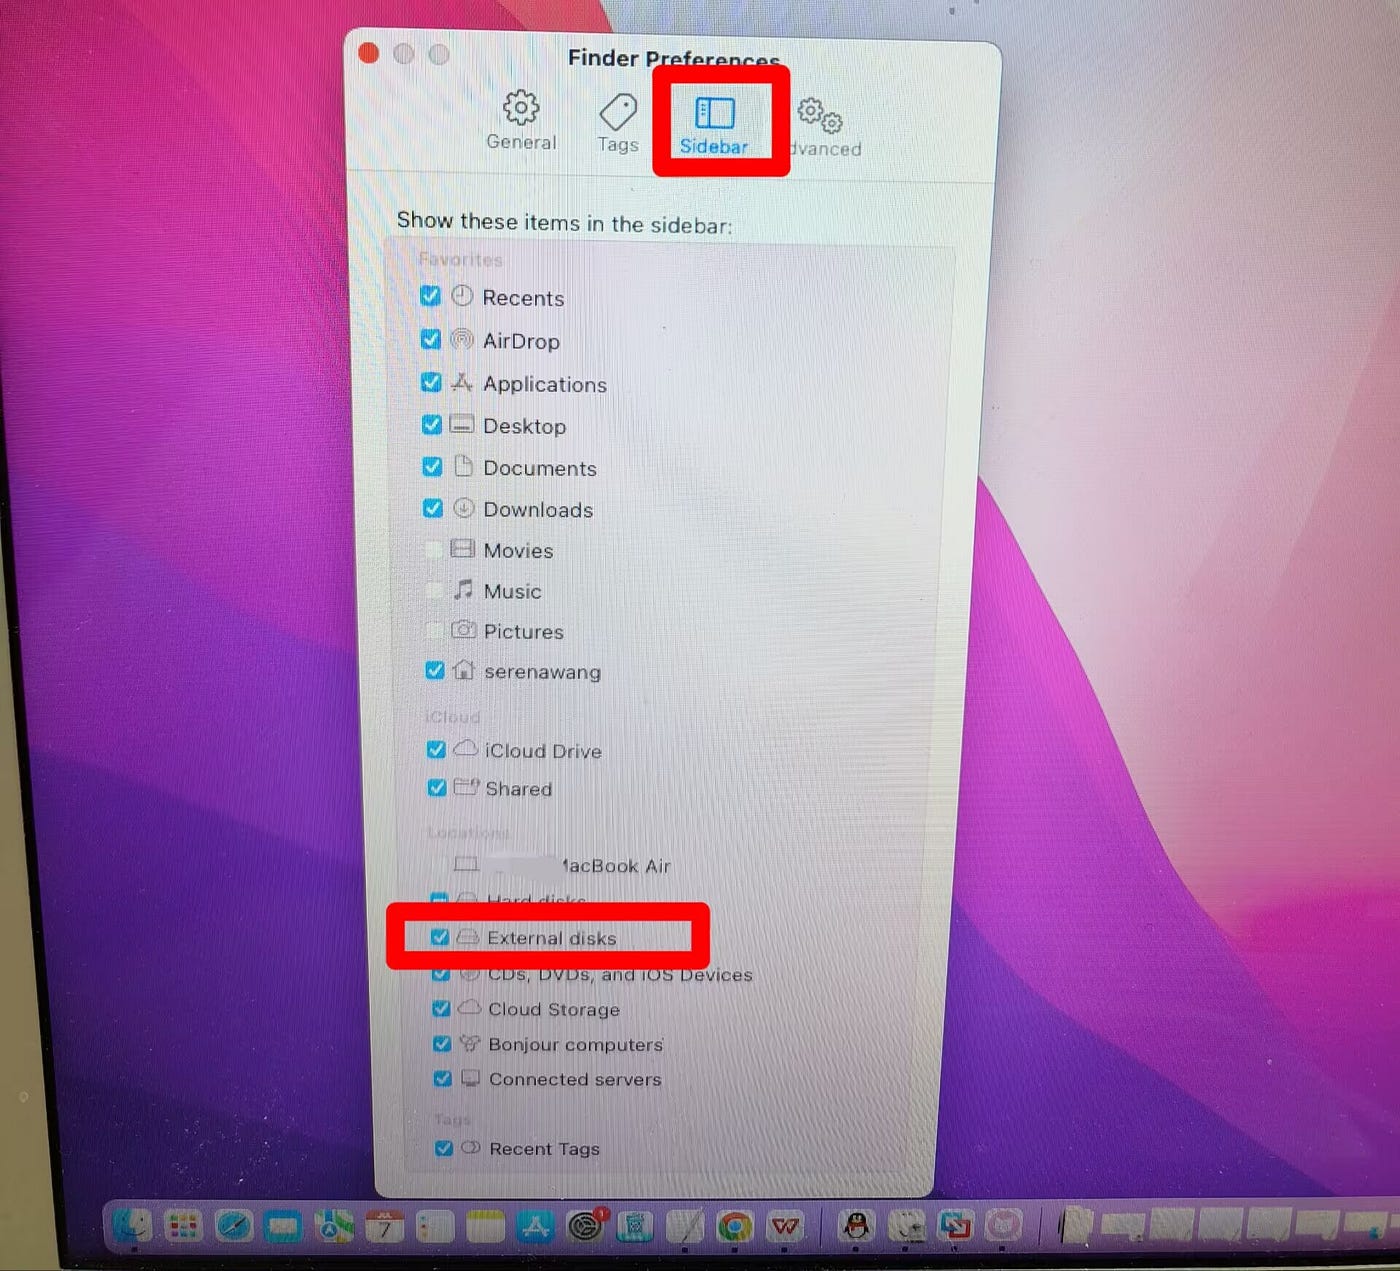
On newer macOS versions, I go to Finder > Settings. On older versions, I go to Finder > Preferences.

Then I check two places:
- Under General, I make sure External disks can appear on the desktop.
- Under Sidebar, I make sure External disks can appear in Finder.
After that, I disconnect and reconnect the Seagate drive.
If the drive shows up, I stop there.
I do not reformat it. I do not scan it. I do not install anything.
The drive was not broken. I was just looking in a place where Finder was not set to show it.
That is why I always rule out the simple visibility issue before touching the file system.
When Disk Utility sees the drive, I try mounting before repairing
A greyed-out Seagate drive in Disk Utility feels more serious.
Sometimes it is.
But I still do not jump straight to repair.
My next step is to see whether macOS can mount the drive manually.
I open Disk Utility, choose View > Show All Devices, select the Seagate volume or device, and click Mount if the option is available.
If it mounts, I treat that as a warning, not a victory.
The drive gave me access once, so I use that access to copy the important files somewhere else.
I do this before running First Aid, before changing formats, and before testing anything else.
A drive that failed to mount once has already shown me that something may be unstable.
When I get a chance to copy the data, I take it.
I use First Aid carefully, not automatically
First Aid can be useful, but I do not treat it as a harmless button.
Apple describes Disk Utility’s First Aid as a way to check and fix some formatting and directory-structure errors. Apple also notes that Disk Utility cannot detect or repair every disk problem.
That distinction changes how I use it.
I consider First Aid only when the drive appears physically stable.
That means no clicking sounds. No buzzing. No repeated disconnects. No obvious I/O errors. No long freezes every time the Mac tries to read the drive.
I also think about the files first.
If the only copy of important files is on that Seagate drive, I am much more cautious. Repair tools can help with some logical problems, but they are not the same thing as data recovery.
If First Aid succeeds, I try mounting the drive again.
If it mounts, I copy the files I care about immediately.
If First Aid fails, I do not keep running it over and over.
At that point, I stop asking, “How do I fix this drive?” and start asking, “Do I need to recover the data before I do anything else?”
When the drive appears nowhere, I move to hardware checks
If the Seagate drive does not appear in Finder or Disk Utility, I stop blaming Finder.
Now I check the basics.
I replug the drive and look for a power or activity light.
I try another USB cable.
I try another USB port or adapter.
I avoid unpowered hubs.
If it is a desktop Seagate drive, I confirm the power adapter is connected.
Then I test the drive on another Mac or Windows PC.
This part is not exciting, but it prevents me from wasting time on software fixes when the Mac may not be detecting the device at all.
A recovery app usually cannot scan a drive that the system cannot see.
If the drive is invisible on multiple computers, makes unusual sounds, spins up and drops out, or repeatedly disconnects, I stop testing.
That is where I would consider professional recovery instead of more experiments.
When the drive was formatted for Windows, I separate access from setup
Some Seagate Backup Plus drives are used across both Mac and Windows.
When I see that possibility, I do not immediately erase the drive to “make it Mac-compatible.”
First, I separate two different problems.
One problem is access:
Can I read the files that are already on the drive?
The other problem is setup:
What format should this drive use going forward?
Those are not the same question.
If the files matter, I deal with access first.
Only after the data is safe do I think about the future format.
For Mac-only use, APFS is usually the format I consider. Apple lists APFS as the file system used by macOS 10.13 or later. For a drive shared with Windows, Apple lists ExFAT as a Windows-compatible option and recommends ExFAT for Windows volumes over 32 GB.
That does not mean I erase the drive just because ExFAT would be convenient.
Formatting is a setup decision.
It is not a rescue step.
When the data matters, I stop trying to make the drive look normal
This is the turning point in my process.
If the data matters, my goal changes.
I am no longer trying to make the Seagate drive behave normally.
I am trying to avoid making recovery harder.
So I do not erase the drive.
I do not initialize it.
I do not keep unplugging and replugging it for an hour.
I do not run the same repair again and again.
I do not save recovered files back onto the same drive.
If the drive is visible but unmountable, recovery software may be worth considering. But I treat it as one possible option, not the first move in every case.
I would only scan a drive that appears physically stable.
I would preview recoverable files before restoring them.
And I would always save recovered files to another disk.
No recovery tool can honestly guarantee success on a physically failing drive.
The more the symptoms look mechanical, the less I want software touching it.
I only reformat after the data question is settled
Reformatting belongs near the end of this process.
Apple is direct about this: erasing a storage device in Disk Utility deletes everything on it, and files you want to keep should be copied to another storage device first.
That is why I only reformat when I am clear on the data risk.
I would consider erasing the Seagate drive only when:
- there is no important data on it
- or the data has already been backed up or recovered
- Disk Utility can see the drive consistently
- the drive appears physically healthy
- there are no unusual sounds or repeated disconnects
Then I use Disk Utility.
I choose View > Show All Devices.
I select the physical Seagate drive, not just a greyed-out volume.
I click Erase.
I choose the format based on how I plan to use the drive.
For Mac-only use, I consider APFS.
For Mac and Windows use, I usually choose ExFAT.
I keep the scheme as GUID Partition Map.
Then I erase.
But I only do that once I am sure I am not erasing the only copy of something important.
The diagnostic order I trust
Here is the order I use when a Seagate Backup Plus does not show up on Mac.
First, I check visibility. If Disk Utility sees the drive but Finder does not, I check Finder settings before doing anything else.
Second, I try mounting. If Disk Utility sees the drive but it is greyed out, I try a manual mount before repair.
Third, I protect the data. If the drive mounts even once, I copy important files before testing further.
Fourth, I use First Aid with limits. I only run it when the drive appears stable and the data risk is acceptable.
Fifth, I separate compatibility from failure. A Windows-formatted drive, a hidden Finder drive, and a failing physical drive should not be handled the same way.
Sixth, I reformat only after the data is safe. Erase is a reset. It is not recovery.
Finally, I stop when the symptoms point to hardware. Clicking, buzzing, repeated disconnects, I/O errors, and invisibility across multiple computers are signs that I should stop experimenting.
My main rule
I do not fix the drive before I understand the failure.
A Seagate drive hidden from Finder may only need a setting changed.
A Seagate drive visible in Disk Utility may need mounting, repair, or recovery.
A Seagate drive that no computer can detect may need hardware help.
That is the safest way I know to approach this problem: start with what macOS can still see, protect the files as soon as access returns, and save reformatting for the moment when data loss is no longer a concern.
If your Seagate drive disappeared, check where it still appears first.
That one detail usually tells you what to do next — and what not to do.
메타데이터
- post_id
- 3cef6ef4e022
- slug
- how-i-diagnose-a-seagate-drive-that-wont-show-on-mac-3cef6ef4e022
- url
- https://medium.com/@ae5385/how-i-diagnose-a-seagate-drive-that-wont-show-on-mac-3cef6ef4e022
- canonical_url
- https://medium.com/@ae5385/how-i-diagnose-a-seagate-drive-that-wont-show-on-mac-3cef6ef4e022
- author_url
- https://medium.com/@ae5385
- status
- ok
- fetched_at
- 2026-07-08 18:29:56