Can You Replace a Kitchen Faucet with a Pull-Down Sprayer Yourself?
Assessing the Challenge: Can You DIY a Pull-Down Faucet Replacement?
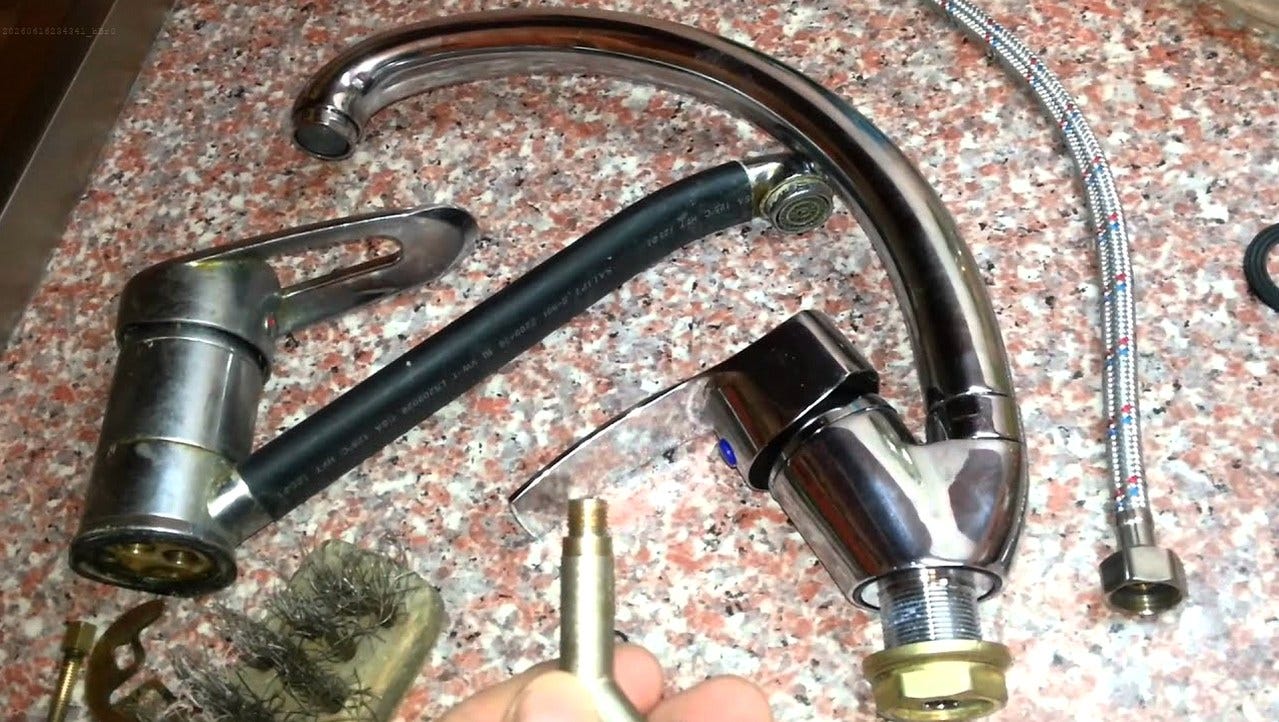
Can You Replace a Kitchen Faucet with a Pull-Down Sprayer Yourself? Risks, Tools, and Expert Tips for DIY Success
Assessing the Challenge: Can You DIY a Pull-Down Faucet Replacement?
Before you jump into a DIY faucet replacement, take a moment to think — does this really match your skill set? It’s not just about being excited; it’s about being honestly realistic with yourself and knowing there are hidden hurdles that can turn a simple job into a real headache.
Sink Material: A Critical Factor
The material of your sink can make or break this project. Stainless steel might look tough, but its thin walls can crack if you tighten too hard when securing the faucet. Porcelain or cast iron? Those need extra care — one wrong move with a wrench, and you’re looking at a permanent chip. Someone I know ended up with a $300 repair bill after scratching their porcelain sink’s enamel during installation.
Existing Faucet Condition: Unseen Complications
Your current faucet’s condition can throw you for a loop. Rusty threads or old, brittle supply lines often cause unexpected delays. Getting a stuck faucet out without damaging the sink or counter takes time and the right tools, like a basin wrench — something a lot of first-timers don’t even think about. One person I heard about spent days stuck because they didn’t have the tool for their rusted faucet.
Tool Proficiency: Bridging the Skill Gap
Sure, tutorials make it look easy, but you’ve gotta know how to handle tools like pipe wrenches, Teflon tape, and plumber’s putty. Tightening too much can lead to leaks or damage, while not tightening enough leaves things wobbly. For example, someone skipped using plumber’s putty, and water started seeping under the faucet base, ruining their cabinet in just a few weeks.
Edge Cases: Beyond Standard Instructions
DIY guides usually skip over weird situations. Odd sink hole setups or short water lines? You’ll have to get creative. One homeowner with a farmhouse sink found the new faucet’s hose was too short for the sprayer to work properly, so they had to buy extensions on the spot. And if you’re dealing with older homes and galvanized pipes, you might need extra steps to make everything work with modern fixtures.
So, replacing a kitchen faucet with a pull-down sprayer isn’t just about following steps — it’s about thinking on your feet and knowing your limits. If you’re confident with tools, understand your sink’s quirks, and can handle surprises, go for it. Otherwise, calling a pro might save you time and frustration.
Essential Tools & Materials for a, uh, Flawless Faucet Replacement
Replacing a kitchen faucet with a pull-down sprayer, it’s not just about swapping parts, you know? It’s about, like, precision to avoid turning a simple project into a costly repair. The right tools and materials — they’re critical to prevent leaks, damage, or delays. Below is a, uh, curated list highlighting common pitfalls and solutions for, you know, challenging scenarios.
- Basin Wrench: Crucial for, uh, accessing tight spaces under the sink. Without it, removing stuck nuts or loosening corroded connections — it’s nearly impossible. Pro tip: Indispensable for, like, rusted faucet bases.
- Adjustable Wrenches (8” and 10”): Used to secure supply lines and mounting nuts. Over-tightening — it can crack sinks or strip threads. Apply, uh, firm, controlled pressure.
- Teflon Tape: Wrap clockwise around male threads of supply lines. Common error: Omitting or, you know, overusing it causes leaks or blockages.
- Plumber’s Putty or Silicone Sealant: Putty suits standard setups, while silicone — it’s ideal for non-porous sinks or humid areas. Real-world caution: Skipping sealant allows water to damage cabinets. I mean, like, in one case, wood warped within weeks.
- Mounting Block or Escutcheon: Conceals gaps when a single-hole sink doesn’t, uh, match the faucet’s requirements. Special case: Older sinks with irregular holes — they may need custom solutions or, you know, additional hardware.
- Hose Extensions (if needed): Older homes with short water lines — they often require extensions. Verify compatibility to, uh, prevent leaks.
- Pipe Compound (Thread Sealant): Enhances security on threaded connections, especially in galvanized pipes. Note: Not all sealants are, like, compatible with plastic threads — double-check before use.
For complex scenarios like mismatched sink holes or galvanized pipes, adaptability — it’s essential. For example, a homeowner with a 1950s sink combined a mounting block and, uh, custom-cut silicone padding to secure the faucet. Another replaced aging supply lines with braided stainless steel to, you know, prevent future failures.
While this list addresses most situations, unexpected issues — like corroded pipes or incompatible fittings — can arise. If uncertain, pause and, uh, reassess. Forcing a step can escalate a $50 DIY project into a $300 repair. Success hinges not only on tools but also on, like, knowing when to adjust or consult a professional.
Step-by-Step Faucet Replacement with Expert Guidance
Replacing a kitchen faucet with a pull-down sprayer, uh, requires some foresight to avoid, you know, common pitfalls. Start by shutting off the water supply under the sink — skipping this step, well, it just risks flooding and, like, rushed work. Quickly open the faucet to drain any leftover water, you know, to prevent spills and keep the workspace clean.
Removing the Old Faucet: Tackling Common Challenges
Unscrewing an old faucet can be tricky, especially with older setups. Rusted mounting nuts or corroded supply lines might, uh, break your tools or damage the sink. Grab a basin wrench for tight spots, and if the nuts are stubborn, apply some penetrating oil and let it sit for, say, an hour. For really tough cases, try heating the area with a hairdryer to expand the metal and loosen things up. Just, uh, avoid prying directly on the sink — it could crack. Instead, slide a wooden shim between the pry bar and the sink for safer leverage.
Mounting Block Installation: Ensuring Compatibility
If your sink’s holes don’t match the new faucet, a mounting block is, like, essential. Standard blocks usually fit most sinks, but older models might need custom fixes, like silicone padding or epoxy-mounted blocks. Double-check your measurements — misalignment can mess up stability and looks. For thinner sink materials, add a metal plate underneath to prevent damage over time.
Assembling the New Faucet: Beyond the Instructions
Follow the manufacturer’s guide, but, uh, don’t expect it to cover everything. Pull-down sprayer hoses often need extra length for full movement; too short, and it’ll limit functionality. In older homes with shorter water lines, extensions are key — just make sure they’re compatible to avoid leaks. Use pipe compound on threaded connections, but skip sealant on plastic threads to avoid cracks. Test the sprayer hose weight’s position before securing it to make sure it retracts smoothly.
Leak Testing: Critical Final Step
After installation, slowly turn the water back on and check all connections for leaks. Even small drips can get worse fast. If you spot a leak, don’t over-tighten — just disassemble, clean the threads, and reapply sealant or tape. For stubborn issues, consider replacing supply lines with braided stainless steel for better durability.
Critical Edge Cases
- Mismatched Sink Holes: Cover exposed holes with sink hole covers or custom silicone padding.
- Galvanized Pipes: Replace corroded or damaged sections instead of forcing connections.
- Cost Escalation: A simple DIY project can get expensive if sinks or pipes are damaged. If you’re unsure, maybe call a professional.
Faucet replacement, it’s all about being adaptable and prepared. Every installation is different, so flexibility is more important than sticking strictly to the instructions.
Critical Risks and How to Mitigate Them
Replacing a kitchen faucet with a pull-down sprayer might seem straightforward, but hidden challenges can turn a quick fix into a costly repair. Spotting these risks early helps you move forward confidently or decide if it’s time to call a pro.
One big issue is sink deformation, usually caused by overtightening mounting nuts or using too much force during installation. Stainless steel and composite sinks are especially vulnerable. The result? A warped surface that looks bad and messes with the faucet’s stability. Solution: Tighten nuts by hand first, then use a wrench to gradually secure them, checking for resistance. If the sink feels soft or spongy, stop and reassess right away.
Another common headache is incompatible threading between the faucet and supply lines. While ½-inch connections are standard, older homes or imported fixtures can vary. Forcing mismatched parts together can strip threads or crack fittings, leading to leaks that might go unnoticed until water damage hits. Solution: Double-check threading compatibility before starting. If unsure, take apart the old setup and compare it to the new parts. When in doubt, use adapters or ask a hardware specialist.
Improper sealing is a frequent DIY slip-up. Missing a spot around the base or sprayer hose can cause slow leaks, damaging cabinets or leading to mold. Standard plumber’s tape often fails under high-pressure sprayer systems, especially if applied incorrectly. Solution: Use silicone-based sealant and Teflon tape for critical joints. Test each connection with water before finishing, wiping away excess sealant to avoid future messes.
Less common but just as tricky are mismatched sink holes and corroded pipes. Older sinks might have non-standard hole sizes, leaving gaps that expose sharp edges or reduce stability. Galvanized pipes in pre-1980 homes often corrode internally, becoming brittle and prone to cracking during removal. Solution: For hole mismatches, use sink hole covers or custom silicone padding to fill gaps. If pipes show corrosion signs — flaking, discoloration, or stiffness — replace them entirely instead of patching them up.
Finally, recognize the limits of DIY. While many installations go smoothly, complications can turn a simple project into a nightmare. Water damage from mistakes can cost thousands to fix, way more than professional installation fees. Real-world example: A homeowner replaced a faucet without checking supply line compatibility, causing a burst pipe that flooded the kitchen. Repair cost? $4,500.
If you’re unsure at any point, take a step back and reassess. Some risks are better left to professionals, especially with older plumbing or unusual setups. DIY success depends on careful prep, patience, and knowing when to ask for help.
When to Call a Professional: Critical Red Flags for Faucet Replacement
Replacing a kitchen faucet with a pull-down sprayer can be a pretty satisfying DIY task, but, you know, certain situations really do need professional expertise. Overlooking these warning signs? Well, it can turn a straightforward upgrade into, like, a total disaster — expensive, too.
Corroded Supply Lines: A Hidden Danger
Homes built before 1980, they often have these galvanized pipes that, yeah, they’re just prone to corrosion. If you notice flaking, discoloration, or like, rigidity in the supply lines, just swapping out the faucet? It’s not gonna fix the real problem. Those corroded pipes? They could crack under pressure, causing leaks or bursts. A licensed plumber, they’ll check out the damage and replace the whole system, so it’s reliable for the long haul.
Non-Standard Sink Configurations: Beyond DIY Capabilities
Standard faucets, they’re made for ½-inch connections and, you know, regular sink thicknesses. But sinks with weird dimensions, mismatched holes, or odd threading? They might not work with off-the-shelf stuff. Forcing parts that don’t fit? That’s just asking for leaks and water damage down the line. In those cases, a pro can figure out the right installation or suggest parts that actually work.
Sink Deformation: An Overlooked Risk
Sinks can warp or deform over time, especially from heat or heavy use. If your sink’s surface is uneven or looks kind of bent, putting in a new faucet? It could make things worse. A professional can tell if the sink needs fixing or replacing before they even start on the faucet.
DIY Risks: When Professional Help is Essential
Plumbing mistakes? They can get seriously bad. Using the wrong supply lines or not sealing things right? Pipes could burst, and you’re looking at repairs costing $4,500 or more. If you’re not sure about any step, especially with older plumbing or weird setups, it’s better to just call a pro. The cost upfront? It’s usually way less than dealing with damage from a DIY mistake.
DIY projects can feel great, but knowing when to stop? That’s key. Complex or risky stuff? Leave it to the pros. They’ve got the tools, experience, and know-how to keep things safe and effective.
Long-Term Maintenance Tips for Pull-Down Faucets
After installing your pull-down faucet, keeping it in good shape is, like, super important. If you don’t take care of it, you could end up with issues like low water pressure or, worse, it just stops working. So, here’s what you can do to avoid problems and make it last as long as possible.
Regular Cleaning: Beyond Appearance
Mineral buildup and debris are, honestly, a big deal for pull-down sprayers. Over time, they clog the nozzle, slow down the water, and put extra stress on the hose, which wears it out faster. Bottom line: Parts can break sooner than they should. What to do: Clean the sprayer head every month. Soak it in vinegar to get rid of limescale, then scrub it with a toothbrush. If you’re in an area with hard water, think about getting a water softener to cut down on mineral buildup.
Sprayer Hose Inspections: Avoiding Hidden Wear
The flexible hose is handy, but it’s also kind of fragile. Kinks, twists, or cracks can sneak up on you until you notice a leak. Big issue: In tight cabinets, the hose might rub against sharp edges and get punctured. What to do: Check the hose every three months for any signs of wear, stiffness, or discoloration. Move it away from surfaces if it’s touching anything. If it’s damaged, replace it ASAP — a $20 part can save you from a huge water damage bill.
Addressing Complex Issues
Sometimes, basic maintenance isn’t enough. Like, if the pressure suddenly drops, it could mean something’s broken inside. Real example: Someone had weak flow even after cleaning the nozzle. Turns out, it was a faulty diverter valve that needed a pro to fix. Heads up: Messing with internal parts yourself usually voids the warranty. If you can’t figure it out, call a plumber to avoid making things worse.
Staying on top of maintenance saves you from pricey repairs and keeps your faucet working smoothly. When you take care of it, it lasts longer and performs better, which is totally worth it.
메타데이터
- post_id
- 3fdcc5a834c8
- slug
- can-you-replace-a-kitchen-faucet-with-a-pull-down-sprayer-yourself-3fdcc5a834c8
- url
- https://medium.com/@jackwilltech/can-you-replace-a-kitchen-faucet-with-a-pull-down-sprayer-yourself-3fdcc5a834c8
- canonical_url
- https://medium.com/@jackwilltech/can-you-replace-a-kitchen-faucet-with-a-pull-down-sprayer-yourself-3fdcc5a834c8
- author_url
- https://medium.com/@jackwilltech
- status
- ok
- fetched_at
- 2026-06-21 12:17:11