A Change Of Tone: How to use Tone.js with React
So for the past few weeks, I’ve been working and learning a lot about databases, how to access them, manipulate them, and all kinds of…
A Change Of Tone: How to use Tone.js with React
So for the past few weeks, I’ve been working and learning a lot about databases, how to access them, manipulate them, and all kinds of playing with data. Which has been very informative and useful for understanding the basics of computer coding and how information gets tossed around. However, pretty much all of the data that I’ve been working with has been text, and sometimes some images(but usually only links to images). This has made me curious as to how to play with other kinds of data, specifically audio, both sampled and synthesized.
This has led me to Tone.js(https://tonejs.github.io/), which seems to be a great way to start getting some audio into Javascript or React-based projects that I’ve been thinking about making recently. I’ve only just begun to dive into it and it’s already solving a lot of problems for me.
So let’s take a look at how I set it up and my first functioning example of a clickable piano keyboard!
To start off you’re going to want to create a react app with npx create-react-app in the desired folder.
Then do a little npm install tone to get Tone.js up and running.
Next up, import tone by adding* import as Tone from ‘tone’** at the top of your App.js.

Now we need to make an instrument. Just make a variable and name it synth, then make a new Tone.Synth. Keep in mind that you don’t have to use Tone.Synth, there are a bunch of other built-in synth sounds available such as Tone.FMOscillator, Tone.MetalSynth, Tone.PluckSynth, as well as samplers. Check out https://tonejs.github.io/docs/14.7.77/index.html for more info on your sound options. I’ll definitely be exploring this more as I dive deeper into Tone.js.
You also want to set the output to toDestination, this just defaults the output to your computer speakers.

After you choose your sound source, set up a function to play the synth. In this case, we are using triggerAttackRelease to start and stop the sound then the function is called. This takes in two arguments, the first one determines the note value/pitch of the sound, and the second the note length, in this case, 1/8th notes. We will be passing in the note value from our buttons, but this will be looking for note names like C3 or D#4.

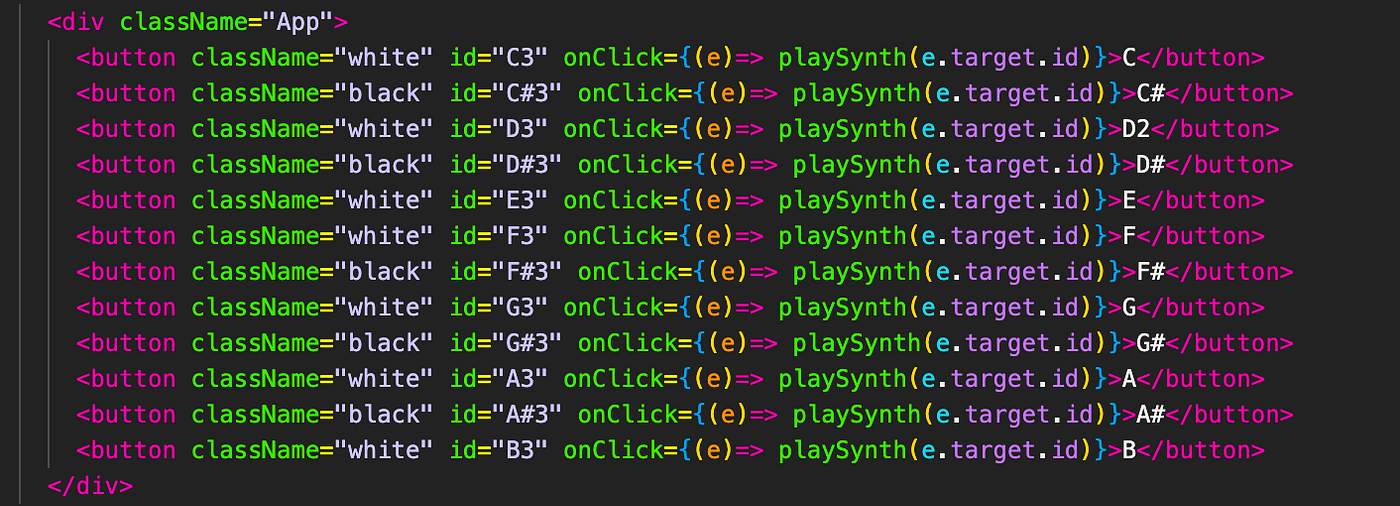
Now we can add some buttons to our App component. I added a class for some css later on. The important part here is that the id is set to the value of the note we want to send to our synth. And the onClick is going to pass that id value into our playSynth function. Now if you press the button it should output a C3 note.

I then went through and repeated the process by copy/pasting the button around and swapping out the note values for each one. Now we have a working one-octave keyboard!
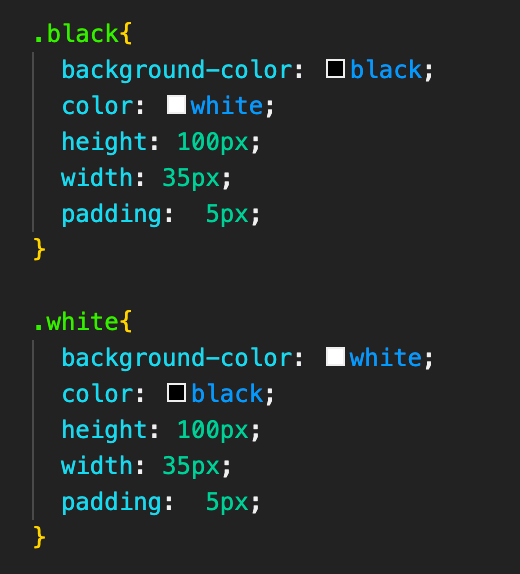
To spruce it up a little bit, add some css to make the buttons a bit more piano-esque and it should be good to go!
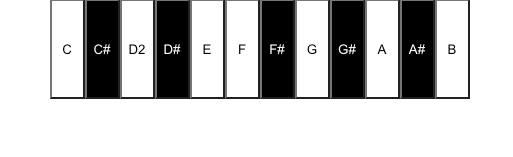
The final product(for now) ended up looking like this. It looks like a keyboard sounds like a synth, and was extremely straightforward to get set up and running. From here, my next plans are to add in more octaves(or an octave button), a dropdown to swap out the sound source, as well as set up a sampler so I can add my own audio samples for each note.
메타데이터
- post_id
- 42efff2a2dbc
- slug
- a-change-of-tone-how-to-use-tone-js-with-react-42efff2a2dbc
- url
- https://medium.com/@zaak.kerstetter/a-change-of-tone-how-to-use-tone-js-with-react-42efff2a2dbc
- canonical_url
- https://medium.com/@zaak.kerstetter/a-change-of-tone-how-to-use-tone-js-with-react-42efff2a2dbc
- author_url
- https://medium.com/@zaak.kerstetter
- status
- ok
- fetched_at
- 2026-07-26 21:24:33