You dunno GIT ( LOL )
So, I had an interview a couple of week ago, and during it, I realized… I don’t really know enough about Git. So, in this story, I’m…
You dunno GIT ( LOL )
So, I had an interview a couple of weeks ago, and during it, I realized… I don’t really know enough about Git. So, in this story, I’m gonna learn Git with you guys and share everything I pick up along the way. And YEAH, let’s go!
These days, most developers use Git instead of SVN or other tools. Actually, about 93% of developers use Git yeah, it’s massively COOL dude. So let’s talk about why we should learn it and what benefits Git brings to the table for us.
Setup

So first of all, we gotta make sure Git is installed on our system. And yeah, be careful GIT is GIT, developed by the absolute MONSTER himself, Linus Torvalds. Right? Git is not GitHub, not GitLab, not Bitbucket, or anything like that.
Alright folks, for the first step, we need to configure our Git with these commands basically telling Git who we are. I know, it looks kinda sophisticated. I bet even Torvalds just copy-pastes these commands instead of memorizing them, you know?
So first, let’s check if your identity is already set in Git with these commands
git config --get user.name
git config --get user.email
If you don’t have them set already, you should! I’d recommend using the same username and email you use on GitHub, GitLab, or whatever platform you’re on.
git config --add user.name --global "your username"
git config --add user.email --global "your email"
Finally, you should set up your default branch with this command. We’ll talk more about this part later, so don’t rush it, my friend
git config --global init.defaultBranch masterHonestly, I always just copy and paste these commands, LOL. (But hey, I think now I can finally do it by myself!) Yeah buddy, we did it our first step! This is kinda like the “Hello World” of the Git world. Stick with me and enjoy the journey!
Repositories

Alright, time to make our first Git repo and get things rolling! This is step 2. First, create your project folder with:
mkdir your_project_nameThen, run this command to set up an empty .git folder and get Git ready to track your project.
git initOk cool, now that you’ve made a Git repo, you can start using some of the core Git commands like…
git statusWith this command, you can check your Git graph status and see the status of your files whether they’re indexed or not. If some files aren’t indexed yet, you can use this command to add them to Git.
git add -A or git add . or git add ./your_filenameNow, with this command, you can add your new file to the Git index… pretty cool, right? So, the big question is… what do you do next? The answer: commit your changes!
git commit -m ":(feat/fix/etc): your commit message"So, what does a commit actually do? Basically, a commit takes your staged changes and adds them to Git’s history with a message and a unique hash. Using this command, you’re saving your staged changes into Git’s history.
Git log
git log
git --no-pager log
git --no-pager log --oneline
git --no-pager log -n 10 --oneline --parents
git --no-pager log -n 10 --oneline --parents --graph
After you commit your staged changes, you can check them out with the git log command. There are also some handy options to make it easier to read, like --oneline, --parents, and --graph.
Obviously, -n 10 just lets you see the latest 10 commits.
Like Primeagen said in his YouTube video, by now you’ve learned half of Git you basically know Git like a Sr Software Engineer LOL.
Internals
Alright, now I wanna do a little deep dive into Git and talk about Git internals. To really get how Git works under the hood, here’s the deal->
Every time you make a commit, Git actually creates a new tree, and your file contents are stored as blob objects. So basically, each commit is like a snapshot of your project, with a bunch of trees and blobs. Pretty cool, right?

You can check out your last commit with:
git cat-file -p <commit-hash>This will show you the files and their contents in that commit. You can even see how your previous file changes appear in the new commit.
Now, you might wonder… wait, if Git takes a snapshot every time, doesn’t it store duplicate files over and over? Here’s the genius part: Git doesn’t. Every file has a unique hash, and if a file hasn’t changed between commits, Git just references the existing blob instead of storing it again.
So basically, Git is taking full snapshots of your project for each commit, but behind the scenes, it’s super smart about storage. Mind-blowing, right? That’s why Git is so fast and efficient … it’s pure GENIUS.
Config
Cool, so now we wanna learn Git config a little better! There are a few interesting things about Git config … but first, let’s talk about the ASSIGNMENT part. With Git config, you can assign your own custom keys and store values in them. For example:
git config --add webflyx.ceo ThePrimeagen
git config --add webflyx.cto TheLaneagen
git config --add webflyx.valuation mid
Now that you’ve assigned those keys, you can check your Git config to make sure they’re actually there. Use one of these commands:
cat .git/config
git config --list --local
The --get Flag
Alright, next up the GET flag.
In the previous commands, we used --list to see all config values, but sometimes you just wanna check a single key. That’s where --get comes in:
git config --get <your-key>The Git config file follows a simple structure made of sections and keys, like this:
<section-name>.<key-name>The --unset Flag
Now, let’s talk about the UNSET flag. This one’s used to remove a config value:
git config --unset <key>On Boot.dev, there’s a great question:
“What happens if you try to remove an entire section instead of a key?”
The answer: it fails. Git can’t unset a whole section it needs a specific key.
Duplicates in Git Config
Here’s a fun one what happens if you add the same key multiple times in Git config?
If you’ve worked with Python dictionaries, you know it’d throw an error. But Git? Nah, Git doesn’t care. Git’s like:
“GIT AIN’T SHIT ABOUT THAT.”
It just reads the last value you set.
Example:
git config --add webflyx.ceo "test 1"
git config --add webflyx.ceo "test 1"
git config --add webflyx.ceo "test 2"
Totally fine for Git it’ll read "test 2" as the value.
But seriously, don’t do that it makes your config messy and confusing. Keep it clean, don’t “Guff that Up,” okay?
Removing All Duplicates
Now, what if your config already has tons of duplicate values?
Do you have to --unset them one by one?
Nope! You can clear them all at once with:
git config --unset-all example.keyAnd if you want to remove an entire section, you can use:
git config --remove-section <section-name>Git Config Locations
Alright, final boss time config locations. Git configs live in a few different places:
- System:
/etc/gitconfig→ applies to all users on the system - Global:
~/.gitconfig→ applies to all your projects - Local:
.git/config→ applies only to the current project - Worktree:
git/config.worktree→ applies to a specific working tree
As Boot.dev puts it nicely:
“In my experience, 90% of the time you’ll use
--globalfor stuff like username and email. 9% of the time, you’ll use--localfor project-specific configs. The last 1%... you might tinker withsystemorworktreeconfigs but that’s extremely rare.”
When you have multiple config files in different locations, they override each other with local > global > system. There’s even a cool (boot.dev) diagram that shows how it all stacks up check it out if you get the chance!

Branching

Here We Go Let’s Talk About the Core of Git: BRANCHES!
Alright folks, it’s time to dive into one of the most essential parts of Git BRANCHES! YEAH!
So first of all, ask yourself: what are branches? In general, “branches” means divisions of a plant LOL. And honestly, thinking of it that way actually helps you visualize your Git branch structure!
A branch in Git is basically just a pointer to a commit it’s cheap and lightweight. Why lightweight? Because when you create 10 branches, Git doesn’t actually copy your project 10 times. It’s just making new pointers.
(Please tell me I’m not the only one who used to think Git made a full copy of the project for each branch? I used to be so naive LOL :)
Branch Nature
Now that we know what branches are, let’s talk about your default branch.
When you run git init, your first branch is usually called master.
But if you’re using GitHub, you might notice the default branch is main.
Why? Who knows sometimes it feels like Git just loves to keep us guessing.
Anyway, sometimes you’ll run into issues because of your branch name. So what’s the solution? Rename your branch!
Renaming a Branch
To rename a branch, use this command:
git branch -m oldbranch newbranchIf you want to change your default branch name from master to main, you can do:
git config --global --unset-all init.defaultBranch
git branch -m master main
git config --global --add init.defaultBranch main
Boom done.
Visualizing Branches
Throughout the rest of this story, I’ll use text to represent commits and branches (like Boot.dev does).
For example:
A → B → C → mainThat means a branch called main with 3 commits.
Now, if we have multiple branches:
A → B → C → main
     ↘ D → E → feature/login
Here we’ve got two branches: main and feature/login.
main has 3 commits, while feature/login has 2.
Notice that when I created the feature/login branch, it was based on commit B.
Then I made commit C on main.
So feature/login includes commits A, B, D, E, but not C, because that one was added after the branch was created.
Creating a New Branch
Alright, time to make some branches!
In the past, we used the checkout command to create a new branch.
These days, Git recommends using the newer, cleaner switch command.
You can create a branch in two ways:
git branch my_new_branch_name
git switch -c my_new_branch_name
The first one only creates the branch it doesn’t switch to it.
Since I usually want to create and switch right away, I prefer the second one.
(switch -c FTW )
Switching Branches
We already mentioned git switch, but let’s talk about it properly.
Back in the day, we used git checkout for everything switching branches, checking out commits, etc.
But now, Git introduced git switch because it’s newer, cleaner, and more intuitive.
So yeah… technically you should use git switch.
But real talk I still use git checkout sometimes LOL.
Anyway, to switch branches:
git switch your_branchThat’s it!
Now if you peek inside .git/refs/heads, you’ll see one file per branch, each containing the commit hash that the branch points to.
And boom! You’re now officially a Git branching wizard
Merge

What’s a Merge in Git?
Alright, now we’re diving into the Git Merge command! So, the big question is: what exactly is Git merge?
Imagine you’ve got two branches your main branch and another one called feat/login.
You’ve made some commits like this:
main:      A – B – C
feat/login: D – E
Now think about it, What do you do when you want the changes from feat/login to show up in your main branch? That’s right … this is where the MERGE command comes to the rescue.
When you merge your secondary branch (feat/login) into the main branch, Git creates a brand-new commit that connects the two branches together kinda like linking two timelines in a multiverse.
Here’s what it looks like:
A --- B --- C -------------- F
           \                /
            D --- E --------
As you can see, Git makes a new merge commit (F) that ties everything together.
Now that we’ve merged our branches, it’s time to talk about the Merge Log let’s see what really went down behind the scenes.

Logging The Advanced Way to Spy on Your Git History (LOL)
Logging is an advanced way to monitor your merge commits and all the crazy stuff you’ve been doing in Git 😂
Now, let me explain this command Primeagen-style, alright? Check this out:
git log --oneline --graph --decorate --parentsLet’s break it down like pros:
**--oneline**
This flag cleans up your log formatting so it’s nice and compact. You’ll see a short, 7-character commit hash followed by your commit message perfect for scanning through your history without losing your mind.
**--graph*
This one adds a cool ASCII art-style graph that helps you see* how your branches and commits are related. It’s basically Git’s version of draw me a picture.
**--decorate**
This flag shows which branches or tags point to each commit. Super useful when you’re trying to figure out where you are in the Git jungle.
**--parents**
This one shows the parent commits for each commit especially handy when inspecting merge commits. It’s like asking Git, Hey, who are your parents? LMAO…
What’s a Fast-Forward Merge?
Alright, picture this:
You create a new branch from main, do your work, but don’t make any new commits on main while working on that branch.
In that case, when you merge back, Git’s like,
“Hey, no conflicts, no drama I can just fast-forward this thing!”
That means Git doesn’t create a new merge commit. It just moves the pointer of main forward simple and clean.
Here’s what it looks like:
main:    A --- B
feature:        \
                 C --- D
After a fast-forward merge, your graph becomes:
main: A --- B --- C --- DGit just updates main to point to commit D, no extra merge commit needed.
Fast-forward merges are like Git saying,
“I got this no need to make things complicated.”
Rebase

Alright, how’s it going, folks? Everything okay? If you’re tired, take a quick break then come back and join me on this little Git journey! I really appreciate your patience, seriously, thanks a lot.
Now… I wanna dive into one of the most sophisticated parts of Git… REBASE
Most developers (like me) struggle to fully grasp the whole concept of git rebase. Honestly, I used to have no clue how to explain the difference between Rebase, Fast-Forward Merge, and Merge. We already talked about merges and fast-forward merges before, so yeah… it’s finally time to tackle this pain in the neck once and for all.
So, imagine you’ve got a local branch called feat/cart. You’ve added your changes, everything’s done and working. Most people at this point would just run git merge or git pull to update their branch with main, then send a merge request. That’s fine, but when you do that, Git creates another graph connection to your main history turning your git log into a messy jungle
Sometimes, though, you want a nice, clean, linear history.
That’s where rebase comes in!
When you run git rebase main on your local branch, you’re basically replaying your commits on top of the main branch cleaning up your graph and making it look way smoother. Plus, you avoid adding those extra “merge commits” that Git creates when you use the merge command. With merge, Git adds an extra commit to connect the two branches together which can make your history look like a wild Git jungle
Check out this picture it’ll make everything crystal clear
Alright, I hope I explained everything clearly, folks!
Now, before we wrap up, I’ve gotta give you an important warning about using git rebase.
Be careful!
You should never use git rebase on a public branch like main, stage, or develop.
When I say “public branch,” I mean any branch that you and your teammates are working on together. If you rebase a shared branch, everyone on your team will end up having to fix a ton of conflicts manually and trust me, that’s not fun.
Here’s why: when you run git rebase, you’re actually rewriting your branch’s history to make it linear. In that process, Git changes the commit hashes (SHA values), so the history no longer matches what your teammates have. That’s what causes all the chaos.
So yeah if you want that clean, linear commit history, only use git rebase on your local branches. Keep the public ones safe!
And hey… after all the struggle trying to understand git rebase, we finally did it together!
Shoutout to Prime and Boot.dev for helping along the way!
Reset

Undoing Changes in Git
Sometimes, you realize you’ve missed something in a previous commit maybe you want to go back and continue working on it, or perhaps you just want to discard it entirely.
That’s where the **git reset** command comes in handy.
git reset lets you move your current branch pointer back to a specific commit. Depending on how you use it, you can keep or discard your changes. It has three modes (or flags): **--soft, `--mixed** (default), and--hard`.
Let’s break them down 👇
--soft
If you want to go back to a previous commit but keep your changes staged, use the --soft flag.
This way, you don’t lose any of your work it just moves the branch pointer back while leaving all your modifications in the staging area.
git reset --soft <commit_hash>
# or
git reset --soft HEAD~1
Ideal when you want to edit your last commit or change the commit message without losing staged changes.
--mixed (default)
The --mixed flag moves your branch pointer back and unstages your files, but it keeps your changes in the working directory.
This is the default mode if you run git reset without specifying a flag.
git reset --mixed <commit_hash>
# or
git reset <commit_hash>
Perfect when you want to keep your code changes but reorganize what’s staged for the next commit.
--hard
Now, this one is powerful and dangerous.
The --hard flag moves your branch pointer back and completely discards all changes from both the staging area and your working directory.
git reset --hard <commit_hash>
# or
git reset --hard HEAD~1
Be Careful Any uncommitted changes will be lost forever. Use it only when you’re absolutely sure you want a clean slate
#Extra Info

During the tutorial video, Prime saw something in the chat and started talking about this super useful Git command:
git add -p It’s extremely handy when you wanna make clean, precise commits. The -p stands for “patch,” which tells Git to interactively select hunks (small chunks of changes) to stage.
Basically, it lets you go through your changes line by line, deciding what to add or skip.
It’s like being the editor-in-chief of your own code!
BTW this command is seriously underrated.
Use it. Love it. YAYAYAYA!
Remote

Now we’re walking through the remote command. So, what is the remote command in Git?
Do you still think the remote URI is actually related to your Git repo’s URL? If you do Prime’s here to tell you that it’s TOTALLY wrong, my friend.
Yep, you completely goofed up this one Actually, a Git remote can be any Git repository. For example, Prime connected his project to a parent repo like this:
git remote add origin ../webflyxSo now we’ve got some better insight into how Git URIs work YAYAYA!
In the next section, we’ll check out git fetch.
This command brings in all the changes from your remote repo super useful for keeping your local project up to date.
Now let’s talk about logs. Did you know you can check commits from a remote repo using the log command like this?
git log remote/branchPretty interesting, right? It’s perfect for monitoring changes in your project.
And finally the merge. You might wonder why it’s part of this section. Well, it’s because you can merge branches between your local repo and a remote one. Yeah, it’s just that cool
Alright, that’s it for this chapter. Stay with me more cool stuff ahead. Thanks for tuning in!
GitHub
Alright folks, in this section, we’re diving into GitHub but first, let’s clear something up: Git and GitHub are not the same thing, okay?
- Git is a command-line tool that helps you track changes in your code.
- GitHub, GitLab, and similar platforms are web-based services built on top of Git. They use Git under the hood, but give you a nice UI and extra features to store, share, and manage your projects.
Basically, Git is the engine, and GitHub is the shiny car wrapped around it.
Now, just like any other web app, you can create an account on GitHub. Once you’re in, you can spin up a new repository (repo), then link it to your local Git project using a remote URL this helps you keep everything synced and managed like a pro.
After that, you can push your code, open pull requests, and even assign reviewers to give feedback on your changes. Pro tip: If you’re working in a team, always make a pull request and ask for a review it’s the best way to make sure your code stays clean and top-quality.
But hey, if you’re a solo dev hacking away on your own repo, you don’t really need to deal with multiple branches or pull requests. Just push your code directly no need to overcomplicate things
Gitignore
.GITIGNORE The Silent Hero
Alright, now let’s talk about .gitignore what is it, and what does it actually do?
Sometimes, there are files or folders in your project that you really don’t want in your Git repo. They’re unnecessary, huge, or constantly changing basically, total chaos.
A classic example? **node_modules
You already know it that massive, heavy folder that eats your disk space like a hungry beast. The good news is: you don’t need to upload it to Git :) Why? Because you can always get it back just by running npm i, since all your dependencies are listed in package.json**.
So what do we do to ignore it? That’s where the .gitignore file comes in!
Just create a .gitignore file and add this line:
/node_modulesNow, when you run:
git add -AGit will ignore your node_modules folder. No more clutter in your commits nice and clean.
Btw, you can also have nested .gitignore files in your project. Super handy for monorepos, where multiple projects live inside one repo. Each subproject can have its own .gitignore, keeping things organized.
Negation in .gitignore
Let’s say you want to ignore all .txt files, except one special file. You can do that using a negation (!) like this:
*.txt
!my_specific_text_file.txt
Boom. Everything ending in .txt gets ignored except my_specific_text_file.txt. Magic ;))
Also, if you want to leave comments in your .gitignore, just use a hashtag:
# Ignore node modules
/node_modules
Bonus Tip
At the end of this section, the instructor mentioned a cool command:
git commit --amendIf you ever make a commit with the wrong message (it happens to the best of us LOL), this command lets you edit it. Super useful when you just realized your commit message says fix stuff lol
YAYAYA We did it, guys! We officially wrapped up Chapter 1 of this course! Bada Boom, Bada Bang!
Fork

Now I wanna dive into forks.
So, fork isn’t actually a Git command it’s a GitHub feature. If you wanna contribute to an open-source project on GitHub, you’ll need to fork that project into your own GitHub account first.
Now, the big question is: What’s the difference between a fork and a clone?
When you fork a repository, GitHub basically makes a copy of the entire repo under your own account. From there, you can clone your fork locally, make changes, and then send a pull request back to the original repository so the maintainers can review and hopefully merge your updates :)))
But if you’re not planning to contribute and just wanna mess around with the code, you can simply clone the repo directly no need to fork it.
In short:
Forking is for contributing. Cloning is for experimenting.
Forks are one of the most useful tools when it comes to open-source collaboration on GitHub.
Reflog

Now it’s time to talk about Reflog in this section it’s such a useful command! Please be careful: it’s not pronounced re-flog, it’s pronounced Ref-Log. Yeah, it’s kinda like git log, but it stands for reference log.
Like other sections, the first question here is: What is the Reflog?
The answer is: the reference log (or reflog) records when the tips of branches and other references were updated.
Basically, when you create branches or make commits, Git tracks every step you take. And if you lose a commit don’t worry, DDDude Reflog can literally save your life!
You can see how your HEAD transitions using the Reflog and even recover lost commits if you need to.
You can use the command like this:
git reflogIf you accidentally delete something or lose some changes, you can use reflog to find the commit SHA and recover it with your code like this:
git reflog          # find the commit SHA at HEAD@{1}
git cat-file -p <sha>
git add -A
git commit -m "B: recovery"
git merge HEAD@{1}
And yeah, this is such a useful command it can totally rescue you when you mess up your project. (Don’t worry, every developer’s been there at least once!)
REFLOG IS HERE TO SAVE YOU!
Merge Conflicts

Alright, sometimes when you’re working with Git, you might think, Oh God, thanks this is everything I’ve ever wanted! But don’t dream too soon! Because when you work in a large team and other people are using Git on the same repo and project, you’ll eventually run into merge conflicts.
This happens because newer commits are based on older ones, and when two commits modify the same line in the same file, Git can’t automatically decide which one to keep. That’s when you get a merge conflict error. You’ll have to fix it manually by prioritizing the correct changes. Once you’ve resolved the conflicts, you’ll be able to continue and merge the code.
When conflicts happen usually as the result of a merge or rebase Git will prompt you to manually decide which changes to keep. It’s fine if the same line is modified across different commits in sequence (a parent–child relationship). The real problem arises when the same line is changed in two separate commits that aren’t related that way.
Btw, Git adds conflict markers in your files so you can easily find the conflicting parts. You’ll need to check them all, fix them manually, then stage the resolved files and push a new commit to merge everything cleanly.
Last but not least, there’s the git checkout command a super useful tool that can help you during merge conflicts.
For example, git checkout can apply individual changes using the --ours and --theirs flags:
--oursoverwrites the file with the changes from the branch you are currently on (the branch you’re merging into).--theirsoverwrites the file with the changes from the branch you are merging into your current branch.
You can use it like this:
git checkout --ours <file>
git checkout --theirs <file>
Rebase Conflicts
Alright, now let’s talk about Git rebase conflicts. We’ve already covered merge conflicts, but rebase conflicts tend to feel a bit scarier. That’s because rebasing actually rewrites your Git history. Some developers don’t like it and that’s fair since you can lose work if you mess something up, and recovery isn’t always simple.
But here’s the thing: if you really understand how git rebase works, you can make life a lot easier (and cleaner) for yourself and your teammates.
So, in the video, you can see that prime intentionally create some conflicts on a secondary branch. Then, when prime rebase that branch onto the target branch, Git “replays” our commits on top of it. That’s why during a rebase, the HEAD hunks in conflicts refer to our changes from the secondary branch the opposite of how merge conflicts work.
That’s a key detail to understand, my imaginary friend YAYAYA.
I’ve attached a weird little “prime visualization” so you can get slightly confused while figuring it out LOL

Now, when it comes to rebase conflicts:
- Ours actually refers to theirs,
- and Theirs refers to ours. Yeah, confusing so be careful.
If you’re using VS Code like me (no shame, it makes life easier btw N00b), you can handle all this right from the UI. But if you’re using nvim or another terminal-based editor, you’ll need these commands:
git checkout --theirs   # Accept incoming change
git checkout --ours     # Accept current change
Once you’ve fixed all the conflicts, run:
git rebase --continueNow, an important note: if you had commits on your secondary branch, those commits will disappear after the rebase. That’s because rebase reapplies your changes on top of the main branch rewriting history. So Git drops the old commits since they’ve effectively been replaced by new ones.
The Repeat Resolution Setup (aka Git Rerere)
One of the biggest complaints about rebasing is that you might have to resolve the same conflicts over and over especially on long-running feature branches, or when rebasing multiple branches onto main.
That’s where Rerere comes to the rescue.
git rerere (short for reuse recorded resolution) is a somewhat hidden but super handy feature. When enabled, it tells Git to remember how you resolved a conflict hunk. Then, if it sees the same conflict again in the future, Git can automatically apply the same resolution for you.
In other words: once enabled, rerere remembers how you fixed a conflict (during a rebase or a merge) and will reuse that resolution automatically the next time. Pretty neat, right?
Accidental Commits During a Rebase
Sometimes you might accidentally make a commit while in the middle of a rebase. Unlike during a merge, where that’s totally fine, in a rebase you should not create new commits manually.
If that happens, don’t panic you can undo it with:
git reset --soft HEAD~1The --soft flag keeps your changes but removes the accidental commit. Then you can just continue the rebase normally:
git rebase --continueAnd boom you’re back on track.
We’ve talked about the --soft flag before, so you should be familiar with how it works :)
Squash
Okay, okay, thanks for still tuning in to this story! So right now, we’re at the cool part of Git GIT SQUASH, DUDE! YEAH, BUDDY.

If you work at a company, you might notice some places prefer a single commit for the entire pull request, while others prefer keeping all the commits separate. Honestly, it’s kinda nonsense in my opinion. If you’re working on a single feature branch and pushing lots of changes, it totally makes sense to squash them into one commit. I personally like it because it’s easy to pull in, easy to pull out, and just cleaner overall.
So, how do we squash our commits? Sounds like a good question, right? The answer is… a little confusing, mate. You should use git rebaseYAYAYA because rebase lets you manipulate git history LOL. Basically, you remove all those commits and apply them as a single commit. Yeah, it’s like magic: MANIPULATING GIT HISTORY WITH REBASE :)))
Remember: rebase is all about replaying changes. When we rebase onto a specific commit (like HEAD~n), we’re telling Git to replay all the changes from the branch on top of that commit. Then, using the interactive flag, we can “squash” those changes so they become a single commit.
In that video, Prime wanted to squash commits j-l-k into a single commit. To do that, he ran:
git rebase -i HEAD~3This command lets him rebase the last three commits. Then, in the interactive screen, he changed the pick flag to s (squash) for the commits he wanted to combine. Boom three commits become one.
But a word of caution: be careful when squashing commits. Never squash commits on public branches like main or dev. Why? Because you’re rewriting the branch’s history, and that can cause serious headaches. Squashing is powerful but scary.
When you squash three commits into one, you’re actually removing the individual commit history. Sure, all the changes are still there, but the checkpoints for each change are gone. In the lessons we just covered, once commits are erased, you can’t go back to the individual points anymore though you can recover them using git reflog, so don’t panic.
Once you’ve squashed your commits into a single commit, you can push your changes, open a pull request, merge it into the public branch, and enjoy the clean history. Easy peasy pumpkin peasy
Stash

Alright guys, in this section we’re going to learn about the **git stash** command.
Sometimes, you start working on a feature, and then the team encounters a new bug on the platform that needs fixing ASAP. Now, you’re in the middle of your feature work. Some people, in this situation, might commit their changes, create a new branch, and start fixing the bug. Others might copy the whole project to a different location as a backup, remove their current changes, and start fixing the issue. But honestly, you shouldn’t have to be a Git ninja to handle this, my friend.
This is where **git stash** comes in. It saves your current changes both staged and unstaged into a safe place and reverts your working directory to match the HEAD commit (the last commit on your current branch).
You can stash your changes easily with:
git stash
So now we should deep dive into stash
Stash have few options but the most command developers use it is these command
git stash
git stash pop
git stash list
What’s pop?
Think of a stack in your mind — this is basically the philosophy of stash. When you stash your changes, you’re actually saving them on a stack. Stash works on a FILO (First In, Last Out) structure.
- When you stash something, your changes get stored on the stack.
- When you want to get them back, you use
**git stash pop**, which takes your last stashed changes, applies them to your working directory, and removes them from the stash stack

You can have multiple stashes, and even give them a custom message, like this:
git stash -m "your message"Personally, I rarely use stash messages because I usually have just one stash at a time. But if you keep a deep stash stack, messages can be really helpful. Usually, I stash, then pop it back out a few minutes or hours later.
Other stash tricks:
- If you want to apply a stash without removing it from the stack, use:
git stash apply- If you want to remove a stash without applying it, use:
git stash drop- If you have multiple stashes and want to apply, drop, or pop a specific stash, use:
git stash apply stash@{2}
git stash drop stash@{2}
git stash pop stash@{2}
Revert
Here we go now let’s talk about the **git revert command. git revert is basically the anti-commit command. It doesn’t actually remove your commits instead, it creates a new commit that undoes the changes from a previous one. It’s super useful when you want to keep your Git history clean without rewriting it**.
For example, if you’re working on a public branch, you shouldn’t use git resetbecause reset rewrites the Git history, and that can mess things up for others working on the same branch. That’s dangerous.
So, when you need to undo a commit on a public branch, **git revert** is the way to go. It safely creates a new commit that reverses the unwanted changes, without altering the existing history.
However, if you find yourself reverting a lot, it might be a sign that your development process isn’t too healthy maybe your CI/CD pipeline needs improvement, your tests aren’t solid, or your automation isn’t reliable. Production is the ultimate testing ground, sure but it shouldn’t be the only one.
Git revert vs git reset
**git reset --soft : Undo commits but keep the changes staged.
`git reset --hard** : Undo commits and discard all changes. git revert` : Create a new commit that undoes a previous one.
When to Use What
- If you’re working on your own private branch and you mess something up cool, go ahead and use
git reset. It’s great for cleaning up your local commit history. - But if you’re working on a shared branch (like
main,dev, or any branch your teammates touch), you should use**git revert**, becausegit resetrewrites history and yeah, that’s bad news for everyone else.
How to Revert a Commit
git revert <commit-hash>To find the commit hash, you can run:
git logWe’ve already gone through git log examples in this story, so you can check those out.
Git diff See What Changed
git diff helps you view the differences between commits or your working tree. Here are a few handy examples:
# Show changes between your working tree and the last commit
git diff
# Show the difference between the previous commit and the current state
git diff HEAD~1
# Show the changes between two specific commits
git diff COMMIT_HASH_1 COMMIT_HASH_2
Cherry Pick

Alright dawg , we’re in the lovey-dovey part of Git now: Cherry Pick
I love this one, okay? Let’s nail it.
So, when you wanna yoink a commit from another branch but you don’t wanna merge or rebase the whole thing because you only need that one sweet commit that’s when git cherry-pick comes in clutch.
git cherry-pick <commit-hash>It’s a super handy command, though you won’t use it all the time. Cherry-picking basically means you’re taking one specific change from a branch without dragging along the entire messy history.
Here’s where it really shines :
Let’s say you’ve got a branch called release, and your main development branch main has been cooking hundreds of commits, new features, experiments, chaos. Suddenly, boom a bug pops up in production.
You fix the bug on main, and now you just want that one fix on releasewithout pulling in all those untested or half-baked features from main.
That’s where cherry-picking saves the day. You can just grab that one commit (or a few, if you want), apply them to release, and ship the fix clean, safe, and simple.
But heads up before cherry-picking, make sure your working tree is clean (no uncommitted changes). Then find the commit you want using:
git logOnce you’ve got the commit hash, just run:
git cherry-pick <commit-hash>And boom, you’ve successfully plucked that sweet commit from one branch to another like a Git ninja
Bisect

Alright, now in my opinion, this command is one of the most interesting and coolest ones in Git because it’s basically a binary search built right into Git. Ladies and gentlemen, here we go… this is GIT BISECT. I love it, man.
Okay, okay, pull yourself together, Elliot don’t talk too much :)))
So, first of all, I’ve got to give a shoutout to Jadi Mirmirani I learned this command from his YouTube channel, and his content is honestly great.
You can subscribe to his channel here: JadiMirmirani

Alright, back to the story.
git bisect is one of those commands that might look intimidating at first you think it’s complicated or something for Git wizards but trust me, once you get it, it’s actually super useful and surprisingly simple.
So what does git bisect do?
It helps you find the exact commit that introduced a bug, and it does this really fast using a binary search technique.
Imagine you have a branch with a hundred commits. The latest commit has a bug, but 100 commits ago, everything was fine. Now, how do you find which commit introduced the bug?
You could go one by one through each commit, testing as you go but that would take forever.
Instead, Git treats your commits like an ordered list and uses binary search to narrow down the problem. That’s how git bisect works.
Here’s how you’d use it:
Let’s say your project suddenly has a weird issue, and you have no idea which commit caused it. Normally, checking each commit would take all day.
With git bisect, you start by telling Git about a good commit (where everything was fine) and a bad one (where the bug exists).
Git then checks the commit halfway between them. You test it, tell Git whether it’s good or bad, and it keeps narrowing the range by half each time until it finds the exact commit that caused the issue.
If you had 100 commits, you could find the culprit in about 10 checks. That’s the power of binary search O(log n)for the algorithm nerds, instead of O(n) for manually checking every commit.
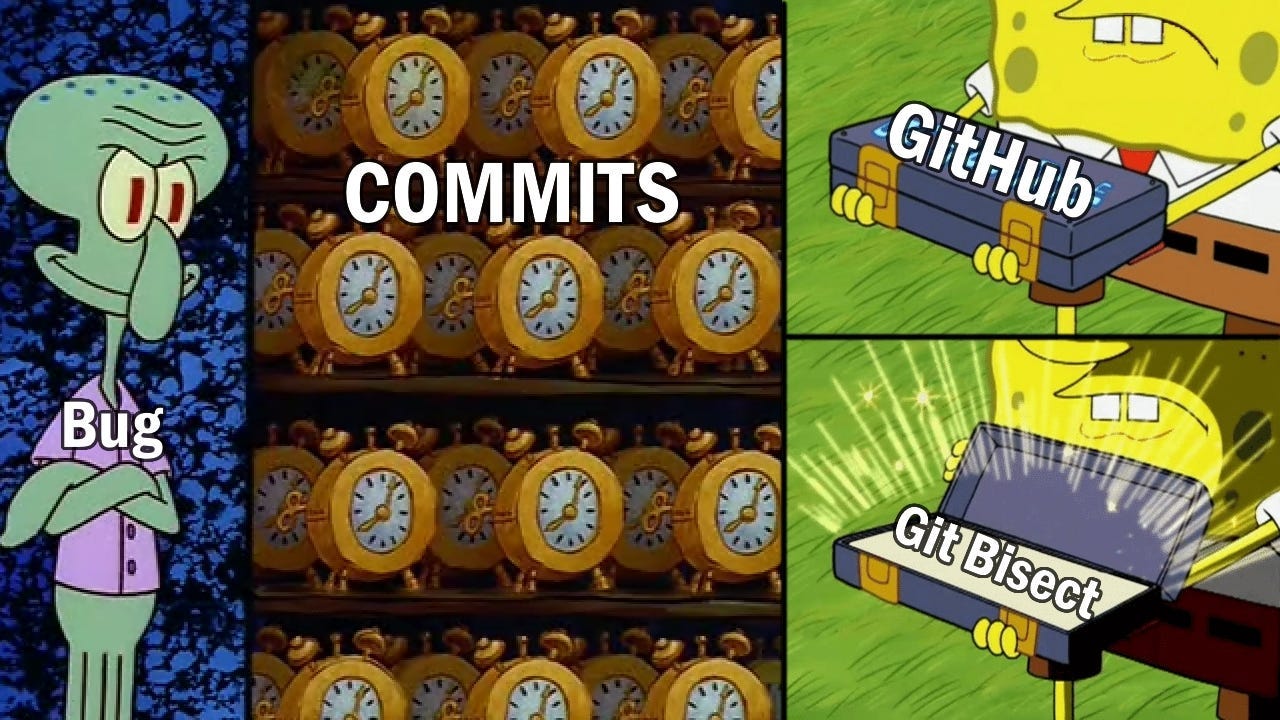
Here’s the basic flow:
git bisect startThen mark your commits like this:
git bisect bad   # the commit that has the bug
git bisect good <commit-hash>   # a commit you know is bug-free
From there, Git walks you through the process testing each commit and asking you whether it’s good or bad.
Sometimes bisecting can get annoying, especially if the testing process takes time. But the cool part is that you can automate it with a bash script Git will run the script for each step and figure it all out automatically. That’s the magic.
I really recommend watching Jadi’s video if you want to see the bisecting flow in action it’ll make the whole process click.

Tada! We’re done with this section. Thanks for tuning in.
Worktrees
Let’s Talk About Git Worktrees
What’s a Worktree?
A worktree (or working directory) is basically a folder on your filesystem where your git tracked code lives. Most of the time, it’s the root of your Git repo the same directory that contains your .git folder.
Your working tree includes:
- Tracked files files that Git already knows about.
- Untracked files files Git hasn’t seen before.
- Modified files tracked files that have changed since the last commit.
If you want to see all your existing worktrees, run:
git worktree listLinked Worktrees
We’ve already talked about cloning projects, creating new branches, and stashing changes for temporary storage. Now, let’s explore linked worktrees they behave similarly to those commands but in a cleaner, more efficient way.
So, what’s a linked worktree?
A linked worktree lets you work on different changes without losing your current progress. It’s super handy when you want to switch between two sets of changes without having to stash or constantly create new branches manually.
It’s also great when you want to keep a lightweight setup on your machine that’s still connected to the main repo (no need to clone it again).
How It Works
By default, you start with a single worktree your main worktree which holds the .git directory containing the entire state of your repo. That directory can get pretty heavy since it stores all your Git data.
If you wanted another copy of your repo, you’d normally run git clone or git init in a new directory but that duplicates all the data.
A linked worktree, on the other hand, is lightweight. Instead of containing a full .git folder, it only includes a small .git file that points to the main repo.
To create one, run:
git worktree add <path> [<branch>]The branch part is optional you can pass it if you want to create or checkout a specific branch.
Once it’s set up, your linked worktree behaves just like a normal Git repo. You can:
- Create new branches
- Switch between branches
- Delete branches
- Create tags
- Commit and push changes
The only limitation: You can’t work on a branch that’s already checked out in another worktree.
Where Worktrees Are Stored
Your main worktree keeps track of all linked worktrees in this directory:
.git/worktreesAnd just to be clear a linked worktree isn’t a separate repo or filesystem. It’s simply another view of the same repository. Any changes you make there are reflected in the main repo automatically. You can think of it as another branch that happens to live in its own directory.
Do You Still Need Stash?
Good question. Linked worktrees might make you feel like you’ll never need git stash again but stashing is still useful for quick, temporary saves or experimental tweaks.
Cleaning Up
If you ever want to remove a worktree, run:
git worktree remove <worktree-name>Then, to clean up any leftover references to deleted worktrees, prune them:
git worktree pruneTags

Alright at first thank you guys for still being with me on this story. This is the last section of our deep dive into Git with Prime and Boot.dev so yeah, thanks a lot! Let’s start diving into Git Tags, YAYAYAYA.
A tag is a name linked to a commit that doesn’t move between commits unlike a branch. Tags can be created and deleted, but not modified.
Now I wanna share some useful commands to help you understand how tags work better.
To check the list of your tags, you can use this command:
git tagYeah, easy peasy….
To create a tag on the current commit, you can use:
git tag -a "tag-name" -m "tag message"You can also skip the -a if you want:
git tag "tag-name" -m "tag message"Alright, bada boom bada bang … yeah, it’s easy too. A tag is basically an immutable pointer to a commit, which makes it pretty important.
For example, you can’t “check out” a tag like a branch because it’s immutable you can’t edit a tag.
You can also see tags when you run git log, which is kinda pretty to look at.
Typically, we use tags to point to versions that we’ve released to the public.
So based on that, we just add our version number with a tag cool, right? But hey, we’re engineers. We like to make things sound fancier with weird names like SemVer (LOL).
So what is SemVer? SemVer or Semantic Versioning is a naming convention for versioning software. You’ve probably seen it before it looks like this:

So major version increments when you changes for some kinda of big changes or breaking changes like React 16 -> React 18
And the minor increments when you changes for some add a new feature or backward compatible manner
And the patch increments when we make backward compatible bug fix
At the end of your set some versioning with tags you can push on git like that
git tag v1.0.0
git push --tags
Big thanks to Boot.dev, Lane, and The Primagen I always follow these guys and their team. They’re fun, fascinating, and seriously cool. I mentioned the YouTube video I watched with Prime, and I wrote this story after finishing the Git course with him on Boot.dev. I highly recommend checking out that video and hopping on Boot.dev to learn some cool stuff. It’s easy, engaging, and always fun.
Yeah, that’s it. Cheers, Elliot.

You can check out the Primeagen and Boot.dev YouTube channels via these links:
[embed]ThePrimeTime This is a place for all the things that are awesome on stream.www.youtube.com
Learn Git — https://www.boot.dev/learn/learn-git
Learn Git 2 — https://www.boot.dev/learn/learn-git-2
For fun listen this masterpiece for JOMAAA
메타데이터
- post_id
- 45eaf7c82628
- slug
- you-dunno-git-lol-45eaf7c82628
- url
- https://medium.com/@eliotag/you-dunno-git-lol-45eaf7c82628
- canonical_url
- https://medium.com/@eliotag/you-dunno-git-lol-45eaf7c82628
- author_url
- https://medium.com/@eliotag
- status
- ok
- fetched_at
- 2026-06-28 14:26:31




