How to use Touch and SD Card at the same time on an ESP32 Cheap Yellow Display (“CYD”)
The “ESP32 Cheap Yellow Device” (“CYD”) is a powerful device with a great advantage: a large 2.8-inches TFT Touch display, an SD Card…
How to use Touch and SD Card at the same time on an ESP32 Cheap Yellow Display (“CYD”)
The “ESP32 Cheap Yellow Device” (“CYD”) is a powerful device with a great advantage: a large 2.8-inches TFT Touch display, an SD Card Reader and an RGB LED are wired and ready to use. In the end, you just need to write some lines of code, and you are done! You can find a lot of examples showing e.g. a “virtual button control by touching on a rectangle on the display” or an “image viewer of files on the SD Card”, but there are no examples showing the touch controller active when reading or writing files from the SD Card.
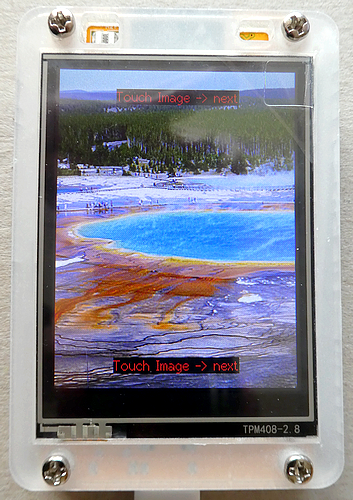
This tutorial is about finding working solutions for this nice and cheap display.
Reasons for the missing examples (Touch and SD Card)
The answer in short: “wrong board design”, visible in this pin mapping I found in the GitHub Repository “**ESP32_TFT_PIO” by hexeditor**, so all credits and rights go to him.

Image taken from https://github.com/hexeguitar/ESP32_TFT_PIO/blob/main/Pics/cyd_pinmapping.gif
There are three colored blocks that are important to our problem:
- Grey: GPIO pins used by the TFT Display
- Orange: GPIO pins used by the SD Card Reader
- Rose: GPIO pins used by the Touch controller
All of them are in common that these are pins that need to get controlled by an SPI bus. As there are “just” two SPI custom buses are available on an ESP32, we run into the problem that using the TFT display with Touch and SD Card means: one SPI bus is missing.
I’m saying “wrong” or “bad” board design, because usually you can share one bus with several devices, so on my own project setup for a TFT display with Touch controller I used just one SPI bus for the display and touch. The developers of the original CYD never explained why they set up the components that way, but now it is too late to complain about it.
Finding working solutions for this problem
As mentioned before, you will find a lot of “single” examples (just “display and touch” or “display and SD Card”) and much more complaints and forum entries when people are trying to use all three components in one sketch. In the end, either the touch is working and the SD Card part does not find any files on the SD Card, or the touch is not working. I found just 2 sources that are showing ways to solve the problem (beneath tips for re-wiring the terminals on the CYD PCB).
The probably best source I found was a post in the arduino.cc forum (**Question about SPI bus assignment for TFT_eSPI, touch screen, and SD card for CYD) by [embeddedkiddie](https://forum.arduino.cc/u/embeddedkiddie). He found solutions on himself and additional help by the second forum post in the arduino.cc forum ([ESP32 touchscreen does not work,,,,](https://forum.arduino.cc/t/esp32-touchscreen-does-not-work/1367011)), answered by [horace](https://forum.arduino.cc/u/horace).**
There are three solutions available, and there are pros and cons for each solution, but in the end you can really use all three components.
Solution 1: use the LovyanGFX library instead of TFT_eSPI
Although the TFT_eSPI was the DE-fact-standard for all ESP32 projects with TFT displays attached, in the last two years this library looks like abandoned to a lot of users. There are no new versions, especially for the new ESP32 boards version 3.x that is necessary when working with newer microcontrollers like ESP32-C6 or ESP32-H2. I recently published a tutorial, showing that it is not that hard to move your TFT_eSPI to LovyanGFX (“[How to use the LovyanGFX library instead of the TFT_eSPI library in your ESP32 project](http://How to use the LovyanGFX library instead of the TFT_eSPI library in your ESP32 project)”).
The technical setup is easy, just change the SPI Host for the Touch controller to “-1”:
section touch:
{ // Configure touch screen control (delete if not needed)
  ...
// For SPI connection
cfg.spi_host = -1;
Pros
- As you can clearly define each setting of the display including touch, it is possible to virtually map the display and touch pins to the same SPI bus, although they are physically on different pins. Sounds crazy, but is working.
- All display settings like display orientation (rotation) and touch calibrations will work like before
- The LovyanGFX library supports an “Autodetect” setting; so you don’t need to find technical data as they get inserted automatically by the sketch
- Some projects require the reading or export of the display content to e.g. a file — this is still possible with the new library
- A nice side effect is: the LovyanGFX library is faster than the TFT_eSPI library.
Cons
- You need to change the display library. As explained in my tutorial, this can be done in minutes in most cases.
- The touch part need to get changed (especially the part in the loop that detects a touch)
I provide an example sketch with this solution in my GitHub Repository (“Esp32_CYD_LovyanGFX_SD_with_Touch”).

Solution 2: Use TFT_eSPI together with a “Bit banging” Touch controller library
As we know, the ESP32 allows for 2 custom SPI buses, but for the touch controller there is another communication type possible, and the data is provided by a “Bit Banging” on the display’s SPI lines. You can’t use the ‘XPT2046_Touchscreen’ library by Paul Stoffregen, but have to use a library like ‘**XPT2046_Bitbang_Slim**’. For more details about this procedure, see the forum reply by embedded-kiddie.
Pros
- You can use your ‘old’ and ‘known’ TFT_eSPI library
- Some projects require the reading or export of the display content to e.g. a file — this is still possible with the new library
Cons
- The biggest disadvantage is the missing of a rotation method for the touch surface. Of course, you can use self written wrappers for that, but I don’t like that procedure
- The library can’t filter out outliers that may cause unexpected results.
For that reasons, I do not provide an example, as I don’t think this way is useful in general.
Solution 3: Use TFT_eSPI together with the “XPT2046 Touchscreen” Touch controller library by Paul Stoffregen
At this point, you may think: wait, I’m already used this combination, and it did not work. You’re right, because you made your homework and did the correct settings in the “User Settings” file of TFT_eSPI.
Your TFT_eSPI settings file will probably look like this, and these are the correct GPIO pin settings:
#define TFT_MISO 12
#define TFT_MOSI 13
#define TFT_SCLK 14
#define TFT_CS   15  // Chip select control pin
#define TFT_DC    2  // Data Command control pin
#define TFT_RST  -1  // Set TFT_RST to -1 if display RESET is connected to ESP32 board RST

#define TOUCH_CS 33  // Chip select pin (T_CS) of touch screen
What does happen when we are commenting the TFT_MISO setting ?
// #define TFT_MISO 12 // don't define this pin when using Touch and SD Card on the CYD
#define TFT_MOSI 13
#define TFT_SCLK 14
#define TFT_CS   15  // Chip select control pin
#define TFT_DC    2  // Data Command control pin
#define TFT_RST  -1  // Set TFT_RST to -1 if display RESET is connected to ESP32 board RST

#define TOUCH_CS 33  // Chip select pin (T_CS) of touch screen
You may be surprised, but the display now has an active touch controller and the images are served from the SD Card. I’m using an initialization method for the SD Card Reader that was provided by embedded-kiddie in his GitHub Repository.
Pros
- You can use your ‘old’ and ‘known’ TFT_eSPI library
- You can use your ‘old’ and ‘known’ Touchscreen library
Cons
- If you need to read the content of the display (e.g. for taking screenshots) this solution is a “No-Go”, as we removed the TFT_MISO pin from the TFT Display library that is responsible for the reading procedure.
I provide an example sketch with this solution in my GitHub Repository (“Esp32CYDTFT_eSPI_SD_with_Touch”).
Summary
Good news for all fans of the ESP32 Cheap Yellow Display: you now can use the full features of the device: using the display together with a touch controller and SD Card Reader, and that is possible without any (re-) wiring of any connections on the PCB.
Source code of the apps
You find the complete code of the apps, the modified TFT_eSPI library and the device-display settings file in my GitHub repositories.
Happy coding !
메타데이터
- post_id
- 45fa55d01ffe
- slug
- how-to-use-touch-and-sd-card-at-the-same-time-on-an-esp32-cheap-yellow-display-cyd-45fa55d01ffe
- url
- https://medium.com/@androidcrypto/how-to-use-touch-and-sd-card-at-the-same-time-on-an-esp32-cheap-yellow-display-cyd-45fa55d01ffe
- canonical_url
- https://medium.com/@androidcrypto/how-to-use-touch-and-sd-card-at-the-same-time-on-an-esp32-cheap-yellow-display-cyd-45fa55d01ffe
- author_url
- https://medium.com/@androidcrypto
- status
- ok
- fetched_at
- 2026-07-11 11:40:08