Turn Your Ordinary Wifi Signals into Invisible Motion Detector With Golang
Ever wondered if your device’s WiFi adapter could do more than just connect to networks? It can actually pick up nearby signals and help…
Turn Your Ordinary Wifi Signals into Invisible Motion Detector With Golang
Ever wondered if your device’s WiFi adapter could do more than just connect to networks? It can actually pick up nearby signals and help detect real time presence. Here’s a complete guide to how it works and how you can build it yourself.
So our goal is to monitor room activity using only WiFi signal information sampled over time. In order to do that we reads RSSI (Received Signal Strength Indicator), stores values in a sliding window, computes variance, and maps that variance to one of three states: EMPTY, STILL & MOVING.
This is a lightweight “invisible sensing” approach that does not use cameras or wearable devices.
RSSI Basics
RSSI is a measure of received radio signal strength. In many systems it is represented in dBm (often negative values), though some platform tools may return percentages.
In indoor environments, RSSI fluctuates due to Multipath reflections (signal bouncing off walls/furniture), Human body absorption and obstruction, Device and channel noise, Environmental changes.
Human movement perturbs propagation paths, often increasing short-term signal variability.
Why Use Variance?

Low variance: signal is stable, likely low or no activity. Medium variance: mild fluctuations, likely still person or slight movement. High variance: larger dynamics, likely active movement.
Step 1 : Define Data Types for Sensor Data & Presence State
We begin by defining simple data structures to represent incoming Wi-Fi signal data and the detected presence state.
type SensorData struct {
    Timestamp int64   `json:"timestamp"` // Unix timestamp of the reading
    RSSI      int     `json:"rssi"`      // Signal strength indicator
    Variance  float64 `json:"variance"`  // Signal variance over the window
}

type PresenceState struct {
    State     string  `json:"state"`     // e.g., "MOVING" or "STILL"
    Variance  float64 `json:"variance"`  // Variance used for detection
    Timestamp int64   `json:"timestamp"` // Time of detection
}
Step 2: Read RSSI from an OS-specific command
To make the system work across different platforms, we use Go build tags and implement a separate GetRSSI() function for each operating system. Each version runs a native command and extracts the signal strength.
macOS Implementation:
//go:build darwin

//import necessary packages

func GetRSSI() (int, error) {
 output, err := exec.Command("sudo", "wdutil", "info").Output()
 if err != nil {
  return 0, err
 }

 for _, line := range strings.Split(string(output), "\n") {
  if strings.Contains(line, "RSSI") {
   parts := strings.Fields(line)
   for i := len(parts) - 1; i >= 0; i-- {
    token := strings.TrimSuffix(parts[i], ":")
    rssi, err := strconv.Atoi(token)
    if err == nil {
     return rssi, nil
    }
   }
  }
 }

 return 0, nil
}
Linux Implementation:
//go:build linux

//import necessary packages

func GetRSSI() (int, error) {
 out, err := exec.Command("bash", "-c", "nmcli -t -f IN-USE,SIGNAL dev wifi | grep '^*' | cut -d: -f2").Output()
 if err != nil {
  return 0, err
 }

 rssi, err := strconv.Atoi(strings.TrimSpace(string(out)))
 if err != nil {
  return 0, err
 }

 return rssi, nil
}
Windows Implementation:
//go:build windows

//import necessary packages

func GetRSSI() (int, error) {
 output, err := exec.Command("netsh", "wlan", "show", "interfaces").Output()
 if err != nil {
  return 0, err
 }

 for _, line := range strings.Split(string(output), "\n") {
  if strings.Contains(line, "Signal") {
   parts := strings.Fields(line)
   if len(parts) >= 2 {
    rssiStr := strings.TrimSuffix(parts[len(parts)-1], "%")
    rssi, err := strconv.Atoi(rssiStr)
    if err != nil {
     return 0, err
    }

    return rssi, nil
   }
  }
 }

 return 0, nil
}
Step 3: Append RSSI to Rolling Buffer (rssiWindow)
Once we start receiving RSSI values, we need to store them in a fixed-size rolling window. This allows us to analyze short-term signal behavior instead of relying on a single reading.
var rssiWindow []int

func getRSSI() (int, error) {
 return sensors.GetRSSI()
}

func addToWindow(val int) {
 if len(rssiWindow) >= windowSize {
  rssiWindow = rssiWindow[1:]
 }
 rssiWindow = append(rssiWindow, val)
}
This sliding window ensures that only the most recent readings are kept. It forms the basis for calculating metrics like variance, which helps detect movement or presence changes.
Step 4: Handle Window Size and Compute Variance
Before computing variance, we need enough data points. If the rolling window is not yet filled, the result would be unreliable. In that case, we simply return 0.
func mean() float64 {
 if len(rssiWindow) == 0 {
  return 0
 }

 sum := 0
 for _, v := range rssiWindow {
  sum += v
 }

 return float64(sum) / float64(len(rssiWindow))
}

func variance() float64 {
 if len(rssiWindow) < windowSize {
  return 0
 }

 m := mean()
 var sum float64
 for _, v := range rssiWindow {
  diff := float64(v) - m
  sum += diff * diff
 }

 return sum / float64(len(rssiWindow))
}
Step 5: Convert Variance to a Presence State
With variance calculated, we can map it to a simple presence state using thresholds. Higher variance usually indicates movement or activity, while lower variance suggests a stable environment.
func detectState(varVal float64) string {
 if varVal > 2.0 {
  return "MOVING"
 } else if varVal > 1.0 {
  return "STILL"
 }
 return "EMPTY"
}
Step 6: Main Loop (Real-Time Detection and Dashboard)
The main loop continuously reads RSSI values, updates the rolling window, calculates variance, detects presence, and renders the terminal dashboard.
func main() {
    for {
        // Read RSSI from the system
        rssi, err := getRSSI()
        if err != nil {
            fmt.Println("Error:", err)
            time.Sleep(time.Second)
            continue
        }

        // Add RSSI to rolling window
        addToWindow(rssi)

        // Compute variance and determine presence
        varVal := variance()
        state := detectState(varVal)

        // Clear the terminal screen
        clearScreen()

        // Display header and stats with colors
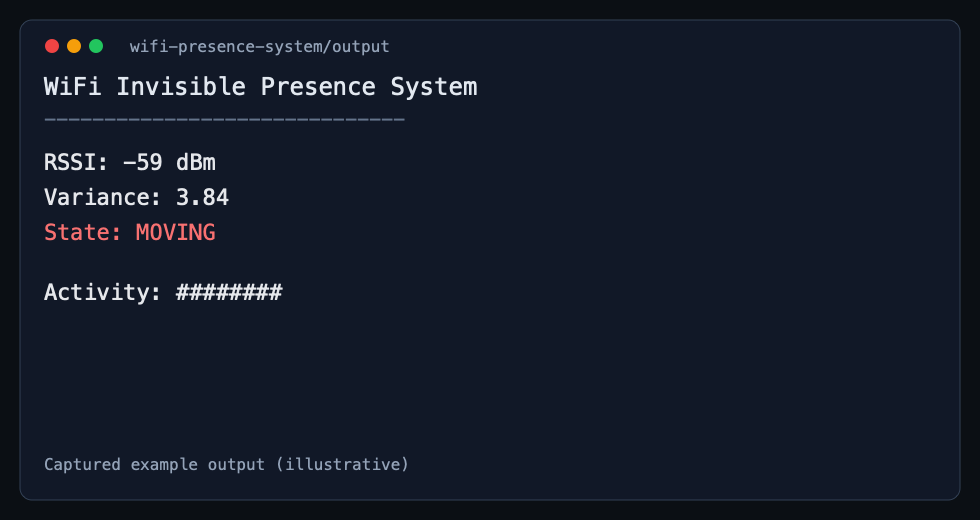
        fmt.Printf("%s%sWiFi Invisible Presence System%s\n", colorBold, colorCyan, colorReset)
        fmt.Printf("%s------------------------------%s\n", colorCyan, colorReset)
        fmt.Printf("%sRSSI:%s %s%d dBm%s\n", colorBlue, colorReset, colorGreen, rssi, colorReset)
        fmt.Printf("%sVariance:%s %.2f\n", colorBlue, colorReset, varVal)
        fmt.Printf("%sState:%s %s%s%s\n", colorBlue, colorReset, colorForState(state), state, colorReset)
        fmt.Println()

        // Draw live activity bar proportional to variance
        bars := int(varVal * 2)
        fmt.Printf("%sActivity:%s ", colorBlue, colorReset)
        for i := 0; i < bars; i++ {
            fmt.Printf("%s█%s", colorForState(state), colorReset)
        }
        fmt.Println()

        // Short delay before next update
        time.Sleep(5 * time.Millisecond)
    }
}
Output Samples:


This system is ideal as a starting point for real-time occupancy monitoring, smart home experiments, or IoT prototypes. Future improvements could include signal normalization, smoothing, hysteresis, and structured JSON output to a live dashboard.
You can explore the full code and contribute at: https://github.com/YasiruLaki/wifi-presence-system
Cheers!
메타데이터
- post_id
- 4e1bc0851add
- slug
- turn-your-ordinary-wifi-signals-into-invisible-motion-detector-with-golang-4e1bc0851add
- url
- https://medium.com/@yasirulaki04/turn-your-ordinary-wifi-signals-into-invisible-motion-detector-with-golang-4e1bc0851add
- canonical_url
- https://medium.com/@yasirulaki04/turn-your-ordinary-wifi-signals-into-invisible-motion-detector-with-golang-4e1bc0851add
- author_url
- https://medium.com/@yasirulaki04
- status
- ok
- fetched_at
- 2026-06-21 07:44:09