Automating PFX Certificate Installation with Advanced Installer and PowerShell
For quite some time now, I’ve been using Advanced Installer in my professional work, and it has proven to be an invaluable tool. It offers…
Automating PFX Certificate Installation with Advanced Installer and PowerShell
For quite some time now, I’ve been using Advanced Installer in my professional work, and it has proven to be an invaluable tool. It offers incredible flexibility and has consistently met every client requirement I’ve encountered. Whether I’m packaging software for distribution or deploying executables and PowerShell scripts to client machines, Advanced Installer has been a reliable solution.
Advanced Installer is a powerful Windows Installer packaging tool that has been in the industry for over 20 years. It simplifies the process of creating installation packages, making it easier for developers and IT professionals to deploy software and scripts across multiple systems. Its user-friendly interface and robust features make it a go-to tool for anyone involved in software deployment.
I’d like to start by creating a new MSI Installer project.
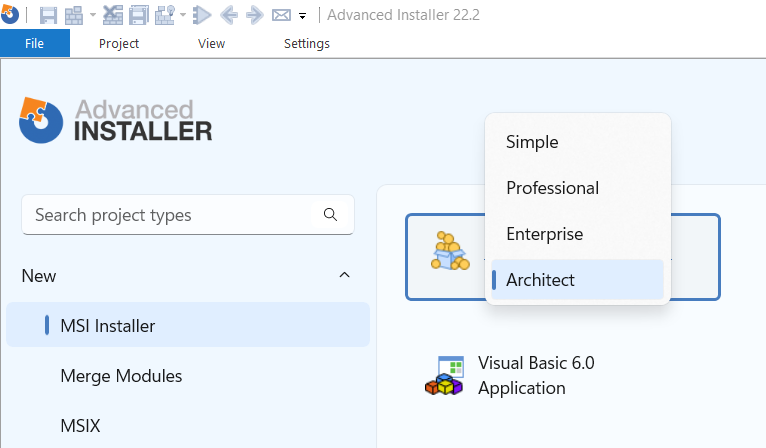
I want to avoid registering the product with Windows Installer, ensuring it doesn’t appear in the “Add or Remove Programs” list.

And administrator privileges will be required to execute the installation process effectively.

Step 1: Preparing the User Interface
Before diving into the script, let’s set up the user interface for collecting sensitive information like the PFX password. For this, we’ll use a dialog box with an EditBox control.
How to Add an EditBox for PFX Password Input
- Navigate to the Dialogs section under the Interface tab.
- Create a new dialog and add an EditBox control.
- Name the EditBox
PFX_PASSWORDand assign it a PropertyName ofPFX_PASSWORD. - Set the Password Attribute to
Trueto mask the input, ensuring the password isn’t visible as plain text.
This step ensures that users can securely provide the PFX password during installation without exposing it.

Step 2: Writing the PowerShell Script
Next, we’ll write a PowerShell script (script.ps1) to handle the certificate import. This script will:
- Validate the provided password.
- Check if the PFX file exists.
- Import the certificate into the appropriate certificate store.
Here’s the script:
param (
    [string]$PfxPassword
 )

# Load System.Windows.Forms for GUI message boxes
try {
    Add-Type -AssemblyName System.Windows.Forms
} catch {
    Write-Host "Error: Unable to load System.Windows.Forms. GUI error messages will not be displayed."
}

# Validate inputs
if ([string]::IsNullOrWhiteSpace($PfxPassword)) {
    $errorMessage = "Error: PFX password cannot be empty. Please provide a valid password."
    Write-Host $errorMessage
    [System.Windows.Forms.MessageBox]::Show($errorMessage, "Error", 0, 16)  # 16 = Critical Error Icon
    exit 2
}

# Replace with the location of your certificate
$CertPath = "C:\certificate.pfx"

# Check if the PFX certificate file exists
if (-Not (Test-Path $CertPath)) {
    $errorMessage = "Error: Certificate file not found at '$CertPath'. Please ensure the file exists and the path is correct."
    Write-Host $errorMessage
    [System.Windows.Forms.MessageBox]::Show($errorMessage, "Error", 0, 16)  # 16 = Critical Error Icon
    exit 3
}

Write-Host "File found at $CertPath"

# Convert password to secure string
try {
    $securePassword = ConvertTo-SecureString $PfxPassword -AsPlainText -Force
    Write-Host "Password converted successfully."
} catch {
    $errorMessage = "Error: Failed to convert the password to a secure string. Please check the password format."
    Write-Host $errorMessage
    [System.Windows.Forms.MessageBox]::Show($errorMessage, "Error", 0, 16)  # 16 = Critical Error Icon
    exit 5
}

# Import the PFX certificate into the Personal store
try {
    Write-Host "Attempting to import the PFX certificate..."
    Import-PfxCertificate -FilePath $CertPath -CertStoreLocation Cert:\CurrentUser\My -Password $securePassword -Verbose
    Write-Host "PFX certificate imported successfully."
    [System.Windows.Forms.MessageBox]::Show("PFX certificate imported successfully.", "Success", 0, 64)  # 64 = Information Icon
} catch {
    $errorMessage = "Error during PFX certificate import: $($_.Exception.Message)"
    Write-Host $errorMessage
    [System.Windows.Forms.MessageBox]::Show($errorMessage, "Error", 0, 16)  # 16 = Critical Error Icon
    exit 6
}
Step 3: Adding a Custom Action to Run the Script
Now that the script is ready, we need to integrate it into the installer using a Custom Action .
Steps to Add a Custom Action
- In your installer project, navigate to the Custom Actions section.
- Create a new custom action and select the option to ‘Run PowerShell Script file’.
- Pass the
PFX_PASSWORDproperty value to the script as a parameter. - Attach the
script.ps1.

By doing this, the installer will execute the script with the user-provided password, ensuring the certificate is imported seamlessly.
메타데이터
- post_id
- 4e7cee280a54
- slug
- automating-pfx-certificate-installation-with-advanced-installer-and-powershell-4e7cee280a54
- url
- https://medium.com/@davidsilwal/automating-pfx-certificate-installation-with-advanced-installer-and-powershell-4e7cee280a54
- canonical_url
- https://medium.com/@davidsilwal/automating-pfx-certificate-installation-with-advanced-installer-and-powershell-4e7cee280a54
- author_url
- https://medium.com/@davidsilwal
- status
- ok
- fetched_at
- 2026-07-21 02:56:48


