Installing Gentoo: Why Did I Do This to Myself?
I assume that most readers of this article have installed an operating system like Windows on a computer before. If not, you’ve probably…

Installing Gentoo: Why Did I Do This to Myself?
I assume that most readers of this article have installed an operating system like Windows on a computer before. If not, you’ve probably installed .exe programs where you simple click Next, Next, Finish. In many ways, a Windows installation can be described like that very straightforward and guided. In this article I will show you the ropes on how to install Gentoo step by step.
We have this activity in our networking class in which can test you on how well can you configure an operating system from scratch. Our professor just gave us some exercises like installing kali linux and ubuntu which were fairly straightforward. However, the real challenge came when we are tasked with installing Gentoo. This activity is quite difficult to be honest and pushed my patience to the limit while scanning through the documentation.
Note: that I will use # to comment out of the descriptions of each commands that I used
We are tasked to download the minimal installation CD under this site [https://www.gentoo.org/downloads/](https://www.gentoo.org/downloads/) and plug it in and install inside our virtual-machine, for my case I grabbed the amd64 version & use vmware as my virtual machine.
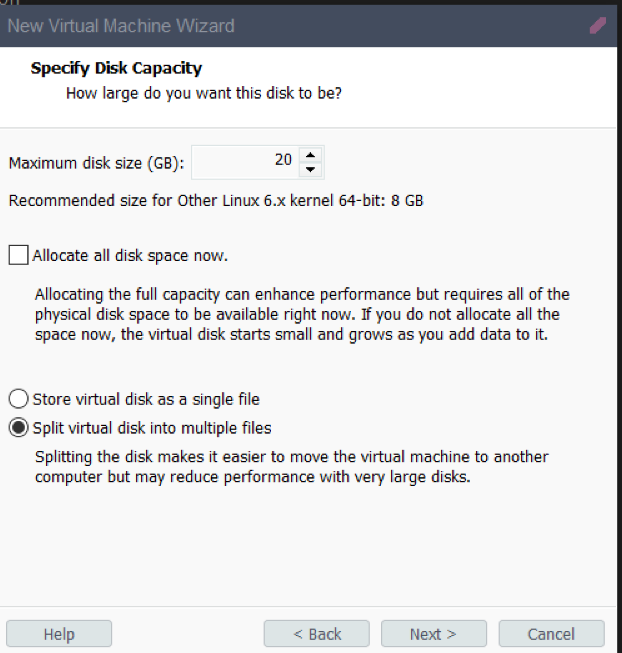
Before booting the virtual machine, check if the boot configuration was set to UEFI because I will exclusively use the openrc version of the init system.
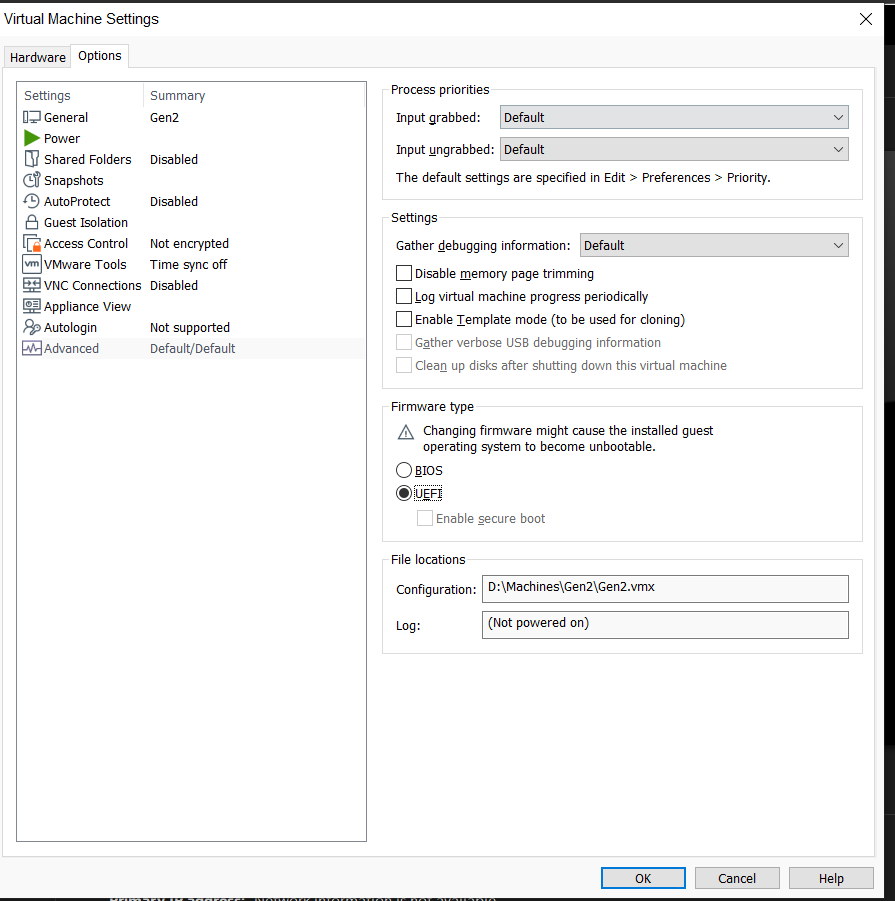
Set your ram at least 8gb as this will help with the package installation
The first thing to check if you have an access to the internet so that you can install gentoo packages from it’s server
ping -c 3 gentoo.orgI also configure the dns to connect to the cloudflare dns by editing /etc/resolv.conf
nano /etc/resolve.conf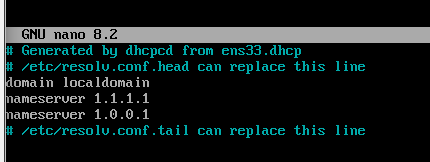
Check the available disk where you will do the partitioning using fdisk command using lsblk
lsblk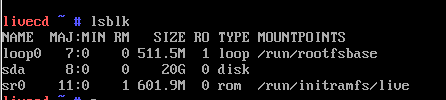
In my case the 20G I defined in the virtual machine is the sda, now we will partition it using the fdisk command to create a boot, root & swap partitions. I will use the EFI system partition;
alternatively, you can use MBR if you have older machines but don’t forget to set your boot settings to BIOS if you are using this option.
Create a boot partition and set the storage to 1GB, as it usually doesn’t take up much space.
fdisk /dev/sda
    g  #set to gpt disk label
    n  #create a new partition
        1 #set the parition number to 1
        <null> #automatically set the default sector available for writing
        +1G #set the space to 1G
Assume that we are still in process of fdisk, next is create the swap partition. Mostly linux system utilize swap parition as it is essential for managing system memory efficiently, preventing crashes in memory overload scenarios.
n #create a new partition
        2 #set the partition number to 2
        <null> #automatically set the default sector avaialable for writing
        +4G #set the space to 4G
Assume that we are still in process of fdisk, lastly create the root partition, Root partition is like the C: drive of windows. Here we will also store the stage3 openrc file temporarily as it will take up approximately 700MB.
n #create a new partition
    3 #set the partition number to 3
    <null> #automatically set the default sector available for writing
    <null> #use all of the remaining spaces available for writing

p # to show the changes you made
Assume that we are still in process of fdisk, now lets set the created partitions to their corresponding file types. After configuring all of the paritions use w command to apply all changes.
Note: if you exit the fdisk command and did not execute the write command (w) most of your progress will be lost
t #set the partition type
    1 #select the boot partition
    1 #set it to EFI system
t
    2 #select the swap partition
    19 #set it to Linux swap
t
    3 #select the root partition
    23 #set it to Linux root (x86-64)

w     #confirm all of the changes done
After syncing the disk, format the each partitions next
mkfs.vfat -F 32 /dev/sda1 #set the boot partition format as FAT32
mkfs.xfs /dev/sda3 #set the root partition format as XFS
mkswap /dev/sda2 #initialize the swap partition
swapon /dev/sda2 #activate the swap parition
Next is to mount the root partition
mkdir --parents /mnt/gentoo #create a folder called gentoo inside mount folder

mount /dev/sda3 /mnt/gentoo #mount the folder into the root parition that you created

mkdir --parents /mnt/gentoo/efi #create a folder under gentoo called efi for the boot partition
set the date using the date command
date 021704002025 #<mm><dd><time><year>before downloading, make sure that we are inside /mnt/gentoo the download the stage3 archives in this link. Pick the openrc with desktop profile Note: Make sure that you picked the dekstop profile or else your gentoo environment will just boot in CLI
cd mnt/gentoo

links https://www.gentoo.org/downloads/

Once downloaded extract the files
tar xpvf stage3-*.tar.xz --xattrs-include='*.*' --numeric-owner -C /mnt/gentoo #extract filesedit portage, note that you should also take note of your cpu model here msinfo32
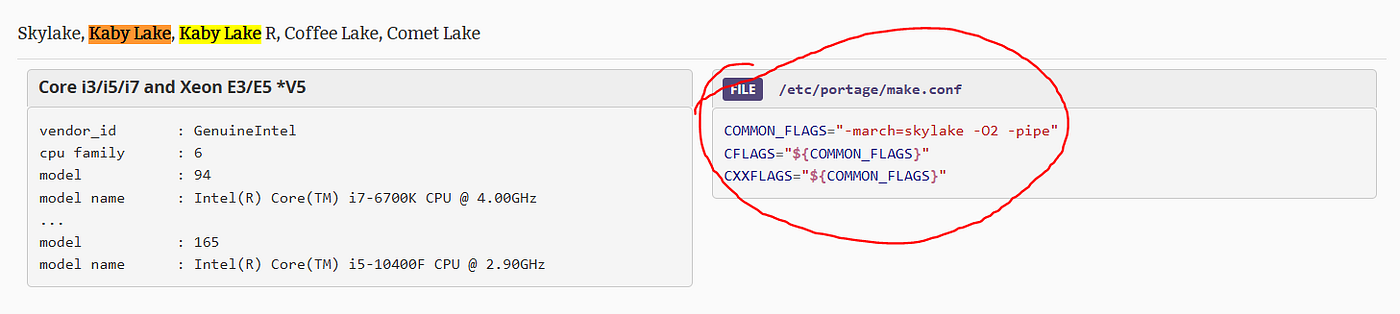
ls #check if the files are already extractedBefore editing the make.conf file check your cpu architecture and define it into the commonflags section. As for my case, I run intel 17–7700HQ which runs in kabylake
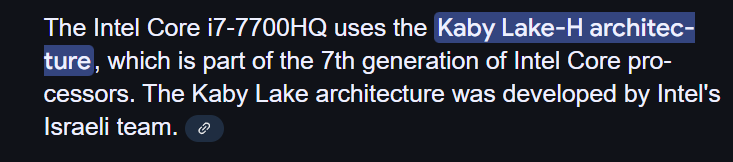
check the flags you need to define in here https://wiki.gentoo.org/wiki/Safe_CFLAGS
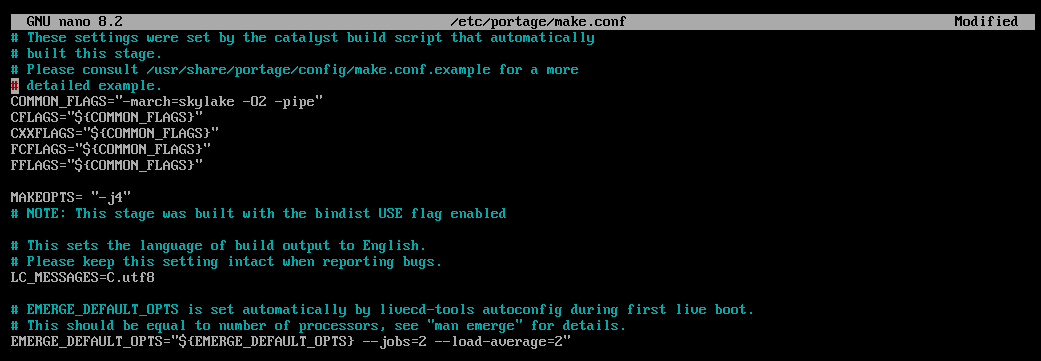
nano /mnt/gentoo/etc/portage/make.conf #edit portagedefine your cpu archtecture and add a line for MAKEOPTS to utilize the cpu cores. For my case I used -march=skylake for my cpu architecture MAKEOPTS = j4 as I have only 8 gb of ram defined ACCEPT_LICENSE =”*” to accept all license available for the package installation
Create a symbolic link of the dns settings before creating a new environment for chroot
cp --dereference /etc/resolv.conf /mnt/gentoo/etc/Proceed to mounting the necessary filesystems and enter the chroot environment
mount --types proc /proc /mnt/gentoo/proc
mount --rbind /sys /mnt/gentoo/sys
mount --make-rslave /mnt/gentoo/sys
mount --rbind /dev /mnt/gentoo/dev
mount --make-rslave /mnt/gentoo/dev
mount --bind /run /mnt/gentoo/run
mount --make-slave /mnt/gentoo/run
chroot /mnt/gentoo /bin/bash
source /etc/profile
export PS1="(chroot) ${PS1}"
ping -c 3 gentoo.org #check for internet connectioncreate an efi folder and mount it onto your boot partition
mkdir efi
mount /dev/sda1 /efi #mount the boot drive in efi folder

emerge-webrsync  #install a snapshot of gentoo ebuild repository
Select a mirror to download packages much faster
emerge -av mirrorselect #download mirrorselect

mirrorselect -i -o >> /etc/portage/make.conf #use mirrorselect
Select the FTP and HTTP servers from Tera-Byte, as it is the closest option for my case.

Now we will select a profile for our gentoo configuration
eselect profile list | less #check profiles available press q to quit

eselect profile set 25 #I want to install the gnome version so that it looks like ubuntu and more lightweight than kde plasma
Enable some of the use flags needed by portage USE=”-gtk -gnome qt5 kde dvd alsa cdr”
nano /etc/portage/make.conf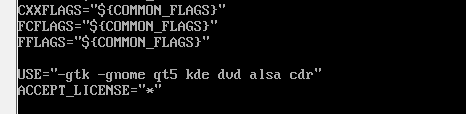
Install other cpu flags using cpuid2cpuflags
emerge --ask --oneshot app-portage/cpuid2cpuflags #install the package

cpuid2cpuflags #check if the installation did go through

`echo "*/* $(cpuid2cpuflags)" > /etc/portage/package.use/00cpu-flags` #create a configuration file under package.use
check if the file had been created

Sync with the correct timezone
ln -sf ../usr/share/zoneinfo/Canada/Mountain /etc/localtimeConfigure Locale gen
nano /etc/locale.genUncomment en_US.UTF-8 UTF-8
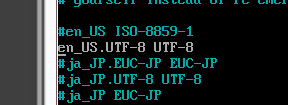
local-gen #generate locale

eselect locale list #list all locale available

eselect locale set 4 #select local en_US.uf8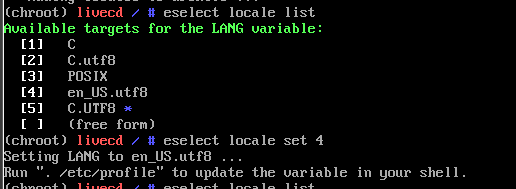
sync your changes in locale to the system
env-update && source /etc/profile && export PS1="(chroot) ${PS1}"Installing the kernel
emerge -av sys-kernel/gentoo-sources

emerge -av sys-kernel/linux-firmware
emerge -av sys-kernel/installkernel dracut

emerge -av sys-kernel/gentoo-kernel-bin #encountered error in this portion refer below
Fixing masked packages
For my use case, emerge -av sys-kernel/gentoo-kernel-bin is not working as dev-lang/rust-bin1.83.0 is being package masked so I will run the ff commands
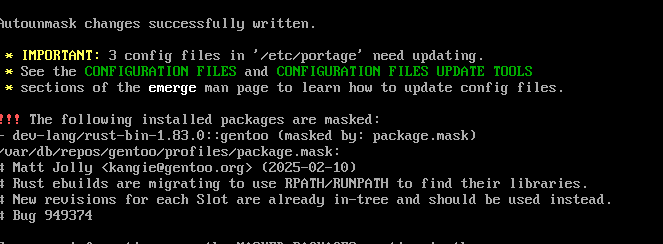
echo "dev-lang/rust-bin" | sudo tee -a /etc/portage/package.unmask #unmask rust-bin package for installation

emerge -av sys-kernel/gentoo-kernel-bin #encountered an error like config files under /etc/portage needs updating

etc-update #update the make.conf files under portage

 -3 #inside prompt apply changes

emerge -av sys-kernel/gentoo-kernel-bin #installation packages worked as all of the dependencies needed are overwritten
So basically I ran emerge -av sys-kernel/gentoo-kernel-bin command for three times just to debug and fix to install that package
Select the linux gentoo distribution, always select the linux-x.x.x.x-gentoo.dist
eselect kernel list #display available distribution that you installed earlier

eselect kernel set 2 #chose the gentoo.dist version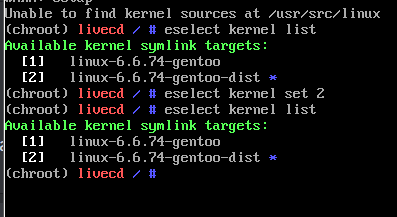
Create a symbolic link
ls -l /usr/src/linuxoutput should be like this one.

Install the kernel drivers for grub
emerge -av sys-kernel/installkernel grubAll of the installed files are in /boot partition

Edit the fstab file
nano /etc/fstab #configure fstab for later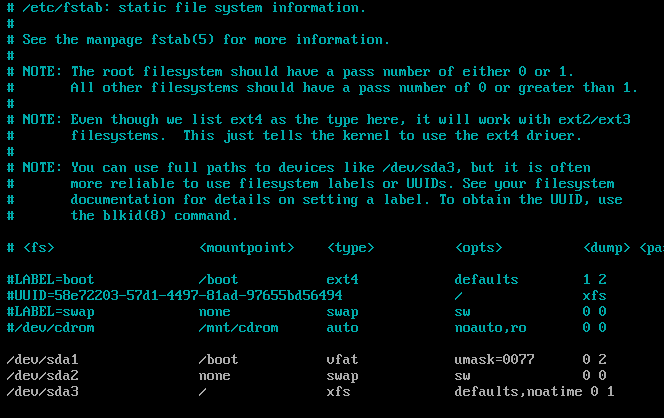
Create hostname
echo zaakceptowac > /etc/hostnameSet the dhcp network
emerge --ask net-misc/dhcpcd

rc-update add dhcpcd default

emerge --ask --noreplace net-misc/netifrc

ifconfig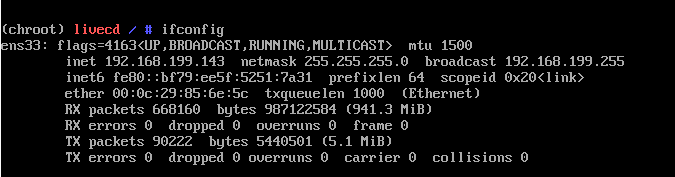
get your network device, for my case is ens33 it should have the ipv4 address
Network setup
nano /etc/conf.d/net 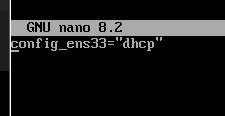
cd /etc/init.d

ln -s net.lo net.ens33
rc-update add net.ens33 default
Edit hosts configuration file
nano /etc/hosts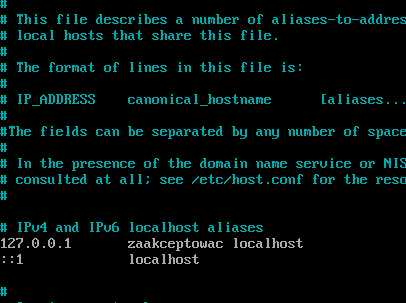
Set up a root password
passwdInstall wireless drivers
emerge -av net-wireless/iw net-wireless/wpa_supplicant emerge -av wireless-tools Install system log
emerge --ask app-admin/sysklogd

rc-update add sysklogd default
Install index manager
emerge -av sys-apps/mlocateInstall drivers for each files system
emerge -av sys-fs/xfsprogs #download xfs tools under root partition

emerge -av sys-fs/dosfstools #download vfat tools under boot partition

emerge -av sys-fs/e2fsprogs #download ext4 as most linux use this filesystem
Install Grub
mount /dev/sda1 /efi
grub-install --target=x86_64-efi --efi-directory=/efi #initialize grub bootloader to your /efi parition

grub-mkconfig -o /boot/grub/grub.cfg #generate grub config inside uefi bootloader
Rebooting time
exit

cd ~

umount -R /mnt/gentoo

reboot
Moment of truth
I tried following the steps to install Linux with a GNOME environment but I think I failed. I ended up installing the version without the GUI environment. Looking back, I think I should have selected the linux-6.6.74-gentoo kernel instead of the distribution one.
Gentoo is still running, but in a minimal CLI-only setup
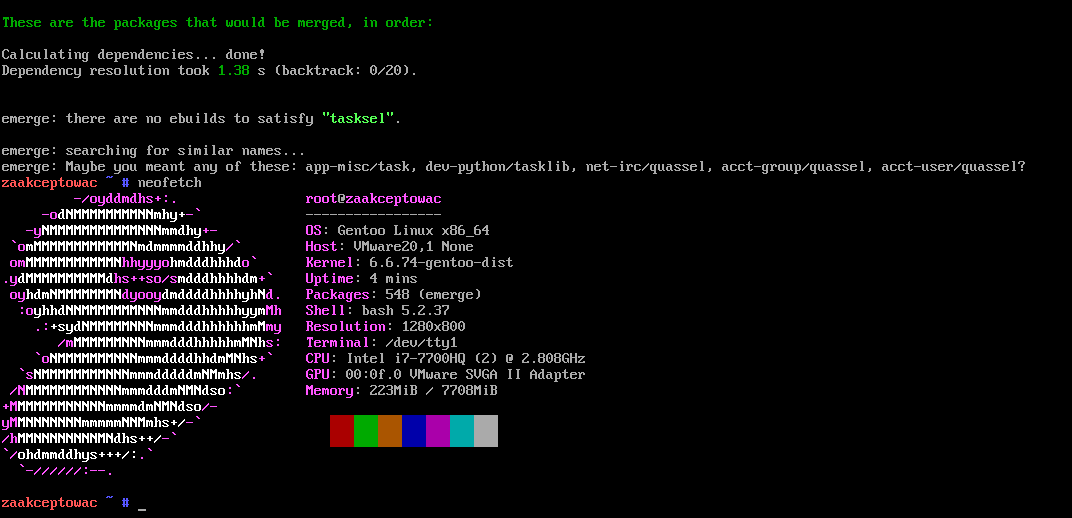
Trying to plug an xfce4 environment
nah it’s pointless just use debian/ubuntu
메타데이터
- post_id
- 4e8ebd4b5eea
- slug
- installing-gentoo-why-did-i-do-this-to-myself-4e8ebd4b5eea
- url
- https://medium.com/@zaakc/installing-gentoo-why-did-i-do-this-to-myself-4e8ebd4b5eea
- canonical_url
- https://medium.com/@zaakc/installing-gentoo-why-did-i-do-this-to-myself-4e8ebd4b5eea
- author_url
- https://medium.com/@zaakc
- status
- ok
- fetched_at
- 2026-07-20 22:59:00