Deploying Your AI Model on Amazon EC2: A Step-by-Step Guide using Ubuntu
Everyone can train AI models, but how to deploy them is a hurdle for many!
Deploying Your AI Model on Amazon EC2: A Step-by-Step Guide
Everyone can train AI models, but how to deploy them is a hurdle for many!
Source: www.reddit.com
With new advancements in AI emerging every day, training models has become a common practice. However, deploying these models to a live environment where they can be accessed and used by others often presents a significant challenge. In this guide, I’ll walk you through the process of deploying an AI model on an Amazon EC2 instance running on Ubuntu. By the end of this tutorial, you’ll be able to take your trained model and make it available in a cloud environment.
Wonder what’s Amazon EC2?
Amazon Elastic Compute Cloud (Amazon EC2) is a web service that provides secure, resizable compute capacity in the cloud, allowing developers to obtain and configure capacity with minimal friction. It offers on-demand, scalable computing, reducing hardware costs and enabling faster application development and deployment.
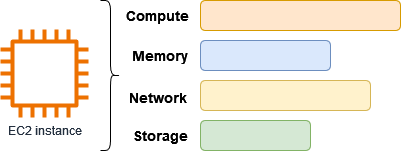
Source: aws.amazon.com
Discover more about Amazon EC2’s characteristics and benefits here — An article **“UNDERSTANDING AMAZON EC2”** by Sahdev Grover.
Let’s get started!
Step 1: Launch an EC2 Instance
- Navigate to **AWS Management Console** and log in with your credentials (or you can create your new free account).
2. Launch a new EC2 instance:

In the AWS Management Console, enter “EC2” in the search bar and select it from the results.
- Go to the EC2 dashboard and click “Launch Instance.”
- Choose an Amazon Machine Image (AMI). Select “Ubuntu Server 20.04 LTS” or any preferred version.
- Choose an instance type. For most small-scale models, a
t2.microinstance is sufficient. - Configure instance details and add Storage as needed.
- Review and launch the instance.
If you’re still confused about the process, here’s the best step-by-step guide with screenshots attached on **“Launching a virtual machine on Amazon EC2 Instance” **by Anjula Shanaka to streamline your launching process.
3. Connect to Your Instance:
- Direct Connection via AWS Interface: If you wish to connect directly from AWS interface, simply click on the “Connect”.
2. SSH Client Connection:
- Open your terminal or command prompt.
- Navigate to the directory where you’ve stored the recently downloaded key pair file (
.pemfile) using thecdcommand.
cd /path/to/your/directory- In the terminal, set appropriate permissions to your key pair file to ensure security. Run the following command:
chmod 400 your-key-pair.pemReplace your-key-pair.pem with the name of your key pair file.
- Once the permissions are set, execute the SSH command provided in the AWS console to connect to your VM.
ssh -i your-key-pair.pem ubuntu@your-instance-public-ipReplace your-key-pair.pem with the name of your key pair file and your-instance-public-ip with the public IP address of your instance.
You have now successfully connected to the VM you just created.
Before moving on to deploying your AI model, it’s important to set up a web server for managing incoming requests efficiently. For this, you can use NGINX. To guide you through the process, I recommend following this detailed article: **“Guide to Setting Up NGINX and Adding a New Domain” **by Muhammad Haseeb Sohail.
Step 2: Deploy Your AI Model
- Confirm Your Working Directory:
#confirm your working directory by running:
pwd

#If needed, navigate to the desired directory using:
cd /path/to/your/directory- Install and Check Python Environment by running:
#Update and Upgrade the System
sudo apt update
sudo apt upgrade -yy

#Install Python and pip
sudo apt install python3-pip python3-dev -y

#Verify the installation with
python3 --version
pip3 --version- Install Git:
#Install Git
sudo apt install git -y

#Verify the installation with:
git --version- Clone Your GitHub Repository:
#Clone Your Repository:
git clone https://github.com/your-username/your-repo.git

#Navigate to the Repository Directory:
cd your-repo
Replace https://github.com/your-username/your-repo.git with the URL of your GitHub repository.
- Install Required Libraries:
#Install Dependencies:
pip install -r requirements.txt
#Ensure that your requirements.txt file is present in the cloned repository- Run Your Model File:
#Replace model_script.py with the script you need to execute
python model_script.py
Step 3: Set Up a Virtual Environment (Optional)
If you prefer to use a virtual environment for better isolation, follow these steps:
#Install virtualenv
sudo pip3 install virtualenv

#Create and Activate a Virtual Environment
virtualenv venv source venv/bin/activate

#Install Dependencies within the Virtual Environment
pip install -r requirements.txt
Step 4: Access Your Model:
Once your AI model is running, you can access it using the public IP address of your EC2 instance. Simply navigate to [http://your-ec2-ip](http://your-ec2-ip:) in your web browser to interact with your model.
Here you go! You’ve successfully deployed your AI model on an EC2 instance.
And here’s your sign to start deployments on Mondays instead :)))
Source: www.reddit.com
메타데이터
- post_id
- 52ef9e96025b
- slug
- deploying-your-ai-model-on-amazon-ec2-a-step-by-step-guide-using-ubuntu-52ef9e96025b
- url
- https://medium.com/@anam.zakir/deploying-your-ai-model-on-amazon-ec2-a-step-by-step-guide-using-ubuntu-52ef9e96025b
- canonical_url
- https://medium.com/@anam.zakir/deploying-your-ai-model-on-amazon-ec2-a-step-by-step-guide-using-ubuntu-52ef9e96025b
- author_url
- https://medium.com/@anam.zakir
- status
- ok
- fetched_at
- 2026-07-23 00:52:37


