How to Capture and Decrypt TLS Packets in Wireshark on Kali Linux (Complete Guide)🖥️👨💻
A step-by-step guide to analyzing HTTPS certificates by decrypting TLS traffic using Chrome/Chromium 🪜
How to Capture and Decrypt TLS Packets in Wireshark on Kali Linux (Complete Guide)🖥️👨💻
A step-by-step guide to analyzing HTTPS certificates by decrypting TLS traffic using Chrome/Chromium 🪜
As a security researcher or penetration tester, you’ll often need to analyze HTTPS traffic and examine SSL/TLS certificates. However, modern browsers use encryption that makes this challenging. By default, you’ll see “Encrypted Handshake” messages instead of the actual certificate details.
In this guide, I’ll show you exactly how to:
- Install Chromium on Kali Linux
- Configure your browser to export TLS session keys
- Set up Wireshark to decrypt TLS traffic using those keys
- Capture and view certificate packets in plain text
Prerequisites:
- Kali Linux installed (physical or VM)
- Root or sudo access
- Basic familiarity with the terminal
Step 1: Install Chromium Browser 🌐
Kali Linux doesn’t come with Chrome or Chromium pre-installed. Let’s install Chromium (open-source version of Chrome) which works perfectly for TLS decryption.
Open a terminal and run:
# Update your package list
sudo apt update
# Install Chromium
sudo apt install chromium -y
# Verify installation
chromium -version

'''Expected output: `Chromium X.X.X` (version number will vary)'''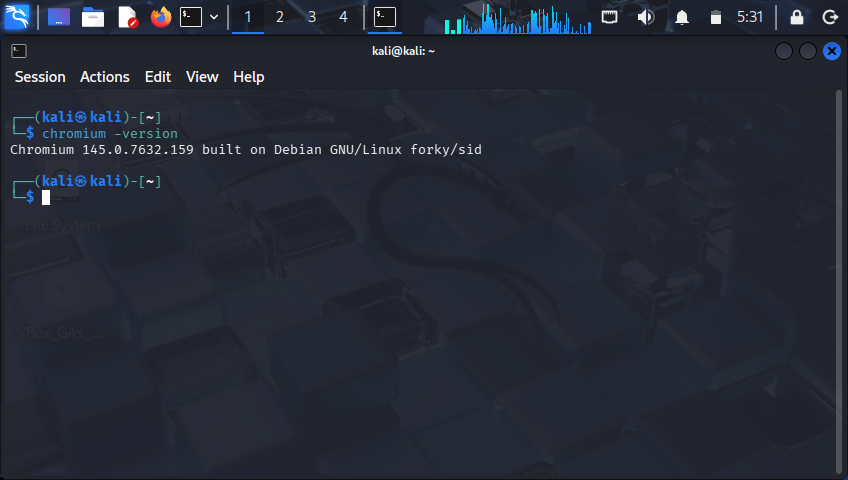
Why Chromium? : The Firefox version that comes with Kali Linux has TLS key logging disabled for security reasons. Chromium works out-of-the-box.
Step 2: Create a Directory for SSL Keys 🗝️📂
We need a place to store the TLS session keys that Chromium will generate.
# Create the directory in your home folder
mkdir -p ~/wireshark-keys

# 2. Create the file manually
touch ~/wireshark-keys/sslkeylog.log

# Set proper permissions
chmod 755 ~/wireshark-keys

# Verify it was created
ls -la ~/wireshark-keys

'''Expected output: drwxr-xr-x 2 kali kali 4096 ... sslkeylog.log'''
Step 3: Launch Chromium with SSL Key Logging Enabled 🚀👩🏻💻
This is the most important step. We’ll launch Chromium with an environment variable that tells it to write decryption keys to our file.
# Launch Chromium with key logging enabled
SSLKEYLOGFILE=~/wireshark-keys/sslkeylog.log chromium --disable-quic
Important notes:
- Keep this terminal window open while capturing traffic
- The
--disable-quicflag forces Chromium to use traditional TLS instead of QUIC - Closing this terminal will close Chromium
What’s happening? The SSLKEYLOGFILE environment variable tells Chromium to write session keys to the specified file. Wireshark will use these keys to decrypt TLS traffic.

Chromium browser be launched
Step 4: Verify Keys Are Being Generated 🔐👀
Open a second terminal and run this command to monitor the key file in real-time:
# Watch the key log file
tail -f ~/wireshark-keys/sslkeylog.log
*Now, in Chromium (the browser window that opened in Step 3), visit any HTTPS website: -Go to “**https://example.com**”
- Or “**https://google.com*”
Look at your second terminal. You should see lines appearing like:
CLIENT_HANDSHAKE_TRAFFIC_SECRET 8a3f2b1c9d4e5f6a7b8c9d0e1f2a3b4c5d6e7f8a 1a2b3c4d5e6f7a8b9c0d1e2f SERVER_HANDSHAKE_TRAFFIC_SECRET 8a3f2b1c9d4e5f6a7b8c9d0e1f2a3b4c5d6e7f8a 5e6f7a8b9c0d1e2f3a4b5c6d
If you see these lines, it’s working! Press “Ctrl+C” to stop the tail command.

Step 5: Install and Launch Wireshark 👩🏻💻🚀
If you don’t have Wireshark installed:
#install wireshark if havent yet
sudo apt install wireshark -y

#launch wireshark
sudo wireshark
Step 6: Configure Wireshark to Use the Key File 👩🏻💻⚙️
Now we’ll tell Wireshark where to find our decryption keys.
1. In Wireshark, go to Edit → Preferences (or press Ctrl+Shift+P)
2. In the left sidebar, expand Protocols
3. Scroll down and select TLS(or SSL in older versions)
4. In the right panel, find the field labeled: (Pre)-Master-Secret log filename
5. Enter the path to your key file: /home/YOUR_USERNAME/wireshark-keys/sslkeylog.log Alternative: Click the Browse button and navigate to the file manually
6. Click OK to save

Step 7: Start Capturing Traffic 📷📄
1. Click on your network interface (usually eth0 for wired, wlan0 for WiFi)
2. Click the shark fin icon (🔴) in the top-left to start capturing
3. In Chromium (still running from Step 3), visit an HTTPS website: https://example.com
4. Let the page load completely, then stop the capture by clicking the red square (🟥)
Step 8: Filter and View TLS Packets 🤖📝
Now let’s find our decrypted packets.
View all TLS traffic: tls
View only certificate packets: tls.handshake.type == 11
View the complete TLS handshake: tls.handshake
To see the decrypted certificate details:
1. Find a packet labeled ”Certificate” in the packet list 2. Click on it 3. In the middle panel (packet details), expand: — Transport Layer Security — TLSv1.3 Record Layer: Handshake Protocol: Certificate — Certificate List — Click on a Certificate entry 4. You’ll now see: — Issuer information — Validity dates — Subject Common Name (CN) — Public key details
Step 9: Follow the Complete TLS Stream
To see the entire decrypted conversation:
1. Right-click on any TLS packet 2. Select Follow→ TLS Stream 3. A new window will open showing the decrypted HTTP traffic in plain text
You’ll now see the actual HTTP requests and responses that were previously hidden under encryption.
Troubleshooting 🔨🔨
No keys are being generated
- Make sure you’re visiting HTTPS sites, not HTTP
- Verify Chromium was launched with the
SSLKEYLOGFILEvariable- Check that you didn’t close the terminal that launched Chromium
*Wireshark isn’t decrypting packets??
- Double-check the key file path in Wireshark preferences
- Restart Wireshark after setting the path
- Ensure you’re capturing on the correct interface*
Why This Works 🤔⁉️
Modern TLS (TLS 1.2 and 1.3) encrypts certificate packets by default. The
SSLKEYLOGFILEenvironment variable tells your browser to write the session keys to a file. Wireshark reads these keys and uses them to decrypt the TLS traffic in real-time, allowing you to see certificates and other handshake details in plain text.
*This technique is essential for:
- Security research
- Certificate analysis
- Debugging HTTPS issues
- Learning how TLS works under the hood*
Conclusion 😊
You’ve successfully set up TLS decryption on Kali Linux! You can now: — Capture and decrypt HTTPS traffic — View certificate details in Wireshark — Follow TLS streams to see decrypted HTTP content
This setup is invaluable for anyone learning about TLS, analyzing certificates, or performing security research.
**👩🏫Further Reading **:
Happy analyzing! 🤩🎉
—-uff my first blog😉
메타데이터
- post_id
- 5dd07d385a26
- slug
- how-to-capture-and-decrypt-tls-packets-in-wireshark-on-kali-linux-complete-guide-️-5dd07d385a26
- url
- https://medium.com/@tarakadivyaketha/how-to-capture-and-decrypt-tls-packets-in-wireshark-on-kali-linux-complete-guide-%EF%B8%8F-5dd07d385a26
- canonical_url
- https://medium.com/@tarakadivyaketha/how-to-capture-and-decrypt-tls-packets-in-wireshark-on-kali-linux-complete-guide-%EF%B8%8F-5dd07d385a26
- author_url
- https://medium.com/@tarakadivyaketha
- status
- ok
- fetched_at
- 2026-07-28 08:31:12



