I Built Kubernetes From Scratch on AWS (and It Broke… a Lot)
I’ve used Kubernetes before. You spin up a cluster, deploy an app, and everything just works. But here’s the thing, I didn’t actually…
I Built Kubernetes From Scratch on AWS (and It Broke… a Lot)
I’ve used Kubernetes before. You spin up a cluster, deploy an app, and everything just works. But here’s the thing, I didn’t actually understand what was happening underneath.
So I decided to do something uncomfortable.
I built a Kubernetes cluster from scratch on AWS.
No EKS. No kubeadm. No automation shortcuts.
Just me, EC2 instances, and a lot of things breaking.
Why I Did This
I wanted to understand:
- what actually happens when a node joins a cluster
- how the API server talks to etcd
- why TLS is everywhere in Kubernetes
- and more importantly, what breaks when something is wrong
This project forced me to stop relying on abstraction and actually see how everything connects.
The Setup (High Level)
I created:
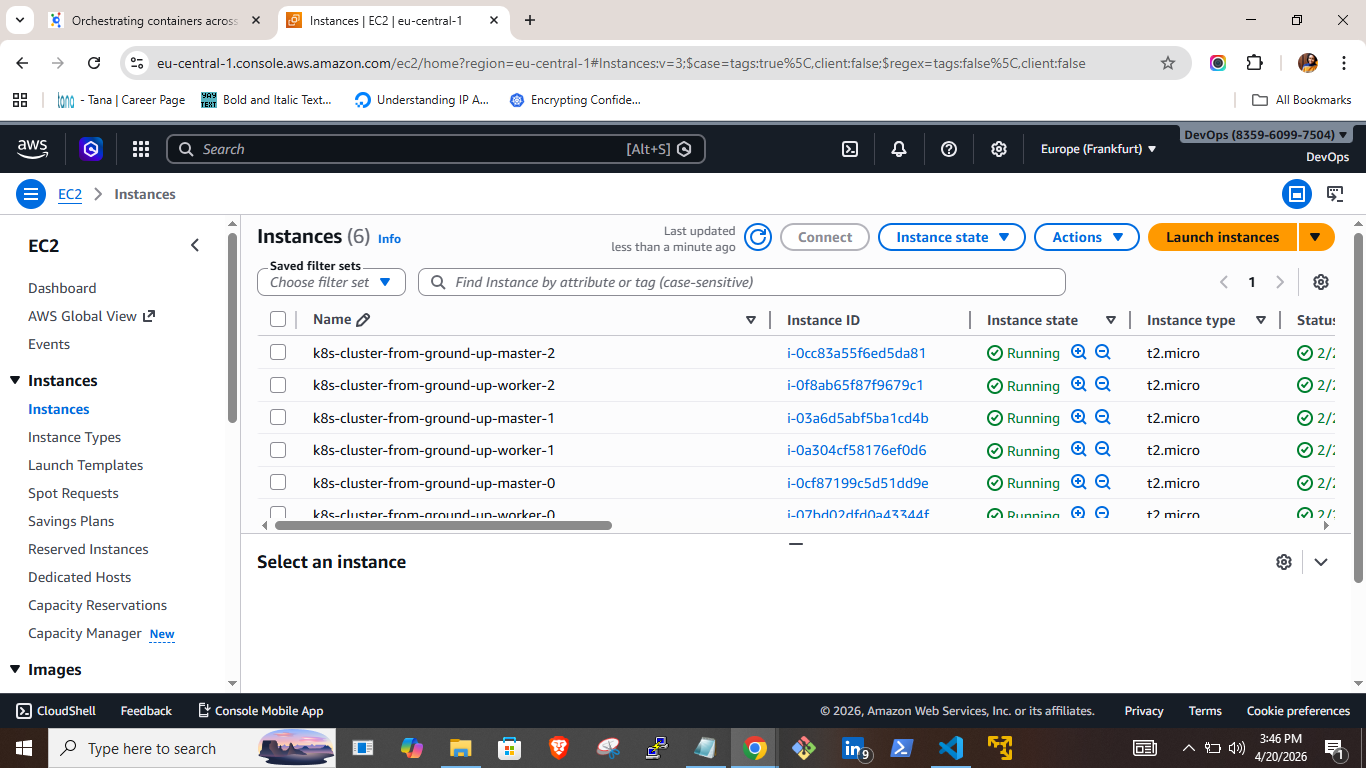
- 3 control plane nodes (the brains of the cluster)
- 3 worker nodes (where applications run)
- an etcd cluster (stores the state of everything)
- a load balancer (entry point to the cluster)
Everything was hosted on AWS EC2.
Step 1: Creating the Infrastructure
I started by provisioning EC2 instances.
aws ec2 describe-instances \
  --filters "Name=tag:Name,Values=${NAME}-master-0"
What this does in simple terms:
- It asks AWS, “Show me my instances”
- Then filters them by name so I can identify specific nodes
Why this matters: Later, I use these names to automate things like copying files between machines.
Step 2: Creating Certificates (Security Layer)
Kubernetes components don’t just talk freely. They authenticate each other using certificates.
So I created my own Certificate Authority:
cfssl gencert -initca ca-csr.json | cfssljson -bare caWhat this does:
- Generates a root certificate
- This certificate is used to “trust” all other components
Think of it like issuing IDs to every part of the system.
Step 3: Creating Kubeconfigs (How Components Connect)
Every component needs to know:
- where the API server is
- how to authenticate
So I created kubeconfig files:
kubectl config set-cluster kubernetes \
  --certificate-authority=ca.pem \
  --server=https://<LOAD_BALANCER>:6443 \
  --kubeconfig=admin.kubeconfig
In plain English:
- “Here is the cluster”
- “Here is how to securely connect to it”
Step 4: Setting Up etcd (The Brain’s Memory)
etcd stores everything about the cluster.
Pods, nodes, configurations, everything.
I installed it manually:
tar -xvf etcd-v3.5.9-linux-amd64.tar.gz
sudo mv etcd* /usr/local/bin/
Then verified it:
ETCDCTL_API=3 etcdctl member list \
--endpoints=https://127.0.0.1:2379
This command basically says: “Show me all the members of the etcd cluster”
Step 5: Configuring the Control Plane
This is where Kubernetes starts to come alive.
The API server is the central component.
I configured it with encryption:
--encryption-provider-config=/var/lib/kubernetes/encryption-config.yamlThis ensures sensitive data (like secrets) is encrypted before being stored.
Step 6: Setting Up Worker Nodes
Worker nodes are where your applications actually run.
I installed kubelet and started it:
sudo systemctl start kubeletThis tells the node: “Start managing containers and connect to the cluster”
Step 7: Networking (This One Almost Broke Me)
At one point, everything looked fine…
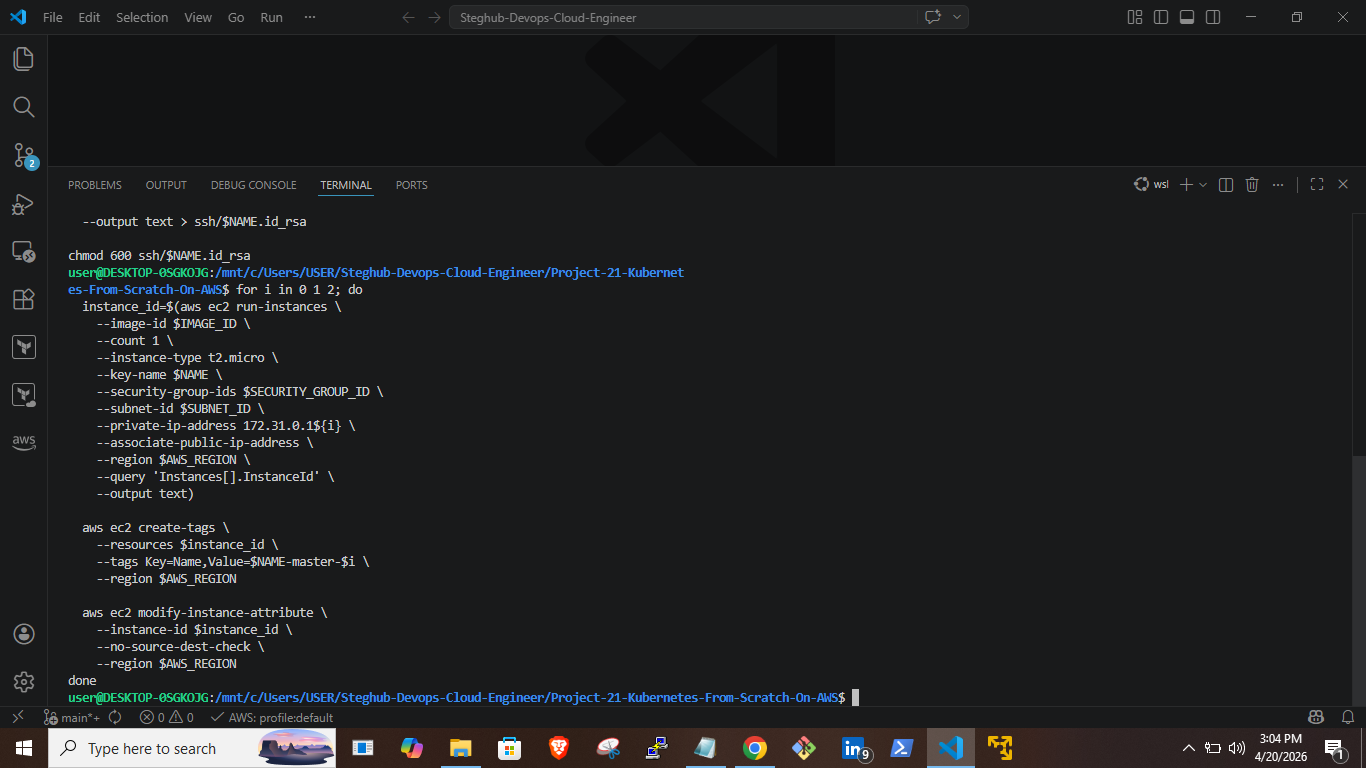
But all my nodes were stuck in:
NotReadyThe issue?
No networking.
I fixed it by creating a CNI configuration:
cat <<EOF | sudo tee /etc/cni/net.d/10-bridge.conf
{
  "type": "bridge"
}
EOF
What this does:
- Allows containers (pods) to communicate with each other
Once I fixed this, everything changed.
The Moment It Worked
I ran:
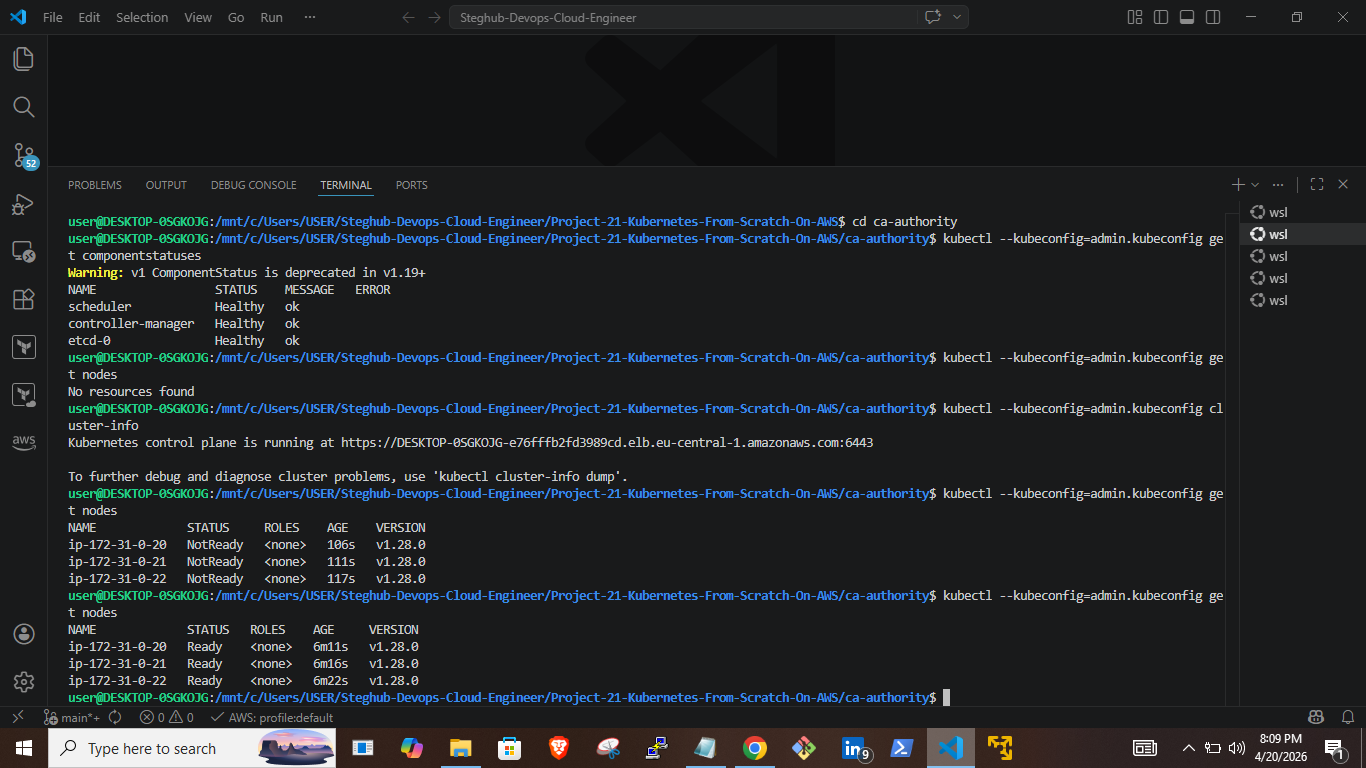
kubectl --kubeconfig=admin.kubeconfig get nodesAnd saw:
Ready
Ready
Ready
That moment made all the debugging worth it.
It confirmed:
- nodes were successfully registered
- networking was working
- the control plane was stable
Things That Broke (and Taught Me the Most)
This project wasn’t smooth. At all.
Here are some of the issues I hit:
1. Kubelet failing to start
Error:
unknown flag: --network-pluginCause:
- deprecated Kubernetes flags
Fix:
- removed outdated flags
2. YAML errors that stopped the API server
Error:
could not find expected ':'Cause:
- bad formatting
Fix:
- corrected indentation
3. SSH key issues
Error:
Permissions 0777 are too openFix:
chmod 600 key.pem4. Nodes stuck in NotReady
Cause:
- missing networking
Fix:
- configured CNI
What I Learned
This project changed how I see Kubernetes.
- It’s not “magic”, it’s just a set of components working together
- Small mistakes can break everything
- Security (TLS) is at the center of it all
- Debugging is the real skill, not just setup
Final Thoughts
Before this, I could use Kubernetes.
Now, I understand it.
And that changes everything.
Want to See the Full Project?
You can check out the full implementation, configs, and documentation here:
If you’re learning Kubernetes, I’d honestly recommend trying something like this.
It’s frustrating.
But it’s the kind of frustration that actually teaches you something.
This project is part of my Cloud & DevOps Engineering apprenticeship with StegHub.
메타데이터
- post_id
- 5eb4f7a54c23
- slug
- i-built-kubernetes-from-scratch-on-aws-and-it-broke-a-lot-5eb4f7a54c23
- url
- https://medium.com/@LydLaw/i-built-kubernetes-from-scratch-on-aws-and-it-broke-a-lot-5eb4f7a54c23
- canonical_url
- https://medium.com/@LydLaw/i-built-kubernetes-from-scratch-on-aws-and-it-broke-a-lot-5eb4f7a54c23
- author_url
- https://medium.com/@LydLaw
- status
- ok
- fetched_at
- 2026-06-10 12:26:30