Simplifying Deployment: Mastering Django with Docker on a VPS
Master Django deployment with Docker on VPS! Join us for an easy, fun guide to set up your web app. From basics to launch — we’ve got you…
Simplifying Deployment: Mastering Django with Docker on a VPS
Master Django deployment with Docker on VPS! Join us for an easy, fun guide to set up your web app. From basics to launch — we’ve got you covered.
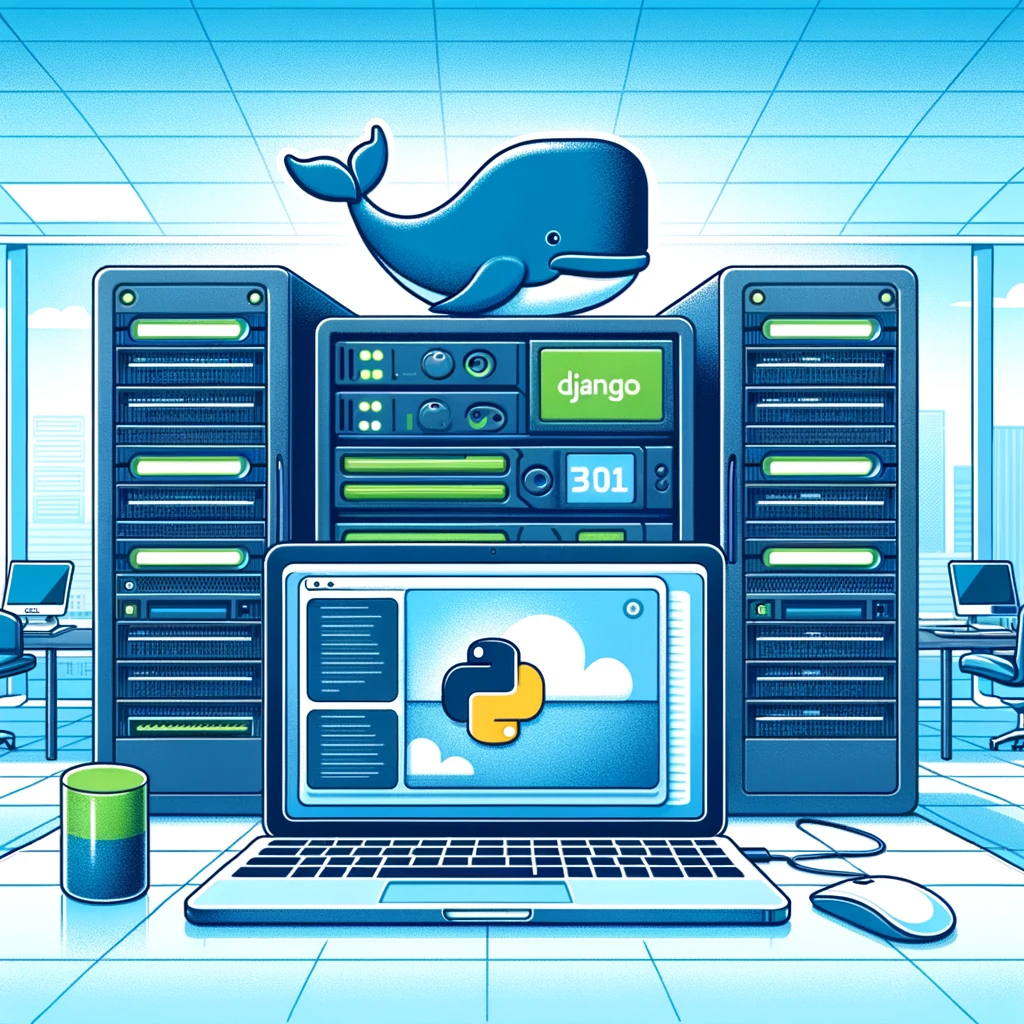
Image created by AI with my prompt 🤭
Hey, ready to make deploying your web app as easy as pie? We’re jumping into a super chill guide to get your Django app going with Docker and a VPS. Think of Django as your pal who’s awesome at building cool websites. Docker? It’s like that trusty travel bag that keeps all your app’s stuff together, wherever you go. And a VPS is like your little corner of the internet to show the world what you’ve made. Whether you’re new to this or just brushing up, I’m here to help make it a smooth ride. No techy headaches, pinky promise! So, grab your favorite snack, and let’s dive in!
Basics for the Newbies
Django 101
Starting with Django here. It’s basically the superhero of web development — making things easier and a whole lot more fun. Why? Because it tackles the tough bits so you don’t have to. With Django, you’re not just coding — you’re bringing your cool ideas to life, whether it’s a quirky blog or the next big social network. Think of it as having a wise guide while you explore the exciting world of coding!
Docker Explained
Next up, Docker. Think of Docker as your packing expert for a big trip. Just like you’d pack your suitcase with everything you need, Docker packages your app with all its essentials. This means no matter where you deploy your app — be it your laptop or a server — it’s going to run smoothly, just like at home. Docker is all about making your app portable and hassle-free.
Understanding VPS
Finally, let’s talk about Virtual Private Servers (VPS). A VPS is like renting an apartment in a big building. It’s your own private space on a server where you can host your web app. Unlike shared hosting, where you have neighbors affecting your space, a VPS gives you more control and power. It’s a fantastic choice for hosting your apps, especially when you’re expecting a lot of visitors.
And there you have it — a quick rundown of Django, Docker, and VPS. Each plays a key role in making web development and deployment a smooth ride. Let’s get ready to put them all together!
Setting Up Your Development Environment
Alright, let’s get Django set up on your machine! It’s super straightforward. First things first, we need Python because Django is like Python’s best buddy for building websites. If you don’t have Python yet, just head over to python.org and grab it. Once Python’s ready, you’re all set to start having fun with Django!
Now, let’s make a cozy space for your Django project:
Fire up your Terminal or Command Prompt.
- It’s where all the magic happens.
Choose a Spot for Your Project.
- Navigate to the place where you want your project to live.
Create a Virtual Environment.
- Type
python -m venv myenv(you can name it whatever you like instead of ‘myenv’). This is like setting up a personal playground for your project.
Activate Your Virtual Environment.
- On Windows, type
myenv\Scripts\activate. - On Mac or Linux, it’s
source myenv/bin/activate. - This steps into your new playground and gets it ready for action.
You are now ready to bring your Django project to life in its own environment.
Install Django:
- With your virtual environment activated, install Django by running
pip install django.
Docker Installation
Now, let’s get Docker set up:
Download Docker:
- Head over to the Docker website and download Docker Desktop for your operating system.
Install Docker:
- Follow the installation instructions specific to your OS. It’s usually a straightforward process.
Verify Installation:
- Once installed, open your terminal or command prompt and type
docker --versionto ensure it's correctly installed.
Run a Test Container:
- To make sure everything’s working, try running
docker run hello-world. This command downloads a test image and runs it in a container. If you see a welcome message, you're all set!
Preparing Your VPS
Getting your VPS ready is the final step:
Choose a VPS Provider:
- Select a provider like Contabo, or any other you prefer. Sign up and create an account.
Create a New Server Instance:
- Follow your provider’s steps to create a new VPS instance. This is usually done through their website with a user-friendly interface.
Getting into Your VPS:
- Got your VPS ready? Awesome! They should’ve sent you an IP address and some login info. Just open up your terminal, and type
ssh root@your_vps_ip– remember to replaceyour_vps_ipwith the actual IP you got. Easy peasy!
Sprucing Up Your Server:
- Now, let’s give your server a quick refresh. If you’re on Ubuntu or Debian, just type
sudo apt update && sudo apt upgradein the terminal. This is like giving it a quick spa treatment – everything gets updated and rejuvenated. Next up, install any extra software you need, like Nginx or Apache for your web stuff, or maybe a database server, depending on what your project's craving.
And boom! With Django and Docker all set, and your VPS prepped and waiting, you’re totally ready to show off your cool applications to the world.
Creating a Simple Django Application
Alrighty, time to roll up those sleeves and jump into making a basic Django app. I’ll walk you through it step by step, keeping it super chill and focusing on what you need for deployment. Let’s get started!
1. Kickstarting Your Django Project
- You’ve already got Django ready from before. Now, let’s make a new project.
- Open your terminal or command prompt.
- Head over to where you want your project to live.
- Run
django-admin startproject mysite(feel free to name it whatever feels right).
This command crafts a new folder decked out with all you need for a Django project.
2. Firing Up Your Django Server
- Time to see if it’s all good: fire up the server with
python manage.py runserver. - Pop open your web browser and hit up
http://127.0.0.1:8000/. If you're greeted with Django’s welcome page, you're golden! Your project is alive and kicking!
3. Create a Django App
Think of apps in Django as components of your project. Let’s create one:
- In your terminal, still inside your project directory, run
python manage.py startapp myapp(you can name your app whatever you like).
This creates a new directory myapp with several files. Each file has a specific purpose in the Django structure.
4. Write Your First View
Views in Django are where you define the logic and data that you present to users. Let’s create a simple view:
- Open
myapp/views.pyin your text editor. - Add the following code:
from django.http import HttpResponse

def home(request):
    return HttpResponse("Hello, world! This is my first Django app.")
This code defines a simple view called home that returns a basic HTTP response.
5. Set Up URL Routing
Now, we need to tell Django when to show this view. We do this by setting up a URL pattern:
- First, open
mysite/urls.py. - Add an import statement and include your app’s URL:
from django.urls import path, include

urlpatterns = [
    path('', include('myapp.urls')),
]- Create a new file
myapp/urls.py. - In
myapp/urls.py, add the following code:
from django.urls import path
from . import views

urlpatterns = [
    path('', views.home, name='home'),
]
This tells Django to use the home view when someone visits the root URL of your site.
6. Run the Server Again
- Back in the terminal, run
python manage.py runserveragain. - Visit
http://127.0.0.1:8000/in your browser. You should now see "Hello, world! This is my first Django app."
Congratulations! You’ve just created a basic Django application. This is a fundamental step in understanding how Django works and is crucial for when you’re ready to deploy your app. Keep experimenting and exploring to see what else you can build!
Containerizing with Docker
Containerizing an application is like packing your entire app and its environment into a portable container that can be easily moved and run anywhere. This approach ensures that your app works seamlessly across different environments — be it your laptop, a friend’s computer, or a server in a data center. Docker is a popular tool for creating these containers. Let’s see how we can use Docker to containerize your Django application.
Understanding Containerization and Its Benefits
- Consistency: Containers ensure your app runs the same way everywhere.
- Isolation: Your app has its own environment and doesn’t interfere with others.
- Portability: Move your app anywhere Docker is installed without worries.
Steps to Containerize Your Django Application
Create a Dockerfile
- A Dockerfile is like a recipe that tells Docker how to build your app’s container.
- In the root of your Django project, create a file named
Dockerfile(no file extension). - Add the following content:
# Use an official Python runtime as a parent image
FROM python:3.8

# Set the working directory in the container
WORKDIR /app

# Copy the current directory contents into the container at /app
COPY . /app

# Install any needed packages specified in requirements.txt
RUN pip install -r requirements.txt

# Make port 8000 available to the world outside this container
EXPOSE 8000

# Define environment variable
ENV NAME World

# Run manage.py when the container launches
CMD ["python", "manage.py", "runserver", "0.0.0.0:8000"]
Understand the Dockerfile
FROM python:3.8: Starts with the Python 3.8 image as a base.WORKDIR /app: Sets the working directory inside the container.COPY . /app: Copies everything from your project into the container.RUN pip install -r requirements.txt: Installs Python dependencies.EXPOSE 8000: Makes port 8000 available outside the container.CMD ["python", "manage.py", "runserver", "0.0.0.0:8000"]: The command that starts your app.
Create a requirements.txt File
- This file lists the Python dependencies for your project.
- Run
pip freeze > requirements.txtin your project directory. - This command creates a
requirements.txtwith all your installed packages.
Build Your Docker Container
- Open your terminal and navigate to your Django project directory.
- Run “docker buildx build -t mydjangoapp .” to build your container.
- The
-t mydjangoapptags your container with the name "mydjangoapp".
Run Your Container
- After building, run your container with
docker run -p 8000:8000 mydjangoapp. - This command starts your app and maps port 8000 on your machine to port 8000 in the container.
Access Your App
- Open your browser and go to
[http://127.0.0.1:8000/.](http://127.0.0.1:8000/.) - You should see your Django app running, now containerized!
And there you go! Your Django app is now neatly packed in a Docker container. It’s like you’ve given your app a super suit that helps it work smoothly and consistently, no matter where you run it. Have fun exploring Docker — it’s a pretty cool tool with lots to offer!
Deploying on a VPS like Contabo
Alrighty, let’s think of deploying your Dockerized Django app on a VPS like Contabo as moving day. You’re taking your app from its comfy, familiar dev environment to a snazzy new pad — the VPS server. This is where it gets to shine and show off to the world. Let’s break down the moving process into easy, bite-sized steps.
Preparing Your VPS
Getting into Your VPS: Just got your VPS keys from Contabo or another provider? Sweet! They’ll give you the magic words (aka credentials) to get in.
- If you’re on Windows, grab PuTTY.
- Mac or Linux? Just fire up your terminal.
The secret knock to get in is typing ssh username@your_vps_ip – replace username and your_vps_ip with your actual details. Think of it as the "Open Sesame!" to your VPS cave.
Update Your VPS
- It’s good practice to update your VPS. Run
sudo apt update && sudo apt upgrade.
Install Docker on VPS
- Run
curl -fsSL https://get.docker.com -o get-docker.shto download the Docker installation script. - Then, execute it with
sudo sh get-docker.sh.
Deploying Your Django App
Transfer Your Project to the VPS
- You can use a tool like
scp(Secure Copy Protocol) to transfer your project files. The command looks like:scp -r /path/to/your/project username@your_vps_ip:/destination/path. - Replace
/path/to/your/projectwith the local path to your Django project, and/destination/pathwith the path on your VPS where you want to put the project.
Build Your Docker Container on VPS
- SSH into your VPS and navigate to the directory where you’ve transferred your Django project.
- Run “docker buildx build -t mydjangoapp .” to build your Docker container on the VPS. Remember, this uses the
Dockerfilein your project.
Run Your Dockerized App
- Once the build is complete, start your container with
docker run -d -p 80:8000 mydjangoapp. - The
-dflag runs the container in detached mode (in the background). -p 80:8000maps port 8000 of the container to port 80 of your VPS, making your app accessible via the VPS's IP address on the standard HTTP port.
Access Your Deployed App
- Open your web browser and enter your VPS’s IP address. You should see your Django application running live!
Quick Tips
Alright, here are some quick tips to make your app’s new home on the VPS not just cool, but also safe and sound:
Be a Security Ninja with ufw
- Think of ufw (Uncomplicated Firewall) as your digital guard dog. It’s super easy to set up and keeps the bad guys out. Just a few commands and you’ve got your own virtual fence!
Your Domain Name: Your App’s Street Address
- Got a domain name? It’s like giving your app a fancy street address on the internet. Point it to your VPS’s IP, and voila, visitors can find your app by typing a name instead of a bunch of numbers. Fancy, right?
SSL/TLS: Your App’s Security Armor
- When your app goes live, you want to make sure it’s secure. Setting up an SSL/TLS certificate, like one from Let’s Encrypt, is like putting a bulletproof vest on your app. It keeps the data safe and makes sure no sneaky peepers can spy on your visitors’ info.
And for the grand finale, especially for when your app hits the big leagues (aka production), you gotta bring in the heavyweights — Nginx and Gunicorn. Think of Nginx as the bouncer, managing the crowd (traffic) at your app’s door, and Gunicorn as the behind-the-scenes manager, keeping your Django app running smoothly. This tag team ensures your app not only runs well but also stays up when the party gets crowded!
Docker can certainly simplify this process, but these components are still crucial for a production-grade deployment.
Let me outline a quick step by step how you can put on a vps with nginx and gunicorn, there are many variables to consider but I didn’t want to make this article very long so if this deployment doesn’t work or you have problems please check out this very complex tutorial with 3 parts.
Integrating Nginx and Gunicorn
1. Setting Up Gunicorn
Gunicorn acts as the middleman between your Django application and the web server (Nginx in this case). It’s a WSGI server that translates web requests from Nginx to something Django can handle.
Modify Your Django Project:
- Create a file
gunicorn_config.pyin your Django project with the following content:
bind = "0.0.0.0:8000"
workers = 3- This sets Gunicorn to listen on all interfaces at port 8000 and starts 3 worker processes.
2. Updating Dockerfile for Gunicorn
- Modify your
Dockerfileto install Gunicorn and run it instead of Django’s development server:
# The previous steps (FROM, WORKDIR, COPY, RUN) remain the same

# Install Gunicorn
RUN pip install gunicorn

# Start Gunicorn with our application
CMD ["gunicorn", "-c", "gunicorn_config.py", "myproject.wsgi:application"]- Replace
myprojectwith your Django project’s name.
3. Adding Nginx
Nginx will act as a reverse proxy, forwarding client requests to Gunicorn.
Create a Docker Compose File:
- It’s efficient to use Docker Compose to run both your Django app and Nginx.
- Create a file
docker-compose.ymlin your project directory with the following content:
version: '3'

services:
  web:
    build: .
    command: gunicorn myproject.wsgi:application --bind 0.0.0.0:8000
    volumes:
      - .:/app
    ports:
      - "8000:8000"

  nginx:
    image: nginx:latest
    ports:
      - "80:80"
    volumes:
      - ./nginx:/etc/nginx/conf.d
    depends_on:
- web- Create a directory
nginxin your project and add a configuration file for Nginx, such asdefault.conf, with the necessary settings to proxy requests to Gunicorn.
server {
    listen 80;
    server_name your_domain_or_IP;

    location / {
        proxy_pass http://web:8000;
        proxy_set_header Host $host;
        proxy_set_header X-Real-IP $remote_addr;
        proxy_set_header X-Forwarded-For $proxy_add_x_forwarded_for;
        proxy_set_header X-Forwarded-Proto $scheme;
    }

    # Handling static files
    location /static/ {
        alias /path/to/your/staticfiles/;
    }

    # Handling media files
    location /media/ {
        alias /path/to/your/mediafiles/;
    }
}
Customize the Configuration:
- Replace
your_domain_or_IPwith your actual domain name or IP address. - The
proxy_passdirective should point to your Django application served by Gunicorn, which in the context of your Docker Compose setup is thewebservice. - Update the
/static/and/media/locations with the correct paths to your Django project's static and media files. These paths should be absolute paths to the locations where you've collected your Django static and media files.
Integrate with Docker Compose:
- In your
docker-compose.yml, you have a service for Nginx that mounts thenginxdirectory to/etc/nginx/conf.din the container. This setup ensures that your Nginx container uses thedefault.conffile you created.
4. Deploying with Docker Compose
- On your VPS, navigate to your project directory.
- Run
docker-compose up --buildto build and start both the Django application and Nginx containers.
5. Access Your Deployed App
- You can now access your application through your VPS’s IP address on port 80, served efficiently and securely by Nginx.
This setup, involving Django with Gunicorn and Nginx, all containerized with Docker, is a common and effective way to deploy web applications. It ensures scalability, security, and better handling of client requests.
Troubleshooting and Best Practices for Deploying on a VPS
Deploying your app on a VPS can sometimes feel like navigating a maze. Let’s walk through some common pitfalls and best practices to make your journey smoother.
Common Pitfalls and Their Solutions
Permission Issues
- Problem: You might face permission errors when trying to run certain commands or access certain directories.
- Solution: Use
sudofor commands that require administrative privileges. Be cautious and understand a command before running it withsudo.
Firewall Blocking Access
- Problem: Sometimes your app seems to be running fine, but you can’t access it in your browser.
- Solution: Check your VPS’s firewall settings. For example, on Ubuntu, you can manage this with
ufw. Ensure ports 80 (HTTP) and 443 (HTTPS, if using SSL) are open.
Incorrect Nginx Configuration
- Problem: Nginx fails to start or doesn’t properly route requests to your app.
- Solution: Double-check your Nginx configuration for syntax errors (
nginx -t) and ensure it's correctly pointing to your app.
Docker Container Not Starting
- Problem: Sometimes your Docker container might not run or stop unexpectedly.
- Solution: Use
docker logs <container_name>to check for error messages. Ensure yourDockerfileanddocker-compose.ymlare correctly set up.
Database Connection Issues
- Problem: Your app might have issues connecting to your database.
- Solution: Ensure your database server is running and check your database settings in Django’s
settings.py. Verify the host, port, username, and password.
Best Practices for a Smooth Deployment
Keep Your System Updated
- Regularly update your VPS with the latest patches and software updates. Use
sudo apt update && sudo apt upgradefor Ubuntu/Debian systems.
Use Version Control
- Always use version control (like Git) to manage your application’s code. It helps in tracking changes and rolling back if something goes wrong.
Backup Regularly
- Set up regular backups for your application and database. This can be a lifesaver in case of data loss or corruption.
Monitor Your Application
- Use tools like
htop,docker stats, or even more advanced monitoring solutions to keep an eye on your application’s performance and resource usage.
Secure Your Application
Implement security best practices:
- Use SSH keys instead of passwords for server access.
- Set up a firewall.
- Configure SSL/TLS for secure HTTP connections.
- Regularly update your passwords and keep them strong and unique.
Test Before Going Live
- Before updating your live application, test all changes in a staging environment that mirrors your live environment as closely as possible.
Read the Logs
- If something goes wrong, the logs are your best friend. Whether it’s Nginx logs, Docker logs, or Django logs, they often contain vital clues.
Stay Informed
- Keep yourself updated with the latest developments in Django, Docker, and general web security practices.
Remember, every deployment is unique, and you might face challenges not listed here. The key is to stay patient, methodical, and keep learning from each experience.
Conclusion
And there you have it! We’ve journeyed through the exciting process of deploying a Django application using Docker on a VPS like Contabo, covering each step from setting up your environment to troubleshooting common issues. Here’s a quick recap of what we’ve learned:
- Setting Up: We started by installing Django and Docker, and prepping our VPS.
- Creating a Django App: A simple app was our starting point to understand Django’s workings.
- Dockerizing: We packed our app into a Docker container for consistency and portability.
- Deploying: Our app found its new home on a VPS, with Nginx and Gunicorn enhancing performance and reliability.
- Troubleshooting: We tackled common problems and discussed best practices to keep things running smoothly.
I encourage you to apply these techniques to your projects. Experiment with different configurations, try deploying different types of applications, and always keep learning and exploring.
Additional Resources
To dive deeper, here are some resources that will be incredibly helpful:
- Django’s Official Documentation
- Docker’s Get Started Guide
- Nginx Beginner’s Guide
- DigitalOcean Community Tutorials for practical, real-world examples.
Join the Community and Support
If you found this guide helpful, consider following me for more content like this. Your claps and shares are greatly appreciated and help me reach more learners like you.
Also, for those who are keen on learning more, joining discussions, or seeking support, hop into our friendly Discord channel! It’s a great place to connect with fellow developers and tech enthusiasts.
And if you’re interested in supporting my work, you can join my Patreon. Your support enables me to create more content and contribute to this amazing community.
www.patreon.com/BuilescuDaniel
Thank you for joining me on this journey. Keep coding, keep exploring, and most importantly, have fun doing it!
PlainEnglish.io 🚀
Thank you for being a part of the In Plain English community! Before you go:
- *Be sure to clap and follow the writer*️
- Learn how you can also **write for In Plain English**️
- Follow us: **X | LinkedIn | YouTube | Discord | Newsletter**
- Visit our other platforms: **Stackademic | CoFeed | Venture**
메타데이터
- post_id
- 60fdf80d8dc0
- slug
- simplifying-deployment-mastering-django-with-docker-on-a-vps-60fdf80d8dc0
- url
- https://python.plainenglish.io/simplifying-deployment-mastering-django-with-docker-on-a-vps-60fdf80d8dc0
- canonical_url
- https://python.plainenglish.io/simplifying-deployment-mastering-django-with-docker-on-a-vps-60fdf80d8dc0
- author_url
- https://medium.com/@danielbuilescu
- status
- ok
- fetched_at
- 2026-07-24 14:41:54