Create a colorful digital clock on an ESP32 Cheap Yellow Display (“CYD”)
The “ESP32 Cheap Yellow Device” (“CYD”) is a powerful device with a great advantage: a large 2.8 inch TFT Touch display, an SD Card Reader…
Create a colorful digital clock on an ESP32 Cheap Yellow Display (“CYD”)
The “ESP32 Cheap Yellow Device” (“CYD”) is a powerful device with a great advantage: a large 2.8 inch TFT Touch display, an SD Card Reader and an RGB LED are wired and ready to use. In the end, you just need to write some lines of code, and you are done!
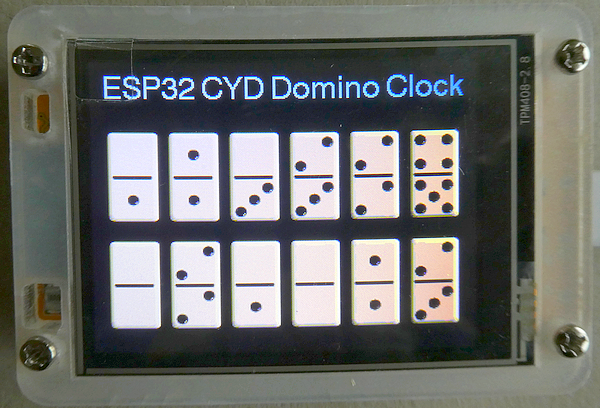
This tutorial is about a stylish looking digital clock with colorful “brick” design:

For short — what is a “Cheap Yellow Display” ? This device was introduced some years ago and allowed for very fast development of projects where an ESP32, a TFT (optional Touch surface), an SD Card Reader and an RGB LED is required. The first version was equipped with a 2.8 inch large TFT display with ILI9341 driver chip and XPT2046 resistive Touch driver chip. Newer versions are sold with a ST7789 display driver chip. Nowadays, the device is available with different display sizes (1.28 up to 7 inches) and driver chips, but I’m focusing on the 2.8 inch variants. The display has a size of 320 x 240 pixels in Landscape orientation. Most of the devices are driven by an ESP32 WROOM microcontroller, but I saw some others with an ESP32-S3 chip.
What are the topics of this tutorial?
- Additional websites about the CYD
- TFT Display driver library TFT_eSPI explained
- Get the correct time including time offsets from an NTP server
- Clock Faces source
- Clock Faces handling in the sketch
- CYD Troubleshooting
- Summary.
I did not cover the Touch or SD Card feature in this tutorial, sorry.
Additional websites about the CYD
- Developer website: this specific device has the “device number” “ESP32–2432S028R”, that was developed by a Chinese company. Their website is difficult to find, here is a link to the folder (containing all models) and the specific product file. You will download a file of about 900 MB size!
- Probably the best website about the CYD is from a hobbyist, “witnessmenow” (Brian Lough), who maintains the GitHub repository “**ESP32-Cheap-Yellow-Display**” with a lot of FAQs and troubleshooting around CYD
- Another source for examples is “https://github.com/bitbank2/CYD_Projects”
- Sara and Rui Santos have a phantastic website around ESP32 topics, and they give a lot of information and examples, e.g. “Getting Started with ESP32 Cheap Yellow Display Board — CYD (ESP32–2432S028R)” and “ESP32 Cheap Yellow Display (CYD) Pinout (ESP32–2432S028R)”. Use their search for more tutorials.
TFT Display driver library TFT_eSPI explained
For my tutorials that include a TFT display, I’m using the “**TFT_eSPI library**” by Bodmer. All tutorials come with a User Setup file for the display. As there are 2 display (driver) types sold, I provide both of them in the project's GitHub Repository. I strongly recommend reading the tutorial “Getting Started with an ESP32-C6 Supermini device connected to an ILI9341 TFT display” as it gives some more information about the library when running with the newest Arduino / ESP32 board combination.
User Setup files for ESP32 2.8 inch ILI9341 and ST7789 TFT display
Setup801_ESP32_CYD_ILI9341_240x320.h
Setup805_ESP32_CYD_ST7789_240x320.h
Get the correct time including time offsets from an NTP server
As the source of the time is an internet service, you need to provide your Wi-Fi credentials for access to your router. Usually, you will receive the Greenwich Median Time (“GMT”) but not the time in your location. You could add or subtract “offsets”, but they may change due to “Summer” or “Wintertime” settings. For this reason, I’m using the “Timezone” feature. Visit the “nayarsystems/posix_tz_db” GitHub Repository, scroll down to your location and copy/paste the timezone string in the MY_TIMEZONE definition:
Germany: #define MY_TIMEZONE "CET-1CEST,M3.5.0,M10.5.0/3"
America/New_York: EST5EDT,M3.2.0,M11.1.0
When a Wi-Fi connection is available, the ESP32 will automatically synchronize the time and date.
Clock Faces source
You can use your own images for displaying the time and date digits, but I took them from EleksTubeHAX repository that offers a “Nixie Fake Clock”. You can find a lot of designs here, and I have the “8 Lego” design selected. In this folder, you find 10 PNG files, but unfortunately there are two hick ups:
- The size of the images does not match our needs
- The images are not directly usable within our sketch.

There are websites that handle both parts, and I’m recommending the “RGB Image to Byte Array Converter for Arduino TFT Displays” by Renzo Mischianti. I downloaded the complete “EleksTubeHAX” repository and opened the images file by file with these Settings that should be the default ones:
Code format Hex 0x00
Palette mod 16bit RRRRRGGGGGGBBBBB (2byte/pixel)
Resize: use both parameters to match exact size, e.g. 50 x 88
Multi line yes
Endianness Little Endian
static yes
const yes
Data type uint16_t
PROGMEM yes
Click on “convert” and then on “Save as file”, you will get 10 files like this:
#define _0_HEIGHT 88
#define _0_WIDTH 50

// array size is 8800
static const uint16_t _0[] PROGMEM  = {
  0x0000, 0x0000, 0x0000, 0x0000, 0x0000, 0x0000, 0x0000, 0x0000, 0x0000, 0x0000, 0x0000, 0x0000, 0x0000, 0x0000, 0x0000, 0x0000, 0x0000, 0x0000, 0x0000, 0x0000, 0x0000, 0x0000, 0x0000, 0x0000, 0x0000, 0x0000, 0x0000, 0x0000, 0x0000, 0x0000, 0x0000, 0x0000, 0x0000, 0x0000, 0x0000, 0x0000, 0x0000, 0x0000, 0x0000, 0x0000, 0x0000, 0x0000, 0x0000, 0x0000, 0x0000, 0x0000, 0x0000, 0x0000, 0x0000, 0x0000,
...
};
Why did I choose an image width of 50 pixels? Because I want to display 6 digits in a row (each 2 for seconds, minutes and hours, 6*50 = 300 pixels) and the display in Landscape mode is 320 pixels wide. Using a second row with day, month and year digits, limit the image height to something around 100 pixels.
Now copy and paste the files within your sketch folder. This way, you can easily use other designs for your own clock.
Clock Faces handling in the sketch
The TFT_eSPI library offers a very convenient way to work with graphics that are changing: they are called “Sprites”. You can, of course, draw all digits each second, but sometimes it ends in a flickering. When using Sprites, the content is changed very fast and you will not see any flickering. This is the workflow in the sketch.
Create the Sprites
Include the downloaded “.h” clock face files:
#include "0.h";
...
#include "9.h";
Create an array of Sprite variables:
TFT_eSprite ts[10] = { TFT_eSprite(&tft), TFT_eSprite(&tft), TFT_eSprite(&tft), TFT_eSprite(&tft), TFT_eSprite(&tft), TFT_eSprite(&tft), TFT_eSprite(&tft), TFT_eSprite(&tft), TFT_eSprite(&tft), TFT_eSprite(&tft) };Load the images into the Sprite. I’m setting the “Color Depth” to save heap space:
void createDisplayTimeCharacters() {
  for (int i = 0; i < 10; i++) {
    ts[i].setColorDepth(8);
    ts[i].setSwapBytes(true);
    ts[i].createSprite(CLOCK_FACE_WIDTH, CLOCK_FACE_HEIGHT);
  }
  ts[0].pushImage(0, 0, CLOCK_FACE_WIDTH, CLOCK_FACE_HEIGHT, _0);
...
  ts[9].pushImage(0, 0, CLOCK_FACE_WIDTH, CLOCK_FACE_HEIGHT, _9);
}
In the loop() the “manageDisplay()” method is called, which updates the clock and calendar every second.
The “updateClock()” method is using a very simple way to get each digit. There may be more sophisticated ways to do; feels free to use your way :-)
Here is an example for the hour digits: I’m displaying the hour in “24 hours mode”, so the first digit is a “0”, “1” or “2”. When it is 9 o’clock, the digit is fixed to display the “zero” sprite at the first position and the “nine” sprite on the second position. The same applies to the minutes, hours and date data.
void updateClock() {
  // there are each 2 digits for the hour, minutes and seconds
  // hour
  if (hh < 10) {
    ts[0].pushSprite(CLOCK_POS_X, CLOCK_POS_Y, TFT_TRANSPARENT);
    ts[hh].pushSprite(CLOCK_POS_X + DIGITS_WIDTH, CLOCK_POS_Y, TFT_TRANSPARENT);
  } else if ((hh > 9) && (hh < 20)) {
    ts[1].pushSprite(CLOCK_POS_X, CLOCK_POS_Y, TFT_TRANSPARENT);
    ts[hh - 10].pushSprite(CLOCK_POS_X + DIGITS_WIDTH, CLOCK_POS_Y, TFT_TRANSPARENT);
  } else {
    ts[2].pushSprite(CLOCK_POS_X, CLOCK_POS_Y, TFT_TRANSPARENT);
    ts[hh - 20].pushSprite(CLOCK_POS_X + DIGITS_WIDTH, CLOCK_POS_Y, TFT_TRANSPARENT);
  }
  // minutes
  if (mm < 10) {
    ts[0].pushSprite(CLOCK_POS_X + (2 * DIGITS_WIDTH), CLOCK_POS_Y, TFT_TRANSPARENT);
    ts[mm].pushSprite(CLOCK_POS_X + (3 * DIGITS_WIDTH), CLOCK_POS_Y, TFT_TRANSPARENT);
  } else if (mm > 9) {
    int mmFirst = mm / 10;
    ts[mmFirst].pushSprite(CLOCK_POS_X + (2 * DIGITS_WIDTH), CLOCK_POS_Y, TFT_TRANSPARENT);
    ts[mm - (mmFirst * 10)].pushSprite(CLOCK_POS_X + (3 * DIGITS_WIDTH), CLOCK_POS_Y, TFT_TRANSPARENT);
  }
  // seconds
  if (ss < 10) {
    ts[0].pushSprite(CLOCK_POS_X + (4 * DIGITS_WIDTH), CLOCK_POS_Y, TFT_TRANSPARENT);
    ts[ss].pushSprite(CLOCK_POS_X + (5 * DIGITS_WIDTH), CLOCK_POS_Y, TFT_TRANSPARENT);
  } else if (ss > 9) {
    int ssFirst = ss / 10;
    ts[ssFirst].pushSprite(CLOCK_POS_X + (4 * DIGITS_WIDTH), CLOCK_POS_Y, TFT_TRANSPARENT);
    ts[ss - (ssFirst * 10)].pushSprite(CLOCK_POS_X + (5 * DIGITS_WIDTH), CLOCK_POS_Y, TFT_TRANSPARENT);
  }
}
CYD Troubleshooting
The display is not working
Did you activate the correct driver in TFT_eSPI ? Devices with one USB connector usually have an ILI9341 driver, whereas the CYDs with two USB connectors are driven by a ST7789.
The display is not working properly
The ILI9341 driver comes in two variants, and I activated the #2 driver. Maybe you should use the other driver:
//#define ILI9341_DRIVER       // Generic driver for common displays
#define ILI9341_2_DRIVER     // Alternative ILI9341 driver, see https://github.com/Bodmer/TFT_eSPI/issues/1172
Development Environment
The code was developed on Arduino version 2.3.6 (Windows) and esp32 (boards) version 3.3.0.
Summary
It is very easy to display a nice digital clock on the TFT display of your ESP32 Cheap Yellow Display device. If you want another design, the exchange of clock faces is done within minutes, e.g. with a Christmas design:

Source code of the app
You find the complete code of the app, the modified TFT_eSPI library and the device-display settings file in my GitHub repositories.
Happy coding !
메타데이터
- post_id
- 641db4642e47
- slug
- create-a-colorful-digital-clock-on-an-esp32-cheap-yellow-display-cyd-641db4642e47
- url
- https://medium.com/@androidcrypto/create-a-colorful-digital-clock-on-an-esp32-cheap-yellow-display-cyd-641db4642e47
- canonical_url
- https://medium.com/@androidcrypto/create-a-colorful-digital-clock-on-an-esp32-cheap-yellow-display-cyd-641db4642e47
- author_url
- https://medium.com/@androidcrypto
- status
- ok
- fetched_at
- 2026-06-13 09:11:36