SOC Home Lab: Building a SIEM with Wazuh
Wazuh is an open-source security platform which can be used for threat detection, log analysis, and endpoint monitoring.
SOC Home Lab: Building a SIEM with Wazuh
Wazuh is an open-source security platform which can be used for threat detection, log analysis, and endpoint monitoring.
What We Will Cover
- Network Setup
- Installing the Wazuh Manager
- Deploying a Wazuh agent
- Installing and Integrating Sysmon with Wazuh
- Monitoring Directories Using the File Integrity Monitoring (FIM) Module
- Integrating VirusTotal for Real-Time Malware Detection and Response Using a Bash Script
Network Setup

For this lab environment, the central Wazuh Manager is hosted on a Linux machine (IP: 192.168.1.242). It is configured to monitor two virtual machines: one running Windows and another running Linux.
Installing the Wazuh Manager
First, we need to install the Wazuh Manager on our Linux host, which will act as our central server. Once it is running, we will deploy Wazuh agents to our target virtual machines to gather their logs and monitor them from a single location. Following the official documentation, we can get the manager running with just one simple command:
curl -sO https://packages.wazuh.com/4.14/wazuh-install.sh && sudo bash ./wazuh-install.sh -a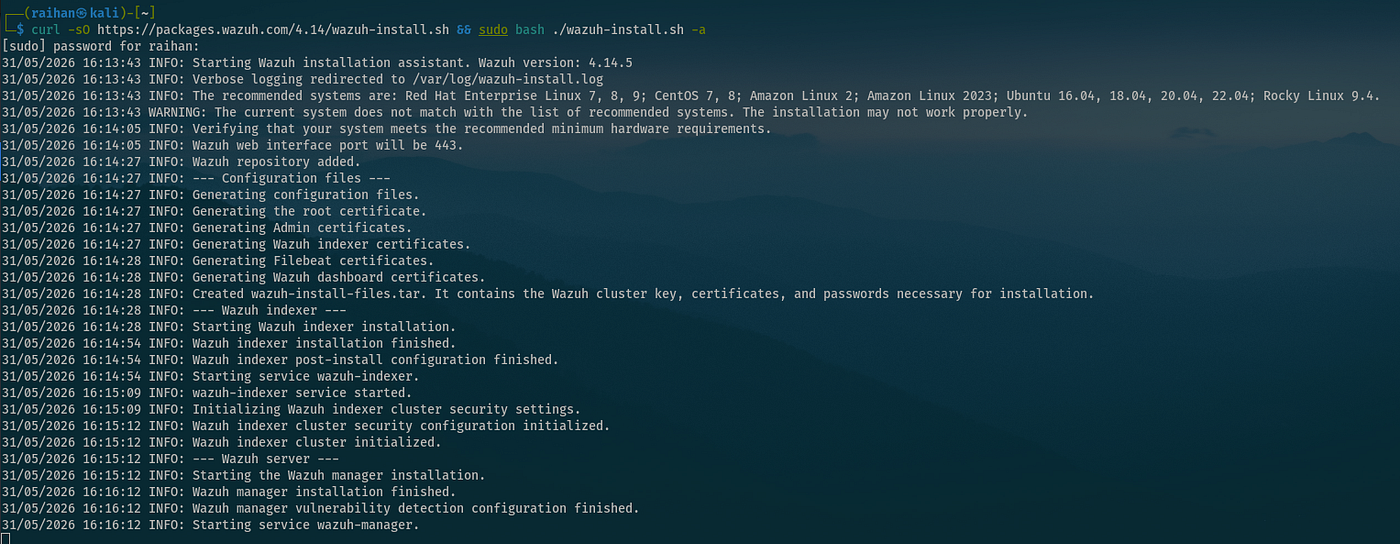
After the installation is complete, you will see a username and password at the bottom of the terminal. Save these credentials somewhere safe, as you will need them to log in to the Wazuh dashboard.
If you lose the password or accidentally clear the terminal screen, don’t worry! The password can easily be changed, and the instructions are detailed in the Wazuh documentation. To reset it, log in as the
rootuser and navigate to the following location:
*/usr/share/wazuh-indexer/plugins/opensearch-security/tools*
and run this command:
*bash wazuh-passwords-tool.sh -u admin -p Secr3tP4ssw*r**
set the password as you wish.
Next, open your browser and go to https://[your-manager-IP]. Don't worry if you see a TLS certificate warning; just ignore it and proceed safely to the dashboard.
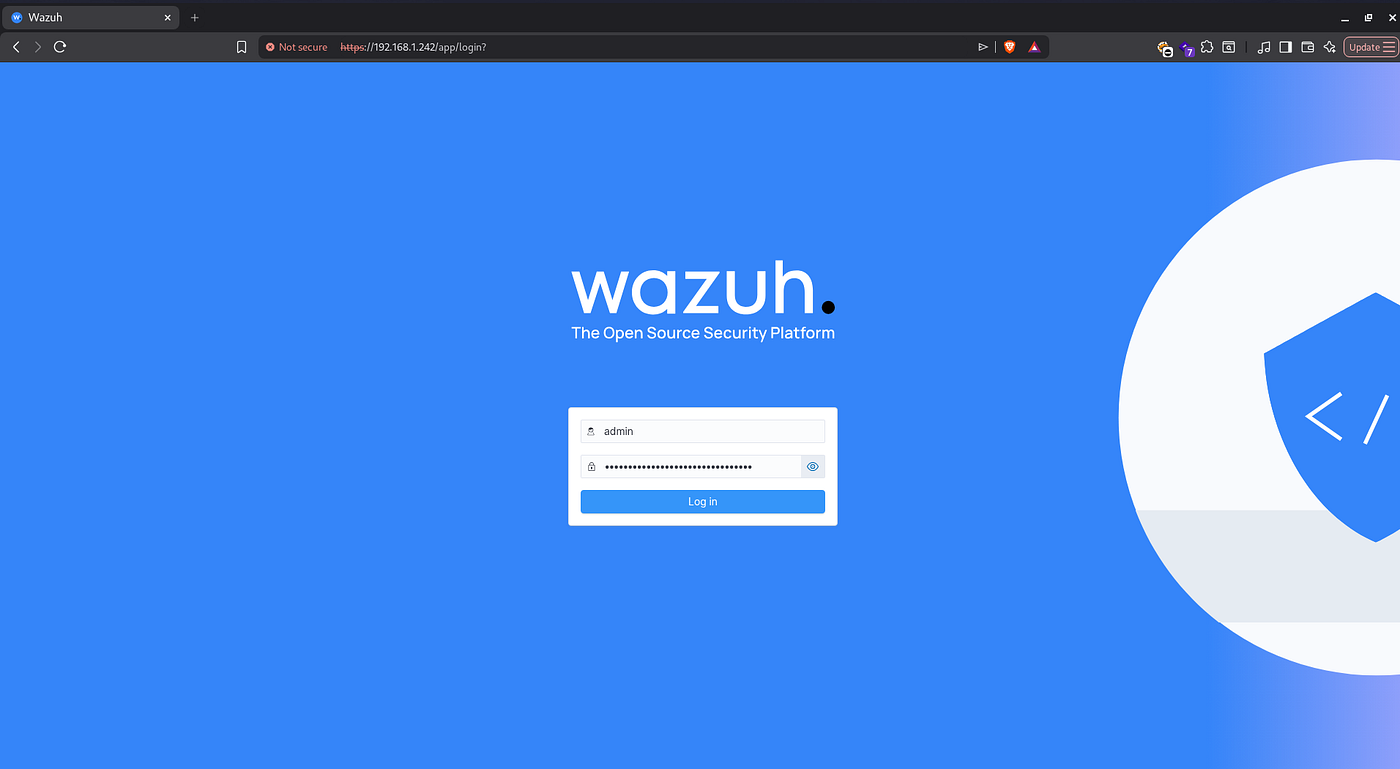
After a successful login, you’ll see the central Wazuh dashboard.
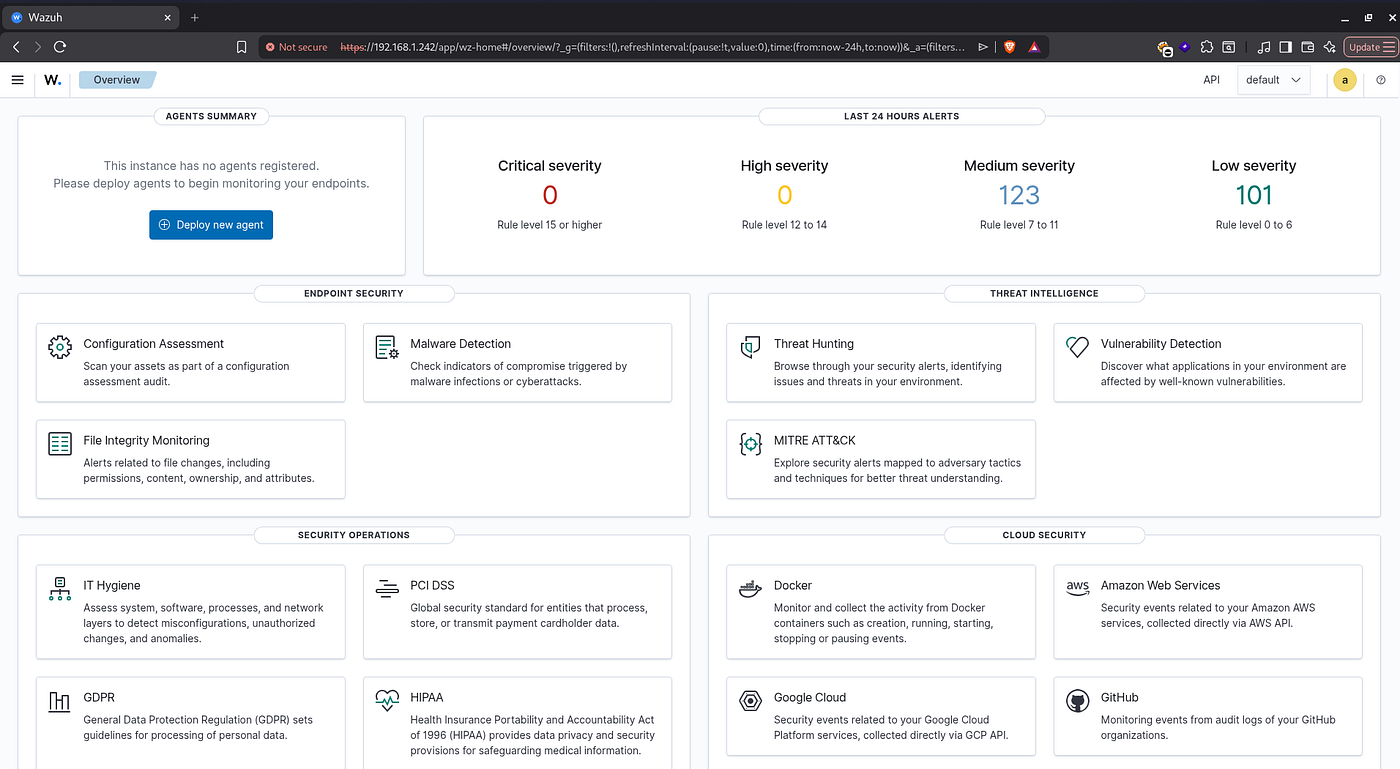
However, we haven’t added any agents to monitor just yet. Let’s add a Windows agent to our environment.
Deploying a Wazuh agent
Since we don’t have any agents connected yet, click the Add agent button directly on the main dashboard.
You can also deploy an agent at any time by going to Agents management > Summary and selecting Deploy new agent.
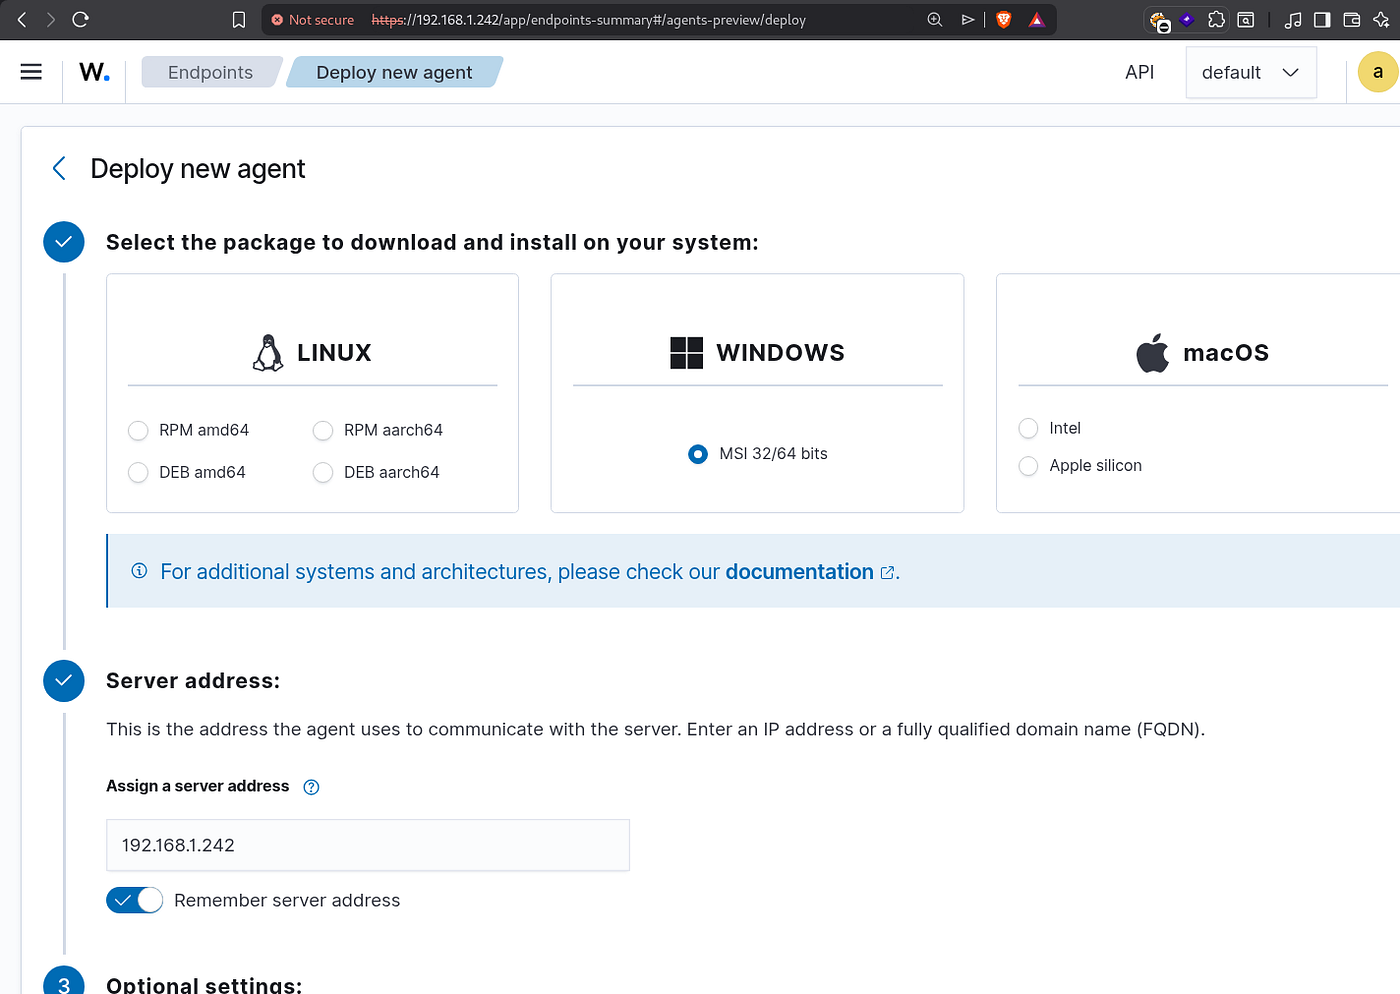
Select Windows as the operating system. Next, enter the IP address of the machine where we just installed the Wazuh Manager into the server address field.
In the optional settings, you can assign a custom PC name that will show up on your dashboard, or simply leave it as the default.
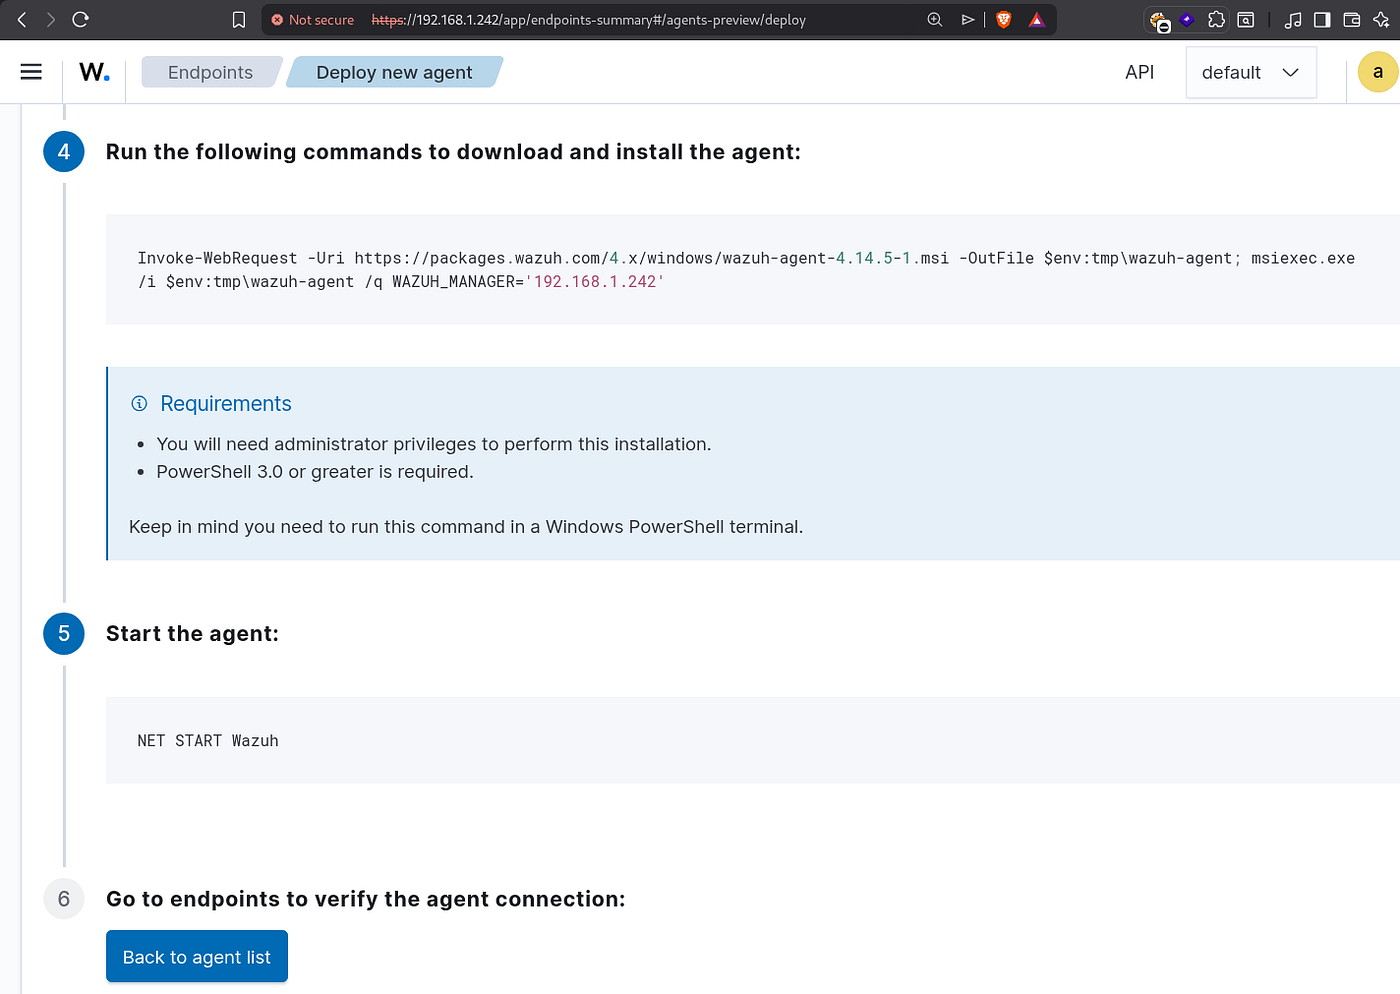
Next, switch over to the Windows machine where you want to deploy the agent. Open PowerShell as an Administrator and paste the installation command provided in step 4 on the dashboard.
After the installation is complete, start the Wazuh service using the following command:
NET START WazuhThe agent is successfully deployed!
You should see it appear in your manager dashboard.
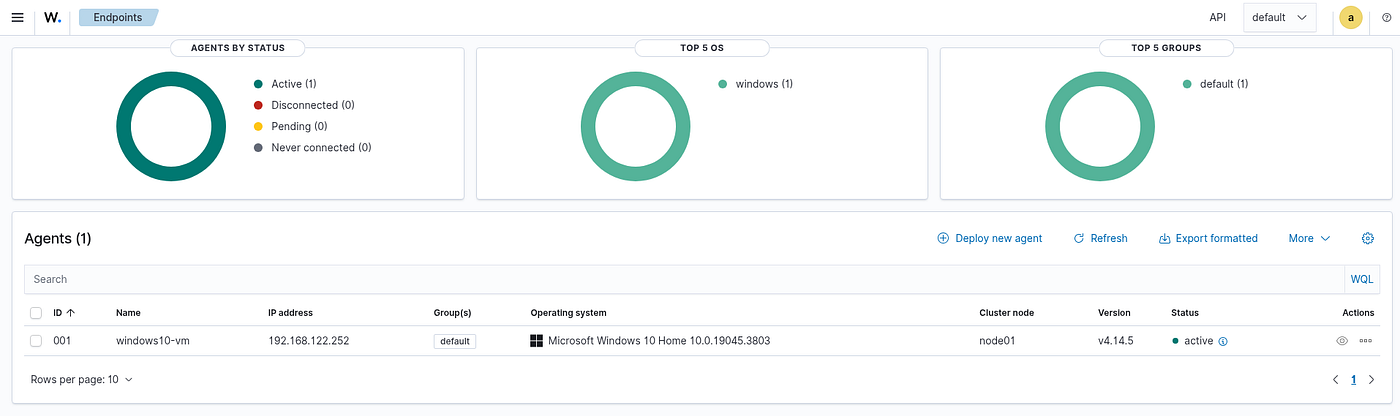
Installing and Integrating Sysmon with Wazuh
By default, Wazuh collects logs from standard Windows Event channels (the same ones you see in the Event Viewer GUI). However, to monitor more specific and detailed activities such as advanced PowerShell execution, network connections, and process creation, we need to install Sysmon and configure it to forward its logs to Wazuh.
Installing Sysmon is quite simple. Just visit the official Microsoft page and download the tool:
https://learn.microsoft.com/en-us/sysinternals/downloads/sysmon
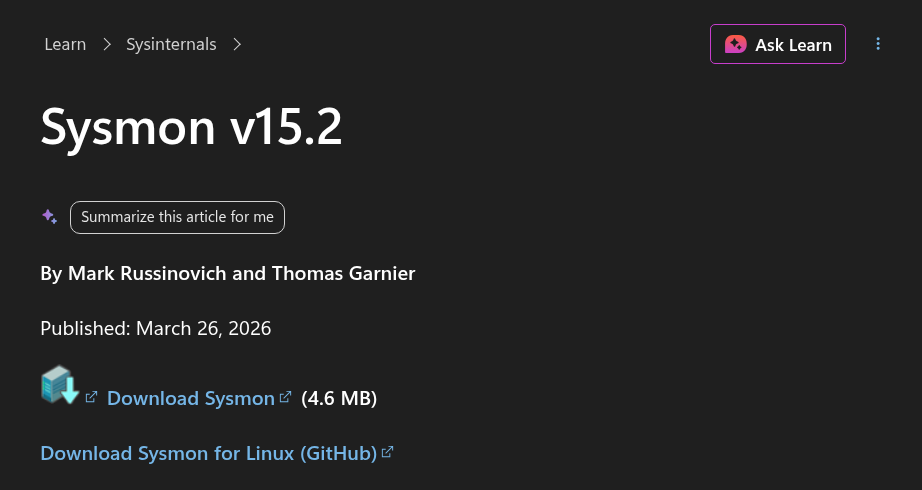
The download will give you a ZIP file. For ease of access, extract the contents to a simple folder path like C:\Sysmon.
Now, we need a configuration file that tells Sysmon which events to monitor. There are several excellent public configuration files available. A very famous one is provided by SwiftOnSecurity on GitHub:

However, there is another file provided directly by Wazuh, which we will use for this demonstration. Go to:

and download it as sysmonconfig.xml. Save it into the exact same directory where your other Sysmon files are located.
Next, open PowerShell as an Administrator.
Navigate to the folder where Sysmon is located, and run the following command to activate Sysmon using the configuration we downloaded:
.\sysmon64.exe -accepteula -i .\sysmonconfig.xml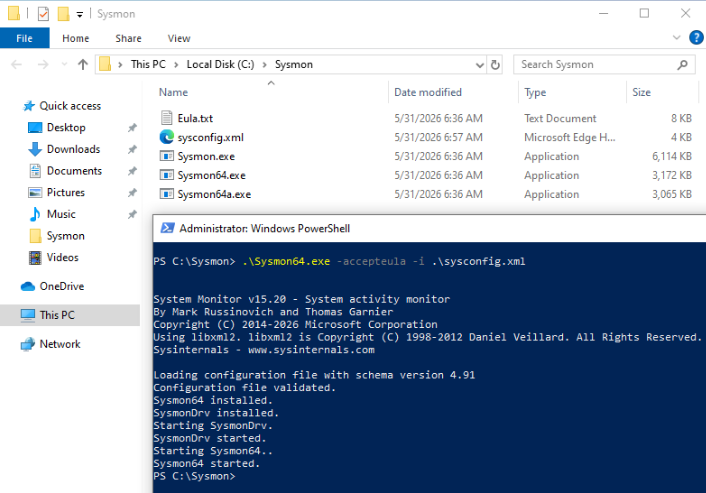
Now, we need to edit the Wazuh agent configuration file on our Windows machine. This file is named ossec.conf and is located in:
C:\Program Files (x86)\ossec-agent\ossec.conf
Edit the file as administrator.
NOTE: If you are using an app like Notepad or Sublime Text, you can search for it in the Start menu and press
Ctrl + Shift + Enterto open it with Administrator privileges. Then, you can open theossec.conffile directly from within the app.
In the configuration file add these lines:
<localfile>
  <location>Microsoft-Windows-Sysmon/Operational</location>
  <log_format>eventchannel</log_format>
</localfile>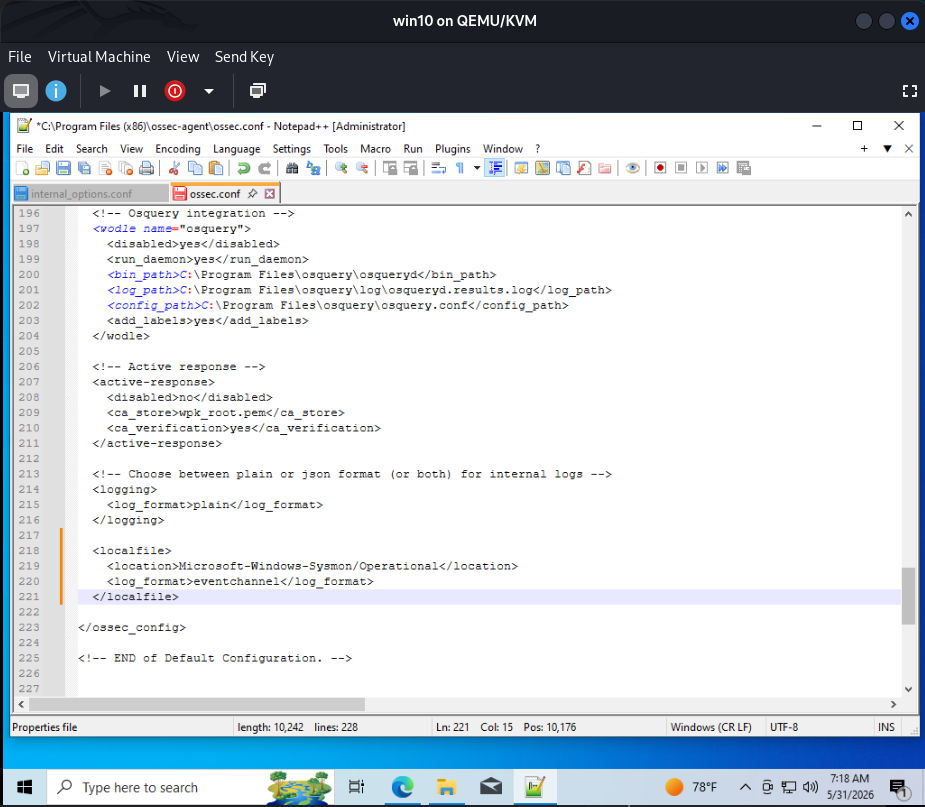
Save the file.
Restart the Wazuh agent using:
> Restart-Service -Name WazuhNow, for demonstration purposes, let’s install several applications using Ninite on our Windows agent.
I installed the PuTTY application.
Go to the Threat Hunting > Events section in the Wazuh dashboard. As we can see, Wazuh has detected the installation.
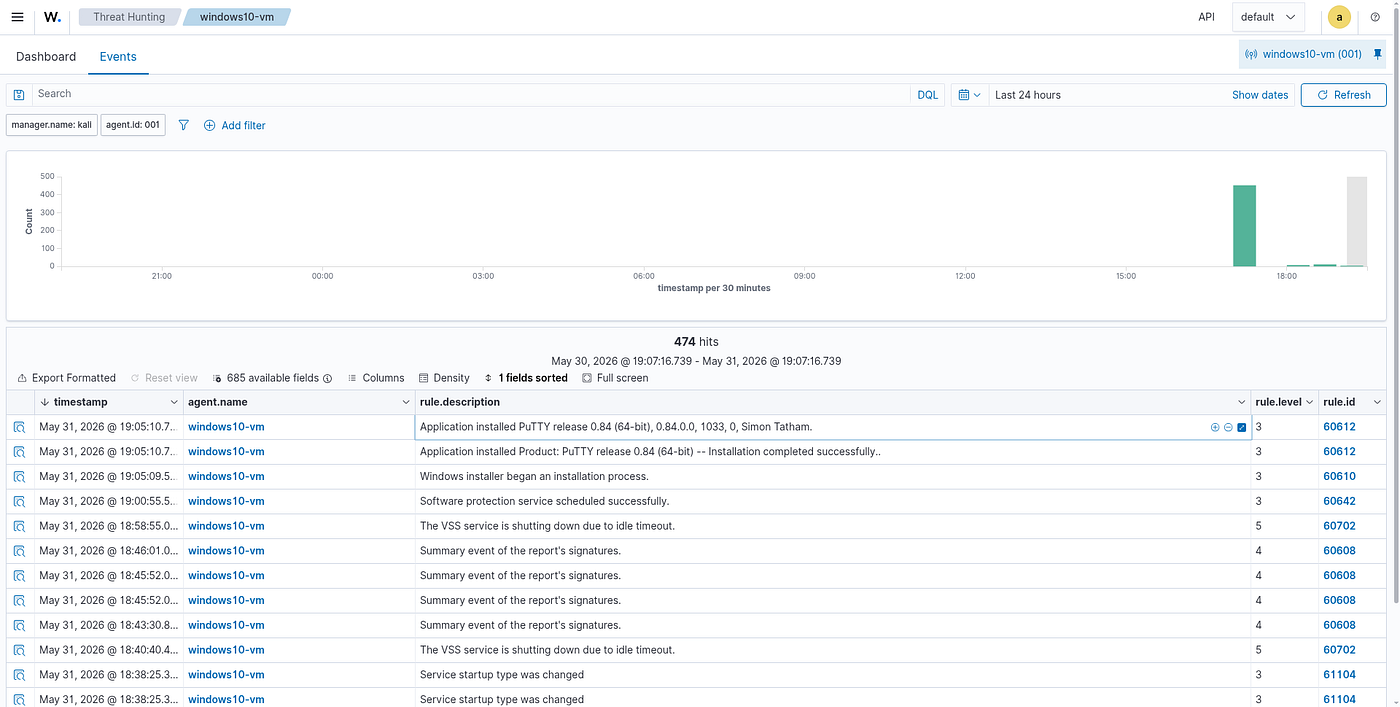
Next, let’s restart the Wazuh agent using PowerShell.
Restart-Service -Name wazuhOnce the service restarts, you will notice that Wazuh immediately detects and logs that the agent was stopped and started:
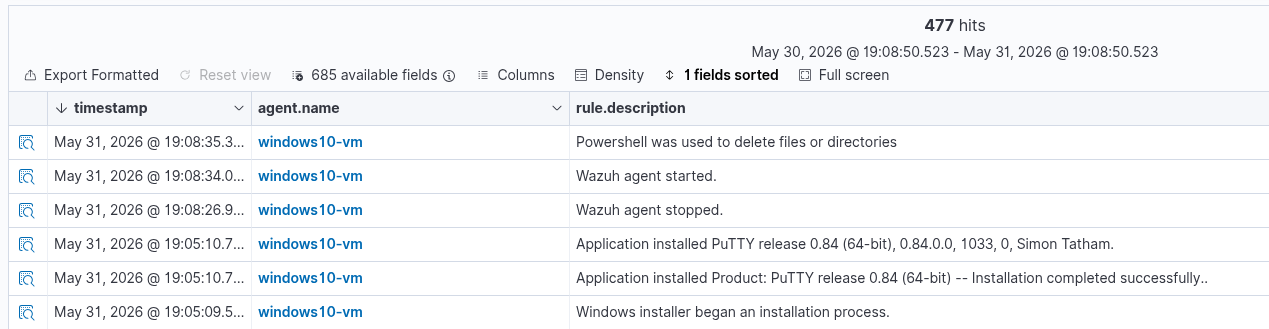
Let’s uninstall the PuTTY application.

And as expected, Wazuh detected the event.
Monitoring Directories Using the File Integrity Monitoring (FIM) Module
To monitor a specific directory in real time for any created or modified files, we can use the File Integrity Monitoring (FIM) feature in Wazuh.
For this demonstration, I will use an Ubuntu agent to highlight that Wazuh works perfectly across both Windows and Linux environments. I added this new Ubuntu agent using the exact same process we used for Windows earlier, and it is now visible in the dashboard.
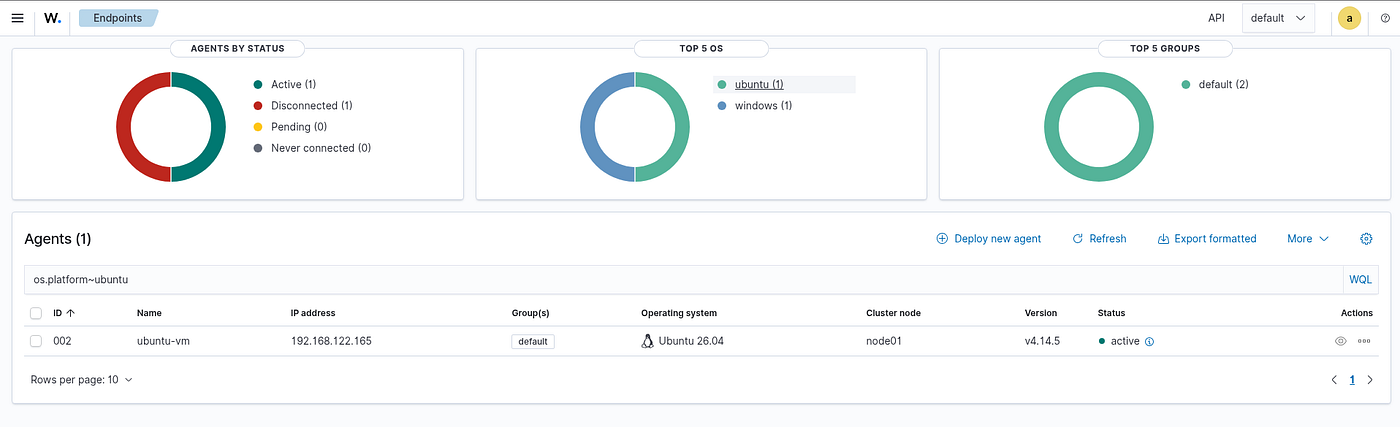
In your Ubuntu agent, open the ossec.conf file with root privileges. You can find this configuration file located in the following directory:
/var/ossec/etcI opened the file using nano and used the search function (Ctrl+F) to navigate directly to the File Integrity Monitoring section:
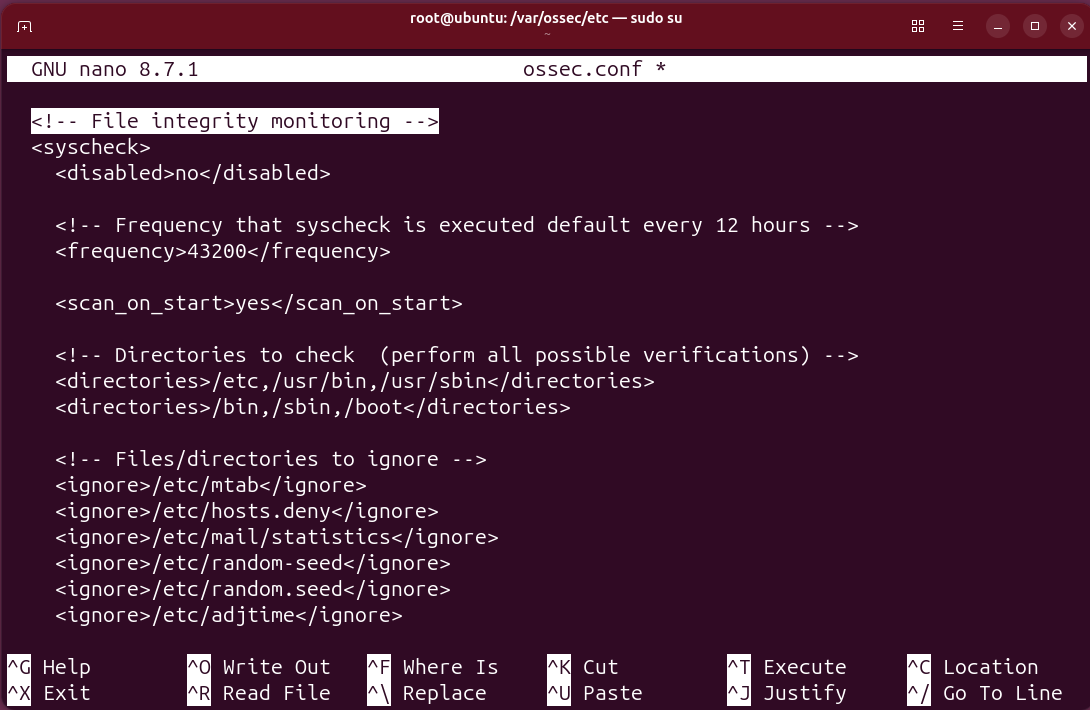
Within the <directories> block, we can specify exactly which folders Wazuh should monitor. Let's configure it to watch the /root directory by adding the following line:
<directories check_all="yes" report_changes="yes" realtime="yes">/root</directories>
Save and exit the file.
Next, apply the changes by restarting the Wazuh agent with the following command:
sudo systemctl restart wazuh-agentNow, let’s test our configuration. We will create a new file in the /root directory, change its contents, and then delete it after a few moments.
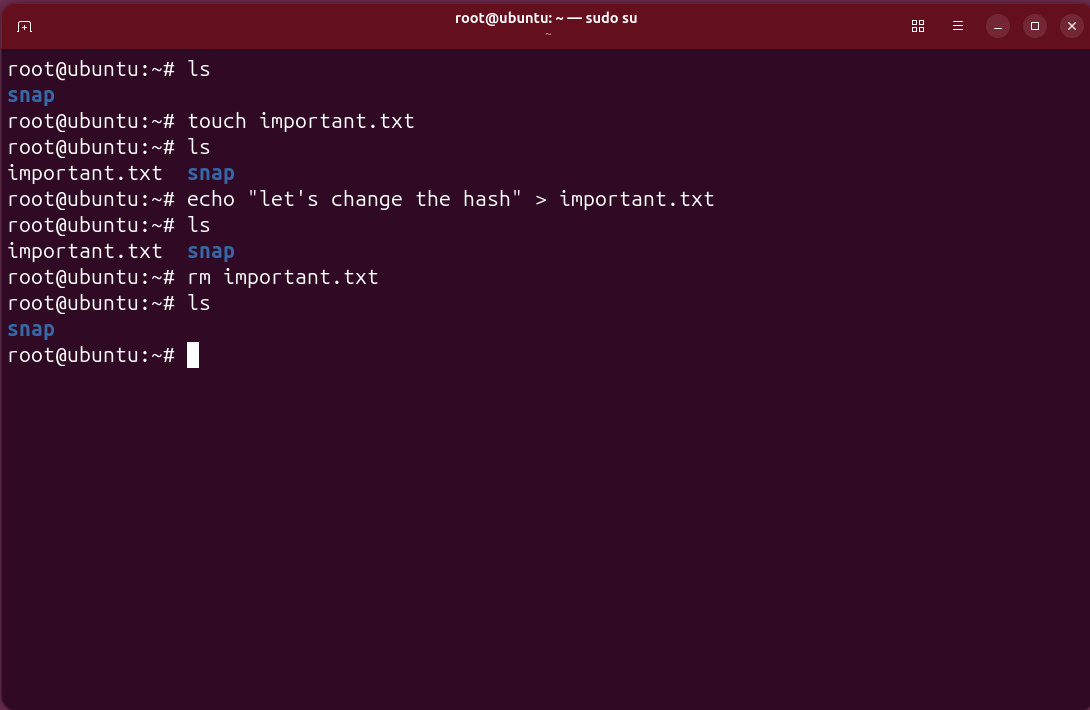
Check the Wazuh dashboard under the File Integrity Monitoring section. As you can see, Wazuh immediately picked up on the activity and recorded all the events:

On the left side of the event log, there is an icon that displays “Inspect document details” when you hover over it. Clicking this will reveal the details of that specific event.
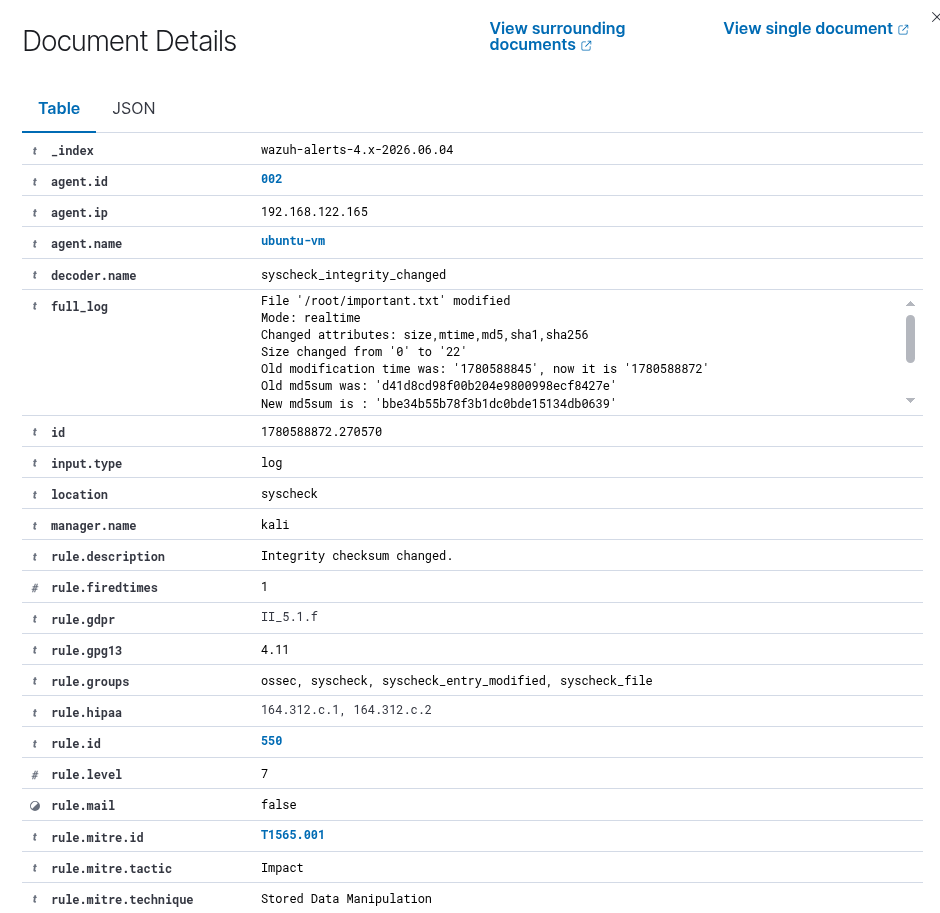
Inside the event details, we can see the file name, the old and new hashes of the file, the associated MITRE tactic, and many other useful pieces of information.
Integrating VirusTotal for Real-Time Malware Detection and Response Using a Bash Script
We can combine the Wazuh File Integrity Monitoring (FIM) module with the VirusTotal API to automatically scan newly modified files. From there, we can configure Wazuh to trigger an active response script that automatically removes any file VirusTotal flags as malicious.
If you don’t already have one, create an account on VirusTotal and get an API key as we will need it for this integration.
The free API tier provides the following features:
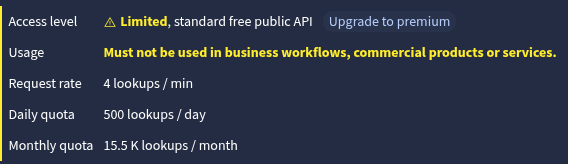
which is more than enough for demonstration purposes.
Next, we need to edit the Wazuh server’s ossec.conf file to integrate it with VirusTotal. You can find this configuration file located at:
/var/ossec/etc/ossec.confOpen the file using root privileges and add the following snippet to the very bottom of the file:
<ossec_config>
  <integration>
    <name>virustotal</name>
    <api_key><YOUR_VIRUS_TOTAL_API_KEY></api_key> <!-- Replace with your VirusTotal API key -->
    <rule_id>100200,100201</rule_id>
    <alert_format>json</alert_format>
  </integration>
</ossec_config>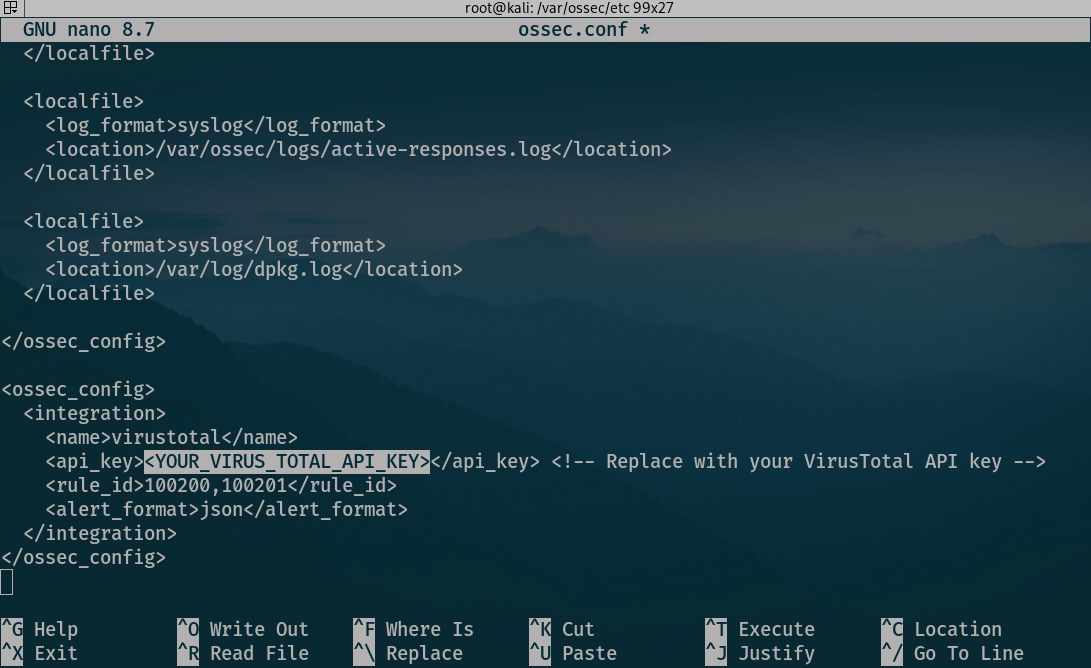
(I replaced the API key section with my personal key after taking the screenshot. Be sure to use your own!)
After saving your changes, restart the server using this command:
systemctl restart wazuh-managerIn the previous section we already set up the FIM module on the Ubuntu agent to keep a real-time watch on the /root directory. To demonstrate this next feature, let's expand our configuration by adding the /home/ubuntu/Downloads directory.
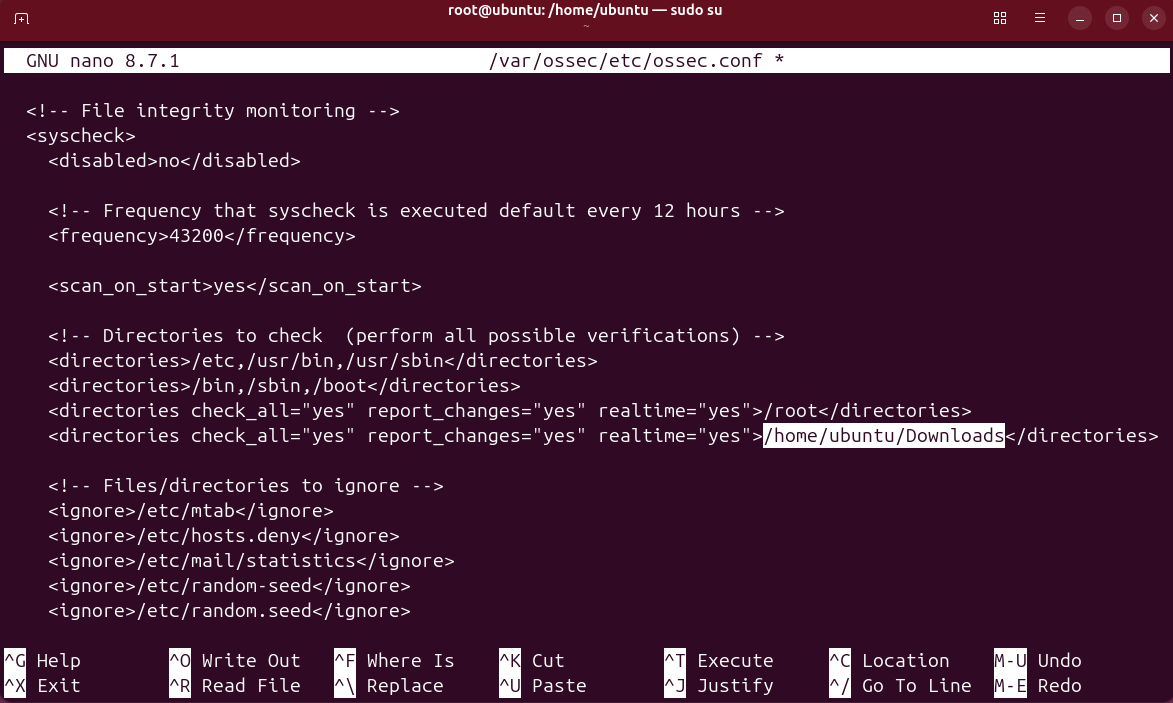
We now have to install jq, a utility that processes JSON input from the active response script.
sudo apt update
sudo apt -y install jq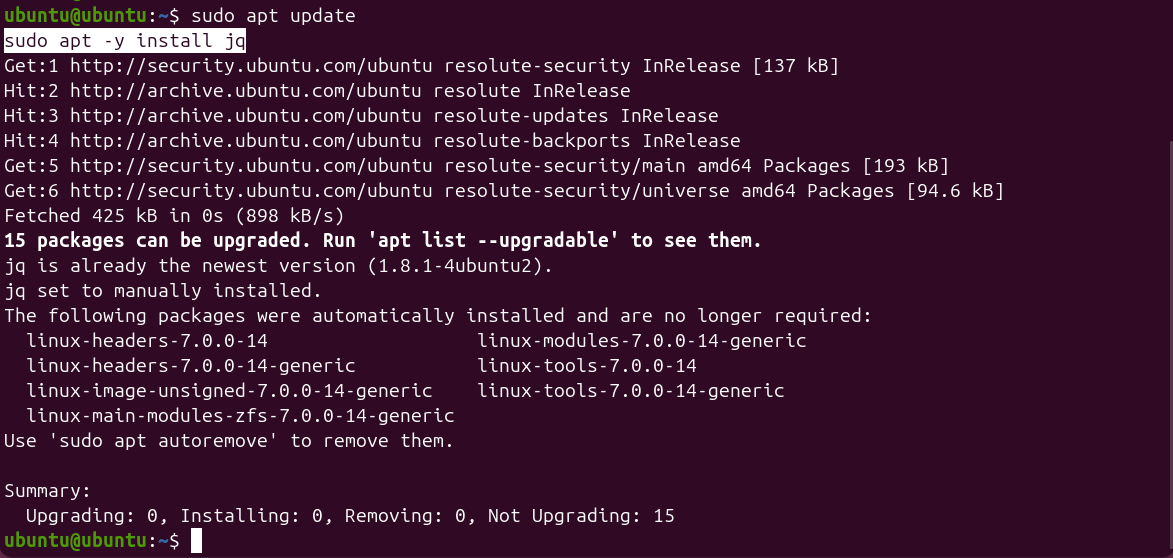
Now we have to create the /var/ossec/active-response/bin/remove-threat.sh active response script, which is provided by official Wazuh documentation, to remove malicious files from the endpoint:
#!/bin/bash

LOCAL=`dirname $0`;
cd $LOCAL
cd ../

PWD=`pwd`

read INPUT_JSON
FILENAME=$(echo $INPUT_JSON | jq -r .parameters.alert.data.virustotal.source.file)
COMMAND=$(echo $INPUT_JSON | jq -r .command)
LOG_FILE="${PWD}/../logs/active-responses.log"

#------------------------ Analyze command -------------------------#
if [ ${COMMAND} = "add" ]
then
 # Send control message to execd
 printf '{"version":1,"origin":{"name":"remove-threat","module":"active-response"},"command":"check_keys", "parameters":{"keys":[]}}\n'

 read RESPONSE
 COMMAND2=$(echo $RESPONSE | jq -r .command)
 if [ ${COMMAND2} != "continue" ]
 then
  echo "`date '+%Y/%m/%d %H:%M:%S'` $0: $INPUT_JSON Remove threat active response aborted" >> ${LOG_FILE}
  exit 0;
 fi
fi

# Removing file
rm -f $FILENAME
if [ $? -eq 0 ]; then
 echo "`date '+%Y/%m/%d %H:%M:%S'` $0: $INPUT_JSON Successfully removed threat" >> ${LOG_FILE}
else
 echo "`date '+%Y/%m/%d %H:%M:%S'` $0: $INPUT_JSON Error removing threat" >> ${LOG_FILE}
fi

exit 0;
we have to change the permissions of the script:
sudo chmod 750 /var/ossec/active-response/bin/remove-threat.sh
sudo chown root:wazuh /var/ossec/active-response/bin/remove-threat.sh
And now we restart the Wazuh agent.
sudo systemctl restart wazuh-agentIn the Server side,
We have to edit the /var/ossec/etc/rules/local_rules.xml file on the Wazuh server. These rules alert about changes in the /root directory that are detected by FIM scans:
<group name="syscheck,pci_dss_11.5,nist_800_53_SI.7,">
    <!-- Rules for Linux systems -->
    <rule id="100200" level="7">
        <if_sid>550</if_sid>
        <field name="file">/root</field>
        <description>File modified in /root directory.</description>
    </rule>
    <rule id="100201" level="7">
        <if_sid>554</if_sid>
        <field name="file">/root</field>
        <description>File added to /root directory.</description>
    </rule>
</group>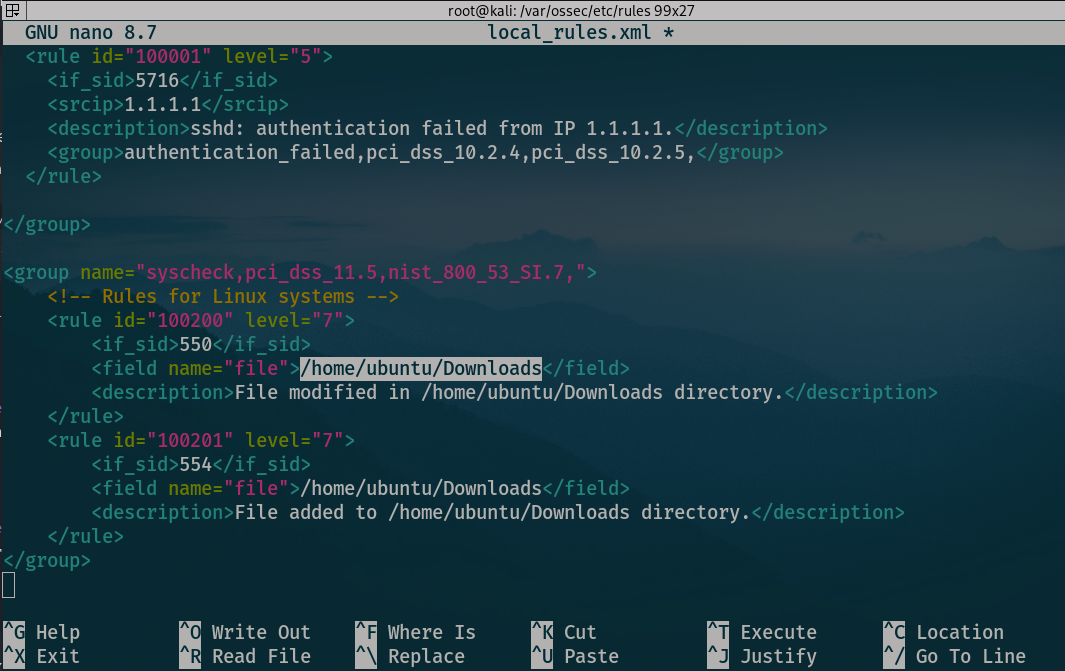
Now, append the following blocks to the Wazuh server /var/ossec/etc/ossec.conf file. This enables Active Response and triggers the remove-threat.sh script when VirusTotal flags a file as malicious:
<ossec_config>
  <command>
    <name>remove-threat</name>
    <executable>remove-threat.sh</executable>
    <timeout_allowed>no</timeout_allowed>
  </command>

  <active-response>
    <disabled>no</disabled>
    <command>remove-threat</command>
    <location>local</location>
    <rules_id>87105</rules_id>
  </active-response>
</ossec_config>
Now, add the following rules to the Wazuh server /var/ossec/etc/rules/local_rules.xml file to alert about the Active Response results:
<group name="virustotal,">
  <rule id="100092" level="12">
    <if_sid>657</if_sid>
    <match>Successfully removed threat</match>
    <description>$(parameters.program) removed threat located at $(parameters.alert.data.virustotal.source.file)</description>
  </rule>

  <rule id="100093" level="12">
    <if_sid>657</if_sid>
    <match>Error removing threat</match>
    <description>Error removing threat located at $(parameters.alert.data.virustotal.source.file)</description>
  </rule>
</group>
With the configuration complete, we just need to restart the Wazuh manager to apply the changes:
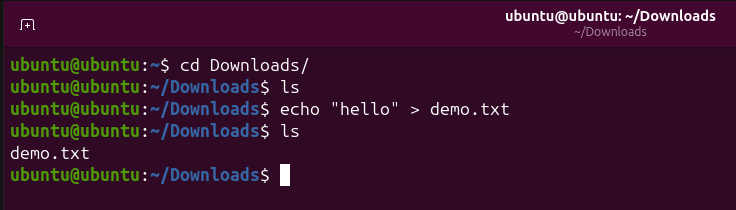
sudo systemctl restart wazuh-managerLet’s check if our FIM module is actively monitoring the new Downloads path. To do this, create a simple text file named demo.txt in that directory.
As we can see in the Wazuh dashboard, the file creation was successfully detected. VirusTotal automatically scanned the new file, and since it is just a normal text document, it reported zero positives.

Now for the real test. We will download a malware sample into the /home/ubuntu/Downloads directory and let Wazuh and VirusTotal do their work. To do this safely, let's use the famous EICAR test file.
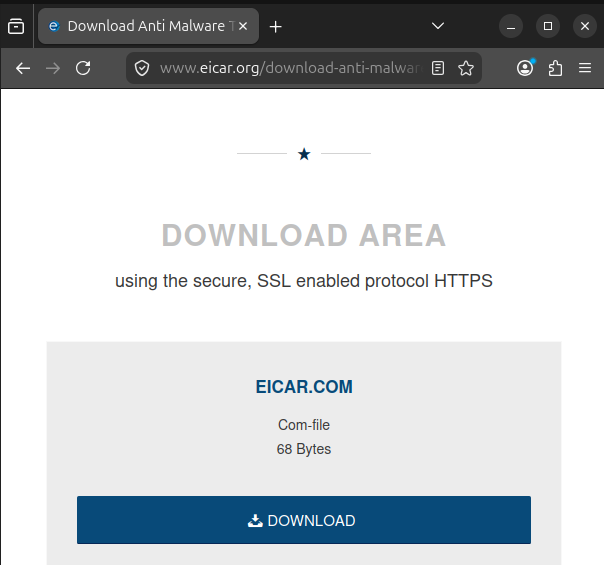
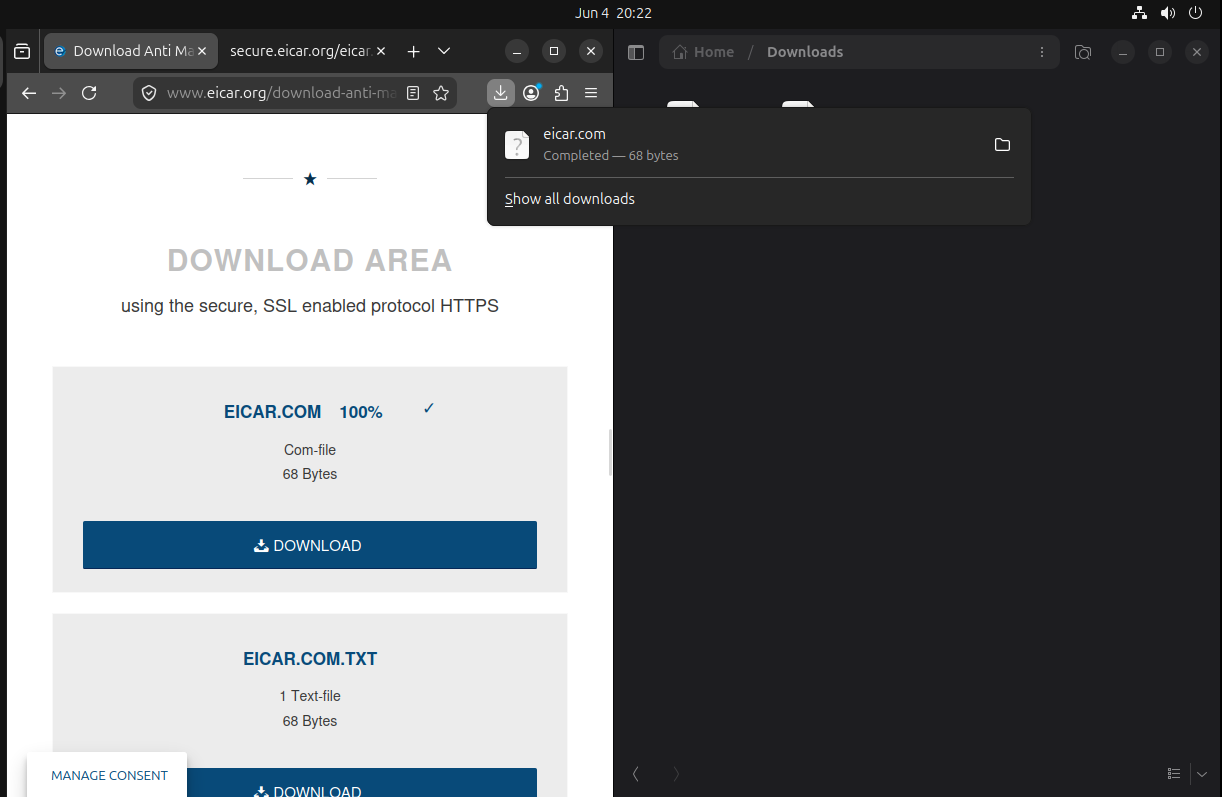
Upon downloading the EICAR test file, it was immediately identified and deleted in less than a second. To catch this fast action, I arranged my workspace with the browser on one side and the Downloads folder on the other. If you try this yourself, you'll see just how rapidly Wazuh triggers the deletion!
\
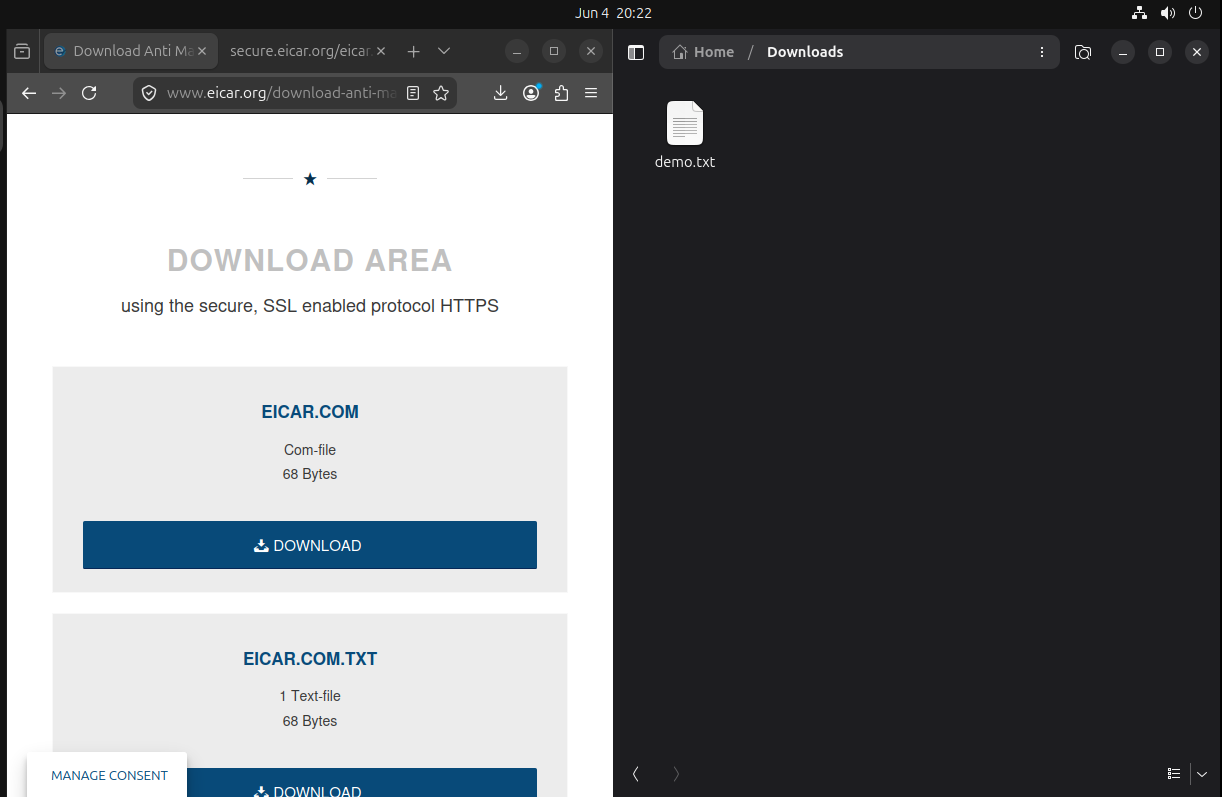
The EICAR file got deleted
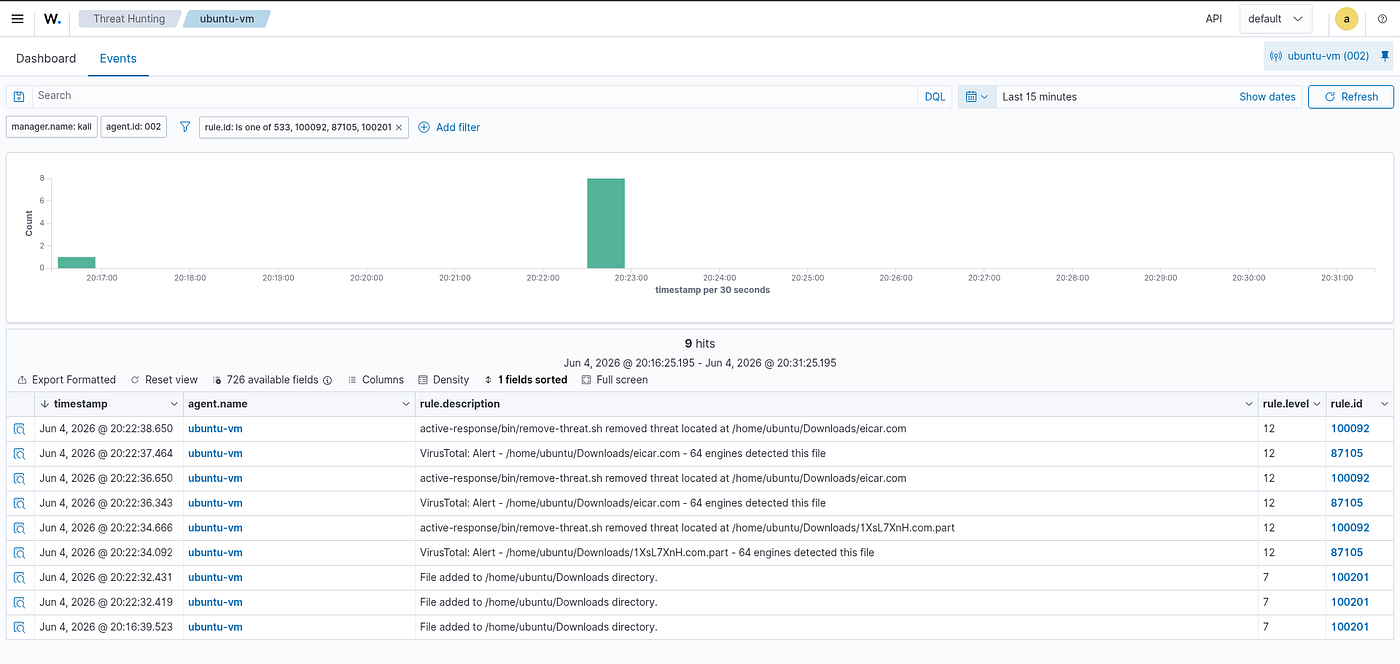
Checking the Wazuh dashboard, we can see the complete timeline: the file was created, VirusTotal immediately scanned it, 64 different engines flagged it as malware, and the active response successfully deleted it.

Finally, checking our VirusTotal account confirms the integration is working, as the API usage graph shows a clear spike from these automated scan requests.

We can also visualize these alerts by applying filters in the Threat Hunting section of the Wazuh dashboard. For this view, I filtered by specific rule IDs using: rule.id: is one of 553, 100092, 87105, 100201.

The dashboard will neatly display all the alerts tied to our specific rules:
As you can see, Wazuh is an incredibly powerful open-source tool for SIEM, threat hunting, and automated malware response. Setting up integrations like this showcases how easily it can be adapted to secure and monitor an enterprise environment.
This brings us to the end of our demo. Thank you for reading!
메타데이터
- post_id
- 67b16f9b2419
- slug
- soc-home-lab-building-a-siem-with-wazuh-67b16f9b2419
- url
- https://medium.com/@cybersum/soc-home-lab-building-a-siem-with-wazuh-67b16f9b2419
- canonical_url
- https://medium.com/@cybersum/soc-home-lab-building-a-siem-with-wazuh-67b16f9b2419
- author_url
- https://medium.com/@cybersum
- status
- ok
- fetched_at
- 2026-06-09 15:37:30