Crossplane in Action: Provisioning AWS Resources from Kubernetes on Your Laptop
What if you could kubectl apply an S3 bucket the same way you deploy a Pod?
Crossplane in Action: Provisioning AWS Resources from Kubernetes on Your Laptop
What if you could kubectl apply an S3 bucket the same way you deploy a Pod?
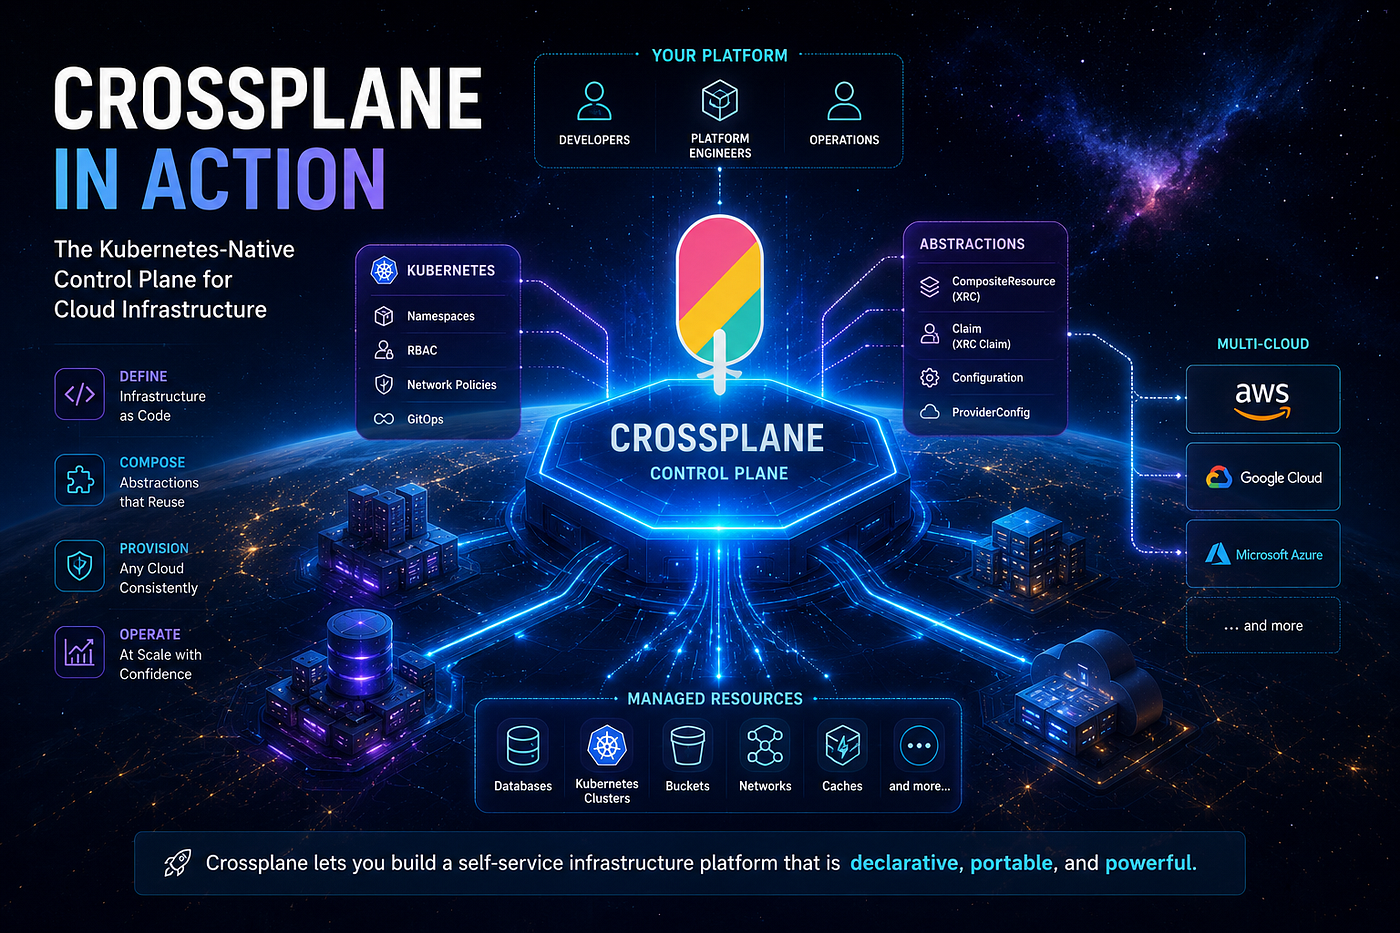
That’s exactly what Crossplane does. It turns your Kubernetes cluster into a universal control plane for cloud infrastructure — no Terraform, no AWS console, no separate tooling. Just YAML and kubectl.
In this guide, I’ll walk you through a complete hands-on demo: provisioning S3 buckets, watching drift detection self-heal deleted resources, building platform APIs with Compositions, and — most importantly — breaking things on purpose so you learn to troubleshoot real-world Crossplane issues. Everything runs locally on your laptop with Minikube and LocalStack. No AWS bill.
Full source code: github.com/23seriy/CROSSPLANE-in-action
The Architecture

Components:
- resource-api — A small Go microservice that reads and writes objects to S3. It proves that the Crossplane-provisioned bucket actually works.
- LocalStack — A local AWS simulator. Same S3 API, zero cost. Crossplane talks to it exactly like it would talk to real AWS.
- Crossplane — Installed via Helm. Watches for Bucket CRDs and reconciles them against the cloud provider.
- Provider AWS S3 — A Crossplane provider package from Upbound’s marketplace that knows how to manage S3 resources.
Step 1: Prerequisites
You need macOS with Docker Desktop running, Homebrew, and about 8 GB of free RAM.
git clone https://github.com/23seriy/CROSSPLANE-in-action.git
cd crossplane-in-action
chmod +x scripts/*.sh
Run the prerequisites installer:
./scripts/01-install-prerequisites.shThis checks for (and installs if missing) minikube, kubectl, helm, and docker. It also checks if any of these tools have newer versions available via brew outdated.
./scripts/01-install-prerequisites.sh
Crossplane in Action — Prerequisites
[INFO] minikube already installed: v1.38.1 [INFO] kubectl already installed: v1.36.1 [INFO] helm already installed: v4.0.5+g1b6053d [INFO] Docker already installed: Docker version 28.5.2, build ecc6942
Checking for available upgrades… [WARN] Docker can be upgraded: 28.5.2 → 29.5.1 [WARN] Update via Docker Desktop → Check for Updates [INFO] All Homebrew tools are up to date.
[INFO] All prerequisites are ready.
Step 2: Start the Cluster and Install Crossplane
./scripts/02-start-cluster.shThis does three things:
- Creates a Minikube cluster (
crossplane-demoprofile) with 4 CPUs and 8 GB RAM - Adds the Crossplane Helm repo and installs Crossplane into the
crossplane-systemnamespace - Waits for the Crossplane operator and RBAC manager to become ready
Verify it’s running:
kubectl get pods -n crossplane-systemYou should see crossplane and crossplane-rbac-manager pods in Running state.

Step 3: Deploy the Demo Application
./scripts/03-deploy-app.shThis script:
- Configures Docker to use Minikube’s daemon (so images are built directly inside the cluster)
- Builds the Go
resource-apiimage - Deploys LocalStack as a local S3 simulator
- Creates the
crossplane-demo-bucketin LocalStack - Creates the
aws-credentialsSecret with LocalStack's dummy credentials (test/test) - Deploys the
resource-apiDeployment, Service, ConfigMap, and ServiceAccount

Step 4: Verify the App Works
Open a port-forward in a separate terminal:
kubectl port-forward svc/resource-api 9090:8080 -n crossplane-demoTest the API:
# Health check
curl http://localhost:9090/health
{“status”:”healthy”,”version”:”v1",”bucket”:”crossplane-demo-bucket”,”region”:”us-east-1"}
# Write an object
curl -X POST http://localhost:9090/api/object/put \
  -H "Content-Type: application/json" \
  -d '{"key":"hello.txt","content":"Hello from Crossplane in Action!"}'
{“message”:”object ‘hello.txt’ created in bucket ‘crossplane-demo-bucket’”}
# List objects
curl http://localhost:9090/api/objects
{“bucket”:”crossplane-demo-bucket”,”objects”:[“hello.txt”],”count”:1}
# Read it back
curl "http://localhost:9090/api/object?key=hello.txt"
{“bucket”:”crossplane-demo-bucket”,”key”:”hello.txt”,”content”:”Hello from Crossplane in Action!”}
The app is working against LocalStack. Now let’s bring in Crossplane.
Step 5: Install the AWS S3 Provider
Crossplane needs a Provider to know how to talk to AWS. Think of it like a Terraform provider, but it runs as a pod in your cluster.
kubectl apply -f crossplane/provider-aws.yamlThe provider manifest:
apiVersion: pkg.crossplane.io/v1
kind: Provider
metadata:
  name: provider-aws-s3
spec:
  package: xpkg.upbound.io/upbound/provider-aws-s3:v1.7.0
  runtimeConfigRef:
    name: default
Wait for it to become healthy (takes 1–2 minutes as it downloads the package):
kubectl wait --for=condition=healthy provider.pkg/provider-aws-s3 --timeout=300s
kubectl get providers
You should see INSTALLED=True and HEALTHY=True.
Step 6: Configure ProviderConfig for LocalStack
The provider knows how to manage S3, but it doesn’t know where to connect or what credentials to use. That’s what ProviderConfig is for.
kubectl apply -f crossplane/provider-config-localstack.yamlThis creates two things:
- A Secret in
crossplane-systemwith dummy AWS credentials (test/test) - A ProviderConfig named
localstackthat points to[http://localstack.crossplane-demo.svc.cluster.local:4566](http://localstack.crossplane-demo.svc.cluster.local:4566)
apiVersion: aws.upbound.io/v1beta1
kind: ProviderConfig
metadata:
  name: localstack
spec:
  credentials:
    source: Secret
    secretRef:
      namespace: crossplane-system
      name: localstack-aws-creds
      key: credentials
  endpoint:
    url:
      type: Static
      static: http://localstack.crossplane-demo.svc.cluster.local:4566
    services:
      - s3
  s3_use_path_style: true
Note:
*s3_use_path_style: trueis critical for LocalStack. Without it, the provider uses virtual-hosted-style addressing (`bucket-name.localstack:4566`*) which LocalStack can't resolve inside the cluster.
Verify:
kubectl get providerconfigStep 7: Your First Managed Resource — Create an S3 Bucket with kubectl
This is the “aha moment.” You’re about to create an S3 bucket by applying a YAML file:
kubectl apply -f crossplane/bucket-claim.yamlThe manifest:
apiVersion: s3.aws.upbound.io/v1beta2
kind: Bucket
metadata:
  name: crossplane-demo-bucket
spec:
  forProvider:
    region: us-east-1
    tags:
      Project: crossplane-in-action
      ManagedBy: crossplane
  providerConfigRef:
    name: localstack
Watch it get provisioned:
kubectl get bucket.s3.aws.upbound.io -wYou’ll see it transition from SYNCED=False / READY=False to SYNCED=True / READY=True. Crossplane just created an S3 bucket by reconciling a Kubernetes CRD against the AWS API.
Compare this to Terraform:

Step 8: Bucket with Versioning
Crossplane can manage multiple related resources declaratively:
kubectl apply -f crossplane/bucket-with-versioning.yamlThis creates both a Bucket and a BucketVersioning resource that references it:
apiVersion: s3.aws.upbound.io/v1beta1
kind: BucketVersioning
metadata:
  name: crossplane-versioned-bucket-versioning
spec:
  forProvider:
    region: us-east-1
    bucketRef:
      name: crossplane-versioned-bucket
    versioningConfiguration:
      - status: Enabled
  providerConfigRef:
    name: localstack
Check all managed resources:
kubectl get managedStep 9: Drift Detection — The Self-Healing Superpower
This is Crossplane’s killer feature. Delete the bucket directly in LocalStack (bypassing Crossplane):
kubectl exec deployment/localstack -n crossplane-demo -- \
  awslocal s3 rb s3://crossplane-demo-bucket --force
Now watch Crossplane detect the drift and recreate it:
kubectl get bucket.s3.aws.upbound.io -wThe SYNCED and READY columns will temporarily show False, then recover back to True as Crossplane recreates the bucket. This is continuous reconciliation — just like Kubernetes recreates a Pod if you delete it.
No terraform plan. No manual intervention. No surprises.
Step 10: When Things Go Wrong — Real-World Troubleshooting
Most Crossplane tutorials only show the happy path. But in production, things break. This section covers the 4 most common failure modes and how to diagnose and fix them.
🔥 Break #1: Bad Credentials
Someone deploys a ProviderConfig that references a Secret that doesn’t exist:
kubectl apply -f crossplane/broken-bad-credentials.yamlWait 15 seconds, then check:
kubectl get managedThe broken-creds-bucket is stuck at SYNCED=False / READY=False.
Diagnose:
kubectl describe bucket.s3.aws.upbound.io broken-creds-bucketLook at the Status.Conditions and Events sections. You'll see cannot get credentials or secret not found.
Fix:
kubectl patch bucket.s3.aws.upbound.io broken-creds-bucket \
  --type merge -p '{"spec":{"providerConfigRef":{"name":"localstack"}}}'
Wait 15 seconds — the bucket should transition to SYNCED=True / READY=True.
Clean up:
kubectl delete providerconfigs.aws.upbound.io bad-creds
kubectl delete bucket.s3.aws.upbound.io broken-creds-bucket
🔥 Break #2: Wrong Endpoint
Credentials are fine, but the ProviderConfig points to a dead URL (localstack-typo:9999):
kubectl apply -f crossplane/broken-wrong-endpoint.yamlWait 20 seconds:
kubectl describe bucket.s3.aws.upbound.io broken-endpoint-bucketYou’ll see no such host or connection refused in the conditions.
Check the provider pod logs:
kubectl logs -n crossplane-system -l pkg.crossplane.io/revision --tail=10Fix:
kubectl patch bucket.s3.aws.upbound.io broken-endpoint-bucket \
  --type merge -p '{"spec":{"providerConfigRef":{"name":"localstack"}}}'
Clean up:
kubectl delete bucket.s3.aws.upbound.io broken-endpoint-bucket
kubectl delete providerconfigs.aws.upbound.io wrong-endpoint
kubectl delete secret wrong-endpoint-creds -n crossplane-system
🔥 Break #3: Missing ProviderConfig Reference
This is the #1 most common Crossplane mistake. A bucket references ProviderConfig production — which was never created:
kubectl apply -f crossplane/broken-missing-providerconfig.yamlkubectl describe bucket.s3.aws.upbound.io orphan-bucketYou’ll see: cannot get referenced ProviderConfig.
Compare what exists vs. what’s referenced:
kubectl get providerconfigOnly localstack exists. The bucket wants production.
Fix:
kubectl patch bucket.s3.aws.upbound.io orphan-bucket \
  --type merge -p '{"spec":{"providerConfigRef":{"name":"localstack"}}}'
Clean up:
kubectl delete bucket.s3.aws.upbound.io orphan-bucket🔥 Break #4: Stuck Finalizer on Delete
When you kubectl delete a Crossplane resource, the provider must confirm the external resource is deleted before removing the Kubernetes object. If the provider can't reach the backend, the object gets stuck in Terminating forever.
# Create a bucket tied to the dead endpoint
kubectl apply -f crossplane/broken-wrong-endpoint.yaml
kubectl apply -f crossplane/broken-stuck-finalizer.yaml
sleep 10
# Try to delete it
kubectl delete bucket.s3.aws.upbound.io finalizer-test-bucket --wait=false
sleep 10# It's stuck
kubectl get bucket.s3.aws.upbound.io finalizer-test-bucketThe object shows Terminating but never disappears.
Check the finalizers:
kubectl get bucket.s3.aws.upbound.io finalizer-test-bucket -o yaml | grep -A5 finalizersFix (nuclear option — only if you’re sure the external resource is already gone):
kubectl patch bucket.s3.aws.upbound.io finalizer-test-bucket \
  --type json -p '[{"op":"remove","path":"/metadata/finalizers"}]'
The object disappears immediately.
⚠️ Warning: Removing finalizers skips the external cleanup. Only do this if the external resource no longer exists or you’ll have orphaned infrastructure.
Troubleshooting Cheat Sheet

Step 11: Platform Engineering — XRD + Composition
This is where Crossplane goes beyond “Terraform in Kubernetes” and becomes a platform engineering tool.
The problem: You don’t want every developer to know about S3 bucket configurations, regions, versioning settings, and ProviderConfig names. You want them to say: “I need object storage in us-east-1.”
The solution: Define a custom API.
Create the CompositeResourceDefinition (XRD)
This defines what your platform API looks like:
kubectl apply -f crossplane/xrd-objectstorage.yamlapiVersion: apiextensions.crossplane.io/v2
kind: CompositeResourceDefinition
metadata:
name: xobjectstorages.demo.crossplane.io
spec:
group: demo.crossplane.io
names:
kind: XObjectStorage
plural: xobjectstorages
versions:
- name: v1alpha1
served: true
referenceable: true
schema:
openAPIV3Schema:
type: object
properties:
spec:
type: object
properties:
parameters:
type: object
properties:
region:
type: string
default: us-east-1
versioning:
type: boolean
default: falseNote: Crossplane v2 uses
apiextensions.crossplane.io/v2and removed namespace-scoped claims. Composite resources are cluster-scoped.
Create the Composition
This defines how the API is implemented — mapping the simple parameters to real AWS resources:
kubectl apply -f crossplane/composition-objectstorage.yamlCrossplane v2 requires pipeline-mode Compositions with function-patch-and-transform. First, install the function:
kubectl apply -f crossplane/function-patch-and-transform.yaml
kubectl wait --for=condition=healthy function.pkg/function-patch-and-transform --timeout=300s
Then apply the Composition:
apiVersion: apiextensions.crossplane.io/v1
kind: Composition
metadata:
  name: objectstorage-s3
spec:
  compositeTypeRef:
    apiVersion: demo.crossplane.io/v1alpha1
    kind: XObjectStorage
  mode: Pipeline
  pipeline:
    - step: patch-and-transform
      functionRef:
        name: function-patch-and-transform
      input:
        apiVersion: pt.fn.crossplane.io/v1beta1
        kind: Resources
        resources:
          - name: s3-bucket
            base:
              apiVersion: s3.aws.upbound.io/v1beta2
              kind: Bucket
              spec:
                forProvider:
                  region: us-east-1
                  tags:
                    ManagedBy: crossplane-composition
                providerConfigRef:
                  name: localstack
            patches:
              - fromFieldPath: spec.parameters.region
                toFieldPath: spec.forProvider.region
Note: Crossplane v2 replaced inline
spec.resourceswithspec.pipeline. Thefunction-patch-and-transformfunction provides the same patching capabilities.
Create a Composite Resource
Now a developer can request storage without knowing anything about S3:
kubectl apply -f crossplane/claim-objectstorage.yamlapiVersion: demo.crossplane.io/v1alpha1
kind: XObjectStorage
metadata:
name: team-highlights
spec:
parameters:
region: us-east-1
versioning: falseVerify the chain:
# The composite resource
kubectl get xobjectstorages

# The actual S3 bucket (managed by the composition)
kubectl get bucket.s3.aws.upbound.io
The developer creates an XObjectStorage. The platform team controls the Composition. The cloud team manages the ProviderConfig. Clean separation of concerns.
Going Real — Switch to AWS
Everything above uses LocalStack. To switch to real AWS:
- Create an AWS IAM user with S3 permissions
- Update
crossplane/provider-config-aws.yamlwith real credentials - Apply it:
kubectl apply -f crossplane/provider-config-aws.yaml - Change
providerConfigRef.namefromlocalstacktoaws-realin your bucket manifests
Same CRDs, same workflow, real infrastructure. Costs apply.
Teardown
./scripts/05-teardown.shThis deletes all Crossplane resources, uninstalls providers and Crossplane, and removes the Minikube cluster.
Key Takeaways
- Infrastructure as Kubernetes resources —
kubectl applyan S3 bucket the same way you deploy a Pod. - Drift detection is automatic — Crossplane continuously reconciles desired state with actual state. No more
terraform plansurprises. - XRDs + Compositions = platform APIs — Dev teams self-serve without cloud console access.
- LocalStack makes it free — Experiment without any AWS bill. Switch to real AWS when ready.
- Kubernetes skills transfer — If you know
kubectl, you know Crossplane. - Troubleshooting is a skill — Bad credentials, wrong endpoints, missing configs, and stuck finalizers are the real production issues. Most tutorials skip them.
Resources
- Crossplane Documentation
- Upbound Marketplace — AWS Providers
- Crossplane Compositions Guide
- LocalStack Documentation
- Full source code on GitHub
If this helped you get started with Crossplane, give the repo a ⭐ and let me know in the comments — what infrastructure would you manage with Crossplane?
Tags
crossplane, kubernetes, infrastructure-as-code, aws, s3, platform-engineering, devops, cloud-native, minikube, localstack, troubleshooting
메타데이터
- post_id
- 692d3aa35c6a
- slug
- crossplane-in-action-provisioning-aws-resources-from-kubernetes-on-your-laptop-692d3aa35c6a
- url
- https://medium.com/@sergeiolshanetski/crossplane-in-action-provisioning-aws-resources-from-kubernetes-on-your-laptop-692d3aa35c6a
- canonical_url
- https://medium.com/@sergeiolshanetski/crossplane-in-action-provisioning-aws-resources-from-kubernetes-on-your-laptop-692d3aa35c6a
- author_url
- https://medium.com/@sergeiolshanetski
- status
- ok
- fetched_at
- 2026-06-09 15:37:30