A4: 3D Printed Charging Station
Design: I would like to start this process log by talking about one of our 4 main design concerns; feasibility. For A4, I was going to try…
A4: 3D Printed Charging Station
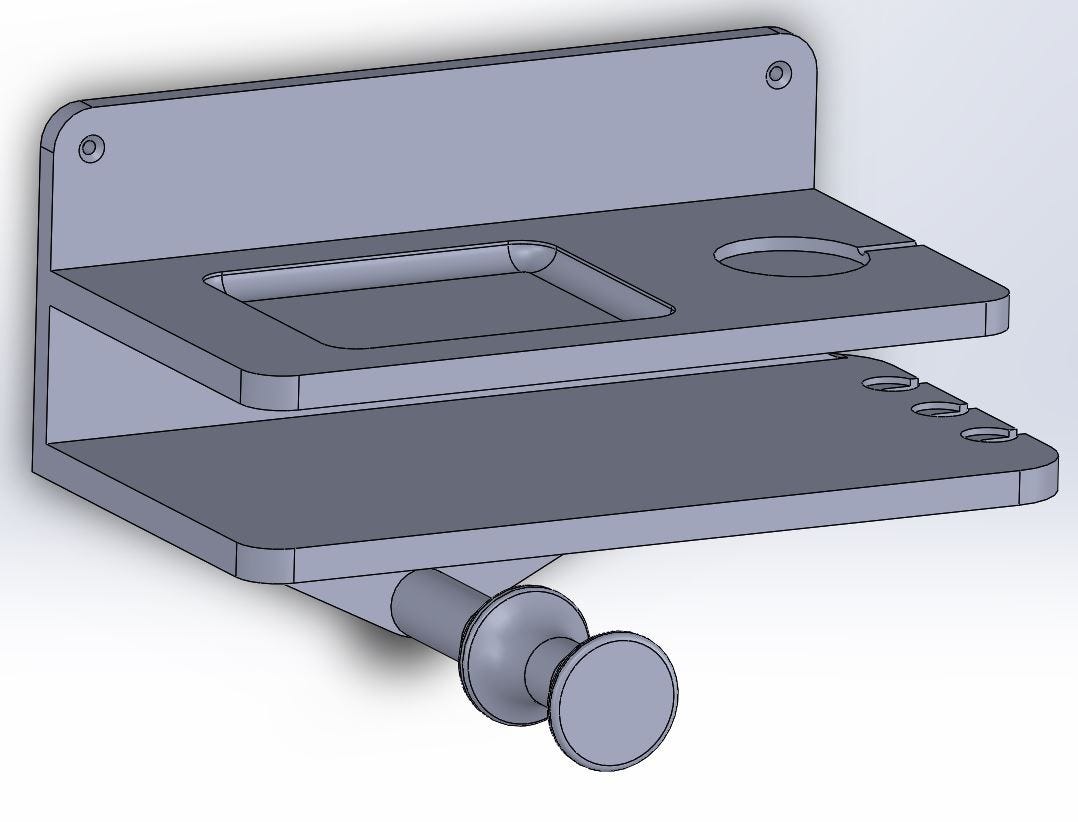
Design: I would like to start this process log by talking about one of our 4 main design concerns; feasibility. For A4, I was going to try to challenge myself and make a design from the list of potential devices listed on the class canvas page. I enjoy the occasional cocktail, and I thought a lemon juicer that juiced lemons into any bowl would be kind of cool, so I started with some preliminary sketches. Unfortunately, when It was time for me to convert these sketches into a SolidWorks part, I had a tremendous difficulty working with the loft feature I figured I would need to implement to get the shape I wanted. After an hour or so of wasted time, I deemed that approach for this assignment to be unfeasible, and opted to pivot.

Ultimately, my design ideas for A4 came from a place of necessity. My bedroom is shaped in such a way that there is no room for a bedside table next to my bed, so I wanted to create a place where I could keep all of the things that go there (phone, glasses, etc.) What I ultimately realised was that the majority of these things I was coming up with needed to be charged at the end of the day, and some sort of media center with some built-in organization would be super useful. Ultimately, I decided I needed reliable ways to charge my phone, my AirPods, my Apple Watch, and my Beats headphones. Once I had made a list of what I would need to have room for, I was able to start generating sketches.

After sorting out where everything should go and landing on a final sketch I wanted to model for my print, I knew I needed to take some measurements. It was important to me that my charging station not take up too much space, so precision would be important. I got a set of calipers and began taking measurements which I used to fill in the values of the sketch below. This “measurement” drawing would then be used to form the SolidWorks file that I printed out.


Analysis: The first attempt at a print went poorly. I sliced it and left it on a Mill printer to print overnight. When I arrived the next morning, my print was not only unfinished, but had failed in a major way as well. In addition to peeling off of the build plate in several places, the g-code shifted at some point during the printing process, meaning that many parts of the print didn’t line up as I had intended. I didn’t have time to fully evaluate the print before class, so I just scraped the build plate and ran the job again.


While doing our in-class critique, I came to the realization that the part that printed out had to have been too large. I was fairly sure I had made my measurements correctly, and everything about the print seemed to be uniformly wrong. I measured, and sure enough, the back panel of my media center (that was supposed to be six inches) came in at 9 exactly. The slicer had automatically resized my print without me noticing. This could potentially explain some of the print problems I was experiencing.
After class, I went to check on my second print, which I knew now was wrong. The print had not peeled off of the bed this time, however the printer had run out of filament. I pulled the object below off of the printer.

I was able to reslice the stl file, printing it at the correct proportions. The print now said it would take only 10 hours, rather than the 22 it had previously indicated. I was pleased with this, and decided to print again.
I am pleased with what ended up as the final product. The final version of the print came out as anticipated. There are no structural concerns with the new version, and the dimensions seem to be in compliance with the uses I had in mind, with one small exception. The holes intended to mount the rack to the wall are too small and awkward for easy mounting. This aspect of the design seems to need a full redesign.


After critique, there were a few more observations that I feel the need to address as they were relevant to my analysis.
Highly Custom — It was brought to my attention that my design is completely custom to my needs. This is part of what makes the idea so effective, as it fits my needs perfectly to me. Highly useable. It also means that my design may be completely useless to someone else, someone whose technology lies outside of Apple’s ecosystem for example. For a product, something like this may need to be more modular to best fit the needs of individuals.
Over-ear Headphone Mounting — My critique partner voiced concerns with my Beats fitting in the space I had made for them. I was able to demonstrate that fitting the headphone strap through the allotted space was a non-issue (her main concern). However, the headphones do sit rather precariously on their perch, and this space could be easily made larger for improved quality of life.
Reflection: Most of what I learned from this experience related to 3D printers and how they are best used. I came into this class with a fair bit of experience with both 3D printers and CAD, though I had never interfaced with the Prusa MK4 printers. Some of the biggest kernels of wisdom include:
- Double check a sliced file before printing
- If something feels wrong about a print, there’s probably something wrong (i.e. 22 hour print for a handheld object)
- 3D printing (and CAD for that matter) is often an imprecise and frustrating process that can yield kick-ass results
As mentioned earlier, there were times when both my CAD software (SolidWorks) and the Prusa slicing software were incredibly frustrating to me. The reason for this tended to be me not understanding how certain features worked (importing stl, lofting, hole wizard, etc.) Through asking specific and measurable questions, I was able to work through most of my issues.
Overall, I really enjoyed this project. My favorite part of it was simply talking to people about what I was making. Most people I talked to were curious about the intention, were able to understand the need I was trying to fill, and were able to relate to that need themselves. It was incredibly rewarding.

메타데이터
- post_id
- 72bb50b160ec
- slug
- a4-3d-printed-charging-station-72bb50b160ec
- url
- https://medium.com/@20zisley/a4-3d-printed-charging-station-72bb50b160ec
- canonical_url
- https://medium.com/@20zisley/a4-3d-printed-charging-station-72bb50b160ec
- author_url
- https://medium.com/@20zisley
- status
- ok
- fetched_at
- 2026-08-22 17:56:31



