Bridging the Gap: Crafting an Angular-Electron Application with TypeScript, using Angular CLI and…
This is outdated the new version is coming soon.
Bridging the Gap: Crafting an Angular-Electron Application with TypeScript, using Angular CLI and Electron Forge at Das Keyboard
This is outdated the new version is coming soon.
Electron Forge is a standout tool for the automation of building and delivering Electron applications, equipped with many plugins. Yet, while working on software for the Das Keyboard 5QS, I discovered a gap: the lack of a plugin designed specifically for the Angular CLI ecosystem. In this article, I’ll detail the steps I took to bridge this gap and achieve a successful integration between the Angular CLI and Electron Forge.
The Crossroads: Starting with Electron or Angular?
Both Electron and Angular CLI have their respective scaffolds for generating new apps. Faced with the question of whether to kick off with Electron and later integrate Angular CLI or vice versa, I opted to lead with Angular, keeping my project aligned with the latest version.
Here’s the process I followed:
Setting up Angular:
- Initial Setup,
Let’s first make sure we have the latest Angular cli version:
npm uninstall -g @angular/cli
npm install -g @angular/cli@latest
If you are using yarn:
yarn global remove @angular/cli
yarn global add @angular/cli@latest
Then let’s create a new Angular workspace without any initial application using the following command:
ng new das-keyboard-q --create-application=falseThis approach sets up a structure conducive to housing multiple Angular projects, each potentially corresponding to a separate Electron browser window in the future. We’ll also be positioning our Electron project within this ‘projects’ directory
- Navigate to the root of your project and generate a new application
cd das-keyboard-q
ng generate application das-keyboard-q- Adjust Production Settings in
angular.jsonsetup file: As we’ll be loading static files in production, add thebaseHrefbuild option to./for"architect" -> "build" -> "configurations" -> "production"
"configurations": {
            "production": {
"baseHref": "./",- Rename the
tsconfig.jsontoangular-tsconfig.jsonto not be conflicting with thetsconfig.jsonthat we will setup later for electron-forge cli. Let’s also update the content ofprojects/das-keyboard-q/tsconfig.app.jsonandprojects/daskeyboard-q/tsconfig.spec.jsonto extend this newangular-tsconfig.jsoninstead of the old one:
/* To learn more about this file see: https://angular.io/config/tsconfig. */
{
  "extends": "../../angular-tsconfig.json",
  "compilerOptions": {
    "outDir": "../../out-tsc/app",
    "types": []
  },
  "files": [
    "src/main.ts"
  ],
  "include": [
    "src/**/*.d.ts"
  ]
}
Adding Electron and Electron Forge:
- In the
package.jsonupdate de version to be a meaningful one and add a description, productName, author and license that are mendatory for publishing later:
  "productName": "das-keyboard-q",
  "version": "1.0.9",
  "description": "Configure Das Keyboard devices",
  "author": {
    "name": "mubramaj",
    "email": "ahmed.loudghiri@gmail.com"
  },
  "license": "MIT",
...- Create a folder named
electroninsideprojects
cd projects
mkdir electron
This folder will house our Electron-specific files:
Start by creating the src folder with an index.ts file:
cd electron
mkdir src
touch src/index.ts
touch src/preload.ts- Content of
projects/electron/src/index.ts:
import { app, BrowserWindow } from "electron";
import path from 'path';

// Handle creating/removing shortcuts on Windows when installing/uninstalling.
if (require("electron-squirrel-startup")) {
  app.quit();
}

let mainWindow: BrowserWindow | null;

const createWindow = (): void => {
  // Create the browser window.
  mainWindow = new BrowserWindow({
    height: 600,
    width: 800,
    webPreferences: {
      preload: path.join(__dirname, 'preload.js')
    }
  });

  const startURL = app.isPackaged ? `file://${path.join(__dirname, 'das-keyboard-q','index.html')}` : `http://localhost:4200`;

  mainWindow.loadURL(startURL);

};

// This method will be called when Electron has finished
// initialization and is ready to create browser windows.
// Some APIs can only be used after this event occurs.
app.on("ready", () => {
  createWindow();

});

// Quit when all windows are closed, except on macOS. There, it's common
// for applications and their menu bar to stay active until the user quits
// explicitly with Cmd + Q.
app.on("window-all-closed", () => {
  if (process.platform !== 'darwin') {
    app.quit();
  }
});

app.on('activate', () => {
  // On OS X it's common to re-create a window in the app when the
  // dock icon is clicked and there are no other windows open.
  if (BrowserWindow.getAllWindows().length === 0) {
    createWindow();
  }
});

// In this file you can include the rest of your app's specific main process
// code. You can also put them in separate files and import them here.
Don’t forget to replace das-keyboard-q by the name of your app. Also something important to highlight here is this part:
const startURL = app.isPackaged ? `file://${path.join(__dirname, 'das-keyboard-q','index.html')}` : `http://localhost:4200`;In an Electron application that integrates Angular (or any web framework), it’s crucial to discern between development and production modes. This distinction determines what content the Electron window should load.
- Development Experience: In development, developers benefit from hot-reloading, where the app automatically updates as they make changes. This is made possible by pointing the Electron app to the Angular development server.
- Performance & Security: In production, it’s more efficient and secure to load the built Angular app as a static file. This eliminates the need for a server and potential security vulnerabilities.
We will see later how do we setup this 2 environments.
- Content of
projects/electron/src/preload.ts:
// See the Electron documentation for details on how to use preload scripts:
// https://www.electronjs.org/docs/latest/tutorial/process-model#preload-scripts

import { contextBridge, ipcRenderer } from "electron";

contextBridge.exposeInMainWorld('electron', {
  send: (channel: string, data: any) => {
    ipcRenderer.send(channel, data);
  },
  on: (channel: string, func: (...args: any[]) => void) => {
    const newFunc = (...args: any[]) => func(...args);
    ipcRenderer.on(channel, newFunc);
  },
  sendSync: (channel: string, data: any) => {
    return ipcRenderer.sendSync(channel, data);
  },
  removeListener: (channel: string, func: (...args: any[]) => void) => {
    ipcRenderer.removeListener(channel, func);
  },
})
This script is crucial as it exposes specific Electron APIs to the Angular window.
If you’d like to delve deeper into preload scripts, Electron’s official documentation provides rich details. Here’s a snapshot of how I set up the preload script:
- Setup TypeScript Configuration for Electron: Add a
tsconfig.jsonfile inprojects/electron/tsconfig.jsonto cater to Electron-specific requirements with this content:
{
 "compilerOptions": {
   "target": "ES6",
   "allowJs": true,
   "module": "commonjs",
   "skipLibCheck": true,
   "esModuleInterop": true,
   "noImplicitAny": true,
   "sourceMap": true,
   "baseUrl": ".",
   "outDir": "../../dist",
   "moduleResolution": "node",
   "resolveJsonModule": true,
   "paths": {
     "*": ["node_modules/*"]
   }
 },
 "include": ["src/**/*"]
}- Electron Forge Configuration: Create
forge.config.tsat the root of our project to set up Electron Forge with the following content:
import type { ForgeConfig } from '@electron-forge/shared-types';
import { MakerSquirrel } from '@electron-forge/maker-squirrel';
import { MakerZIP } from '@electron-forge/maker-zip';
import { MakerDeb } from '@electron-forge/maker-deb';
import { MakerRpm } from '@electron-forge/maker-rpm';
import { AutoUnpackNativesPlugin } from '@electron-forge/plugin-auto-unpack-natives';

const config: ForgeConfig = {
 packagerConfig: {
   asar: true
 },
 rebuildConfig: {},
 makers: [new MakerSquirrel({}), new MakerZIP({}, ['darwin']), new MakerRpm({}), new MakerDeb({})],
 plugins: [
   new AutoUnpackNativesPlugin({}),
 ],
 publishers: [
 ]
};

export default config;- Install necessary electron-forge cli and dependencies
Start with the dev dependencies
yarn add --dev @electron-forge/cli \
@electron-forge/maker-deb \
@electron-forge/maker-rpm \
@electron-forge/maker-squirrel \
@electron-forge/maker-zip \
@electron-forge/plugin-auto-unpack-natives \
electron \
ts-loader \
ts-node
Then the dependencies
yarn add electron-squirrel-startup- Package Configuration:
- In
package.json, specify the main script, pointing to the Electron's entry point by adding the following:"main”: “dist/index.js”. Your package.json should look like that:
{
  "name": "das-keyboard-q",
  "version": "0.0.0",
  "main": "dist/index.js"
  "scripts": {
    "ng": "ng",
...- In the
package.json, add a build scripts for Electron:"build-electron": "tsc --project projects/electron/tsconfig.json"
Your package.json should look like:
  "scripts": {
    "ng": "ng",
    "build-electron": "tsc --project projects/electron/tsconfig.json",
...- Update the
.gitignorefile to ignore electron-forge related dist outputs. You can just update the content of your.gitignoreto look like:
# See http://help.github.com/ignore-files/ for more about ignoring files.

# Compiled output
/dist
/tmp
/out-tsc
/bazel-out

# Node
/node_modules
npm-debug.log
yarn-error.log

# IDEs and editors
.idea/
.project
.classpath
.c9/
*.launch
.settings/
*.sublime-workspace

# Visual Studio Code
.vscode/*
!.vscode/settings.json
!.vscode/tasks.json
!.vscode/launch.json
!.vscode/extensions.json
.history/*

# Miscellaneous
/.angular/cache
.sass-cache/
/connect.lock
/coverage
/libpeerconnection.log
testem.log
/typings

# System files
.DS_Store
Thumbs.db

# Logs
logs
*.log
npm-debug.log*
yarn-debug.log*
yarn-error.log*
lerna-debug.log*

# Diagnostic reports (https://nodejs.org/api/report.html)
report.[0-9]*.[0-9]*.[0-9]*.[0-9]*.json

# Runtime data
pids
*.pid
*.seed
*.pid.lock
.DS_Store

# Directory for instrumented libs generated by jscoverage/JSCover
lib-cov

# Coverage directory used by tools like istanbul
coverage
*.lcov

# nyc test coverage
.nyc_output

# node-waf configuration
.lock-wscript

# Compiled binary addons (https://nodejs.org/api/addons.html)
build/Release

# Dependency directories
node_modules/
jspm_packages/

# TypeScript v1 declaration files
typings/

# TypeScript cache
*.tsbuildinfo

# Optional npm cache directory
.npm

# Optional eslint cache
.eslintcache

# Optional REPL history
.node_repl_history

# Output of 'npm pack'
*.tgz

# Yarn Integrity file
.yarn-integrity

# dotenv environment variables file
.env
.env.test

# parcel-bundler cache (https://parceljs.org/)
.cache

# next.js build output
.next

# nuxt.js build output
.nuxt

# vuepress build output
.vuepress/dist

# Serverless directories
.serverless/

# FuseBox cache
.fusebox/

# DynamoDB Local files
.dynamodb/

# Webpack
.webpack/

# Vite
.vite/

# Electron-Forge
out/
Development and Production Setups
Development setup
- In the
package.jsonfile modify the Angular build command for clarity:
"build": "ng build" should become "build-das-keyboard-q": "ng build"
-
Add a script command to serve your angular application:
"serve-das-keyboard-q": "ng serve das-keyboard-q" -
Development Mode: To facilitate faster development, take advantage of hot reload:
- Install necessary dependencies:
yarn add --dev concurrently wait-on - In
package.jsonadd thewait-for-serve-das-keyboard-qscript command:"wait-for-serve-das-keyboard-q": "wait-on http://localhost:4200" - Finally update the start command:
"start": "concurrently \"yarn build-electron\" \"yarn serve-das-keyboard-q\" \"yarn wait-for-serve-das-keyboard-q && electron-forge start\"",Don’t forget to replace das-keyboard-q by the name of your app for all the previous script commands.
Let’s break down what’s happening here:
- We concurrently build the electron javascript files using typescript
- We start das-keyboard-q angular project on port 4200
- We wait for it to be ready on port 4200 to run
electron-forge startthat fires the electron app
Running yarn start should bring up this window:
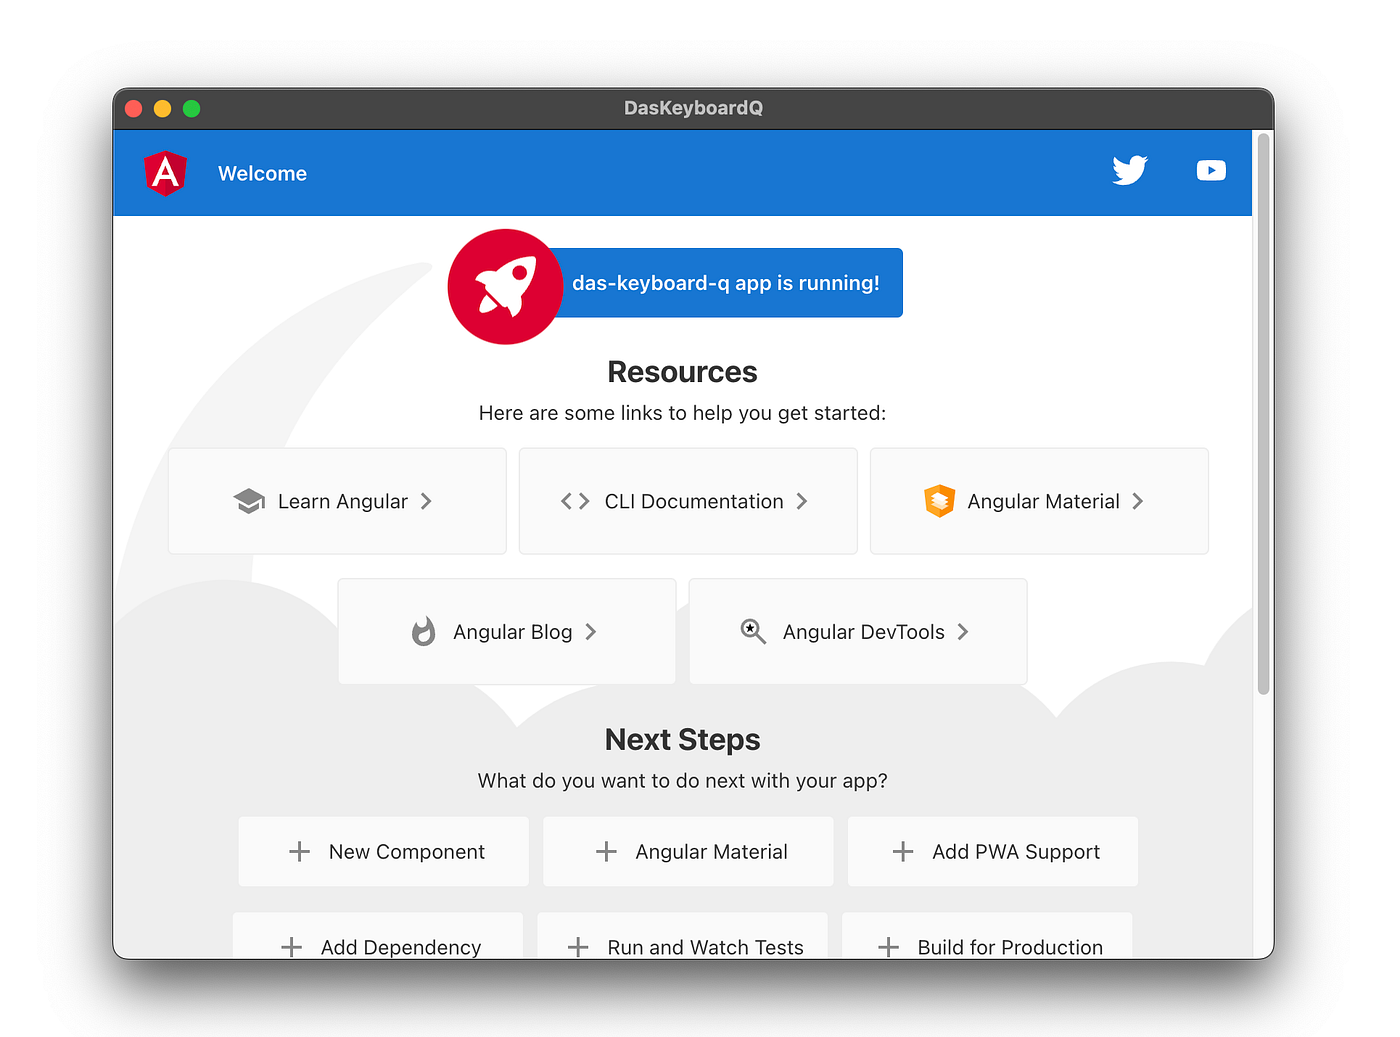
Try to make a change to projects/das-keyboard-q/src/app/app.component.html and see your changes reflected in real time in the electron browser window.
Production Mode:
Electron Forge offers comprehensive tooling for packaging and distributing applications. As our app is a blend of Electron and Angular, our build process needs a few custom tweaks. By referring to the Electron Forge documentation at https://www.electronforge.io/, we can combine their workflow with Angular’s build tools.
To manage this, consider adding these scripts to your package.json:
"package": "yarn build-electron && yarn build-das-keyboard-q && electron-forge package",
"make": "yarn build-electron && yarn build-das-keyboard-q && electron-forge make",
"publish-app": "yarn build-electron && yarn build-das-keyboard-q && electron-forge publish"
Here’s a brief rundown on what each script accomplishes:
- package: This first builds both the Electron and Angular components (
build-electronandbuild-das-keyboard-qrespectively) and then uses Electron Forge to package the app for distribution. - make: Similar to the above, but Electron Forge will produce platform-specific distributables or installers.
- publish-app: Builds both Electron and Angular components and then employs Electron Forge to publish the built app.
An essential point to remember: Electron Forge typically labels the publish script as publish. To avoid any confusion with yarn publish (used for npm modules), we've chosen a more distinct label: publish-app. It's a subtle change but ensures clarity in your build and distribution process.
At this point your package.json should have the following scripts:
  "main": "dist/index.js",
  "scripts": {
    "ng": "ng",
    "build-das-keyboard-q": "ng build",
    "build-electron": "tsc --project projects/electron/tsconfig.json",
    "watch-das-keyboard-q": "ng build --watch --configuration development",
    "wait-for-serve-das-keyboard-q": "wait-on http://localhost:4200",
    "serve-das-keyboard-q": "ng serve das-keyboard-q",
    "start": "concurrently \"yarn build-electron\" \"yarn serve-das-keyboard-q\" \"yarn wait-for-serve-das-keyboard-q && electron-forge start\"",
    "package": "yarn  build-electron && yarn build-das-keyboard-q && electron-forge package",
    "make": "yarn  build-electron && yarn build-das-keyboard-q && electron-forge make",
    "publish-app": "yarn  build-electron && yarn build-das-keyboard-q && electron-forge publish",
  },
After running yarn package this should be the content of the out folder
Upon running the build scripts, depending on your development platform, you might observe different output formats. For instance, macOS typically produces .dmg or .app formats, while Windows might yield a .exe.
However, in today’s world of diverse user environments, our goal is to cater to multiple platforms without the hassle of installing every individual operating system or the required toolchains. This endeavor might seem challenging, but that’s where the power of GitHub Actions shines.
With GitHub Actions, you can automate your build process in a platform-independent manner. This allows you to compile and package your application for macOS, Windows, Linux, or any other target you desire, all from the same codebase and without any manual intervention or dedicated build machines.
Exciting, right? This capability to seamlessly build across platforms leads us directly into the next segment of our article, where we’ll dive deeper into leveraging GitHub Actions for our Electron-Angular application.
Multi-Platform Builds with GitHub Actions:
To bypass the hassle of installing multiple operating systems for cross-platform builds, let’s leverage GitHub Actions:
-
Setup Publisher: We’ll use GitHub as our publisher. Install the publisher:
yarn add --dev @electron-forge/publisher-github -
Update the
forge.config.tspublishers array with the following:
 publishers: [
   new PublisherGithub({
     repository: {
       owner: 'metadot',
       name: 'das-keyboard-q',
     },
     prerelease: true,
   })
 ]
Update the publisher config metadot and das-keyboard-q to meet your setup. In this same config you could specify your Github token in case you are using a private Github repository but for security reason we will use the secrets in github action.
In my case I added a github secret called ELECTRON_FORGE_GITHUB_TOKEN.
- GitHub Action Setup: Create the GitHub Action workflow file at
.github/workflows/release.yml.
mkdir -p .github/workflows
vim .github/workflows/release.yml
And paste the following content:
name: Release app
on:
  workflow_dispatch:
jobs:
  build:
    strategy:
      matrix:
        os:
          [
             { name: 'linux', image: 'ubuntu-latest' },
            { name: 'windows', image: 'windows-latest' },
             { name: 'macos', image: 'macos-latest' },
          ]
    runs-on: ${{ matrix.os.image }}
    steps:
      - name: Github checkout
        uses: actions/checkout@v3
      - name: Use Node.js
        uses: actions/setup-node@v3
        with:
          node-version: 20
      - name: Cache node modules
        uses: actions/cache@v2
        with:
          path: "node_modules"
          key: ${{ runner.os }}-modules-${{ hashFiles('yarn.lock') }}
          restore-keys: |
            ${{ runner.os }}-modules-
      - run: yarn install --immutable
      - name: Debug token
        run: echo ${GITHUB_TOKEN:0:5}
        env:
          GITHUB_TOKEN: ${{ secrets.ELECTRON_FORGE_GITHUB_TOKEN }}
      - name: Publish app
        env:
          GITHUB_TOKEN: ${{ secrets.ELECTRON_FORGE_GITHUB_TOKEN }}
        run: yarn publish-app
In this file, we use workflow_dispatch to manually trigger the workflow. Each job in this file specifies the OS to build for, sets up Node.js, caches the node modules, and publishes the app.
After pushing your code, head to the GitHub Actions tab and manually run your workflow. Your application should now be built and published for multiple platforms.
When it’s done, navigate to your github releases to see all the published versions https://github.com/{{yourName}}/{{yourRepoName}}/releases
Potential Improvements:
One noticeable gap is that the TypeScript compilation isn’t uglified. A potential enhancement would be to introduce uglification and minification for the build-electron process.
Conclusion: Combining Electron with Angular and TypeScript provides a powerful toolkit for developing cross-platform desktop apps. While Electron Forge is invaluable in this process, integrating with Angular CLI does require some adjustments. We’ve walked through the setup process, tackled differences between development and production setups, and discussed app distribution. Our use of preload.ts highlights the close integration between Electron and Angular. In our next article, we'll explore the preload.ts in detail, and how to use the Electron API inside Angular. As we continue this exploration, check out more at Das Keyboard.
메타데이터
- post_id
- 74cb359daa4a
- slug
- bridging-the-gap-crafting-an-angular-electron-application-with-typescript-using-angular-cli-and-74cb359daa4a
- url
- https://medium.com/@ahmed.loudghiri/bridging-the-gap-crafting-an-angular-electron-application-with-typescript-using-angular-cli-and-74cb359daa4a
- canonical_url
- https://medium.com/@ahmed.loudghiri/bridging-the-gap-crafting-an-angular-electron-application-with-typescript-using-angular-cli-and-74cb359daa4a
- author_url
- https://medium.com/@ahmed.loudghiri
- status
- ok
- fetched_at
- 2026-07-30 13:51:56




