How I respectfully asked Windows 11 to run my external Ubuntu drive (Without Rebooting!)
back up first, this can corrupt the OS if you get it wrong
How I respectfully asked Windows 11 to run my external Ubuntu drive (Without Rebooting!)
back up first, this can corrupt the OS if you get it wrong
We’ve all been there. You have an external hard drive with a nice, fully configured Ubuntu Linux setup on it. But every time you want to use it, you have to shut down your computer, smash the esc key like a maniac, mess around in a scary-looking Boot Menu, and switch your entire system over.
It’s exhausting and it reduces those hardly earned gangsta points ( and we don’t want that, do we?).
I wanted a better way. I wanted to run my actual, physical Ubuntu hard drive inside a window on my Windows 11 desktop — no rebooting required.
When I tried to do this using VirtualBox, I hit a massive brick wall of cryptic error messages. But after a bit of digital wrestling, I figured out the secret. Here is the story of how we built a “ Bridge of narnia” to make it happen, the exact commands that worked, and how you can do it too.
Enter the VMs: Virtual Machines are Usually Simulators
Normally, a Virtual Machine (VM) is just a simulator. It creates a fake, empty file on your computer and pretends that file is a blank hard drive.
But I didn’t want a fake hard drive. I already had a real, physical hard drive with a whole Ubuntu operating system sitting on my desk. To make VirtualBox talk directly to my real USB drive, I had to use something called Raw Hard Disk Access.
This is where the adventure began — and where Windows 11 started playing hard to get.
Act 1: The Fight with a Jealous Operating System
Normally, Windows is a very jealous operating system. The moment you plug in an external drive, Windows grabs it and says, “This is mine now. I am going to monitor it and read it.”
Because Windows was holding onto the drive so tightly, VirtualBox wasn’t allowed to touch it. My first attempt rewarded me with a terrifyingly loud error: **VERR_ACCESS_DENIED**.
The Fix: Telling Windows to “Let Go”
To break Windows’ grip on my drive, I had to use a built-in tool called Disk Management.
- Right-click the Windows Start Button and select Disk Management.
- Scroll down to find the external drive (in my case, it was Disk 1).
- Right-click the square gray box on the left that says “Disk 1” and click Offline.
We essentially tapped Windows on the shoulder and said, “Drop it. Let go of the drive and pretend it isn’t even plugged in.” Once Windows stepped away, the drive was free.
Act 2: Building the “Bridge of Narnia”
Next, I needed to create a special link. I didn’t want to copy my Ubuntu files onto my computer — that would take hours and waste space. Instead, I needed a shortcut.
I opened PowerShell as an Administrator and navigated to the VirtualBox folder:
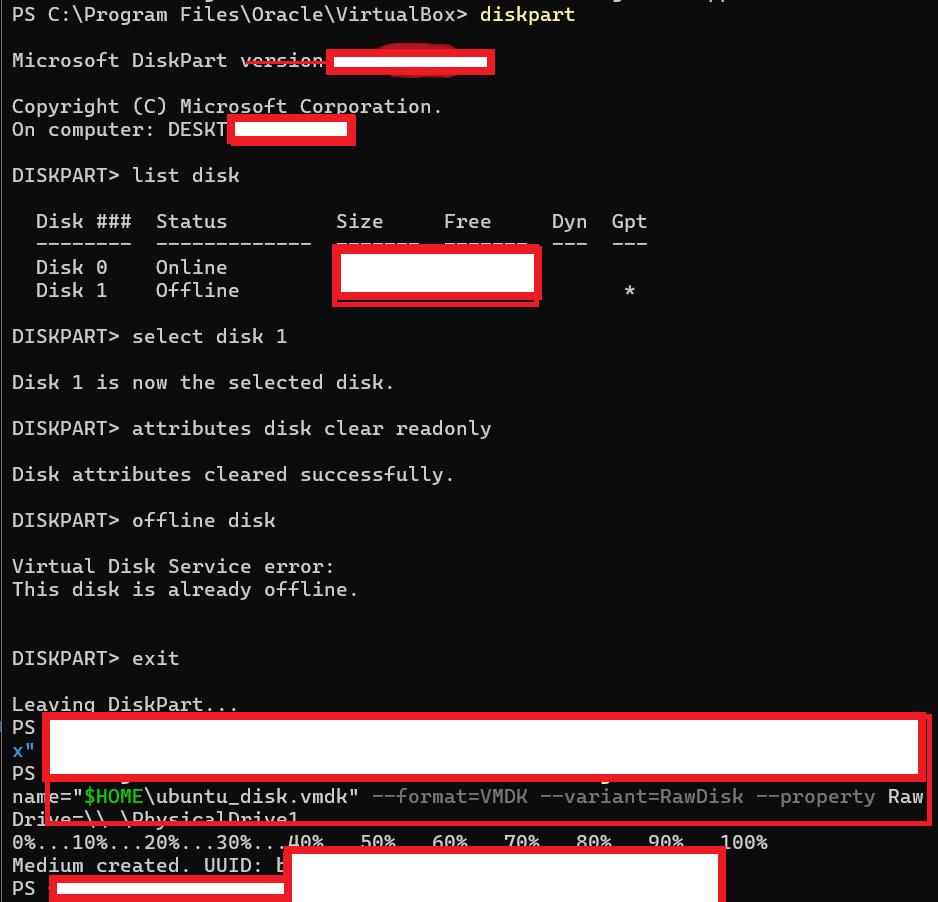
cd "C:\Program Files\Oracle\VirtualBox"Then, I tried to run the traditional command to link the drive, but modern versions of VirtualBox (Version 7+) are incredibly strict. It rejected my commands until I gave it the exact phrase it wanted.
.\VBoxManage createmedium disk --filename="$HOME\ubuntu_disk.vmdk" --format=VMDK --variant=RawDisk --property RawDrive=\\.\PhysicalDrive1(Note: If your drive is listed as Disk 2 or Disk 3 in Disk Management, you would change that PhysicalDrive1 at the very end to match your number).
This command built a “ Bridge” file called ubuntu_disk.vmdk inside my user folder. This tiny file doesn't hold any data. It is purely a pointer that tells VirtualBox: "Hey, whenever you want to read or write data, look directly at USB Slot PhysicalDrive1."
Act 3: Clearing the Hidden Security Traps
Even after the command worked, I faced one final boss: Windows 11 security policies. If you try this and still get an access denied error, here are the two hidden traps I had to disarm:
Trap 1: The Hidden Read-Only Lock
Windows 11 often flags offline external drives as read-only. I had to use a terminal tool called diskpart to clear it:
diskpart
select disk 1
attributes disk clear readonly
exit
This stripped away a hidden “safety switch” Windows automatically flips on external drives.
Trap 2: The Ghost background processes
Even if you close the VirtualBox app window, its background engine (VBoxSVC.exe) stays active as a standard user, blocking your Administrator terminal. I had to open Task Manager, find VirtualBox, and hit End Task before running my command.
Act 4: The Language Barrier (GPT & UEFI)
With the file created, I opened VirtualBox explicitly by right-clicking it and choosing Run as Administrator.
I created a new Virtual Machine, but when looking at my drive details in Disk Management, I noticed a tiny asterisk (*) under the GPT column. GPT is just a modern way hard drives organize their memories. Modern GPT drives speak a language called "UEFI," while older computers speak "BIOS."
If I didn’t change VirtualBox’s language settings, it would stare at my Ubuntu drive blankly and show a black screen.
The Final Setting:
Inside my Virtual Machine Settings -> System -> Motherboard tab, I checked the box for Enable EFI .
Then, I went to Storage, clicked the little hard disk icon, and chose the ubuntu_disk.vmdk ghost bridge file we made in Act 2.
The Coupe de grace
I selected my virtual machine, clicked the green Start arrow, and held my breath.
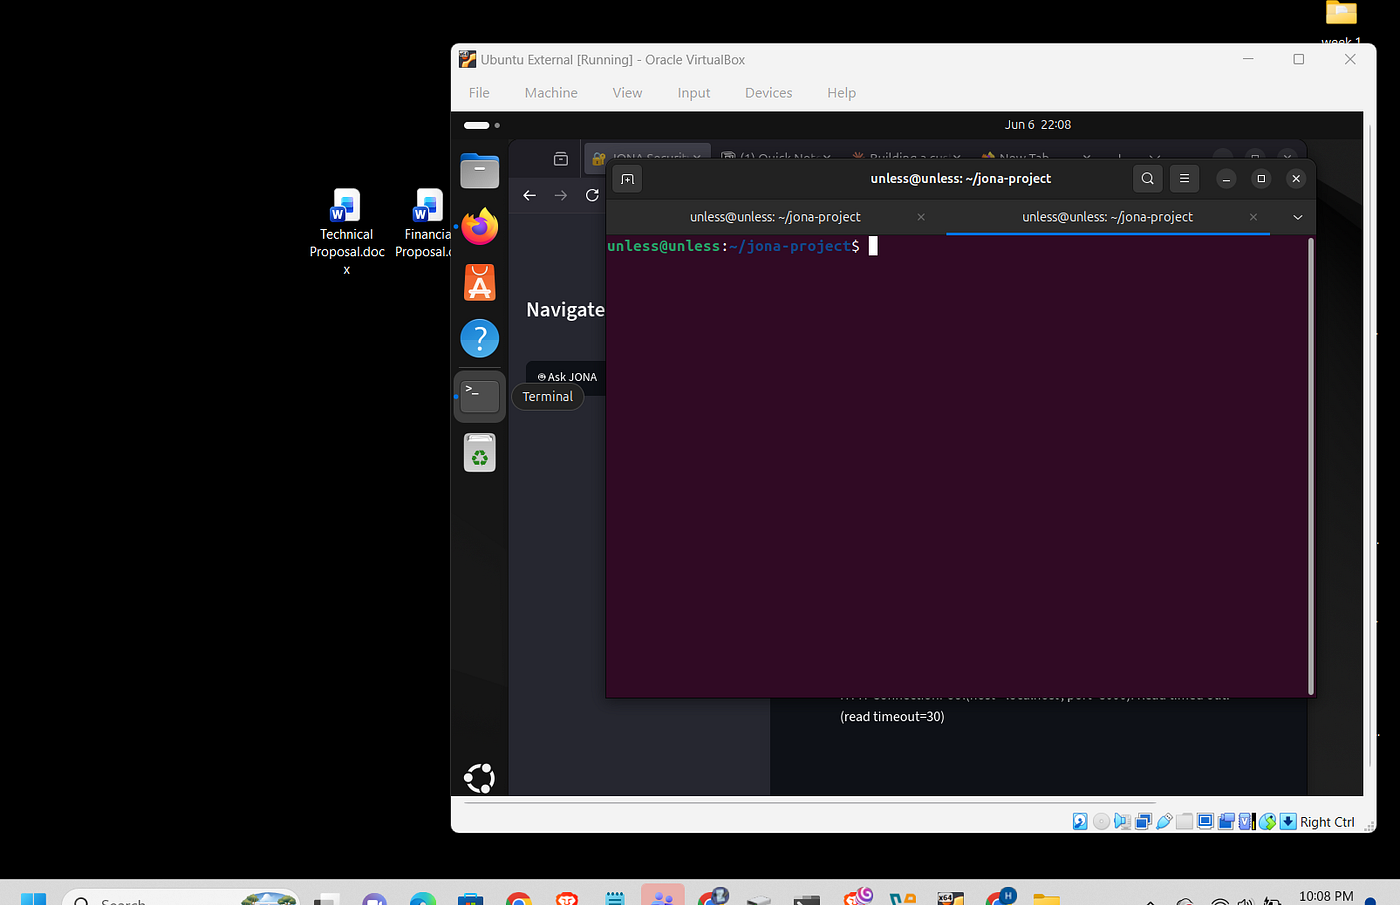
Shaboom!! The VirtualBox window flickered, and booted straight into my physical Ubuntu login screen.
Now, I have the absolute best of both worlds.
Three Rules to Keep Your Setup Alive
If you set this up yourself, keep these three in mind so you don’t corrupt your data:
- Always Run as Admin: You must right-click VirtualBox and choose “Run as administrator” every single time you want to use this VM, or Windows will block the USB connection.
- Never Yank the Cable: Treat the VirtualBox window like a real computer. Always click Shut Down inside Ubuntu and wait for the window to close completely before unplugging your hard drive. Pulling the cable early can corrupt your entire OS.
- Watch the USB Ports: If you plug your drive into a different USB port next time, Windows might rename it from
PhysicalDrive1toPhysicalDrive2, breaking your ghost bridge. Try to use the same USB slot every time!
Adieu!!
메타데이터
- post_id
- 7579bfc104f9
- slug
- how-i-respectfully-asked-windows-11-to-run-my-external-ubuntu-drive-without-rebooting-7579bfc104f9
- url
- https://medium.com/@mug1sh4/how-i-respectfully-asked-windows-11-to-run-my-external-ubuntu-drive-without-rebooting-7579bfc104f9
- canonical_url
- https://medium.com/@mug1sh4/how-i-respectfully-asked-windows-11-to-run-my-external-ubuntu-drive-without-rebooting-7579bfc104f9
- author_url
- https://medium.com/@mug1sh4
- status
- ok
- fetched_at
- 2026-06-15 20:49:13