The Developer’s Guide to OpenCode on Google Cloud
Combine model flexibility with enterprise-grade security and performance
The Developer’s Guide to OpenCode on Google Cloud
Combine model flexibility with enterprise-grade security and performance
What is OpenCode?
OpenCode is an open-source coding platform that provides developers with a powerful AI-driven development environment through your choice of interfaces: a Terminal User Interface (TUI), a desktop application, an IDE plug-in, or a web page interface. It’s similar to other agentic coding platforms like Google’s Gemini CLI, Anthropic’s Claude Code, or OpenAI’s Codex, with the main difference being that OpenCode is model-agnostic.
Why would I use OpenCode with Google Cloud Platform (GCP)?
The main benefits of OpenCode are:
- It’s open source (and therefore the source code is available for examination)
- It allows easy switching between multiple models (either cloud-based or local)
- It maintains data privacy, since data only flows between the OpenCode UI and the model it’s using.
The main benefits of using OpenCode with GCP are:
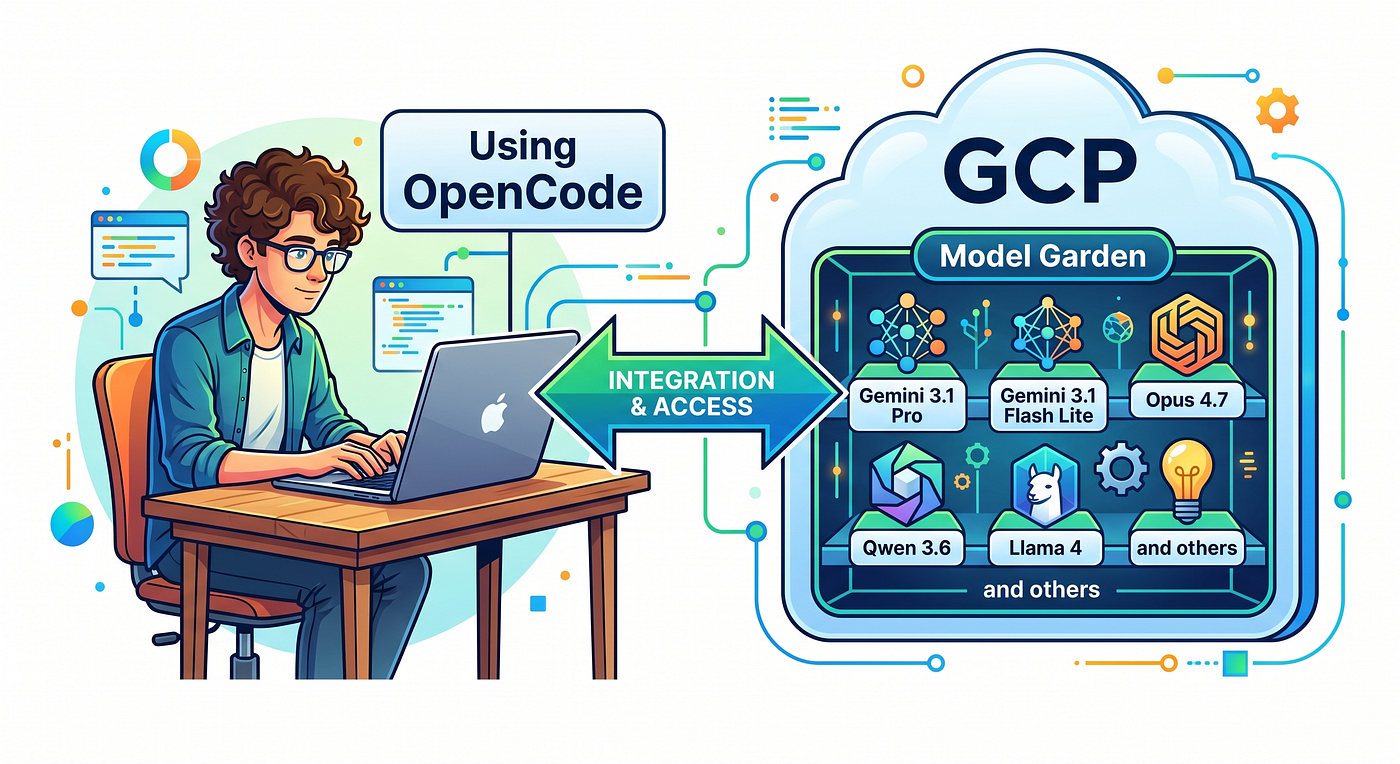
- You can choose from all of the models available in the Model Garden, from the latest version of Gemini to open source models like Gemma, Qwen, or Kimi.
- You can pick which region your model resides in, which allows you to control data locality.
- GCP guarantees customer data, source code, and prompts are never used to train foundation models. This means that using models from the GCP Model Garden keeps your data private.
- You can route your data through private networking via Private Service Connect, which keeps all of your data off of the public internet. If your business has data residency requirements, this can really help.
- You can fine-tune your own model and host it on GCP, and use that model for coding assistance.
- You can track usage and costs via Resource Labels, and billing is rolled up under your GCP billing, rather than being a separate cost.
To me, the strongest argument in OpenCode’s favor is the fact that you can easily switch between different models, often just by choosing the model from a dropdown control. Different models have different strengths and weaknesses, and being able to choose to use Gemini 3.1 Pro or Claude Opus 4.7 or any other model to suit my needs is a major strength.
While OpenCode supports local models, real-world coding requires massive context windows and KV caching that quickly overwhelm standard consumer GPUs — even modern 16GB cards like an RTX 5060 Ti. Using cloud-hosted models gives you access to enterprise-grade hardware without the severe performance degradation of local offloading. The bottom line is that unless you have a very powerful machine, a local model probably isn’t going to be good enough for real coding. Because of that, I think a cloud-based model is the way to go.
How do I install and set up OpenCode?
You can install OpenCode by downloading an installer from https://github.com/anomalyco/opencode. Note that there are several installation options, including using npm.
If you’re a Windows user like me, you may want to check the OpenCode documentation about how to set up the server component of OpenCode to run under WSL, which provides faster file access, and a unified Linux toolset. That said, I will say that I use the desktop version of OpenCode on Windows without WSL, and I have yet to see any problems. However, if you plan to let the agent run complex shell scripts or run local testing suites, using a WSL environment ensures the agent doesn’t trip over Windows-specific CLI syntax.
Activating Models
Once you have the software installed, the next step is to enable the use of different models within Model Garden. Here’s how to do that.
Log into the GCP console, choose or create your project, and navigate to the “APIs & Services” page, and click on the button labelled “+ Enable APIs and services”. Enable the “Agent Platform API”. This allows you to use the models in the model garden. The next step is to activate the models you want to use.
In the search bar at the top of the page, type in “garden”. That will give you a link that will take you to the Model Garden main page. From there, activate the models you wish to use with OpenCode.
Some models like Gemini and Claude are usage-driven, meaning that you don’t have to manually spin up a virtual machine to host them, and instead you pay only for the input and output tokens. Other models require a dedicated endpoint, which will incur costs related to having that server up and running, regardless of how much you use it.
Cost Warning for Dedicated Endpoints: Unlike Gemini’s pay-per-token API, hosting an open-source model on a dedicated endpoint means you are paying for the virtual machine (often equipped with expensive NVIDIA L4 or A100 GPUs) 24/7. Pro-tip: If you are using a dedicated endpoint for personal testing, write a quick gcloud script to spin down/pause the endpoint when your workday ends, or set up GCP budget alerts to prevent weekend cost spikes.
Configuring OpenCode
The next step is to tell OpenCode about which models are available for use, and which GCP project they are activated under. The first thing to do is to authenticate with GCP, which you accomplish using the following command:
gcloud auth application-default login
This command will open a web page to allow you to authenticate with GCP. Behind the scenes, OpenCode utilizes your local Application Default Credentials (ADC) to securely authenticate direct API requests to Vertex AI, meaning your GCP IAM permissions dictate exactly which Model Garden endpoints OpenCode is allowed to call.
Finally, use the following variable to specify which project within GCP to use (use “export” on WSL or Linux, use “set” in Windows):
export GOOGLE_CLOUD_PROJECT=<gcp_project_id>Alternate Approach: Note that if you don’t want to use ADC (application default credentials), you can set the following environment variable to point to the file that defines a service account to use:
export GOOGLE_APPLICATION_CREDENTIALS=<sa_credentials_filename>I recommend checking the official docs at https://opencode.ai/docs/providers/#google-vertex-ai for details about connecting to GCP-hosted models, as things change over time.
Private Service Connect
If your organization requires that traffic to Vertex AI stay off the public internet — for data residency, compliance, or general security posture — you can route OpenCode’s API calls through a Private Service Connect (PSC) endpoint instead of the default public Google API endpoints.
Setting up PSC is a non-trivial networking task that requires proper VPC configuration. At a high level, it involves:
- Creating a Global PSC Endpoint: Although Vertex AI uses regional hostnames (e.g., us-central1-aiplatform.googleapis.com), standard API access requires a global PSC endpoint. You will need to reserve a global internal IP address in your VPC and create a forwarding rule that points to the global Google APIs bundle (either all-apis or vpc-sc).
- Configuring Private DNS: To make the routing seamless for OpenCode without needing to override application base URLs, create a private Cloud DNS zone for googleapis.com. Within this zone, create an A record (e.g., *.googleapis.com or specifically for the Vertex AI hostname) that resolves to the internal IP address of your new PSC endpoint.
- Ensuring Connectivity: Ensure whatever machine runs OpenCode can reach that endpoint. This is easiest if OpenCode runs on a Cloud Workstation or GCE VM inside the VPC. Reaching it from a local machine additionally requires Cloud VPN or Cloud Interconnect, plus a Cloud DNS inbound forwarding policy so your local host can correctly resolve the private googleapis.com hostname.
The relevant Google Cloud documentation to follow is:
- Configure Private Service Connect to access Google APIs: This guide walks through the exact step-by-step setup for a global endpoint and DNS.
Because you are using Cloud DNS to seamlessly route googleapis.com traffic to your internal VPC endpoint, you do not need to manually configure custom endpoints or alter the opencode.json configuration file. OpenCode will route its API calls securely and internally by default.
Using OpenCode
Once your project is set up with the required enabled APIs and models, and (optionally) you’ve set up private networking, you’re ready to start using the tool. If you installed the CLI version, simply type “opencode” to run it. The desktop version is launched just like any other application, so once the application shows on the screen, you are ready to start typing in queries. Like many other agentic coding systems, “/init” will examine your current code base and produce a Markdown file with an overview of the code and important details.
Conclusion
There are many different tools available for AI-assisted coding these days, but OpenCode stands out for its flexibility. With a variety of interfaces and simple model-switching, it’s a tool well worth exploring.
메타데이터
- post_id
- 79a6920543b3
- slug
- the-developers-guide-to-opencode-on-google-cloud-79a6920543b3
- url
- https://medium.com/google-cloud/the-developers-guide-to-opencode-on-google-cloud-79a6920543b3
- canonical_url
- https://medium.com/google-cloud/the-developers-guide-to-opencode-on-google-cloud-79a6920543b3
- author_url
- https://medium.com/@gregsommerville1
- status
- ok
- fetched_at
- 2026-06-09 15:37:30