ODSA for Java Developers (Part 7) — Connecting to Oracle ADB from a Spring Boot 3.0
by Juarez Junior
ODSA for Java Developers (Part 7) — Connecting to Oracle ADB from a Spring Boot 3.0 App with Spring Data JPA on Azure Container Instances
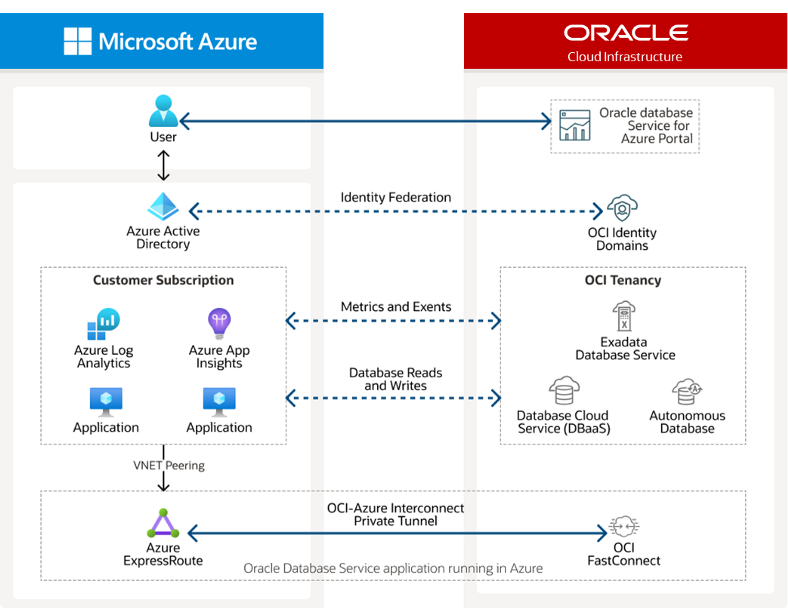
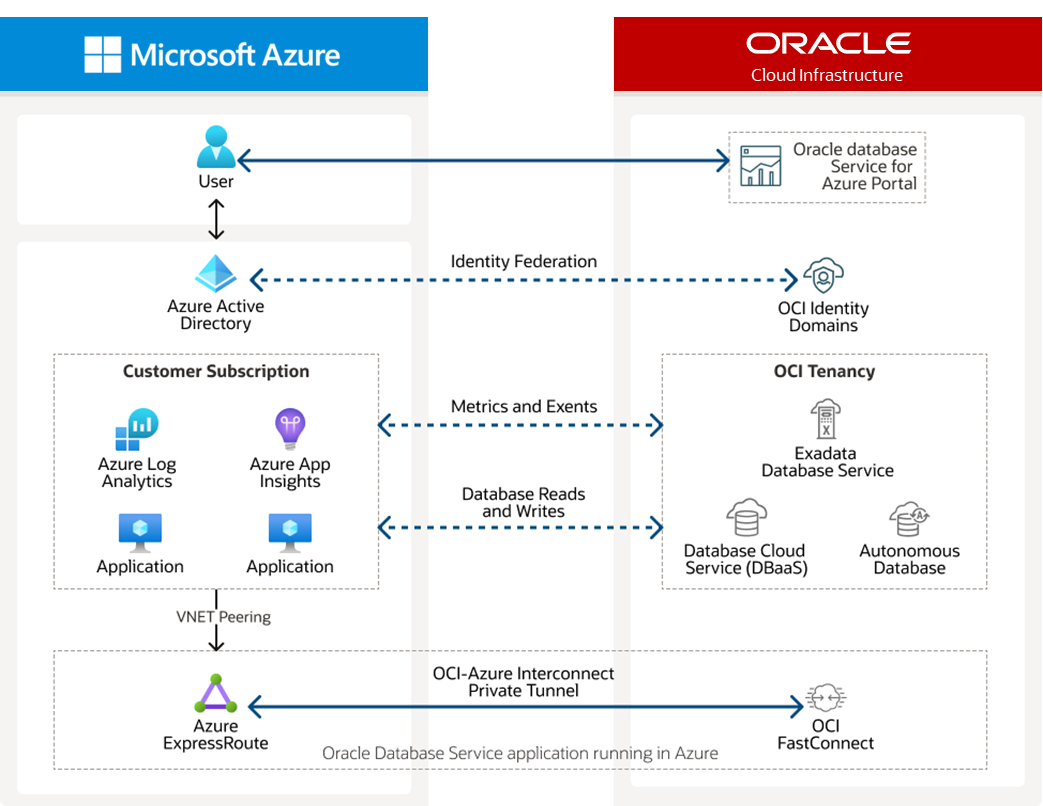
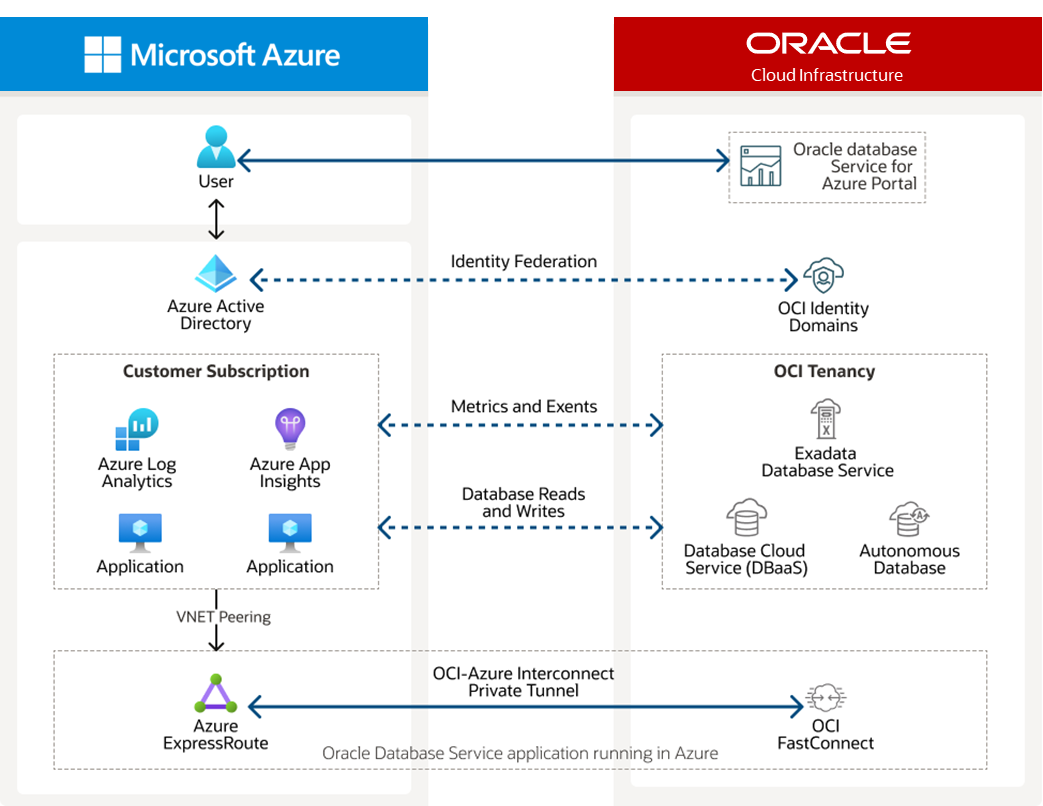
Oracle Database Service for Microsoft Azure (ODSA)
Introduction
This blog post is about creating a container image for a Spring Boot 3.0 application, deploying the image to Azure Container Registry, then using it to deploy the application to Azure Container Instances (ACI).
Its goal is to provide a quick tutorial on creating and deploying a Spring Boot 3.0 application to ACI, then connect it to an Oracle Autonomous Database (ADB) instance provisioned using the Oracle Database Service for Azure.
Please check the official documentation for Azure Container Instances (ACI) to explore it comprehensively.
So without further ado, let’s get started!
Prerequisites
- JDK — Java Development Kit 17
- Your preferred Java IDE — Eclipse, IntelliJ, VS Code
- Apache Maven
- Oracle Database Service on Azure
- Azure Subscription
- Azure CLI
- Docker
Azure Containers Instances (ACI)
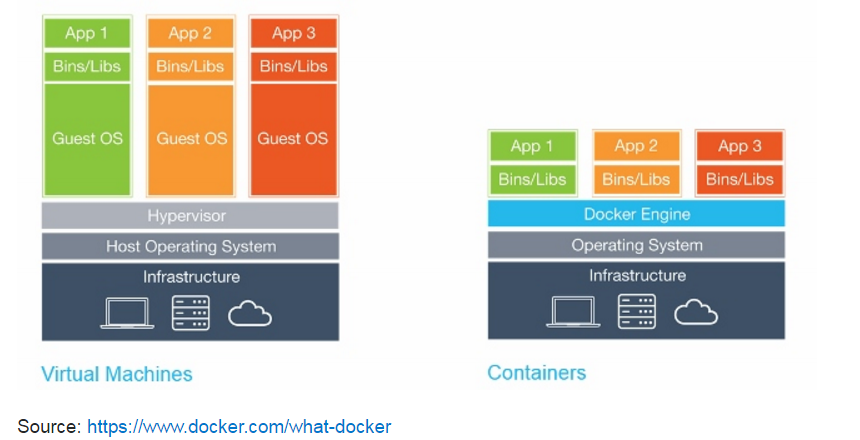
Azure Containers Instances allow you to run Docker containers in a managed, serverless Azure environment. By running your workloads in Azure Container Instances (ACI), you can focus on building your applications instead of addressing the infrastructure that runs them.
This blog post is not an exhaustive guide to Azure Containers Instances. Its goal is to provide a quick guide on how to build a container image for a Spring Boot 3 application, deploy it to Azure Container Registry, then deploy an application based on that image to Azure Container Instances (ACI).
Get the sample code
We’ll use the same Spring Boot 3.0 sample application as in the previous blog posts in this series to perform the steps described above.
The only addition is a Dockerfile that will be used for our containerized Spring Boot 3.0 application, as shown below.
[embed]
Note that this is a basic example of how to containerize a Spring Boot application, and there are many ways you can customize it. You can get more details by visiting the official Spring Boot with Docker guide.
If you have to install Docker, there are some options, such as Docker Desktop and Rancher Desktop, and you can see this blog post for pointers on installing Docker Desktop.
Copy the file above to the root directory of your project at the same level as the POM.xml file.

Dockerfile
Test the Docker image locally
Assuming that you have Docker installed locally, you can test the application on your local machine.
Just navigate to the root directory of your project, and run the commands below.
docker build -t odsa-spring .
docker images
You will see the image below if everything is OK with your environment.

Docker image — ods-spring:latest
Now you can test the sample application locally. To do so, run the command below.
docker run -p 8080:8080 odsa-spring:latestThe Spring Boot 3.0 application will start. Open a browser and navigate to http://localhost:8080/employees

docker run -p 8080:8080 odsa-spring:latest
You should see a JSON response below, confirming that your Spring Boot application is running successfully in a Docker container.

Containerized Spring Boot app at http://localhost:8080/employees
Create an Azure Container Registry (ACR) instance
Azure Container Registry is a private registry service for building, storing, and managing container images.
So, the next step is to create an Azure Container Registry instance with the Azure CLI. Part 3 in this series has a specific section documenting the Azure CLI installation process.
Sign in to the Azure CLI and set your chosen Azure Subscription.
az login
az account set --subscription <YOUR_SUBSCRIPTION_ID>
Create or reuse an existing Azure resource group. Remember to substitute the placeholders below with your preferred values.
Examples of the values used in commands are available throughout this blog post for your easy reference.
az group create --name <AZURE_RESOURCE_GROUP> --location <AZURE_REGION>An example:
az group create --name aci-my-rg --location eastusRegister an Azure Resource Provider for Container Registry.
az provider register --namespace Microsoft.ContainerRegistryCreate an Azure Container Registry instance. Note that the registry name must be unique within Azure and contain 5–50 lowercase alphanumeric characters. The command below will output a loginServer name, so take note of it.
az acr create --resource-group <AZURE_RESOURCE_GROUP> --name <ACR_INSTANCE_NAME> --sku <ACR_SERVICE_TIER>An example:
az acr create --resource-group aci-my-rg --name orclacregistry --sku basicLog in to Azure Container Registry.
az acr login --name <ACR_INSTANCE_NAME> --resource-group <AZURE_RESOURCE_GROUP>An example:
az acr login --name orclacregistry --resource-group aci-my-rgThe command returns a Login Succeeded message once completed.
Build and deploy an image to your ACR instance
We’ll use the Docker image we used in a previous step to test the Spring Boot application locally. The command below will build, tag and deploy it as required.
az acr build --resource-group <AZURE_RESOURCE_GROUP> --registry <ACR_INSTANCE_NAME> --image <IMAGE_NAME:TAG> .An example:
az acr build --resource-group aci-my-rg --registry orclacregistry --image odsa-spring:v1 .The process to deploy the image will start as expected.

az acr build
After a short while, you will see messages confirming that your image got pushed to your ACR repository as expected.

ACR — image pushed successfully
List the images in your registry to ensure a successful image deployment.
az acr repository list --name <ACR_INSTANCE_NAME> --output tableAn example:
az acr repository list --name orclacregistry --output table
az acr repository list — Result — odsa-spring
You can also use the Azure Portal to check your ACR instance and the respective repository to see the image with the related tag, as shown below.

Azure Portal — ACR repository — odsa-spring
Create a container on Azure Container Instance (ACI)
First, please register an Azure Resource Provider for Container Instance.
az provider register --namespace Microsoft.ContainerInstanceEach container registry includes an admin user account. You have to enable it (it’s disabled by default). The admin user account is currently required to deploy an image from a container registry to Azure Container Instances. Enable the Admin user account as needed.
az acr update --resource-group aci-my-rg --name orclacregistry --admin-enabled trueOpen the Azure Portal, navigate to your ACR, select Access keys under Settings and confirm that it got enabled.

orclacregistry — admin user account
Then, copy the Username for the Admin user and one Password from the screen above.
Next, use the command below to create a container instance. Substitute the placeholders <YOUR_LOGIN_SERVER/YOUR_IMAGE:YOUR_TAG>, <YOUR_LOGIN_SERVER>, <ACR_USERNAME>, and <ACR_PASSWORD> as required.
az container create --resource-group aci-my-rg --name aci-my-container --image <YOUR_LOGIN_SERVER/YOUR_IMAGE:YOUR_TAG> --registry-login-server <YOUR_LOGIN_SERVER> --registry-username <ACR_USERNAME> --registry-password <ACR_PASSWORD> --cpu 1 --memory 1 --dns-name-label aci-my-instance --ports 80 --query ipAddress.fqdn --location eastusThe creation process may take a while to complete. You can check its status with the command below if it takes too long.
az container show --resource-group aci-my-rg --name aci-my-container --query "{FQDN:ipAddress.fqdn,ProvisioningState:provisioningState}" --out tableAs soon as it completes, take note of the FQDN shown below.

Azure Container Instance created — FQDN returned
You can use the az container show command above to check its final status.

az container show
You can open the Azure Portal to see it created as well.

Azure Container Instance — Azure Portal
Last, you can get the container details using Azure CLI.

container details
Add the outbound IP addresses of your ACI container to the ACL
Before you can open a browser to test it, there’s a last but essential step. We have to add the outbound IP address of your Azure Container Instance to your Oracle Autonomous Database instance’s ACL (Access Control List).
The outbound IP address of your Azure Container Instance is not the same as the inbound IP address. Besides, the Azure Portal does not explicitly shows the outbound IP address, as it is automatically assigned and may change when ACI restarts.
There’s an option to configure a single public IP address for outbound and inbound traffic to a container group. However, such a requirement is beyond the goal and scope of this blog post. Nevertheless, if you want to achieve that, follow the documentation.
To complete this task, we’ll get the assigned outbound IP address and add it to the ADB instance’s ACL (Access Control List).
Run the command below to connect to your Azure Container Instance, and run the az container exec command from within a running container of a container group.
az container exec --resource-group aci-my-rg --name aci-my-container –-exec-command “/bin/bash”Run the command below, and take note of the returned IP address.
curl ifconfig.me
curl ifconfig.me
Go to the ODSA console, select your ADB instance, select Networking on the right-hand side, then click Edit at the top. Add the IP address to its ACL. Click OK. Wait until its status changes from Updating to Active.

ODSA — Secure access from allowed IP addresses for the ADBATPODSA instance
You will see a notification message with a confirmation, as shown below.

Oracle Autonomous Database — ACL updated
Test the application
As in the previous blog posts in this series, the URL format for this application is below.
https://<PUBLIC_IP_ADDRESS>/employees
https://<PUBLIC_IP_ADDRESS>/employees
Check the container logs
You can inspect the container instance logs with the command below.
az container logs --resource-group myResourceGroup --name mycontainerYou will see the Hibernate query logged successfully, as expected.

Spring Data JPA with Hibernate — query executed
Congratulations! You deployed a Spring Boot 3.0 application to a container on Azure Container Instances (ACI). It is connected to an Oracle Autonomous Database (ADB) instance provisioned with the Oracle Database Service for Azure.
Wrapping it up
That’s it! You learned how to configure a Spring Boot application to use UCP as a native Spring Datasource.
Then, you deployed it to a container image on Azure Container Instances (ACI). I hope you enjoyed this blog post and our series about ODSA. Stay tuned!
Oracle Database Service for Azure (ODSA) Series
This post complements the series on developing Azure applications with ODSA, which includes the previous blog posts listed below.
ODSA for Java Developers (Part 1) — Introduction to Oracle Database Service for Azure
References
Oracle Database Service for Azure — Documentation
Develop Java applications with Oracle Database
Developers Guide For Oracle JDBC 21c on Maven Central
Oracle Database JDBC Java API Reference, Release 21c
Azure Container Instances (ACI) — Documentation
Azure Container Registry — Documentation
Oracle Developers and Oracle OCI Free Tier
Join our Oracle Developers channel on Slack to discuss Java, JDBC, the Oracle Database, OCI, ODSA, and other topics!
Build, test, and deploy your applications on Oracle Cloud — for free! Get access to OCI Cloud Free Tier!
메타데이터
- post_id
- 7ac563d117a3
- slug
- odsa-for-java-developers-part-7-connecting-to-oracle-adb-from-a-spring-boot-3-0-7ac563d117a3
- url
- https://medium.com/oracledevs/odsa-for-java-developers-part-7-connecting-to-oracle-adb-from-a-spring-boot-3-0-7ac563d117a3
- canonical_url
- https://medium.com/oracledevs/odsa-for-java-developers-part-7-connecting-to-oracle-adb-from-a-spring-boot-3-0-7ac563d117a3
- author_url
- https://medium.com/@juarezjunior
- status
- ok
- fetched_at
- 2026-06-29 22:44:20