Why does the world still use SMB networking — and what to do if you need to as well.
It’s 2025. I had a stupid problem: I had a system that was down, and a motherboard that would only accept a file that was being served…
Why the world still uses SMB networking to bootstrap servers— and what to do if you need to as well.
It’s 2025. I had a stupid problem: I had a system that was down, and a motherboard that would only accept a file that was being served like it was served from a Windows 95 machine, with all the horrible security which is implied by that.
The Backstory:
While my regular readers know I extoll the love for the Dell iDRAC, I recently was dealing a device made by Netgate (the people who make the PFSense firewall). And as a small integrator, they went with SuperMicro hardware. Supermicro servers are reasonable, affordable, machines in everything but their management boards. This machine supported an HTML5 console, so at least I didn’t need to jump through dumb Java hoops to get a remote login.
For the record, the board was the SuperMicro SYS-5018D-FN4T. The last firmware upgrade was in 2023, so not fully ancient by any estimation.
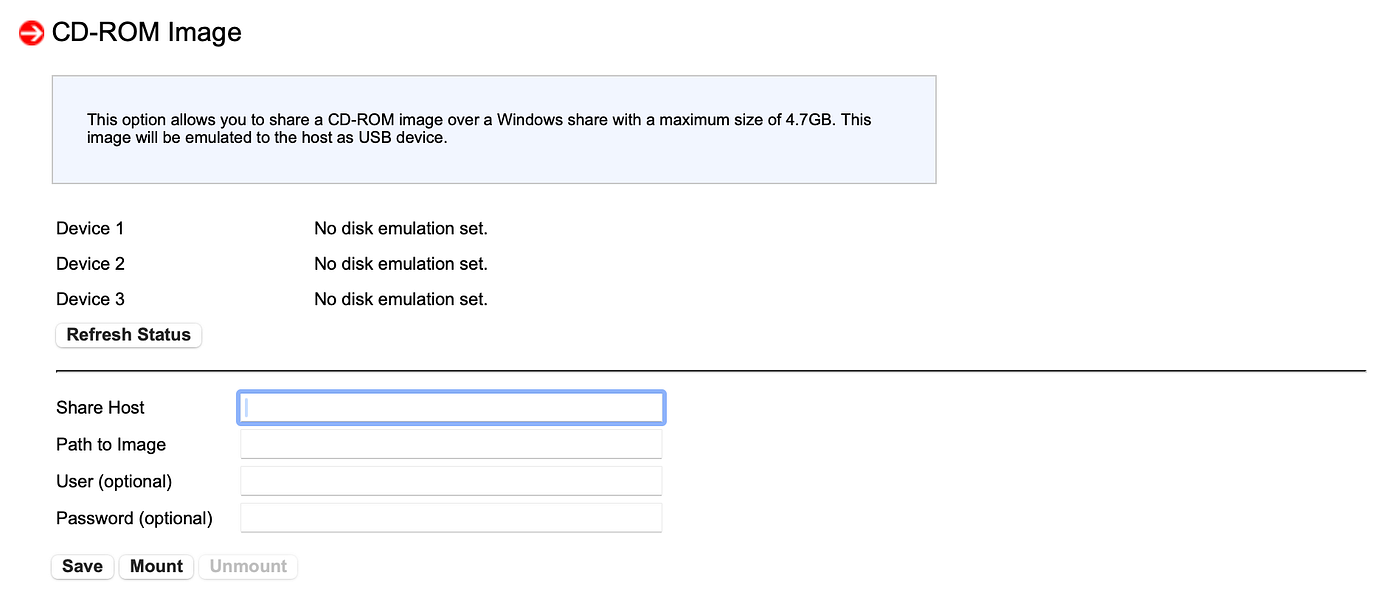
However, when things went far south enough that my only options were to reinstall the OS, I found myself with a dilemma: Yes, the machine could talk to an ISO image, but not one where you browsed on your local machine and uploaded the ISO to an onboard SDcard (such as with Dell’s iDSDM’s) — nor even an emulation layer provided by the HTML5 virtual console. No, this thing would only talk to an ISO mounted on a Windows share.
I even tried chasing down a copy of Supermicro’s IPMIview, which used to be on their FTP site, but is now in a weird ftp-like directory on Supermicro.com. It refused to play ball with my Windows XP VM (which claimed the zip file was corrupted), and running it on Windows 10 worked, but at the end of the day, told me I needed to buy a $180 license for the server to do Virtual Media, which wasn’t available for this motherboard anyway.
No, the only way to get there from here is to mount the iso on a “windows share”. We’re a unix shop.
It gets even worse: This is not modern windows share technology. Not remotely. This board needs SMB version 1.0, and NTLMV1 Authentication. (So, effectively, Windows 95-era networking. Stuff for which there are known vulnerabilities.)
Now, there are ways to make Samba do this kind of dangerous, broken, don’t-try-this-at-home-kids networking, because the Samba developers (unlike the OpenSSH and OpenSSL devs) are willing to leave dangerous off-by-default options in place for the 1% of those who really need them. (Thank you for this). And while I fired up a copy of Samba on one of our jumphosts, firewalled it to only my ILOM, and deleted it right after, it still felt icky.
Credit where it’s due: A blog post by Tom Rogers helped me determine most of what was necessary. Tom stops short of telling you how to actually do this, but I’m going to tell you, because this is the Wisdom of the Ancients:

Even after getting Samba set up, the iLOM did some stupid things with regard to “Optional” usernames. (If you leave it blank in the iLOM, it doesn’t try a guest account, it defaults to trying an Administrator account.)
How to Do It
Step Zero: Create a firewall rule that limits access to ports 139 and 445 (both TCP and UDP) to only the machine in question. Put the .iso or whatever you want in a dedicated directory, not your homedir or something like that. (I used /data/shares in my example).
Step One: Install a modern version of Samba.
Step Two: Here’s your config file, which on my machine goes into smb4.conf. Not all these options may be strictly necessary, but this is what worked for me.
[global]
workgroup = WORKGROUP
server min protocol = NT1
ntlm auth = ntlmv1-permitted
log level = 3 passdb:5 auth:5
ntlm auth = yes
null passwords = yes

[authentication]
ntlm auth = yes

[shares]
    path = /data/shares
    public = yes
    guest ok = yes
    read only = yes
Note: Some of this may not be necessary — the [authentication] block is not a “special thing” in modern versions of samba (but may have been in the past), so this may be ignored. Also, according to the manpage, ntlmv1-permitted and yes mean the same thing, versus being additional options, but again — this is combat sysadmin work, you throw things at the wall until they work, and then you save that config file forever.
Ergo, while I’m leaving “what worked for me” intact above, the following may suffice:
[global]
workgroup = WORKGROUP
server min protocol = NT1
log level = 3 passdb:5 auth:5
ntlm auth = yes
null passwords = yes

[shares]
    path = /data/shares
    public = yes
    guest ok = yes
    read only = yes
Step Three: Just chown the whole lot of your files in /data/sharesto some unprivileged user on your system like “nobody”. Mapping usernames in Samba is a pain in the butt, and you’re going to only have this thing up as long as you need to.
For the simplest use case in Samba: use an account that fully owns your files, where both the Samba username and the unix username are the same. Samba generally requires that a user exist in normal unix passwords to set a samba password for them as well.
Step Four: Set a password for the user with smbpasswd -a nobody. Supermicro will say that a username is optional, but all my logs show that if you leave it blank, it still sends a username of “guest” or “Administrator” (note the cap), which turn out not to work for some reason. Feed it a normal username and password, and don’t spend more time on this than you need to.
Step 5: Recover your system. Don’t use fancy hostnames, just use the ip address, and use a username and password that you’ve set. Mount your iso, boot from it, and do what you need do. Note that in my example above, the sharename is /shares, (it’s what’s specified in the square brackets at the top), so the iso would be something like \\shares\ng.iso. Try with zero slashes, one, and two. There is no consistency in these things.
Step 6: Burn this all to the ground and uninstall samba again. Don’t leave that config file around so that it gets used if samba does ever get installed.
If you actually need the info above, you’re having a bad day. *raises a beer *Hope this helps.
메타데이터
- post_id
- 80b3f7cf6590
- slug
- why-does-the-world-still-use-smb-networking-and-what-to-do-if-you-need-to-as-well-80b3f7cf6590
- url
- https://medium.com/@gushi/why-does-the-world-still-use-smb-networking-and-what-to-do-if-you-need-to-as-well-80b3f7cf6590
- canonical_url
- https://medium.com/@gushi/why-does-the-world-still-use-smb-networking-and-what-to-do-if-you-need-to-as-well-80b3f7cf6590
- author_url
- https://medium.com/@gushi
- status
- ok
- fetched_at
- 2026-06-24 11:06:28
