Raspberry Pi Zero W: Private VPN Gateway with Ad Blocking Part 1
I had a Pi Zero laying around and configuring each device with adbocking extenstons, providing access for every device to my homelab…
Raspberry Pi Zero W: Private VPN Gateway with Ad Blocking Part 1
I had a Pi Zero laying around and configuring each device with adbocking extenstons, providing access for every device to my homelab, issuing multiple VPN profiles was getting out of hand. While investigating different solution I have compiled the guide to be able to run on low powered, edge devices (in my case it’s Pi Zero W 2017). I hope you will find this guide useful no matter the hardwere you are going to run it on.
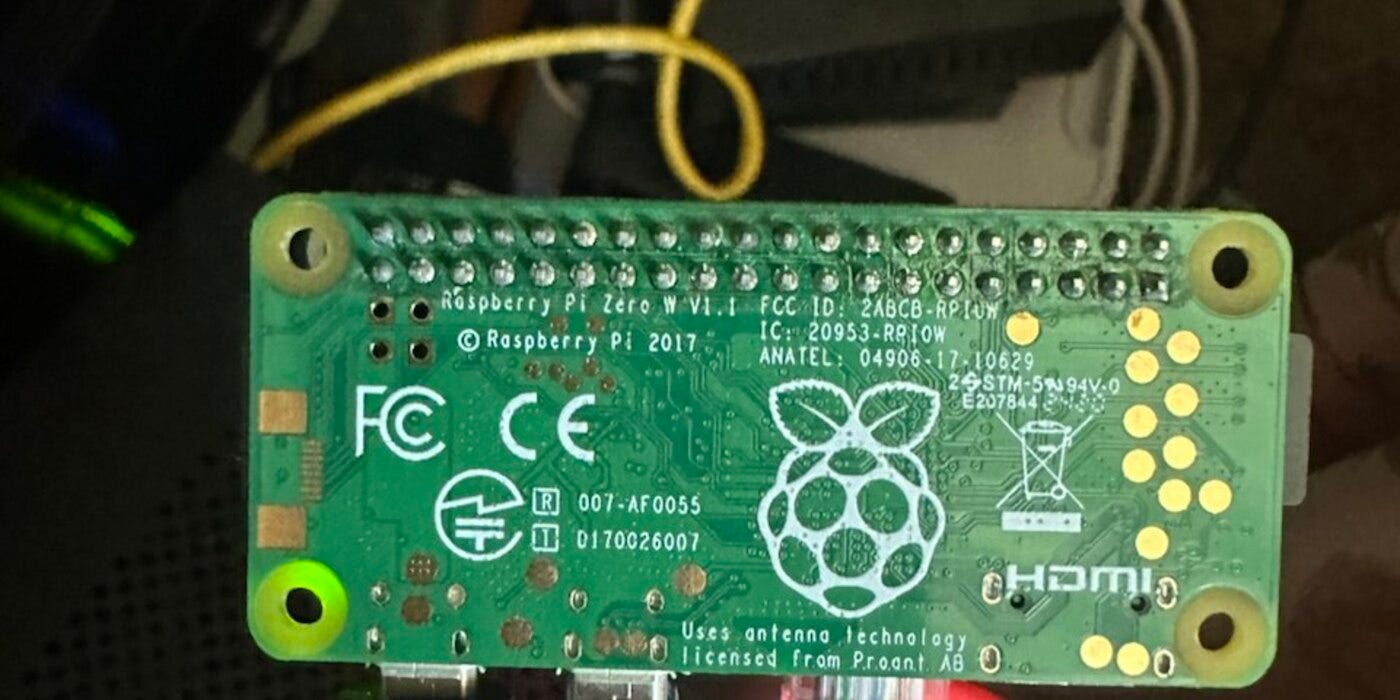
Pi Zero W 2017
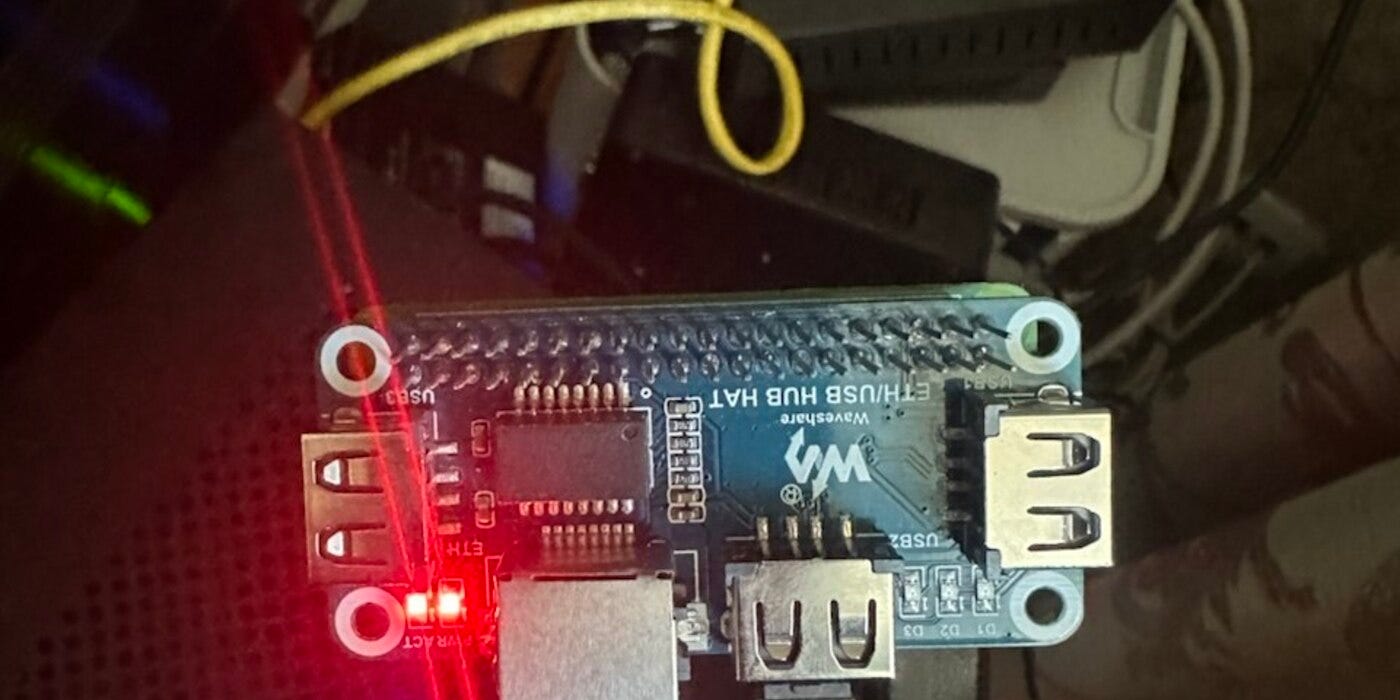
Ethernet Shield for Pi Zero
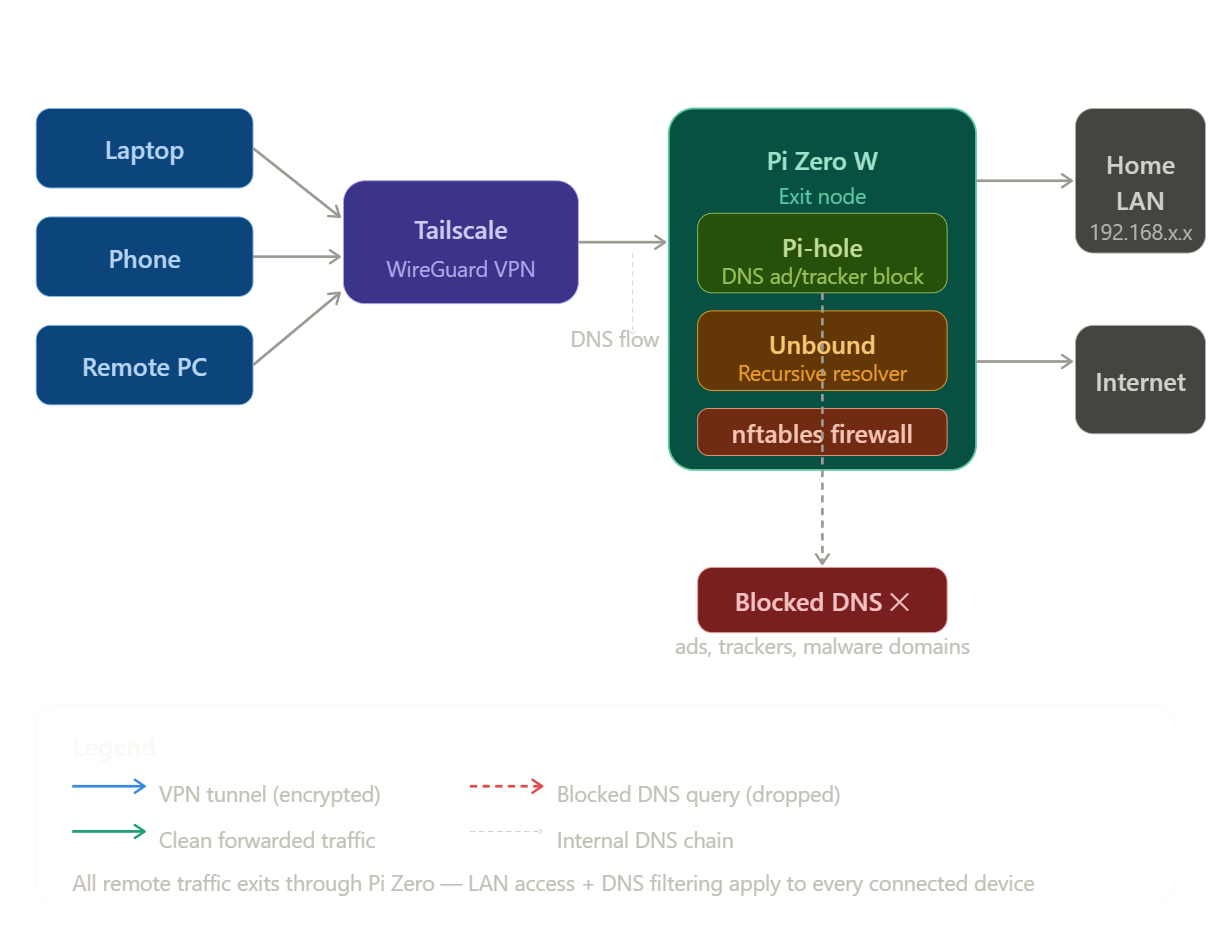
TL;DR: Turn a fresh Pi Zero W into a Tailscale exit node that gives remote devices full access to your home LAN, blocks ads/trackers at the DNS level, and resolves DNS privately without leaking queries to upstream providers.
Guide diagram:
Prerequisites
- Raspberry Pi Zero W or any device which can run Linux
- MicroSD card (8 GB minimum, 16 GB recommended for extended logging/monitoring)
- A Tailscale account (free tier is enough)
- SSH access to the Pi (no keyboard/monitor needed after initial flash)
- Your home router admin access (for a static IP)
Part 1 — Flash and first boot
1.1 Flash the OS
Use Raspberry Pi Imager (https://www.raspberrypi.com/software/). The app is pretty straightforward to use but I will leave my options I used to configure the device:
- OS: Raspberry Pi OS Lite (32-bit) — no desktop needed
- Hostname:
tailscale-pi(or whatever you prefer) - Enable SSH (use password or paste your public key)
- Wi-Fi SSID + password (your home network) but if you have I recommend to use Pi Ethernet shield for more stable wired connection
Flash and insert the card into the Pi. Power on and wait ~60 seconds for first boot.
1.2 Find the Pi’s IP and SSH in
# From your laptop on the same network
ssh user@tailscale-pi
# or use your router's DHCP table to find the IP
ssh user@192.168.1.X
1.3 Set a static IP (recommended)
On your router: assign a permanent IP to the Pi’s MAC address. Note the IP — you’ll use it throughout this guide. Call it PI_IP (e.g. 192.168.1.50).
Alternatively, set it on the Pi itself. If you have too many devices this will be less reliable:
# Edit dhcpcd.conf
sudo nano /etc/dhcpcd.conf
Add at the bottom (adjust to your network):
interface wlan0
static ip_address=192.168.1.50/24
static routers=192.168.1.1
static domain_name_servers=127.0.0.1
1.4 System update
sudo apt update && sudo apt full-upgrade -y
# You might not need all the tools verify what you already have
sudo apt install -y curl git vim nftables
sudo reboot
Part 2 — Install AdGuard Home
I chose AdGuard Home because it’s a lightweight, self-contained DNS filter — a single binary with no PHP or separate web server required. It uses less RAM than Pi-hole, has a cleaner UI, and supports DNS-over-HTTPS/TLS natively without extra tools. Sorry for selling out but I had compared other solution to the AdGuard Home and this tool was right what I needed.
curl -s -S -L https://raw.githubusercontent.com/AdguardTeam/AdGuardHome/master/scripts/install.sh | sh -s -- -vThis installs AdGuard Home to /opt/AdGuardHome and starts it automatically. But, if you are not lazy I would recommend skimming through it. At the very least, try to use LLM to make sure no malicious script is being executed on your device!
2.1 Run the setup wizard
Open http://PI_IP:3000 in your browser and complete the one-time wizard:
- Admin interface port:
80(or keep3000if you want port 80 free for reverse proxy) - DNS port:
53 - Note the admin username and password you set. Dashboard is at
http://PI_IP(or:3000).
2.2 Set AdGuard Home as the system’s DNS resolver
# Tell the Pi itself to use AdGuard Home for DNS
# Backup this file in case you will revert it
echo "nameserver 127.0.0.1" | sudo tee /etc/resolv.conf
# Prevent dhcpcd from overwriting it
sudo chattr +i /etc/resolv.conf
Part 3 — Install Unbound (private recursive resolver)
Unbound resolves DNS queries directly against root servers — no queries leak to Google, Cloudflare, or your ISP.
sudo apt install -y unbound3.1 Configure Unbound
sudo nano /etc/unbound/unbound.conf.d/adguard.confGo over the Unbound documnetaion and read about each options, edit to your need, and paste final config to *.conf file from above:
server:
    verbosity: 0
    interface: 127.0.0.1
    port: 5335
    do-ip4: yes
    do-udp: yes
    do-tcp: yes
    do-ip6: no
#Security
harden-glue: yes
harden-dnssec-stripped: yes
use-caps-for-id: yes
edns-buffer-size: 1232 #Performance
prefetch: yes
num-threads: 1
so-rcvbuf: 1m #Privacy — refuse ANY queries
deny-any: yes #Root hints (update annually)
root-hints: /var/lib/unbound/root.hints #Access control
access-control: 127.0.0.1/32 allow
access-control: 0.0.0.0/0 refuseprivate-address: 192.168.0.0/16
private-address: 172.16.0.0/12
private-address: 10.0.0.0/8
private-address: fd00::/8
private-address: fe80::/103.2 Download root hints
Again, I would first advice to download and the domains with IPs to understand what’s going on
wget -qO- https://www.internic.net/domain/named.root | sudo tee /var/lib/unbound/root.hintsAdd a monthly cron job to keep it fresh:
(crontab -l 2>/dev/null; echo "0 3 1 * * wget -qO /var/lib/unbound/root.hints https://www.internic.net/domain/named.root") | crontab -3.3 Start and test Unbound
sudo systemctl enable unbound
sudo systemctl restart unbound
# Test — should return NOERROR for a valid domain
dig github.com @127.0.0.1 -p 53353.4 Confirm AdGuard Home is using Unbound
If you entered 127.0.0.1:5335 during the setup wizard, you're already done. To verify or change it after setup:
- Go to Settings → DNS settings
- Under Upstream DNS servers, ensure only
127.0.0.1:5335is listed - Remove any other entries (Cloudflare, Google, etc.)
- Click Test upstreams — it should pass
- Save
Part 4 — Install Tailscale
4.1 Install
curl -fsSL https://tailscale.com/install.sh | sh4.2 Enable IP forwarding (required for exit node)
echo 'net.ipv4.ip_forward=1' | sudo tee -a /etc/sysctl.d/99-tailscale.conf
echo 'net.ipv6.conf.all.forwarding=1' | sudo tee -a /etc/sysctl.d/99-tailscale.conf
sudo sysctl -p /etc/sysctl.d/99-tailscale.conf
4.3 Authenticate and advertise as exit node
sudo tailscale up \
  --advertise-exit-node \
  --accept-routes \
  --advertise-routes=192.168.1.0/24 \
  --operator=pi
Replace
192.168.1.0/24with your actual home subnet.
This opens an auth URL — open it on any browser and log in with your Tailscale account.
4.4 Approve in Tailscale admin console
Go to https://login.tailscale.com/admin/machines:
- Find your Pi — click the three-dot menu
- Edit route settings → enable the subnet route + exit node
- Under DNS tab: set the Pi’s Tailscale IP as the Global nameserver and enable Override local DNS
4.5 Tell Tailscale to use AdGuard Home for DNS
# Find your Pi's Tailscale IP
tailscale ip -4
# Output: 100.x.x.x
In the Tailscale admin DNS settings, add that 100.x.x.x address as the nameserver. Remote devices will now use AdGuard Home for all DNS queries when connected through the exit node.
Conclusion
At this point your Pi Zero W (or your hardware) is doing three jobs at once: routing all your remote traffic through your home network, stripping ads and trackers before they reach any device, and resolving DNS privately against root servers without touching Google or Cloudflare. All of this runs on hardware that costs less than a cup of coffee and sips power 24/7.
From here you could harden things further — lock down the AdGuard admin panel behind Tailscale ACLs, add HTTPS to the dashboard, or set up a second Pi as a failover exit node. But even as-is, this is a meaningful upgrade to your privacy and network control, whether you’re working from a cafe or traveling abroad. If anything in this guide didn’t work as expected, drop a comment and I’ll try to help. I will try to think about the next parts of this guide if the current one will have any resonance.
메타데이터
- post_id
- 81d3c3d4e109
- slug
- raspberry-pi-zero-w-private-vpn-gateway-with-ad-blocking-part-1-81d3c3d4e109
- url
- https://medium.com/@kamil.alekber/raspberry-pi-zero-w-private-vpn-gateway-with-ad-blocking-part-1-81d3c3d4e109
- canonical_url
- https://medium.com/@kamil.alekber/raspberry-pi-zero-w-private-vpn-gateway-with-ad-blocking-part-1-81d3c3d4e109
- author_url
- https://medium.com/@kamil.alekber
- status
- ok
- fetched_at
- 2026-06-09 15:37:30

