Neovim: highlighting the text programmatically with Lua
As a modern Vim successor, Neovim itself is a huge step forward in a PDE (Personal Development Environment) area. Using Lua as a…
Neovim: highlighting the text programmatically with Lua
As a modern Vim successor, Neovim itself is a huge step forward in a PDE (Personal Development Environment) area. Using Lua as a first-class language for customizing your experience and building third-party plugins decreases the learning curve and drastically decreases complexity. Nowadays there is a huge community and a number of active projects are growing within and around, forming the whole Neovim ecosystem.
At the same time even with quite decent and well-supported documentation of Neovim API, it can be difficult to write plugins from scratch. I’ve spend couple of hours reading the documentation and source code of some popular plugins. I’ve been trying to get an idea of how plugins are developed, and in what way particular features should be used within my code. One of these feature is text’s highlightings which is the subject of this article.
In this article I’ll try to provide a straightforward guide for creating highlights by introducing some underlying Neovim concepts and Lua API parts. By the end we will develop a tiny plugin intended to highlight the whole line under your cursor.
I should mention that this article is only about Neovim, and not about plain Vim. Although I may use both of the names interchangeably, usually it should just mean “Neovim”. I am sure that the same result could also be achieved with Vim, but this is beyond the scope of this article.
Before
I’m not an mature Vim guru, probably just a regular curious guy like yourself, so please do not judge me too harshly if I do not show you the very best practices. Most of the ideas I’ve grabbed from Neovim documentation and the source code of various plugins such as of hop.nvim and telescope.nvim.
We will start by trying to highlight some text manually by executing commands in Neovim’s command line. After that all of these commands will be put together in code files forming a brand new Neovim plugin.
Also note that you can refer to the final version of the source code in my github repo.
Prerequisites
We will use only two features of Neovim:
- Highlights
- Extended marks (extmarks)
Highlighting
As the name suggests this is defined as:
Syntax highlighting enables Vim to show parts of the text in another font or color.
While developers nowadays can’t even imagine coding without the help from their IDE, including syntax highlighting, it is not surprising that all of the modern terminal emulators have decent support for colors and styles. Vim/Neovim extensively uses this feature and they did a HUGE amount of work on detecting filetypes and introducing appropriate syntax highlighting based on those types. Internally, all the ‘styles’ are introduced at Neovim with a highlightcommand.
By using the highlight command you are able to map custom style to different group names. Basic usage:
:hi[ghlight] [default] {group-name} {key1}={arg1} {key2}={arg2} ...This will set some custom styles defined by key-args pairs to the specified group. But unless text is associated with the group, style changes will not be applied. To make a real highlight you should bind a group to a certain piece of text.
Refer the documentation to read about the key-args. For this guide I’ll just mention that there are two types of highlighting: gui and cterm , and here we will use only fg (foreground) and bg (background) properties.
Let me choose a style for our plugin:
guifg=#ff007c gui=bold ctermfg=198 cterm=bold ctermbg=darkgreenExtended marks (extmarks)
Extended marks (extmarks) represent buffer annotations that track text changes in the buffer.
Extmark will be used to annotate a specific piece of text with some metadata such as a highlighting group name. Based on this Neovim will change the style of your piece of text.
Here is Lua Neovim API for creating an extmark:
nvim_buf_set_extmark({buffer}, {ns_id}, {line}, {col}, {*opts})Where:
- buffer — number of buffer extmark will be applied for
- ns_id — id of the namespace (extmarks are bounded to the namespaces)
- line, col — coordinates of the extmark start position
- opts — other options. end_row and end_col may be passed there
Notice, a namespace should be created before setting up an extmark. This should be done with the nvim_create_namespace({name}) command.
Finally let’s get our hands dirty and highlight some text with the Neovim commands!
How to execute commands
Most straightforward way to accomplish it by exploring Neovim’s command line. While using Vim’s normal mode type in : (colon) and then an actual command: you will see it at the bottom side of the terminal, just above the status line.
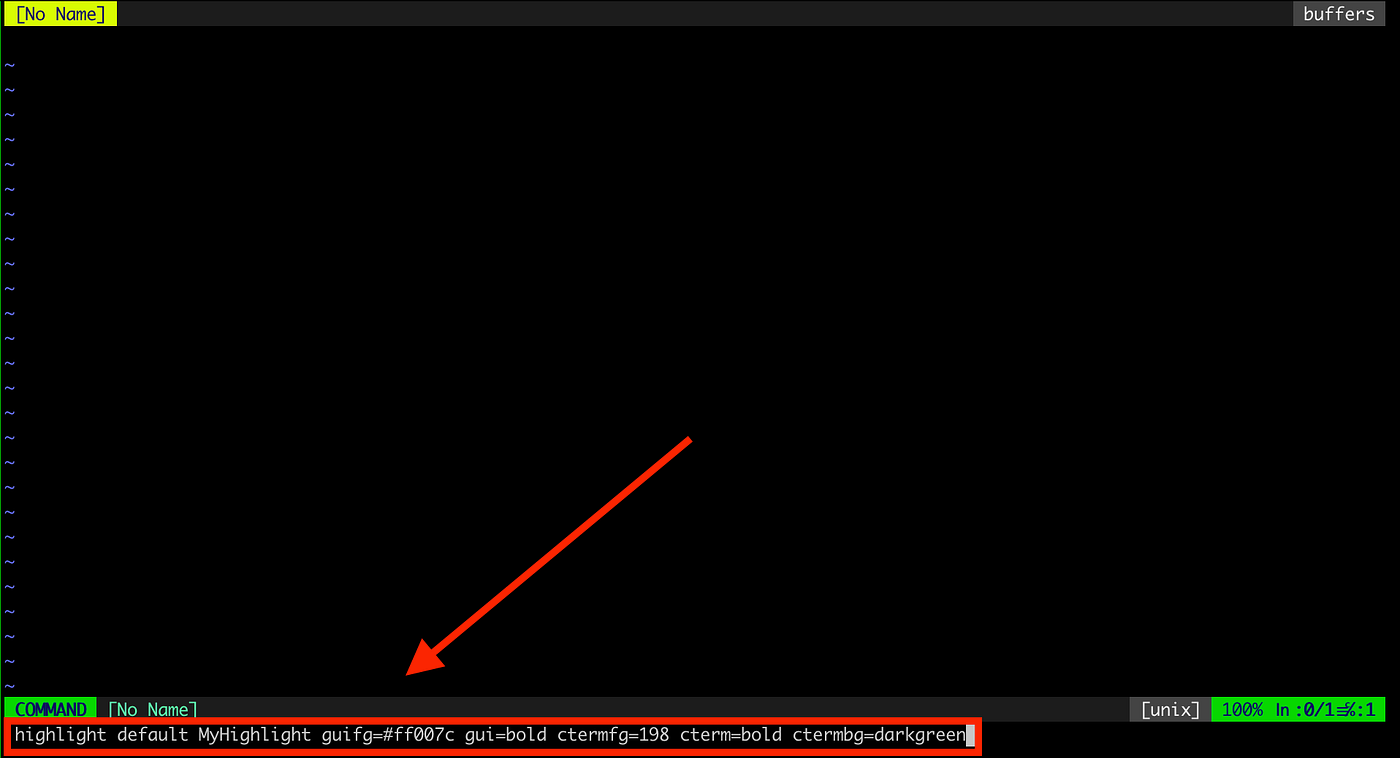
Neovim command line
Highlights in Action
Open any text file with Neovim (e.g. by executing nvim <file_name> in a terminal) and make sure the file is not empty, otherwise you won’t see how the magic happens! Then follow by executing the commands one-by-one. To create a highlight:
:highlight default MyHighlight guifg=#ff007c gui=bold ctermfg=198 cterm=bold ctermbg=darkgreenAfter creating namespace we should receive back its id and then assign it to a variable. The same for the current buffer, both of them are needed for creating an extmark:
:lua namespace_id=vim.api.nvim_create_namespace('MyNamespace')For the buffer:
:lua buffer_id=vim.api.nvim_get_current_buf()If you’ve opened fresh Neovim editor, most probably your buffer id is 1.
Next, you need to find a piece of text as a candidate for highlighting. Please note the line number (to make line numbers visible you may execute :set number) and width. Let’s save these into the variables:
:lua line_number = <your value here>
:lua end_col = <your value here>
:lua start_col = 0 --for readability
Finally, after setting the extmark up our text should be highlighted!
:lua vim.api.nvim_buf_set_extmark(buffer_id, namespace_id, line_number - 1, start_col, {end_row = line_number - 1,end_col = end_col, hl_group='MyHighlight'})You should see something like this:
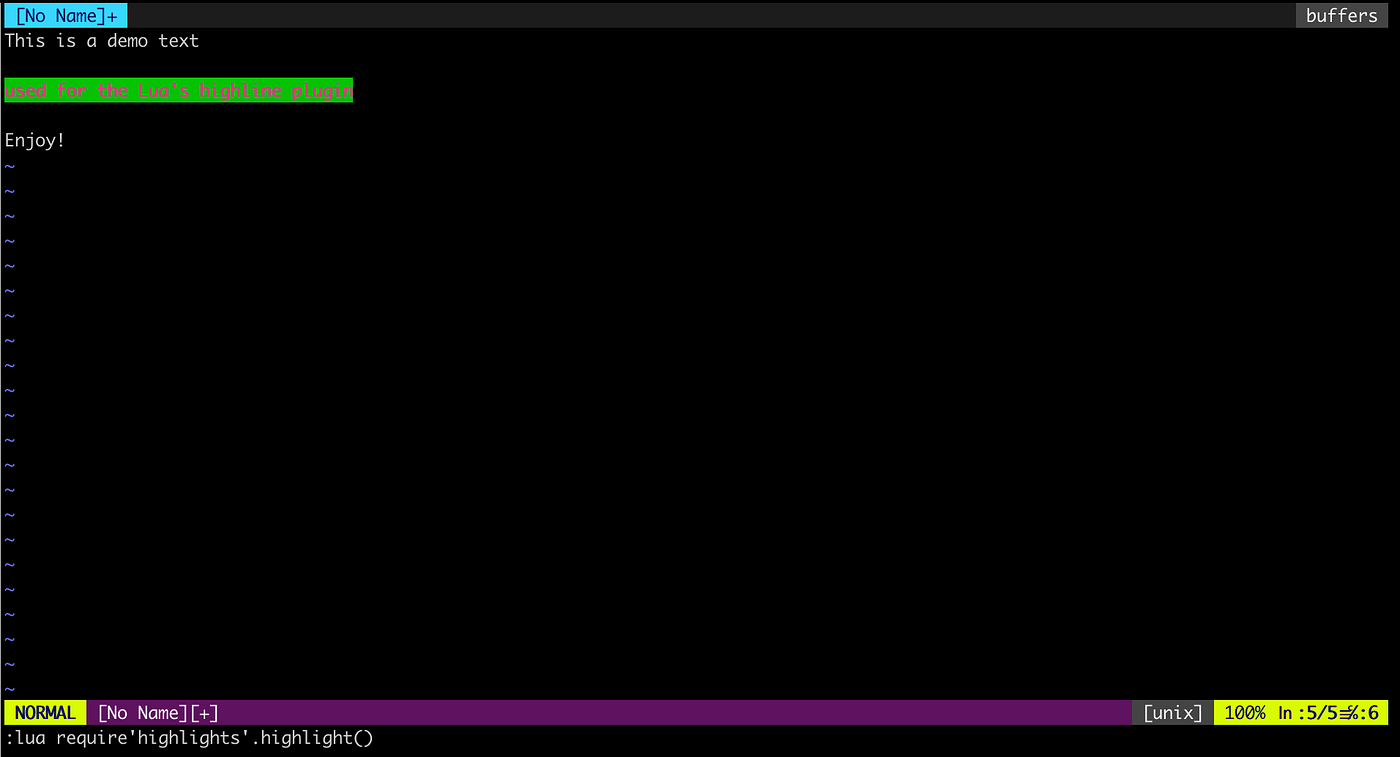
Wrapping up into a plugin
The fact that by executing several commands you can highlight anything you want is very useful but, for sure, doing it that way is tedious (unless you believe you are a cool hacker, who loves typing Neovim commands). The most common way to overcome this is to wrap you code into plugin, make it load automatically on vim startup and bind this highlighting magic to the single command or keystroke. So, let’s bring our small plugin to life!
I will not touch the basics of creating a Lua plugins with Neovim (if you are curious, check this article for more details), so let’s just dive into the actual coding.
In your Neovim configuration directory (for Linux/MacOS it should be ~/.config/nvim ) find or create directory lua with a highline.lua file inside.
Usually plugins are started by creating a module and then they are filled in with functions and variables we need to export:
local M = {}
-- module content will be here
return M
Let’s populate the module with a bunch of useful functions. To start with we should create a highlight and create a namespace:
function M.init_highlights()
  vim.api.nvim_command('highlight default HighlightLine guifg=#ff007c gui=bold ctermfg=198 cterm=bold ctermbg=darkgreen')
  namespace_id = vim.api.nvim_create_namespace('HihglightLineNamespace')
end
Just to make this highlighting work automatically I will use autocommands Neovim feature (read about it here), but this is out of scope for this article. Basic highlighting should work without this, but to make plugin work consistently, it’s better to use this snippet of code:
function M.run_autocommands()
   vim.api.nvim_command('augroup HighlightLine')
   vim.api.nvim_command('autocmd!')
   vim.api.nvim_command("autocmd ColorScheme * lua require'highlights'.init_highlights()")
   vim.api.nvim_command('augroup end')
end
The most interesting part will be place inside a highlight function:
function M.highlight()
  -- dynamic highlighting logic is here
end
First, we need to fetch the current window’s and buffer’s ids:
local current_win = vim.api.nvim_get_current_win()
local current_buf = vim.api.nvim_get_current_buf()
Then, to fetch highlighting coordinates current cursor position and length of the current line should be store into a variables:
local pos = vim.api.nvim_win_get_cursor(current_win)
local row = pos[1] - 1 -- zero-based
local col = pos[2]
local current_line = vim.api.nvim_buf_get_lines(current_buf, row, row + 1, false)[1]
local end_col = string.len(current_line)Finally, we have all the data to be able to perform the actual highlighting. Using coordinates from above let’s use nvim_buf_set_extmark function:
vim.api.nvim_buf_set_extmark(current_buf, namespace_id, row, start_col, {end_row = row, end_col = end_col, hl_group='HighlightLine'})That’s it, our plugin is almost ready-to-use. In order to load the plugin on startup and set a binding to a meaningful command, add the following lines into the new file under ~/.config/plugin/highline.vim:
lua require'highline'.init_highlights() lua require'highline'.run_autocommands() command! Highline lua require'highline'.highlight()<CR>This will create the highlight on the startup of your editor, init autocommands and bind line-highlight call to :Highline command. Navigate to any line at your Neovim’s current buffer and type the :Highlinecommand. See it in action:
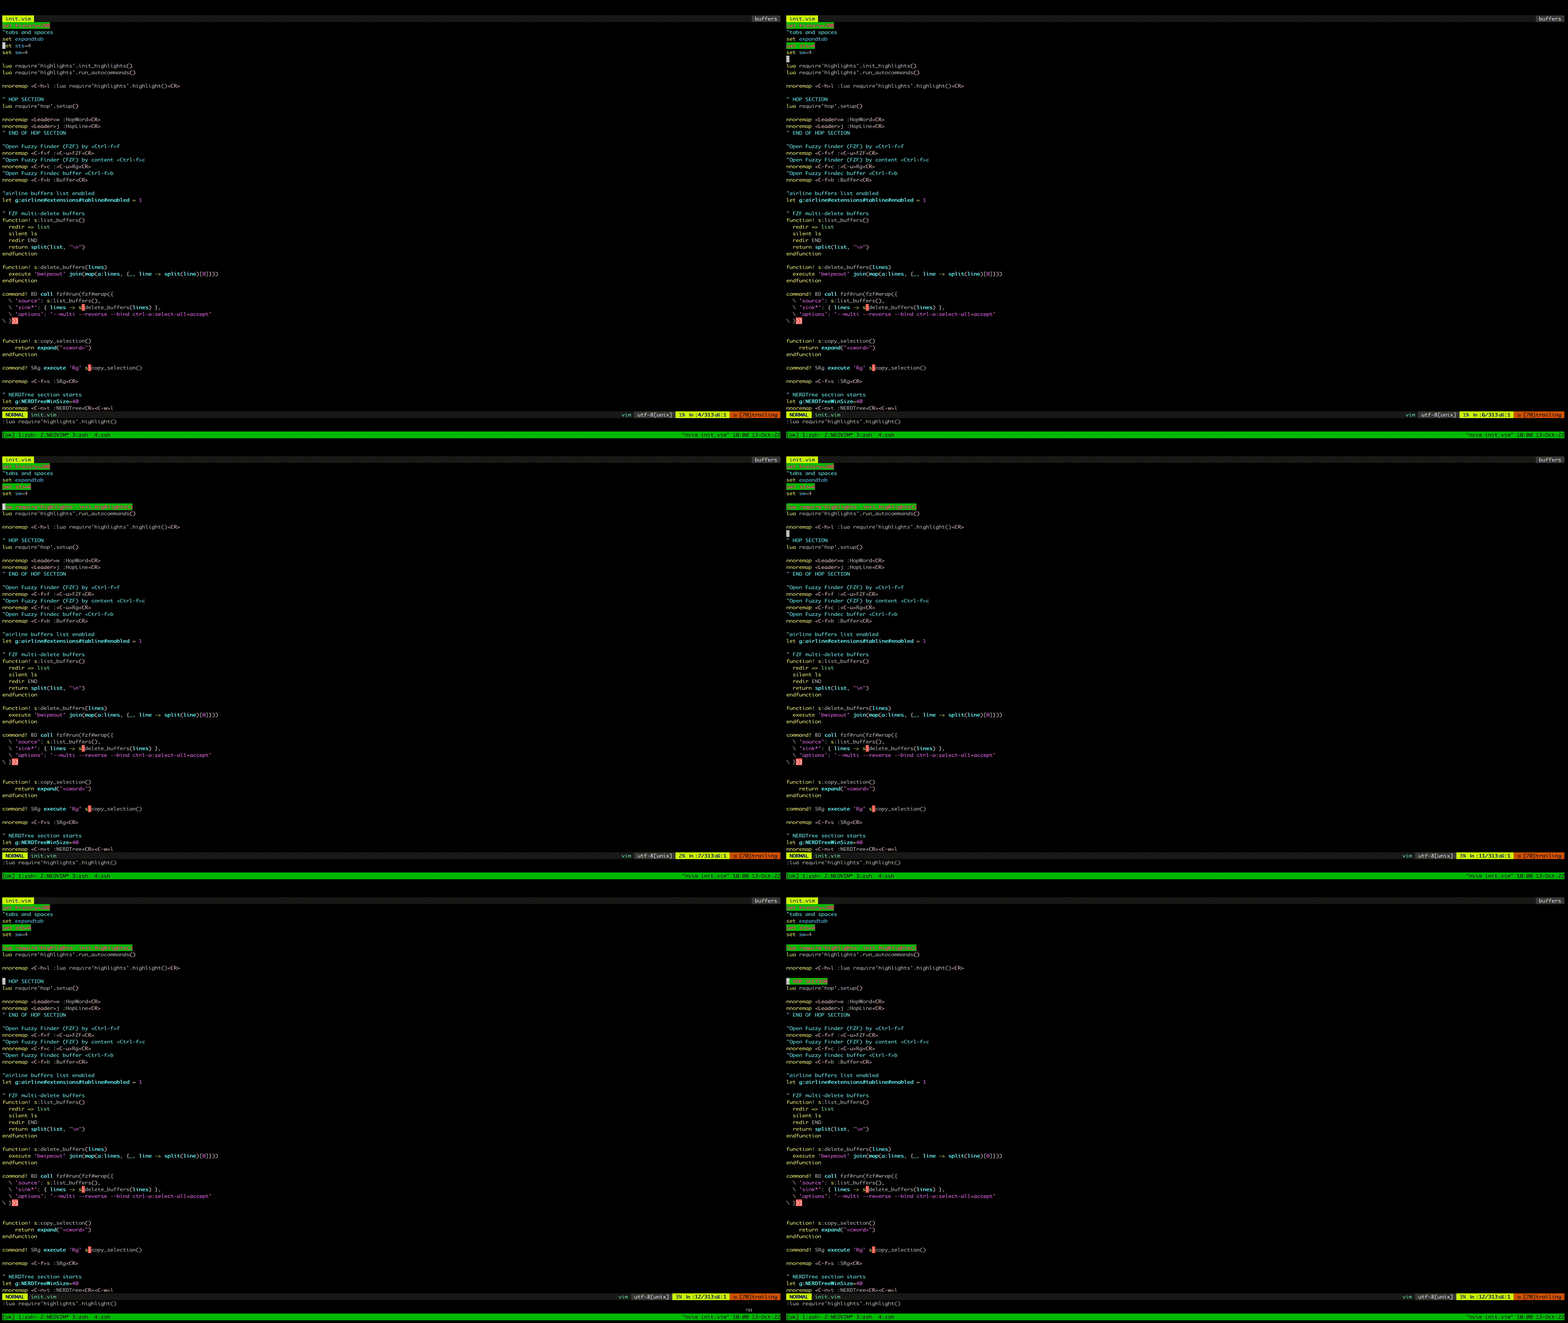
Highline in Action
Conclusion
After spending some time with Neovim highlights I can now admit that it is not really tricky. That is a good news: extending Neovim might be a really straightforward task. Anyway, learning is always a fun, and the whole Neovim world is waiting for us!
I hope you enjoyed my article. All of the code is available at my github repository. Feel free to contact me on Telegram: @AnKochem
메타데이터
- post_id
- 837fecfa36d2
- slug
- neovim-highlighting-the-text-programmatically-with-lua-837fecfa36d2
- url
- https://medium.com/@ankochem/neovim-highlighting-the-text-programmatically-with-lua-837fecfa36d2
- canonical_url
- https://medium.com/@ankochem/neovim-highlighting-the-text-programmatically-with-lua-837fecfa36d2
- author_url
- https://medium.com/@ankochem
- status
- ok
- fetched_at
- 2026-06-29 22:44:20