Parallel Computing 101 — A Beginner’s Guide to OpenMP, MPI, and CUDA
So you know DSA and small projects you’ve coded, right? But have you ever wondered how many cores your calculator program or Tic-Tac-Toe…
Parallel Computing 101 — A Beginner’s Guide to OpenMP, MPI, and CUDA

So you know OOP, DSA and small projects you’ve coded, right? But have you ever wondered how many cores your calculator program or Tic-Tac-Toe AI actually uses on your 8-core CPU? Probably just one. That’s because most beginner-level programs run sequentially one instruction at a time. (No wonder your “find the shortest route for the micromouse” algorithm timed out poor thing was running on a single core, struggling through every possible path!)
Now imagine tasks such as:
- simulating the weather for the next week,
- attempting a brute-force password crack (ethically, of course),
- or running a large-scale physics or engineering simulation.
Running these on a single core would be painfully slow. Sometimes, practically impossible.
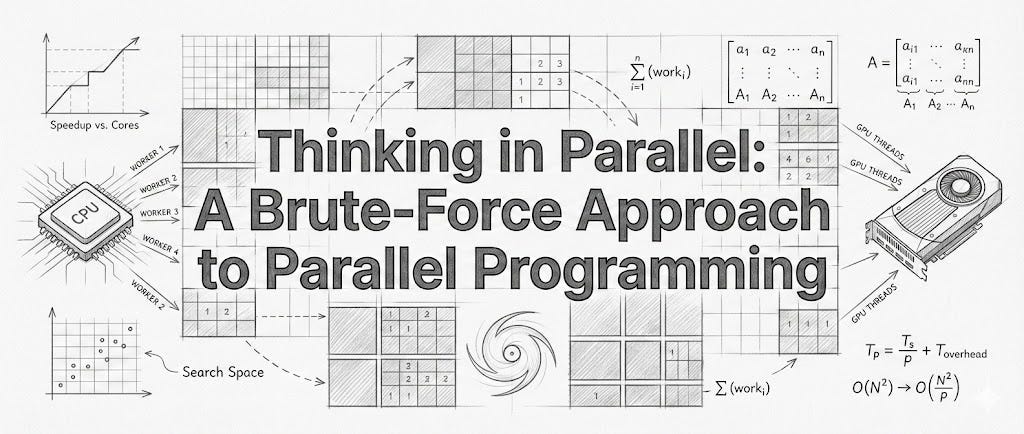
That’s where parallel computing comes in: it lets you split the work across multiple cores, CPUs, GPUs, or even supercomputers, making huge computations run much faster.
Why parallel computing matters
Sequential processing takes too long, so we use parallel computing, which splits programs into smaller tasks that run simultaneously across CPU cores, multiple machines, or thousands of GPU cores.
- Weather prediction: Simulating temperature, wind, and rainfall at once across different regions.
- Scientific simulations: Chemistry, physics, biology experiments with thousands of calculations happening simultaneously.
- Brute-force computations: Trying every possible combination becomes feasible only when the workload is spread across multiple processors.
- Gaming & Finance: Real-time simulations, risk analysis, rendering 3D graphics all happen in parallel.
- Supercomputing tasks: Climate models, physics simulations, genome sequencing.

A NASA computer model simulates the astonishing track and forceful winds of Hurricane Sandy. https://svs.gsfc.nasa.gov/11269/
The Tools We’ll Explore
So now that we get why parallel computing matters, let’s actually look at how we can do it.
There are a few popular frameworks that make it easy to write parallel programs and don’t worry, they’re not as scary as they sound.
We’ll explore three of them:
- OpenMP: Makes your CPU multi-core friendly. Just sprinkle a few directives and your loops run in parallel.
- MPI (Message Passing Interface): Great for distributed systems, like clusters or cloud VMs, where multiple processes communicate.
- CUDA: Lets your program use thousands of GPU cores, perfect for heavy computations like matrix math or AI.
A Quick Note About OOP
OOP is great for organizing and reusing code, but in parallel computing, the focus is on speed and hardware efficiency. So, we keep it simple and procedural just loops and data making it easier to split work across threads or processes.
Setting Up the Environment (Google Cloud for OpenMP & MPI)
Alright, let’s get our hands dirty. We’ll use Google Cloud because it’s perfect for running CPU-based parallel programs like OpenMP and MPI.
Step 1: Create a VM Instance
- Go to Google Cloud Console.
- Create a new VM (I used e2-highcpu-8, which gives 8 vCPUs ~ 4 physical cores).
- Choose Debian or Ubuntu for the OS they’re clean and developer-friendly.
- Allow SSH access so you can connect from your local terminal.
(Tip: You can use the built-in SSH button on the console too — no setup hassle!)
Step 2: Install Essentials
Now let’s install the tools we need. Each one plays a different role in the parallel-computing workflow.
sudo apt update
sudo apt install -y git
sudo apt install -y gcc g++ make
sudo apt install -y openmpi-bin libopenmpi-dev
What each of these is:
- Git: Lets you clone repositories and manage code versions.
- GCC / G++: Compilers for C and C++ required for building OpenMP programs.
- Make: Helps automate builds so you don’t manually compile every command.
- OpenMPI + dev libs: Tools and libraries needed to compile & run MPI-based distributed programs.
Step 3: Verify Installation
Let’s make sure everything works before jumping into code.
gcc --version
mpicc --version
git --version
If you see version info for each command you’re good to go!
Step 4: Clone the Starter Code
To save time, I created a GitHub repo with some starter code for OpenMP, MPI and CUDA.
git clone https://github.com/NayanthaNethsara/parallel-101.git
cd parallel-101
Inside, you’ll find folders for OpenMP, MPI, and CUDA experiments. Now you’re ready to run and test the examples without starting from scratch.
OpenMP: Hello World
We’ll use the starter code from the repo, so no need to create files from scratch.
cd OpenMP/hello
gcc -fopenmp hello.c -o hello
./hello
You should see output from multiple threads, something like:
Hello from thread 0 out of 8
Hello from thread 1 out of 8
...
What is -fopenmp?
The -fopenmp flag:
- enables OpenMP support in GCC
- links the OpenMP runtime library
- tells the compiler to expand
#pragma ompinto real multithreaded code
Without this flag, OpenMP is ignored and the program runs single-threaded.
Understanding the Parallel Block
OpenMP makes your CPU go multi-core with just a few special directives.
#pragma omp parallel // Create multiple threads and run the following block on all of them
    {
        int id = omp_get_thread_num(); // Each thread gets a unique ID (0, 1, 2, …).
        int total = omp_get_num_threads(); // Every thread can see how many threads were created in total.
        printf("Hello from thread %d out of %d\n", id, total); // Every thread prints its ID and the total number.
    }
In short, this little block is your first glimpse of shared-memory parallelism in action: one piece of code, executed simultaneously by multiple threads on different CPU cores.
How to Change the Thread Count
You control OpenMP threads using an environment variable:
export OMP_NUM_THREADS=4
./hello
If you don’t set it, OpenMP uses all available cores by default.
More OpenMP Examples in the Repo
There’s also a simple parallel loop and matrix calculation examples you can try:
#pragma omp parallel for
for (long long i = 0; i < N; i++) {
    sum += i;
}
This shows how OpenMP can automatically split a for loop across multiple threads. Each thread gets a chunk of the loop iterations, so the work gets divided and executed in parallel.
How to run this example
cd OpenMP/loop
gcc -fopenmp simple-for.c -o loop
./loop
(We’re not getting into reductions or race conditions here — that’s a whole topic for later.)
MPI: Hello World
Now let’s move from shared-memory (OpenMP) to distributed-memory parallelism with MPI. Unlike OpenMP, MPI doesn’t use threads it launches multiple processes, each with its own memory space.
cd parallel-101/MPI/hello
mpicc hello.c -o hello
mpirun -np 4 ./hello
You should see output like:
Hello from process 0 of 4
Hello from process 1 of 4
Hello from process 2 of 4
Hello from process 3 of 4
What is mpicc?
mpicc is just a wrapper around GCC that automatically links all MPI libraries for you.
It ensures:
- correct MPI headers get included
- correct MPI runtime libs are linked
- the binary is MPI-aware
You can technically compile with gcc manually, but mpicc saves hassle.
Understanding the MPI Hello World Block
Here’s the core part of the code:
MPI_Init(NULL, NULL); // starts the MPI environment.

int rank, size;
MPI_Comm_rank(MPI_COMM_WORLD, &rank);   // The ID of the current process
MPI_Comm_size(MPI_COMM_WORLD, &size);   // Total number of processes

printf("Hello from rank %d out of %d\n", rank, size); // Every process prints independently, even though they run the same code

MPI_Finalize(); // shuts MPI down gracefully.
This is your first taste of distributed-memory parallelism multiple processes running the same program, each with its own memory space
How to Change the Number of Processes
Instead of threads, MPI uses process count:
mpirun -np 8 ./hello-np means “number of processes”.
On your VM, you can run:
-np 2-np 4-np 8
Just don’t exceed your CPU core count for realistic results.
CUDA: Hello World in Colab
GPUs are insanely powerful, but also expensive. Most laptops or free-tier VMs don’t have them, so for CUDA experiments, we’ll use Google Colab. It gives free access to an NVIDIA GPU, which is perfect for running starter programs without any setup hassle.
Before writing any code, let’s understand how CUDA actually works.
What Is a CUDA Kernel? (Quick Intro Before We Begin)
A CUDA kernel is a function that runs on the GPU, not the CPU.
__global__ void my_kernel() {
    // This runs on the GPU
}
When you “launch” a kernel, the GPU creates thousands of threads that all run this function at the same time.
- Each GPU thread runs its own copy of the kernel.
- Threads are grouped into blocks.
- Blocks form a grid.
This is why GPUs are amazing for parallel computations — they can run huge amounts of tiny threads insanely fast.
The CPU and GPU work together like this:
- CPU decides what work to run.
- CPU launches the kernel with a configuration (grid + block sizes).
- GPU runs the kernel in parallel (many threads).
- CPU waits for GPU to finish (optional).
- CPU continues the rest of the program.
Now that you understand the model, let’s run our first kernel.
Enable GPU Runtime
- Open a new Colab notebook.
- Go to Runtime → Change runtime type → GPU.
Now your notebook can run CUDA programs!
Check your GPU:
!nvidia-smiYou’ll see something like:
+-----------------------------------------------------------------------------------------+
| NVIDIA-SMI 550.54.15              Driver Version: 550.54.15      CUDA Version: 12.4     |
|-----------------------------------------+------------------------+----------------------+
| GPU  Name                 Persistence-M | Bus-Id          Disp.A | Volatile Uncorr. ECC |
| Fan  Temp   Perf          Pwr:Usage/Cap |           Memory-Usage | GPU-Util  Compute M. |
|                                         |                        |               MIG M. |
|=========================================+========================+======================|
|   0  Tesla T4                       Off |   00000000:00:04.0 Off |                    0 |
| N/A   46C    P8             10W /   70W |       0MiB /  15360MiB |      0%      Default |
|                                         |                        |                  N/A |
+-----------------------------------------+------------------------+----------------------+
This tells us the GPU model we’ll use it to compile CUDA programs with the correct architecture.
How to Work With Files & Commands in Colab
Before writing CUDA code, a few Colab tricks:
# 1. Create a CUDA source file using %%writefile
%%writefile hello.cu
// your CUDA code here

# 2. Compile and run using shell commands (!)
!nvcc -arch=sm_75 -O3 hello.cu -o hello
!./hello

# 3. Change directories using %cd
%cd folder_name   # navigate into a folder

# 4. Run multi-line Bash commands using %%bash
%%bash
nvcc -arch=sm_75 -O3 hello.cu -o hello
./hello
These make Colab behave like a mini Linux environment perfect for compiling CUDA programs.
Install CUDA Toolkit
Before compiling CUDA code, install the required toolchain:
!sudo apt-get update
!sudo apt-get install -y cuda-toolkit-12-2
!sudo apt-get install -y nvidia-cuda-toolkit
This gives you:
nvcc: the CUDA compiler- CUDA headers & libraries
- GPU development tools
After installation, you can verify:
!nvcc --versionClone the Repo
We already have a starter repo for CUDA programs:
!git clone https://github.com/NayanthaNethsara/parallel-101.git
%cd parallel-101/CUDA/hello
Now you have the CUDA examples ready.
Compile and Run Hello CUDA
Compile the CUDA program using the correct architecture for Tesla T4 (sm_75) and enable optimizations (-O3):
!nvcc -arch=sm_75 -O3 hello.cu -o hello
!./hello
You should see output like:
Hello from CUDA thread 0, block 0!
Hello from CUDA thread 1, block 0!
...
CUDA program finished successfully!
Each line comes from a different GPU thread.
Understanding the CUDA Kernel
Core kernel:
__global__ void hello_kernel() {
    printf("Hello from CUDA thread %d, block %d!\n", threadIdx.x, blockIdx.x);
}
And we launch it using:
hello_kernel<<<1, 5>>>();  // 1 block, 5 threads
cudaDeviceSynchronize();
Now let’s break down what actually happens under the hood.
CPU launches the kernel but doesn’t execute it
The line:
hello_kernel<<<1, 5>>>();does not run the function on the CPU. Instead, the CPU sends a request to the GPU:
“Run this kernel using 1 block and 5 threads.”
CPU schedules the work; the GPU executes it.
GPU creates threads and runs the kernel
The GPU launches:
- 1 block
- 5 threads inside that block
Each thread runs the same kernel function.
Inside the kernel:
threadIdx.x→ thread ID inside the blockblockIdx.x→ block ID
So thread 0 prints one line, thread 1 prints another, etc.
GPU runs all threads in parallel
GPU threads are:
- extremely lightweight
- designed for massive parallelism
- scheduled in groups (warps)
Even though we launched only 5 threads here, real CUDA programs often run thousands or millions of threads at once.
CPU waits for GPU to finish
The CPU does NOT wait automatically so we call:
cudaDeviceSynchronize();This blocks the CPU until the GPU finishes executing the kernel. Without this, the program might exit before anything prints.
Wrapping Up
That’s it! We tried OpenMP, MPI, and CUDA to see how parallel computing works.
From CPU threads to GPU cores, it’s all about making programs faster. Play around, experiment, and have fun with your cores!
Code & Repo
All the code used in this guide (and a few extra examples) is available here:
**https://github.com/NayanthaNethsara/parallel-101**
Each folder has its own README with explanations, sample commands, and additional exercises.
References & Resources
메타데이터
- post_id
- 83dc8b28dc82
- slug
- parallel-computing-101-a-beginners-guide-to-openmp-mpi-and-cuda-83dc8b28dc82
- url
- https://medium.com/@nayanthanethsara/parallel-computing-101-a-beginners-guide-to-openmp-mpi-and-cuda-83dc8b28dc82
- canonical_url
- https://medium.com/@nayanthanethsara/parallel-computing-101-a-beginners-guide-to-openmp-mpi-and-cuda-83dc8b28dc82
- author_url
- https://medium.com/@nayanthanethsara
- status
- ok
- fetched_at
- 2026-07-17 00:59:37